

Overview
Tags in Shopify help organize and categorize your products, orders, and customers, making it easier to manage your store.
You can add and remove tags from the following sections:
- Products
- Orders
- Customers
- Blog posts
- Transfers
- Draft Orders
Tags aren't displayed to customers and are used for internal organization.
However, over time, you might find that some tags are no longer necessary.
Deleting these tags can help keep your store organized.
Here's a step-by-step guide on how to delete tags in Shopify.
As always, before doing anything you need to log in to your store. If you do not know how, here is a tutorial on how to log in to your Shopify store.
Delete a tag individually
Tags can be deleted individually when you need to delete the tag from one product only or if the tag is different for each product.
Delete a product tag
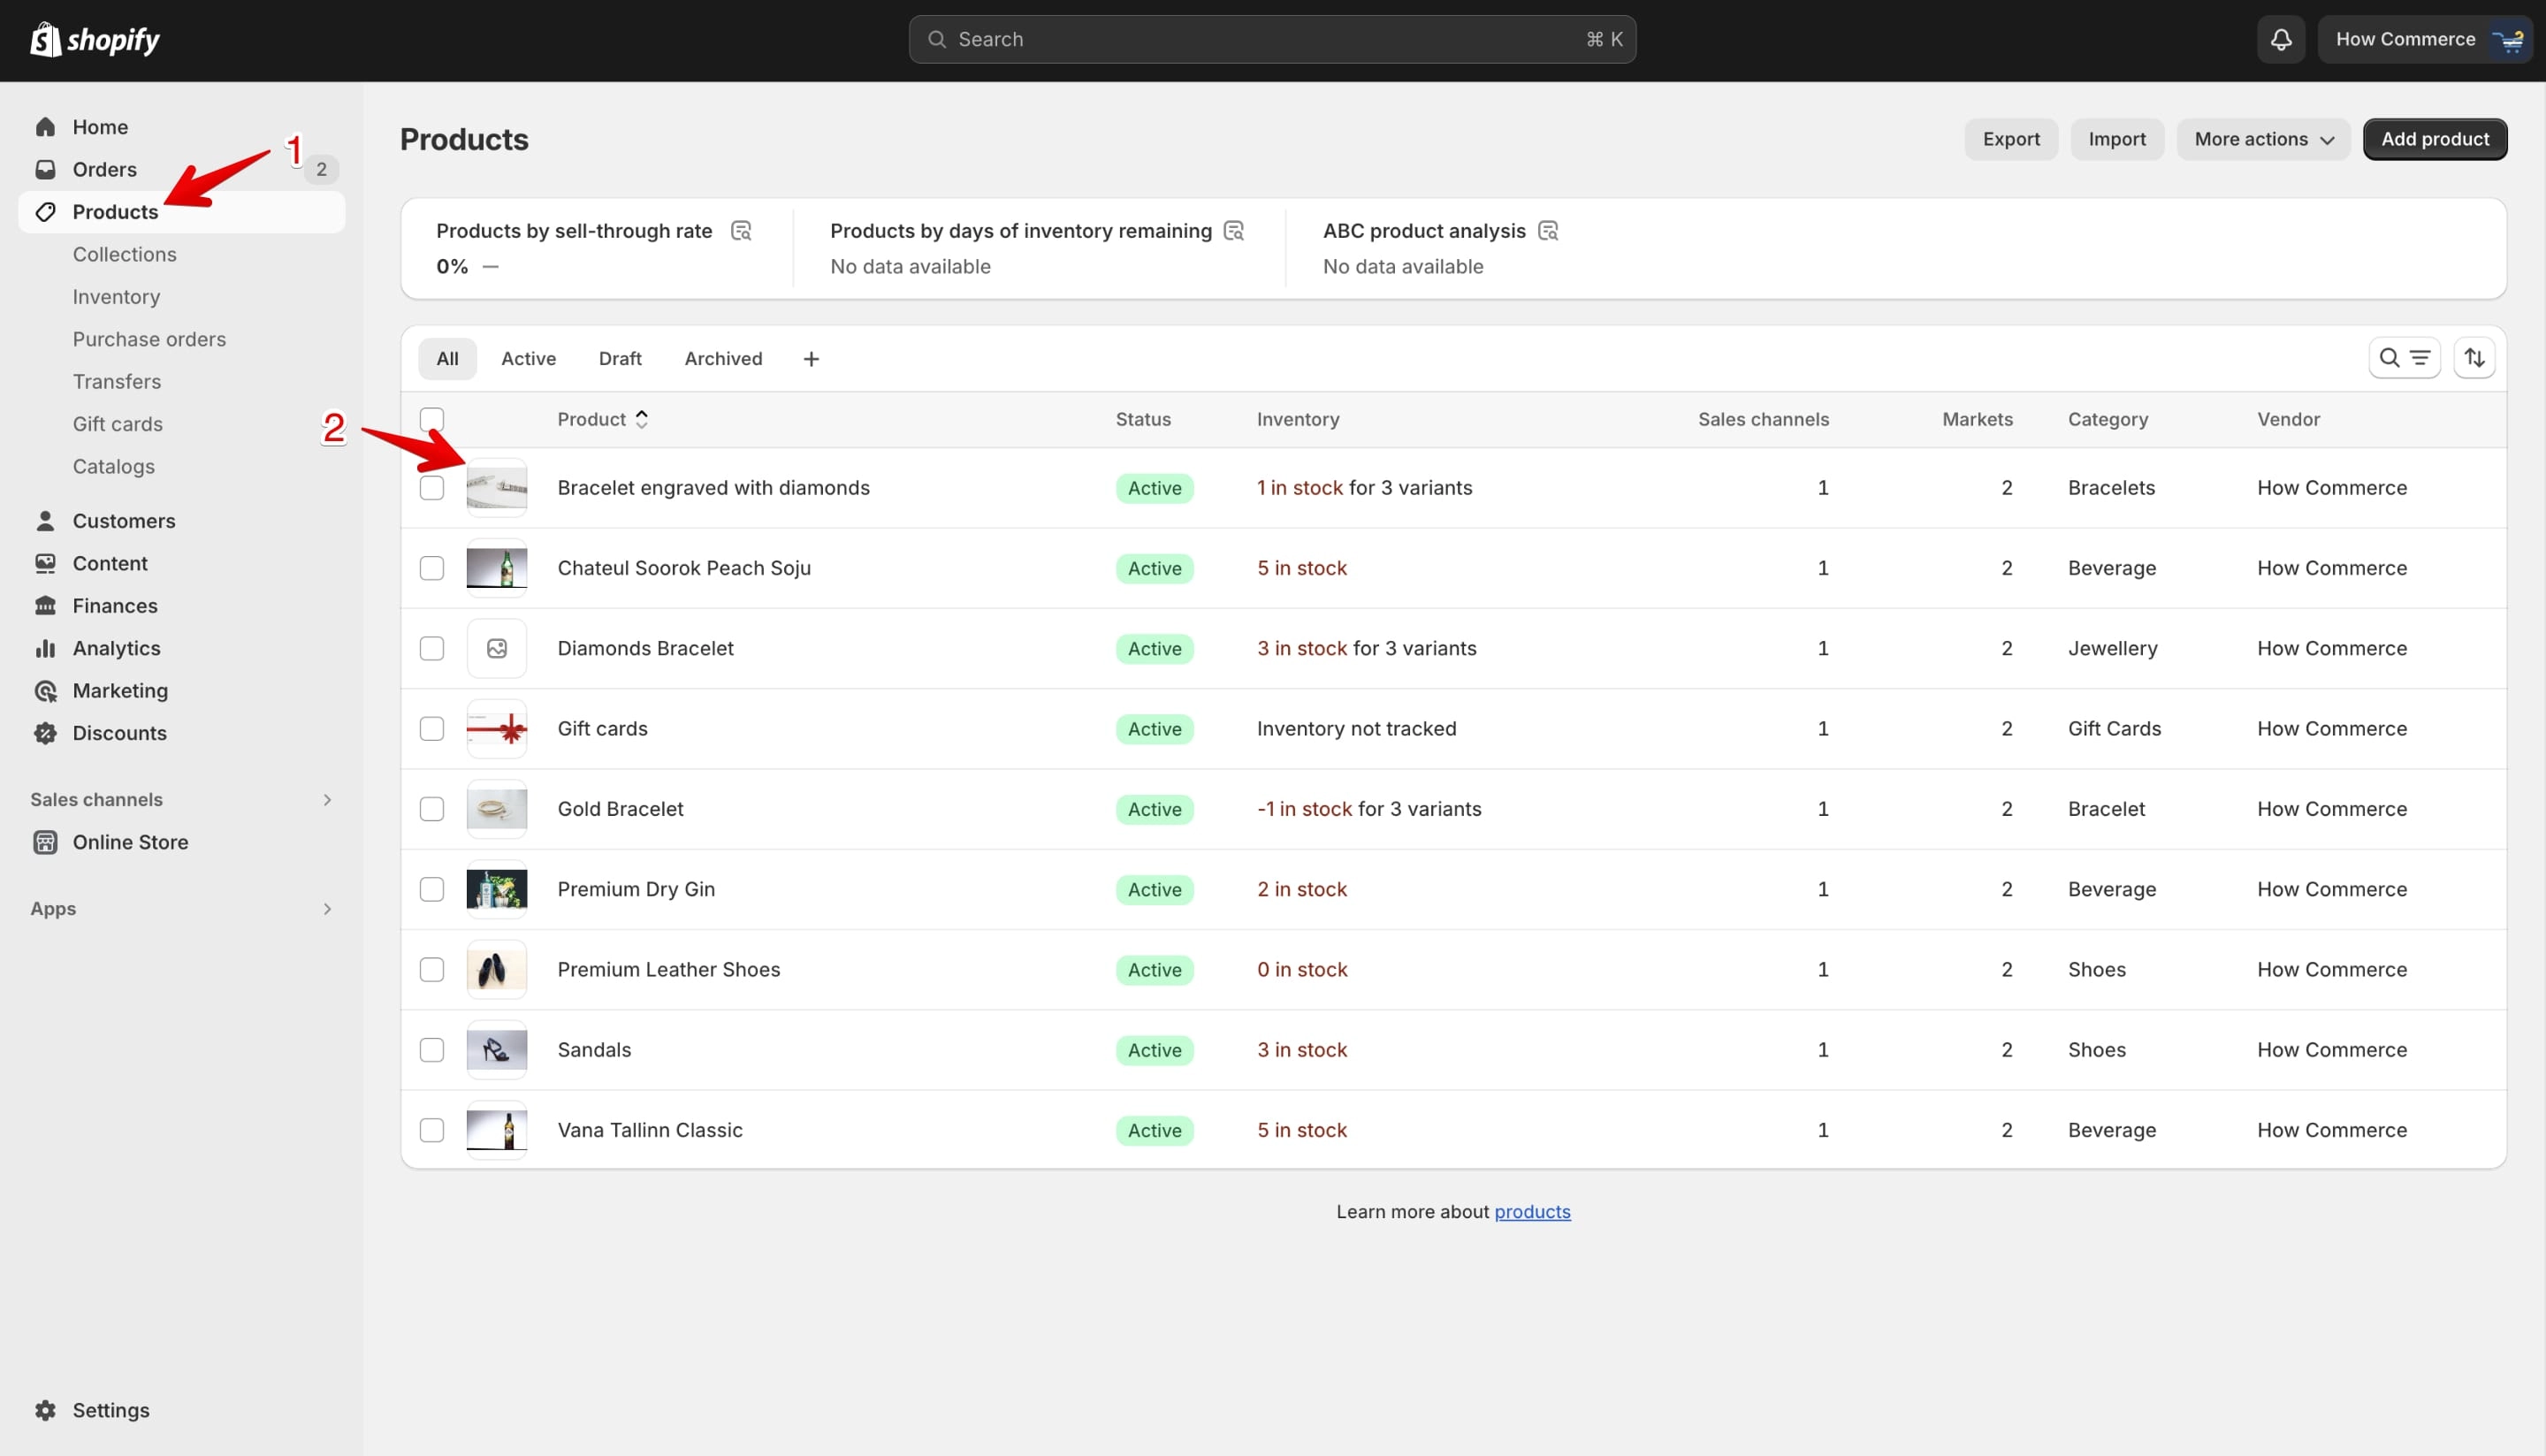
Go to the "Products" page (marked with 1 in the image below) and select the product for which you want to remove the tag (marked with 2 in the image below):
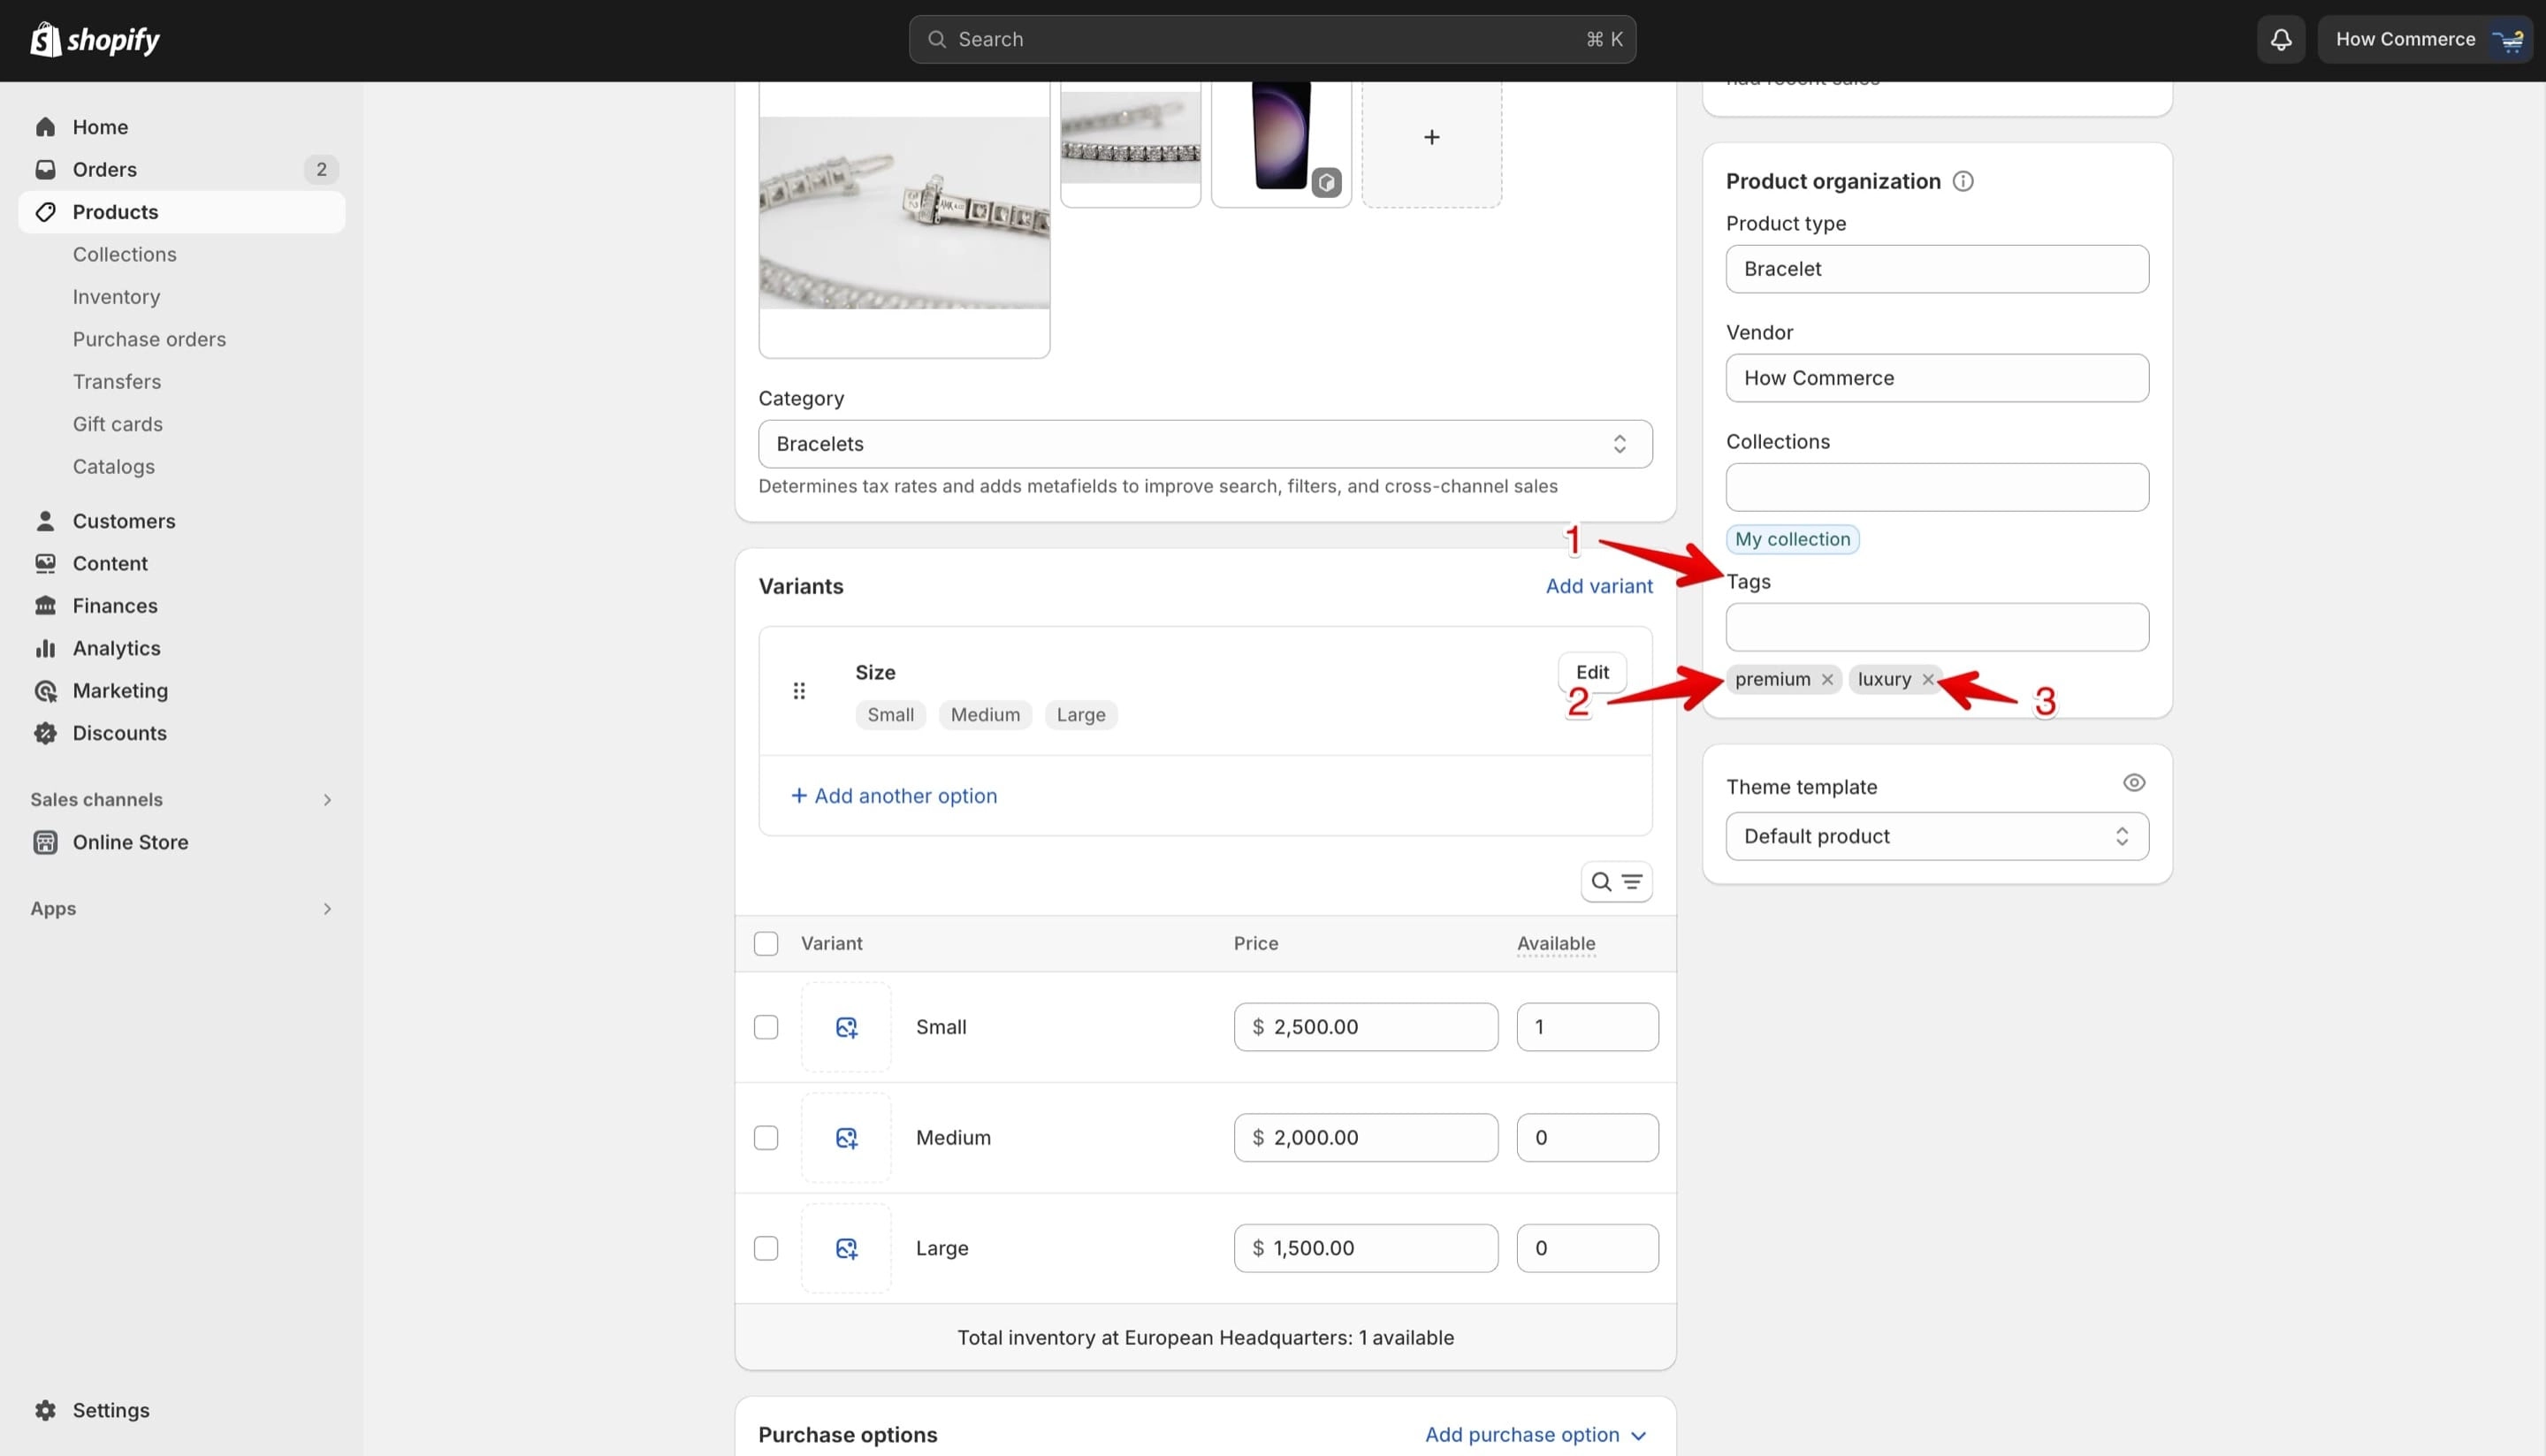
Go to the "Tags" section (marked with 1 in the image below) and you'll see all the tags assigned to this product listed (marked with 2 in the image below).
Select the "X" icon (marked with 3 in the image below) to delete the tag from the product.
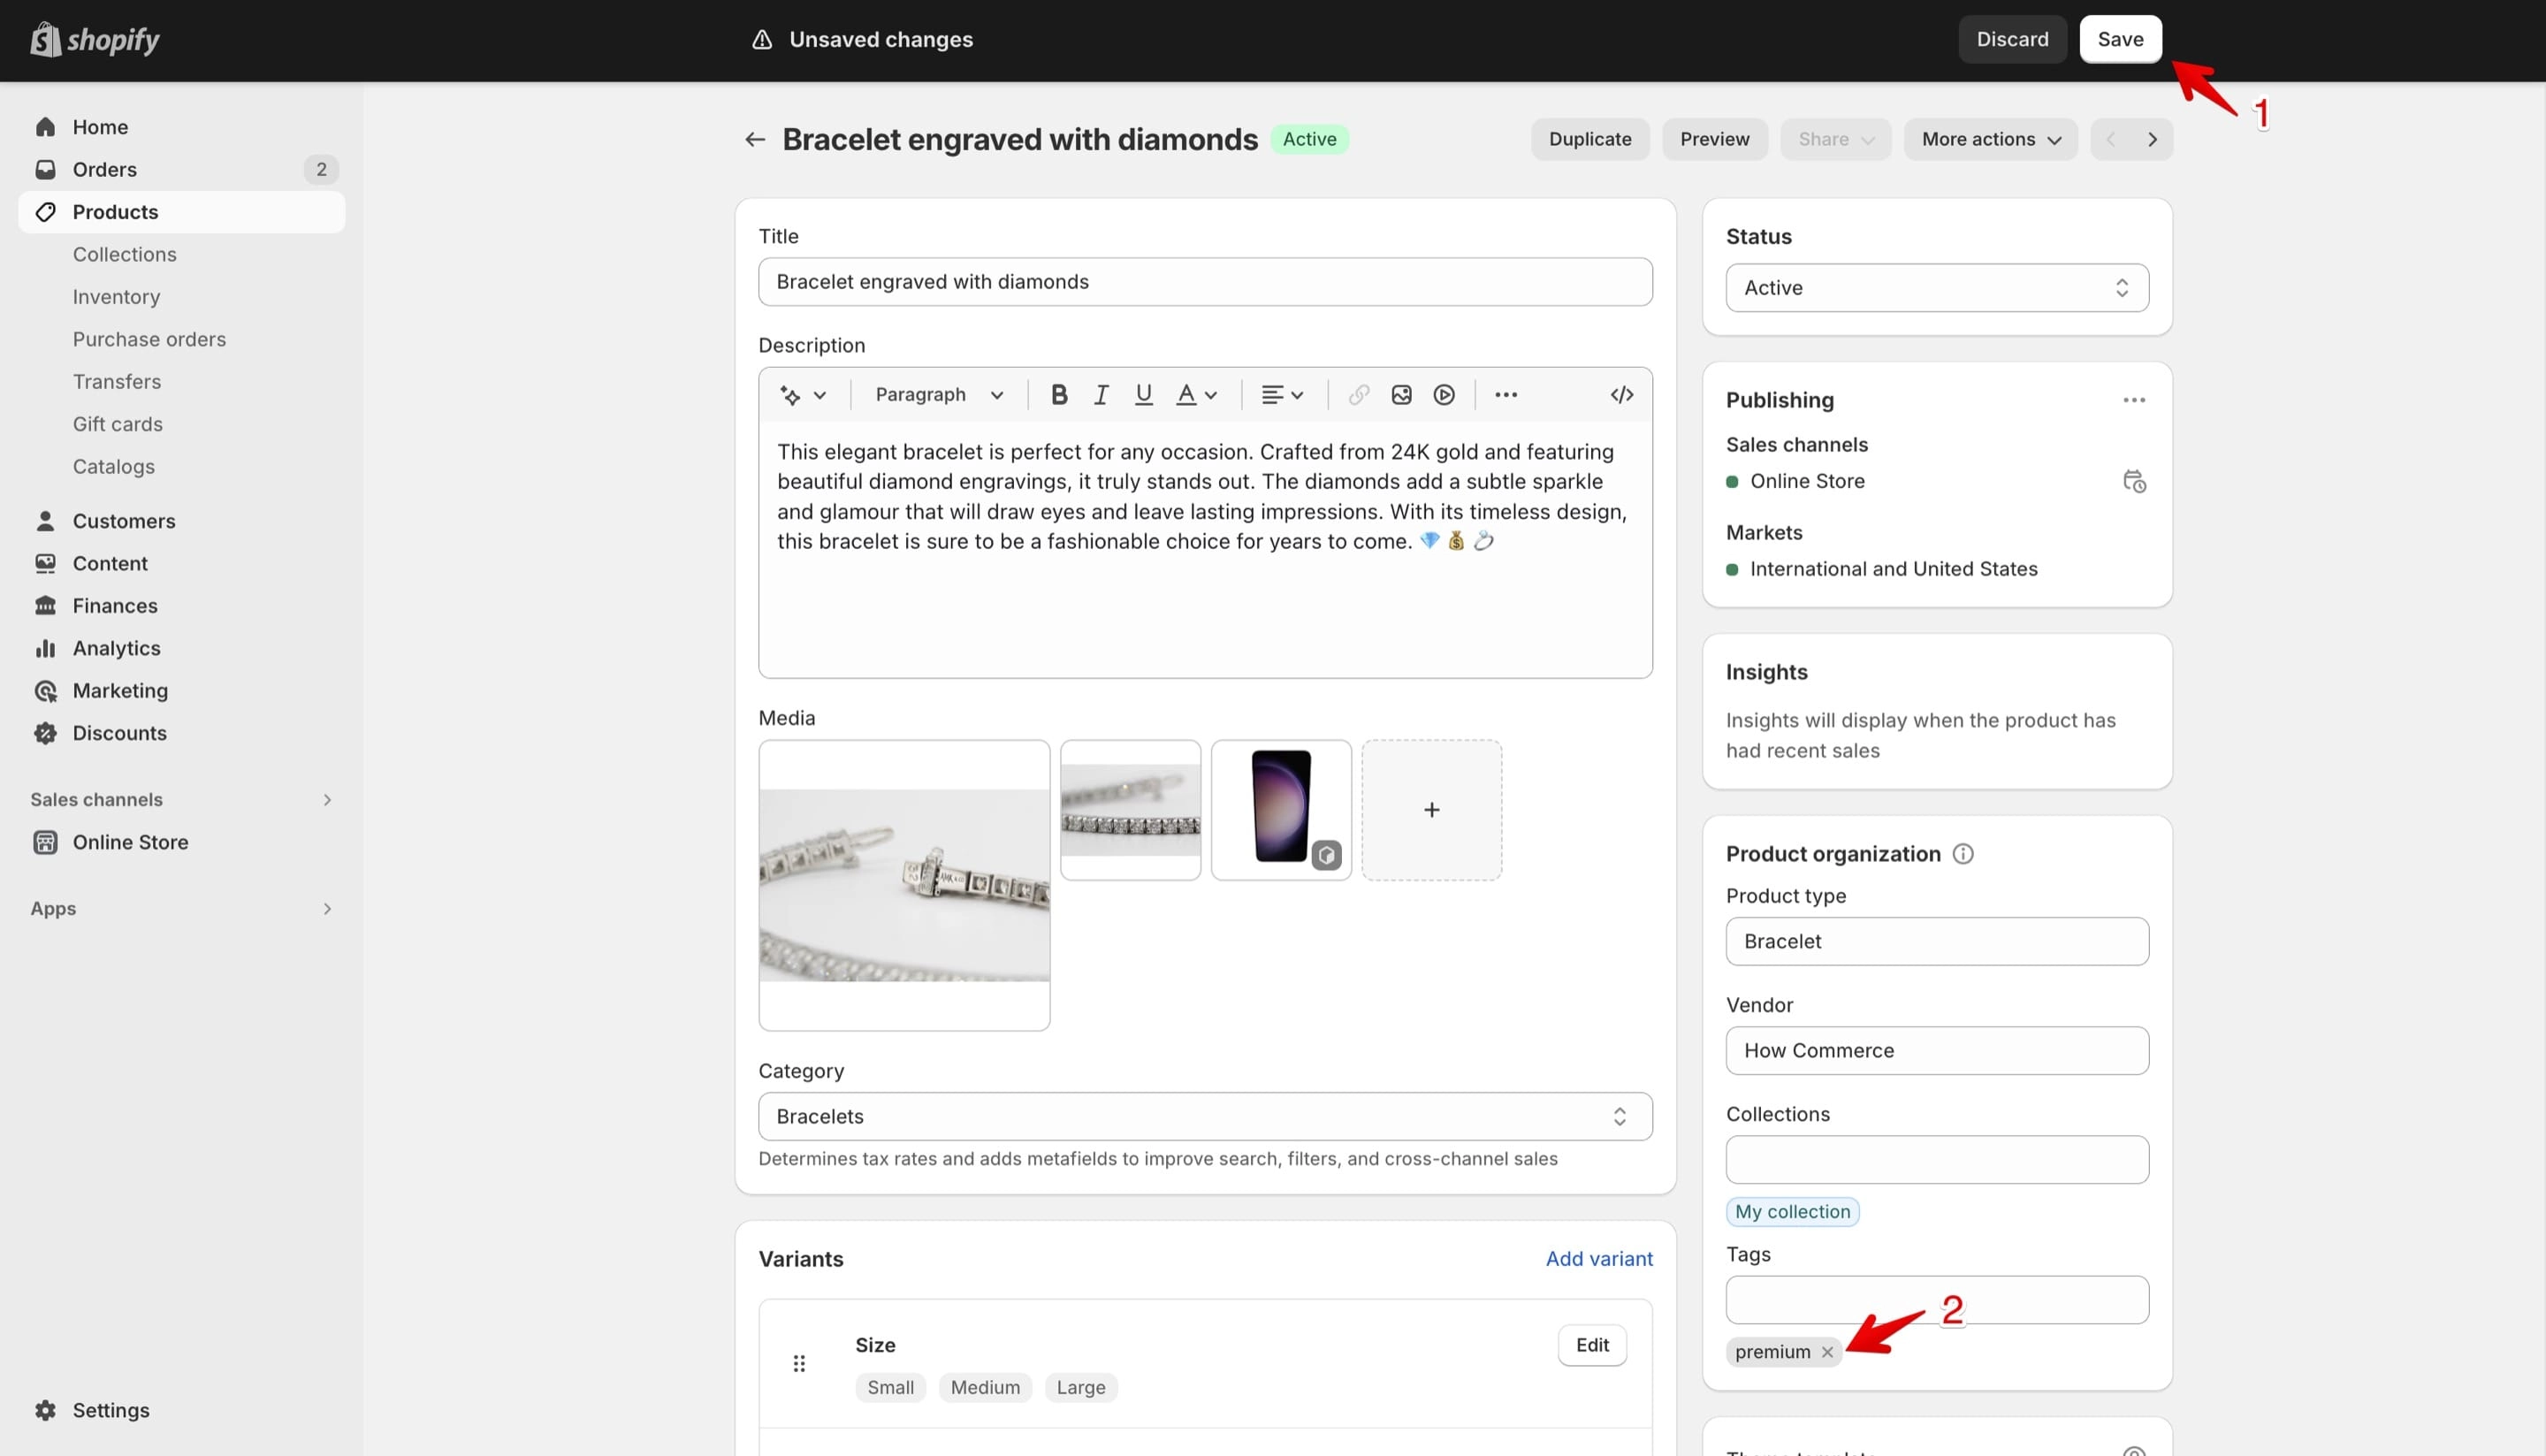
After the operation is complete save your changes (marked with 1 in the image below).
You can see the tags left (marked with 2 in the image below).
Delete an order tag
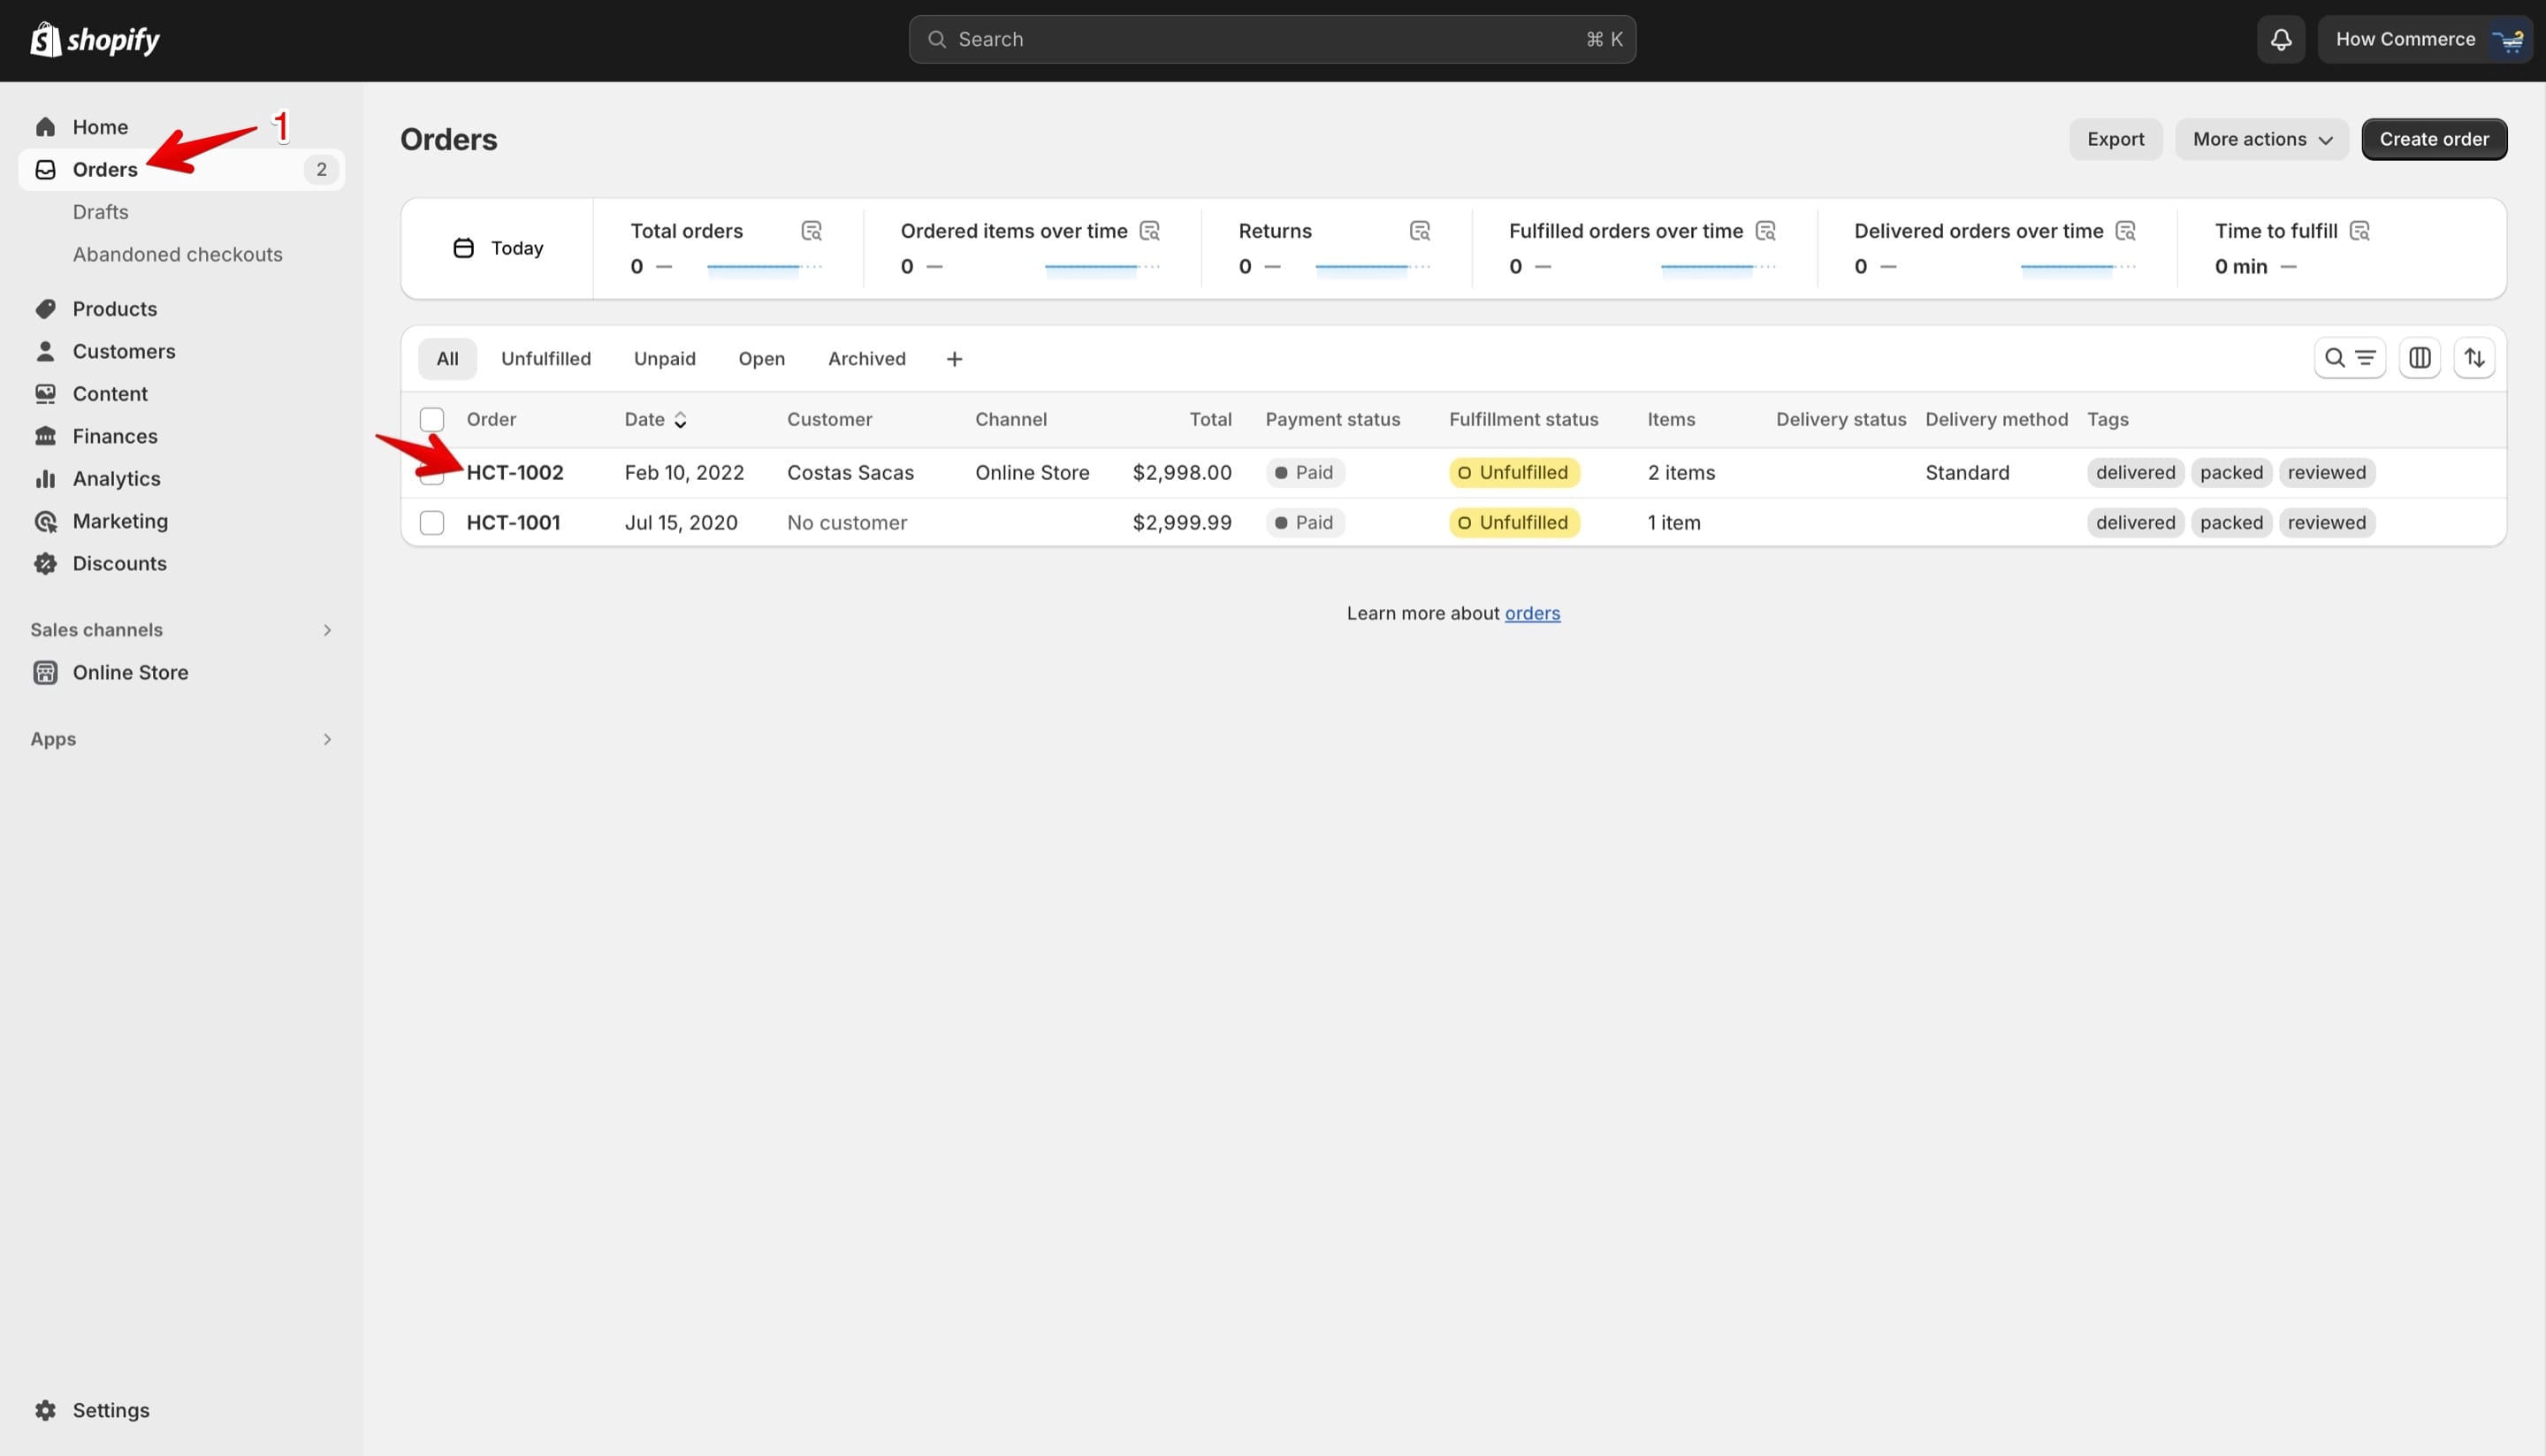
Go to the "Orders" page (marked with 1 in the image below) and select the order for which you want to remove the tag (marked with 2 in the image below):
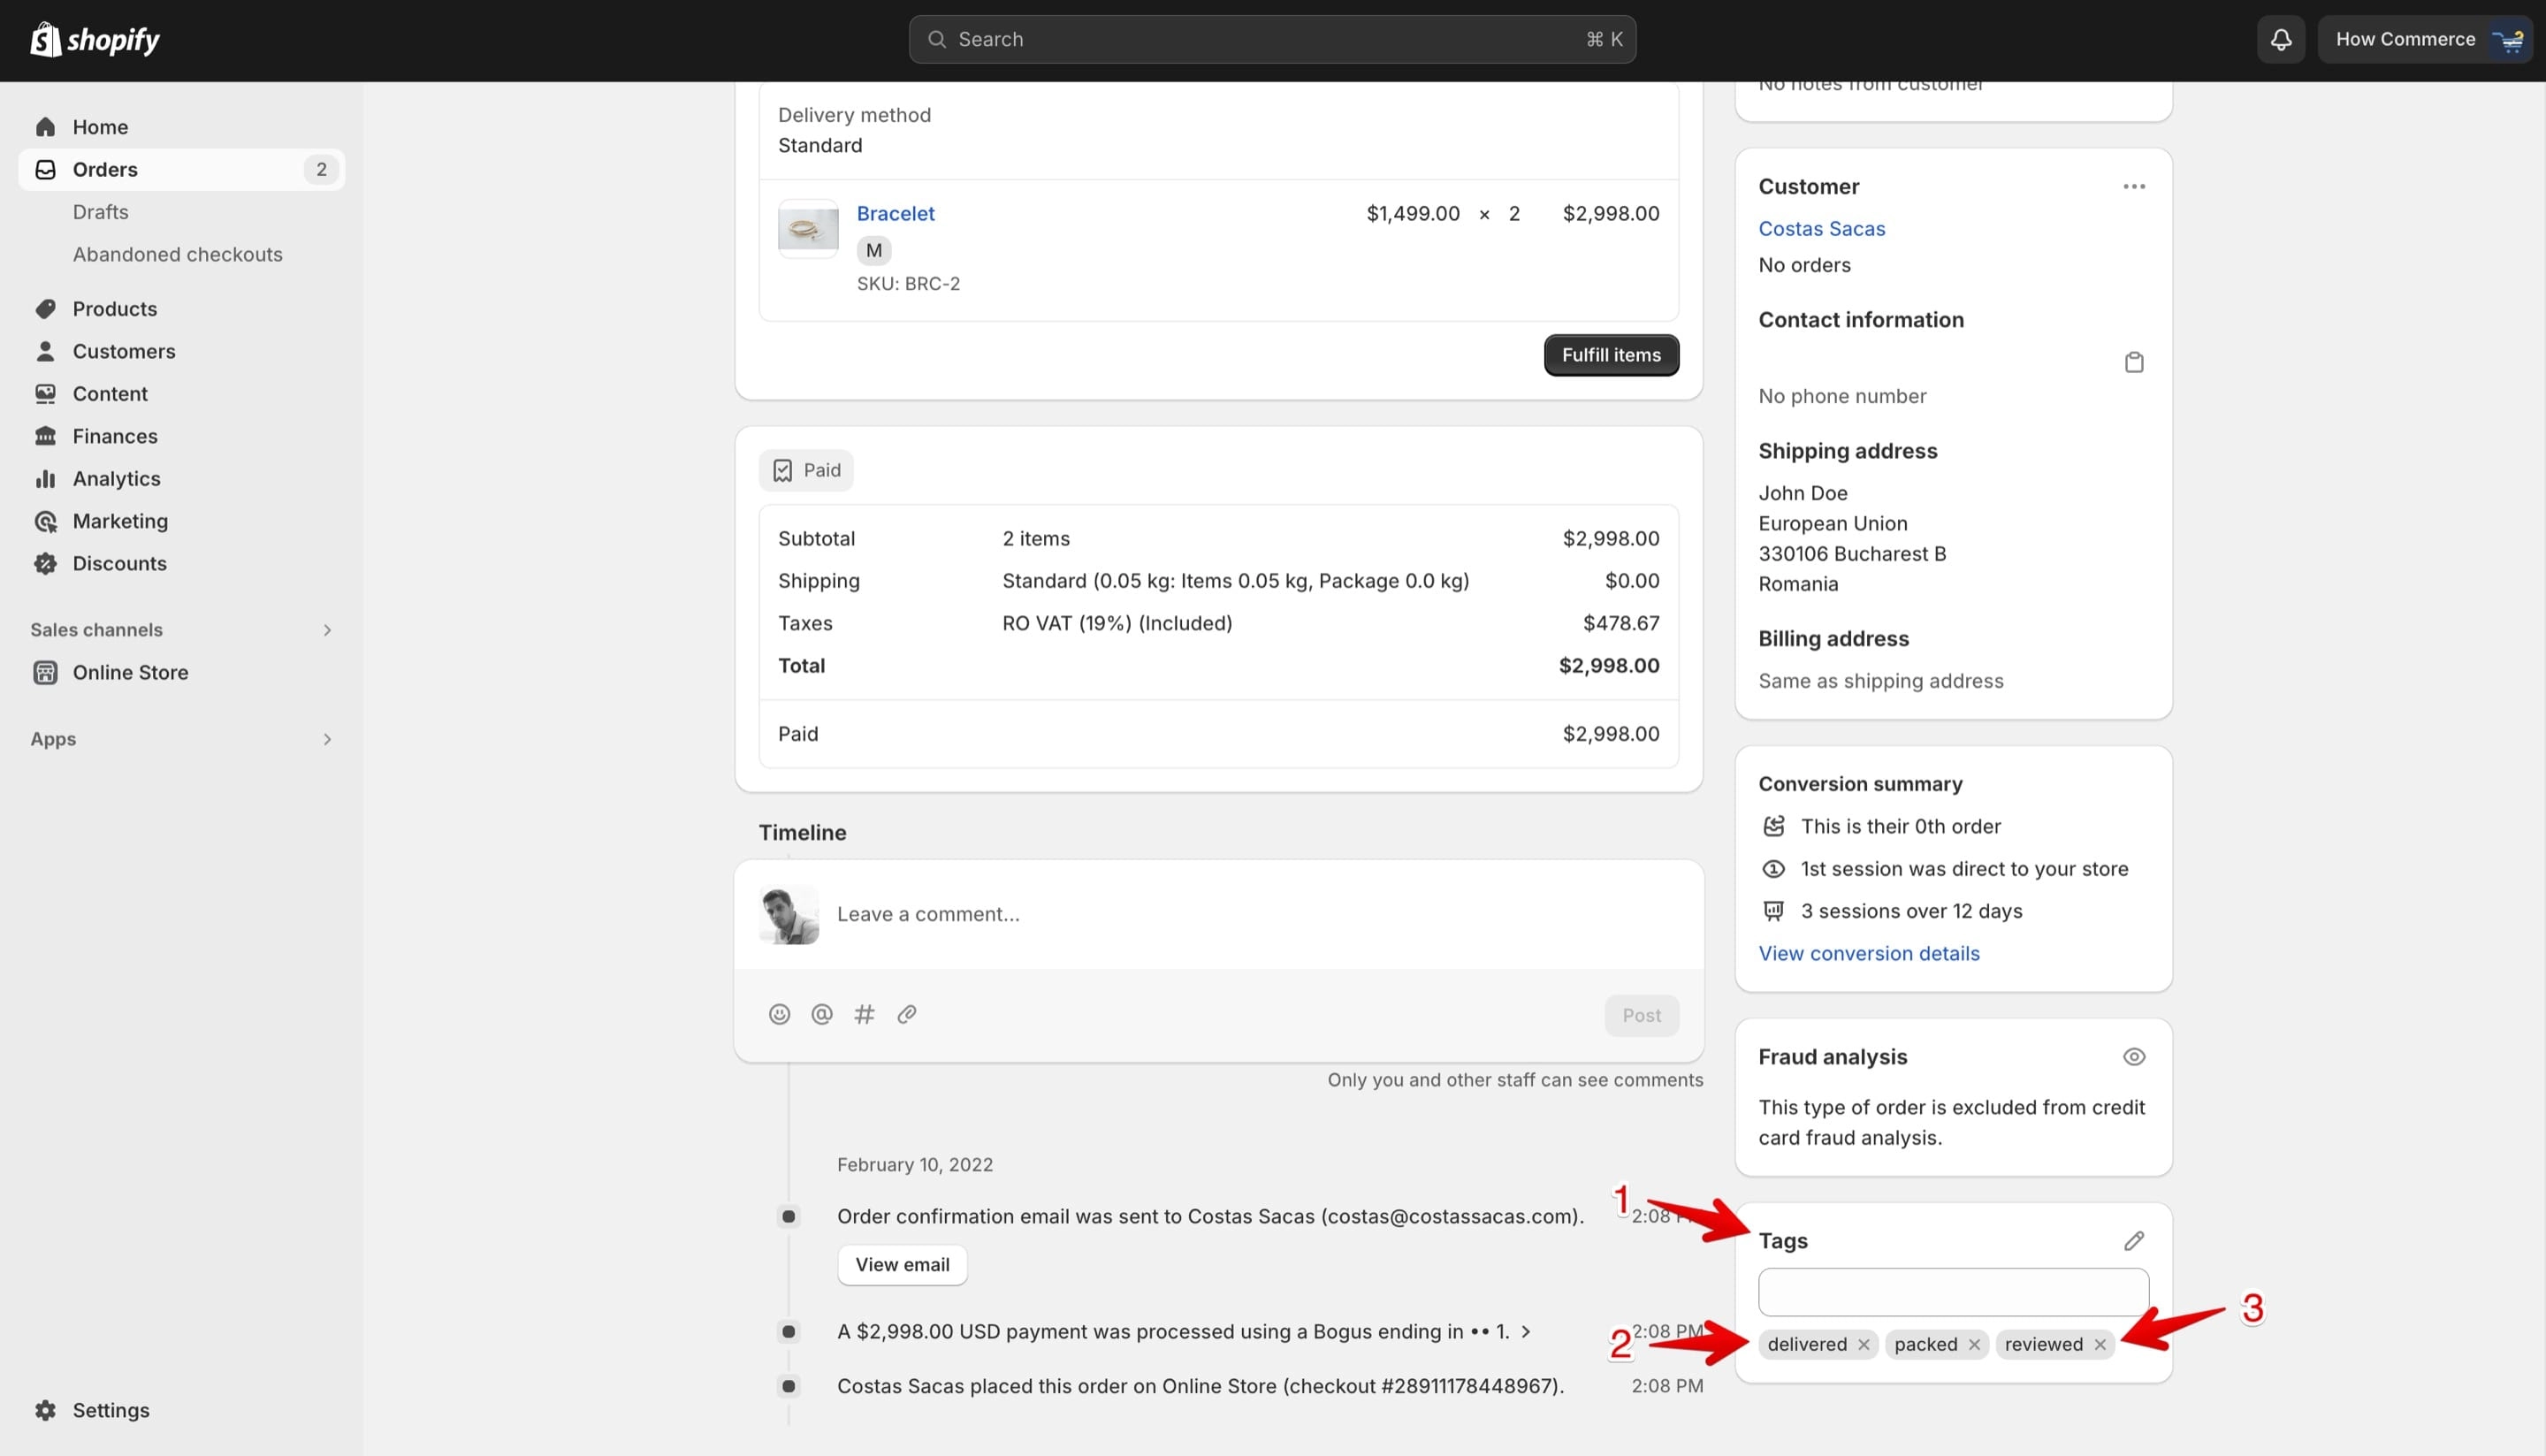
Go to the "Tags" section (marked with 1 in the image below) and you'll see all the tags assigned to this order listed (marked with 2 in the image below).
Select the "X" icon (marked with 3 in the image below) to delete the tag from the order. Repeat this process for all the tags you want to remove from the order.
Here you do not need to save your changes since everything will be saved automatically.
Delete a customer tag
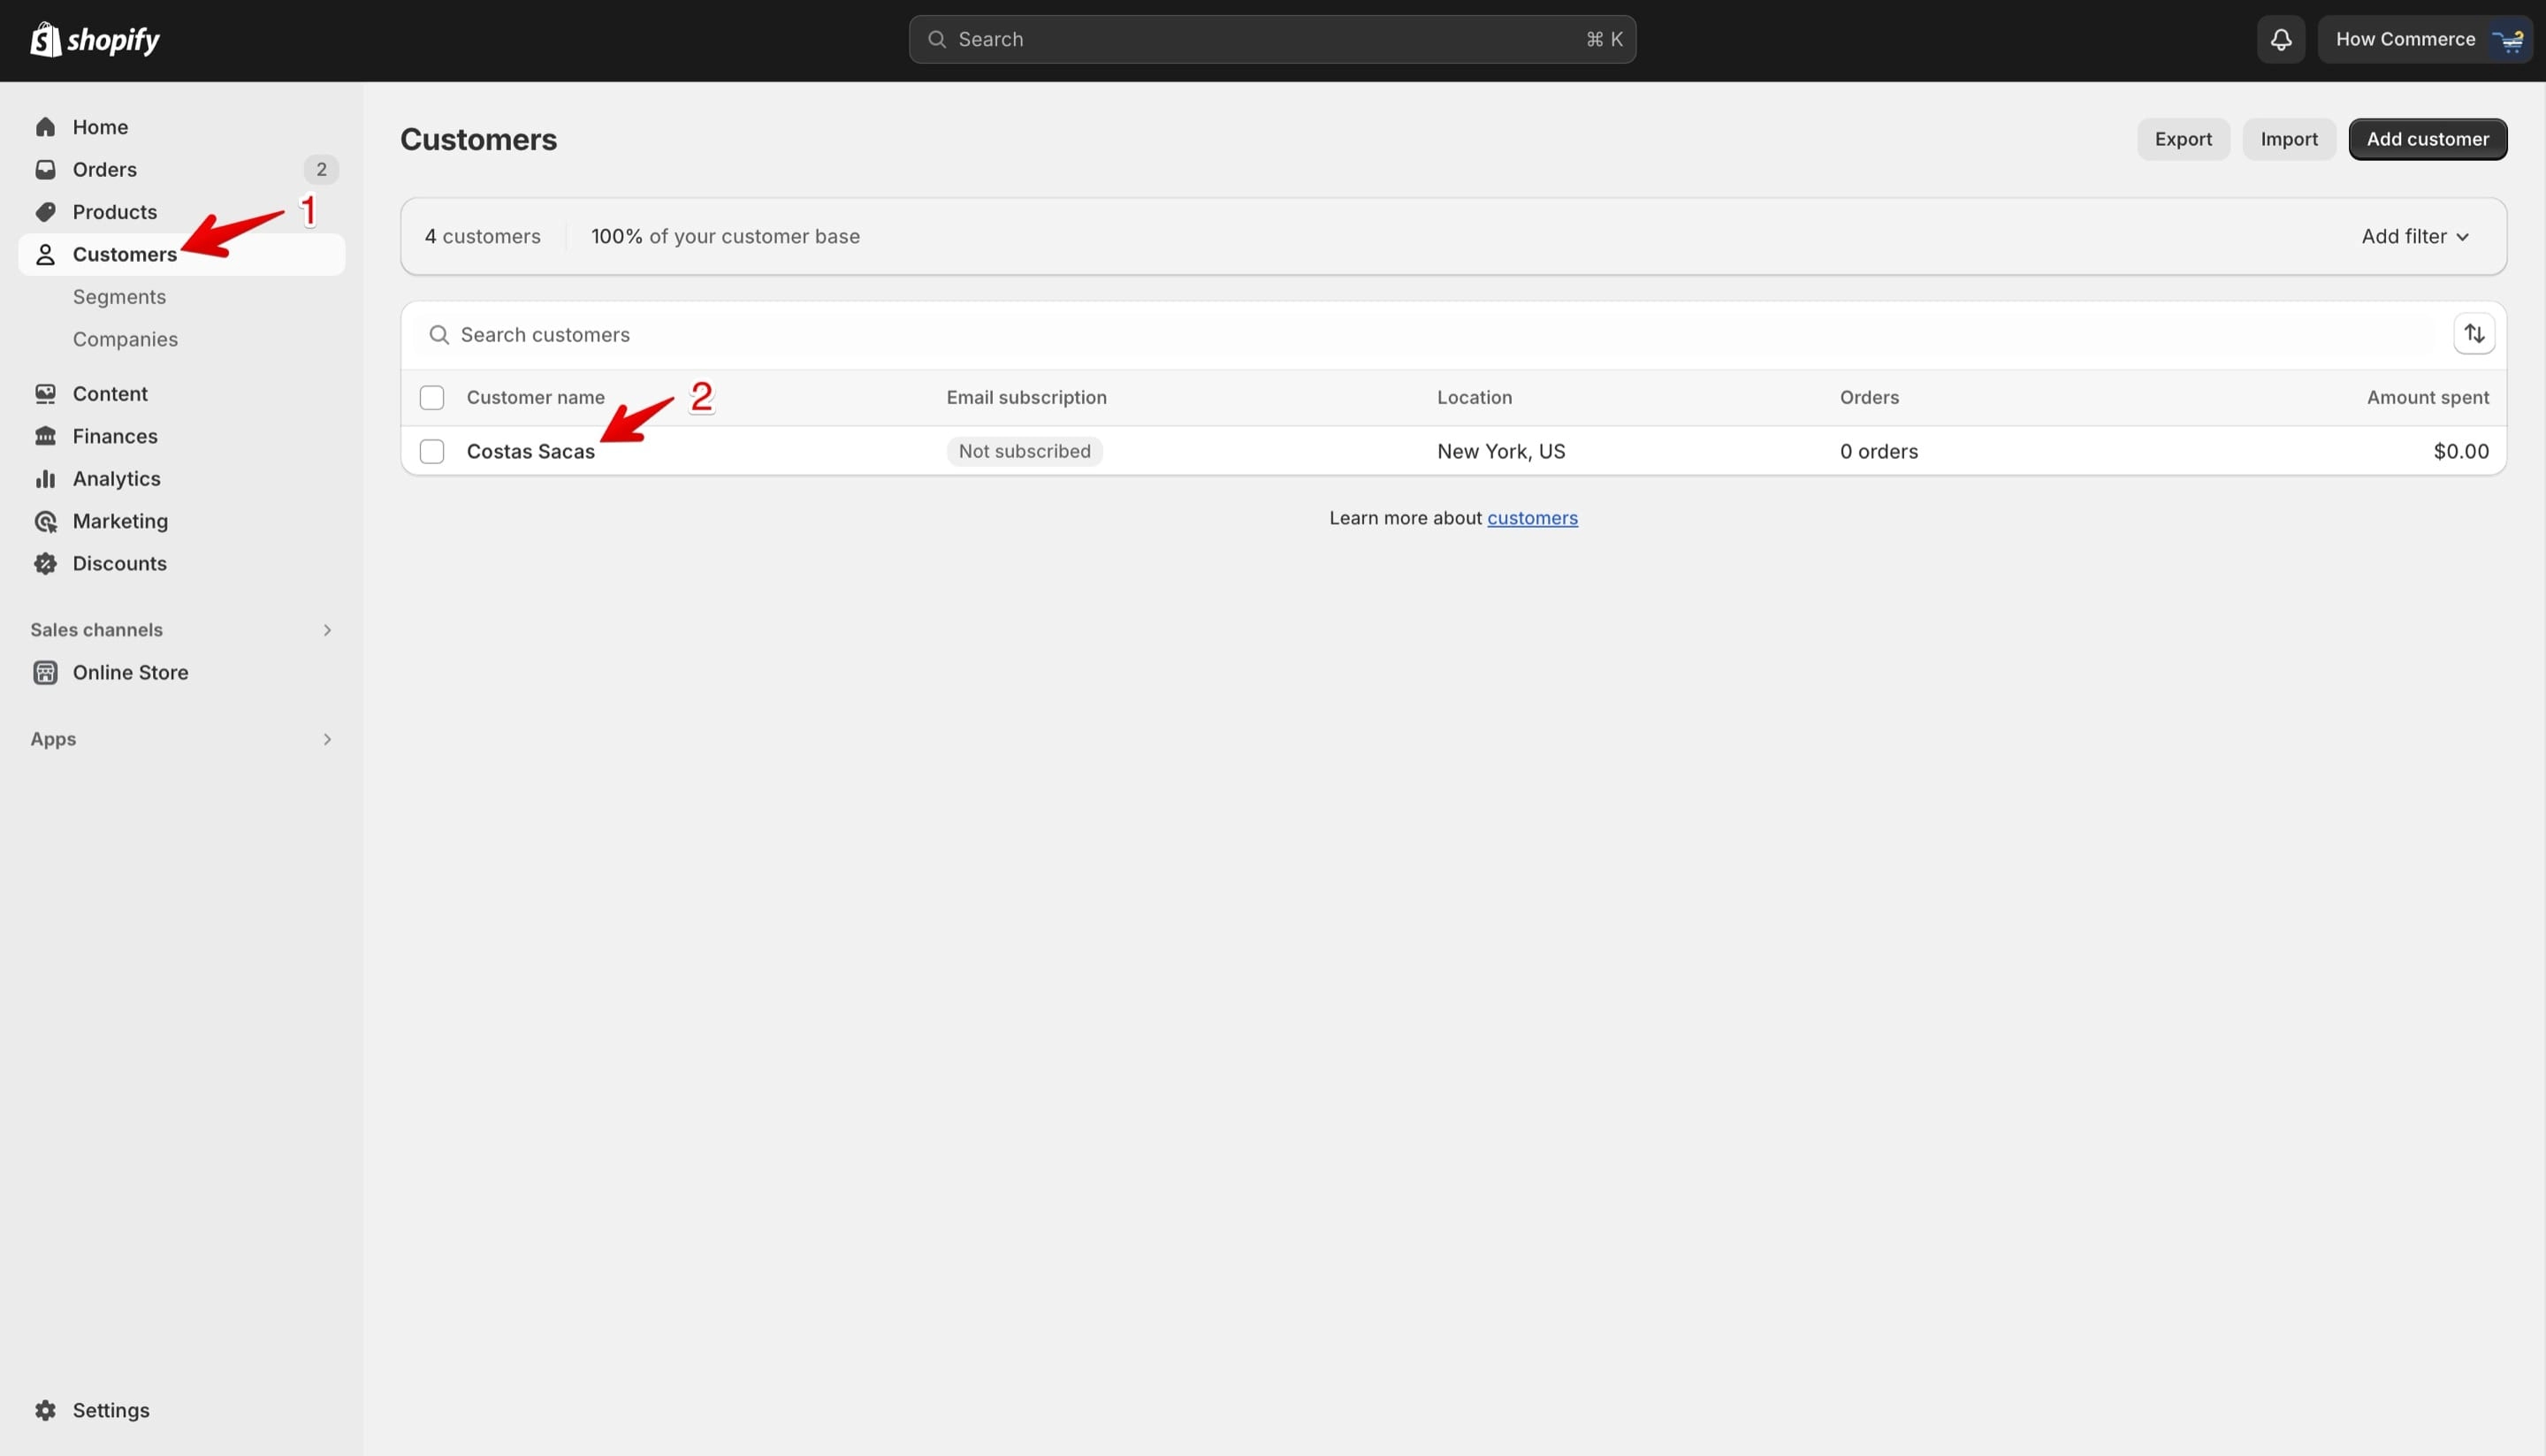
Go to the "Customers" page (marked with 1 in the image below) and select the customer for which you want to remove the tag (marked with 2 in the image below):
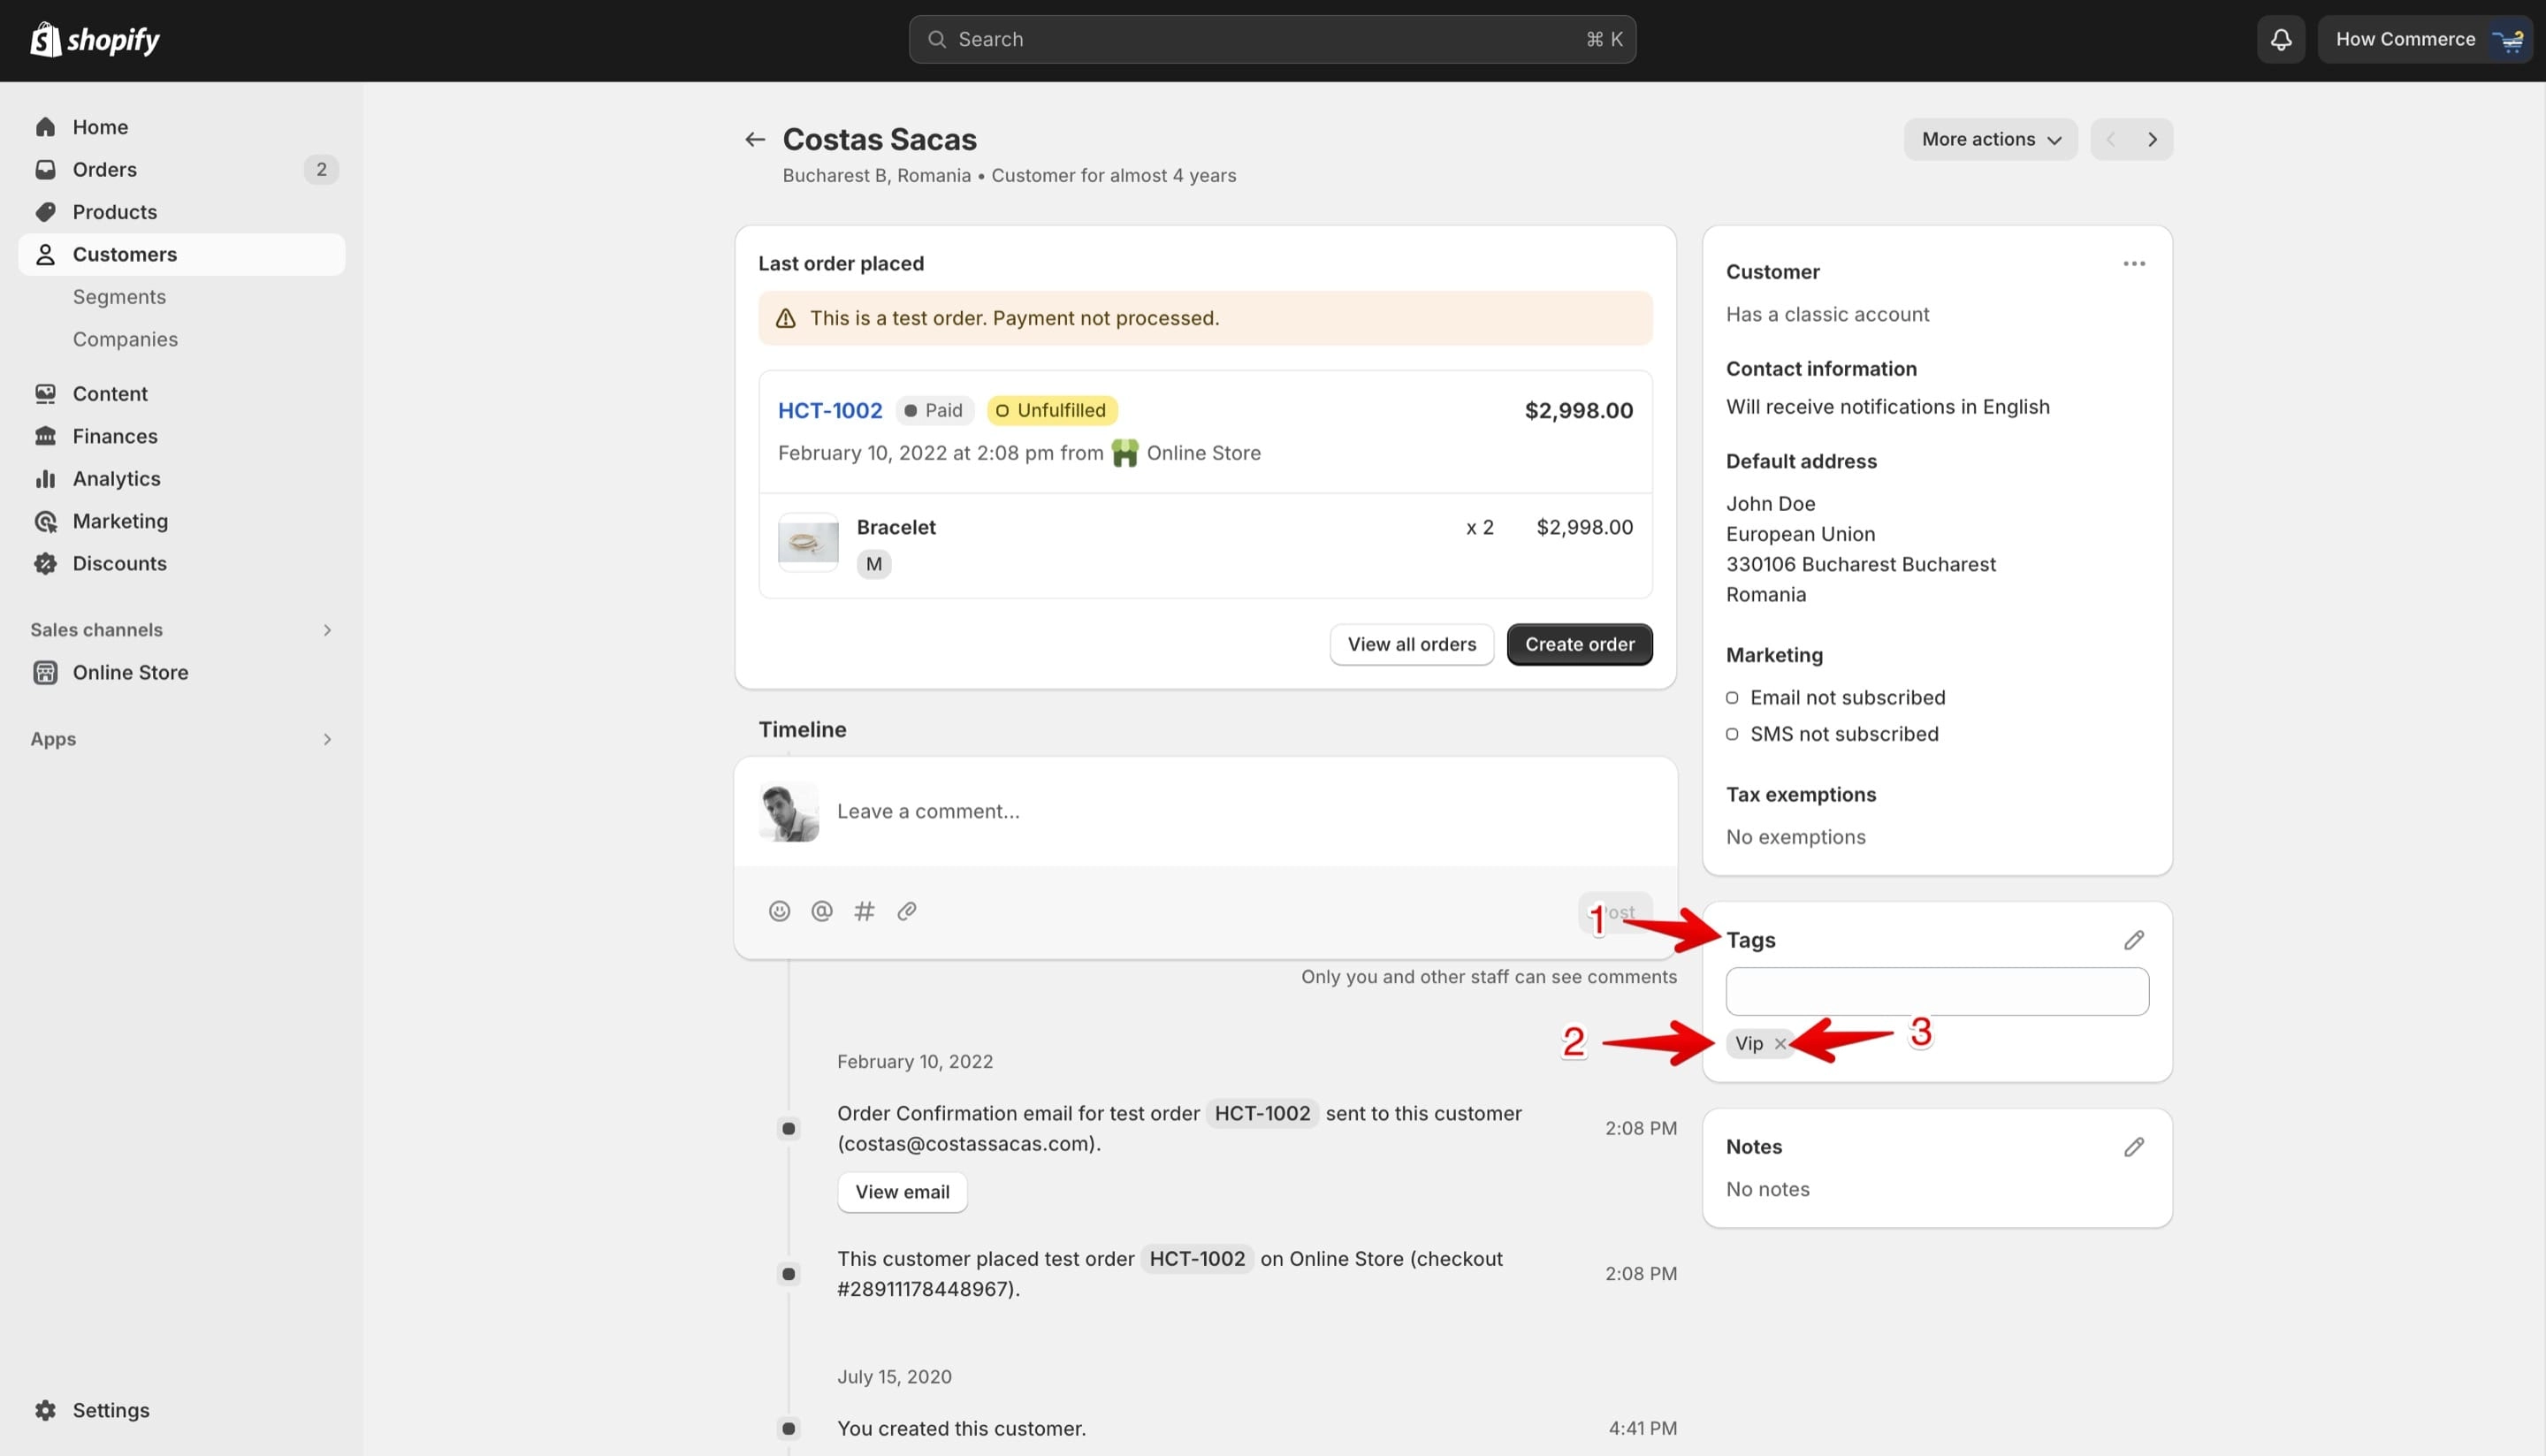
Go to the "Tags" section (marked with 1 in the image below) and you'll see all the tags assigned to this customer listed (marked with 2 in the image below).
Select the "X" icon (marked with 3 in the image below) to delete the tag from the customer. Repeat this process for all the tags you want to remove from the selected customer.
After the operation is complete save your changes.
Delete a blog post tag
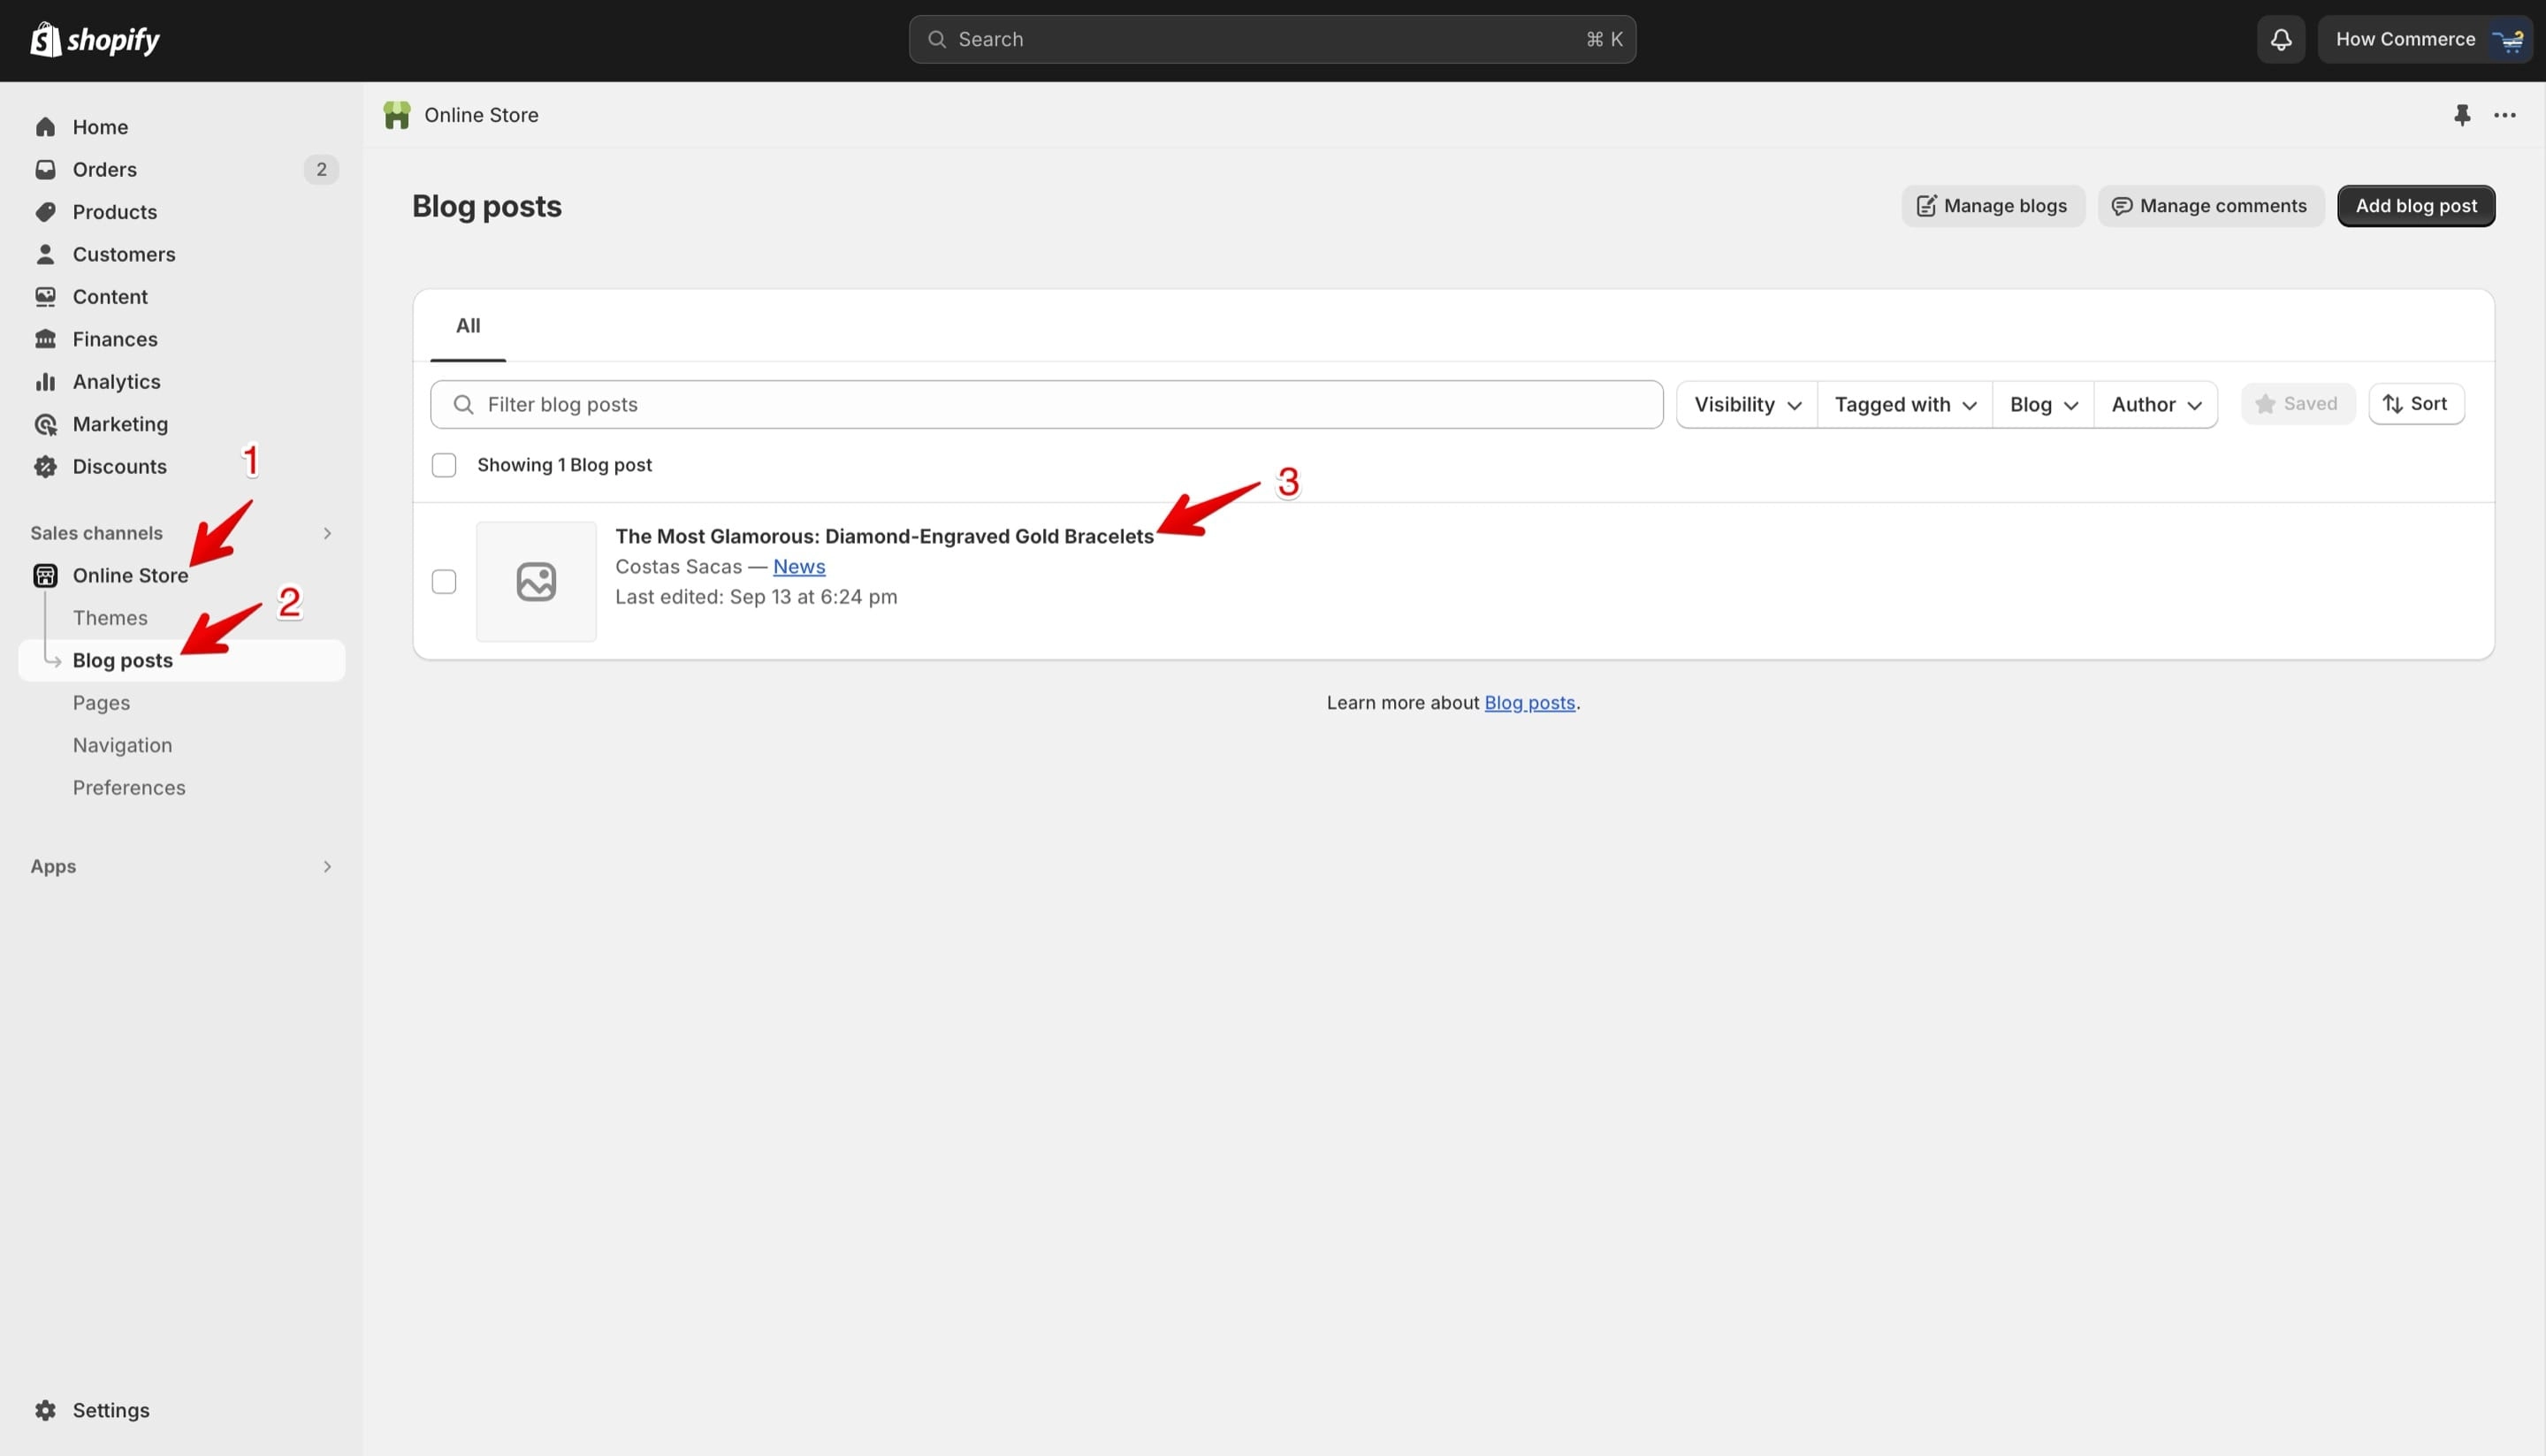
Go to the “Online Store” menu item (marked with 1 in the image below).
Select the “Blog posts” menu item (marked with 2 in the image below).
Select the blog post for which you want to delete the tag (marked with 3 in the image below):
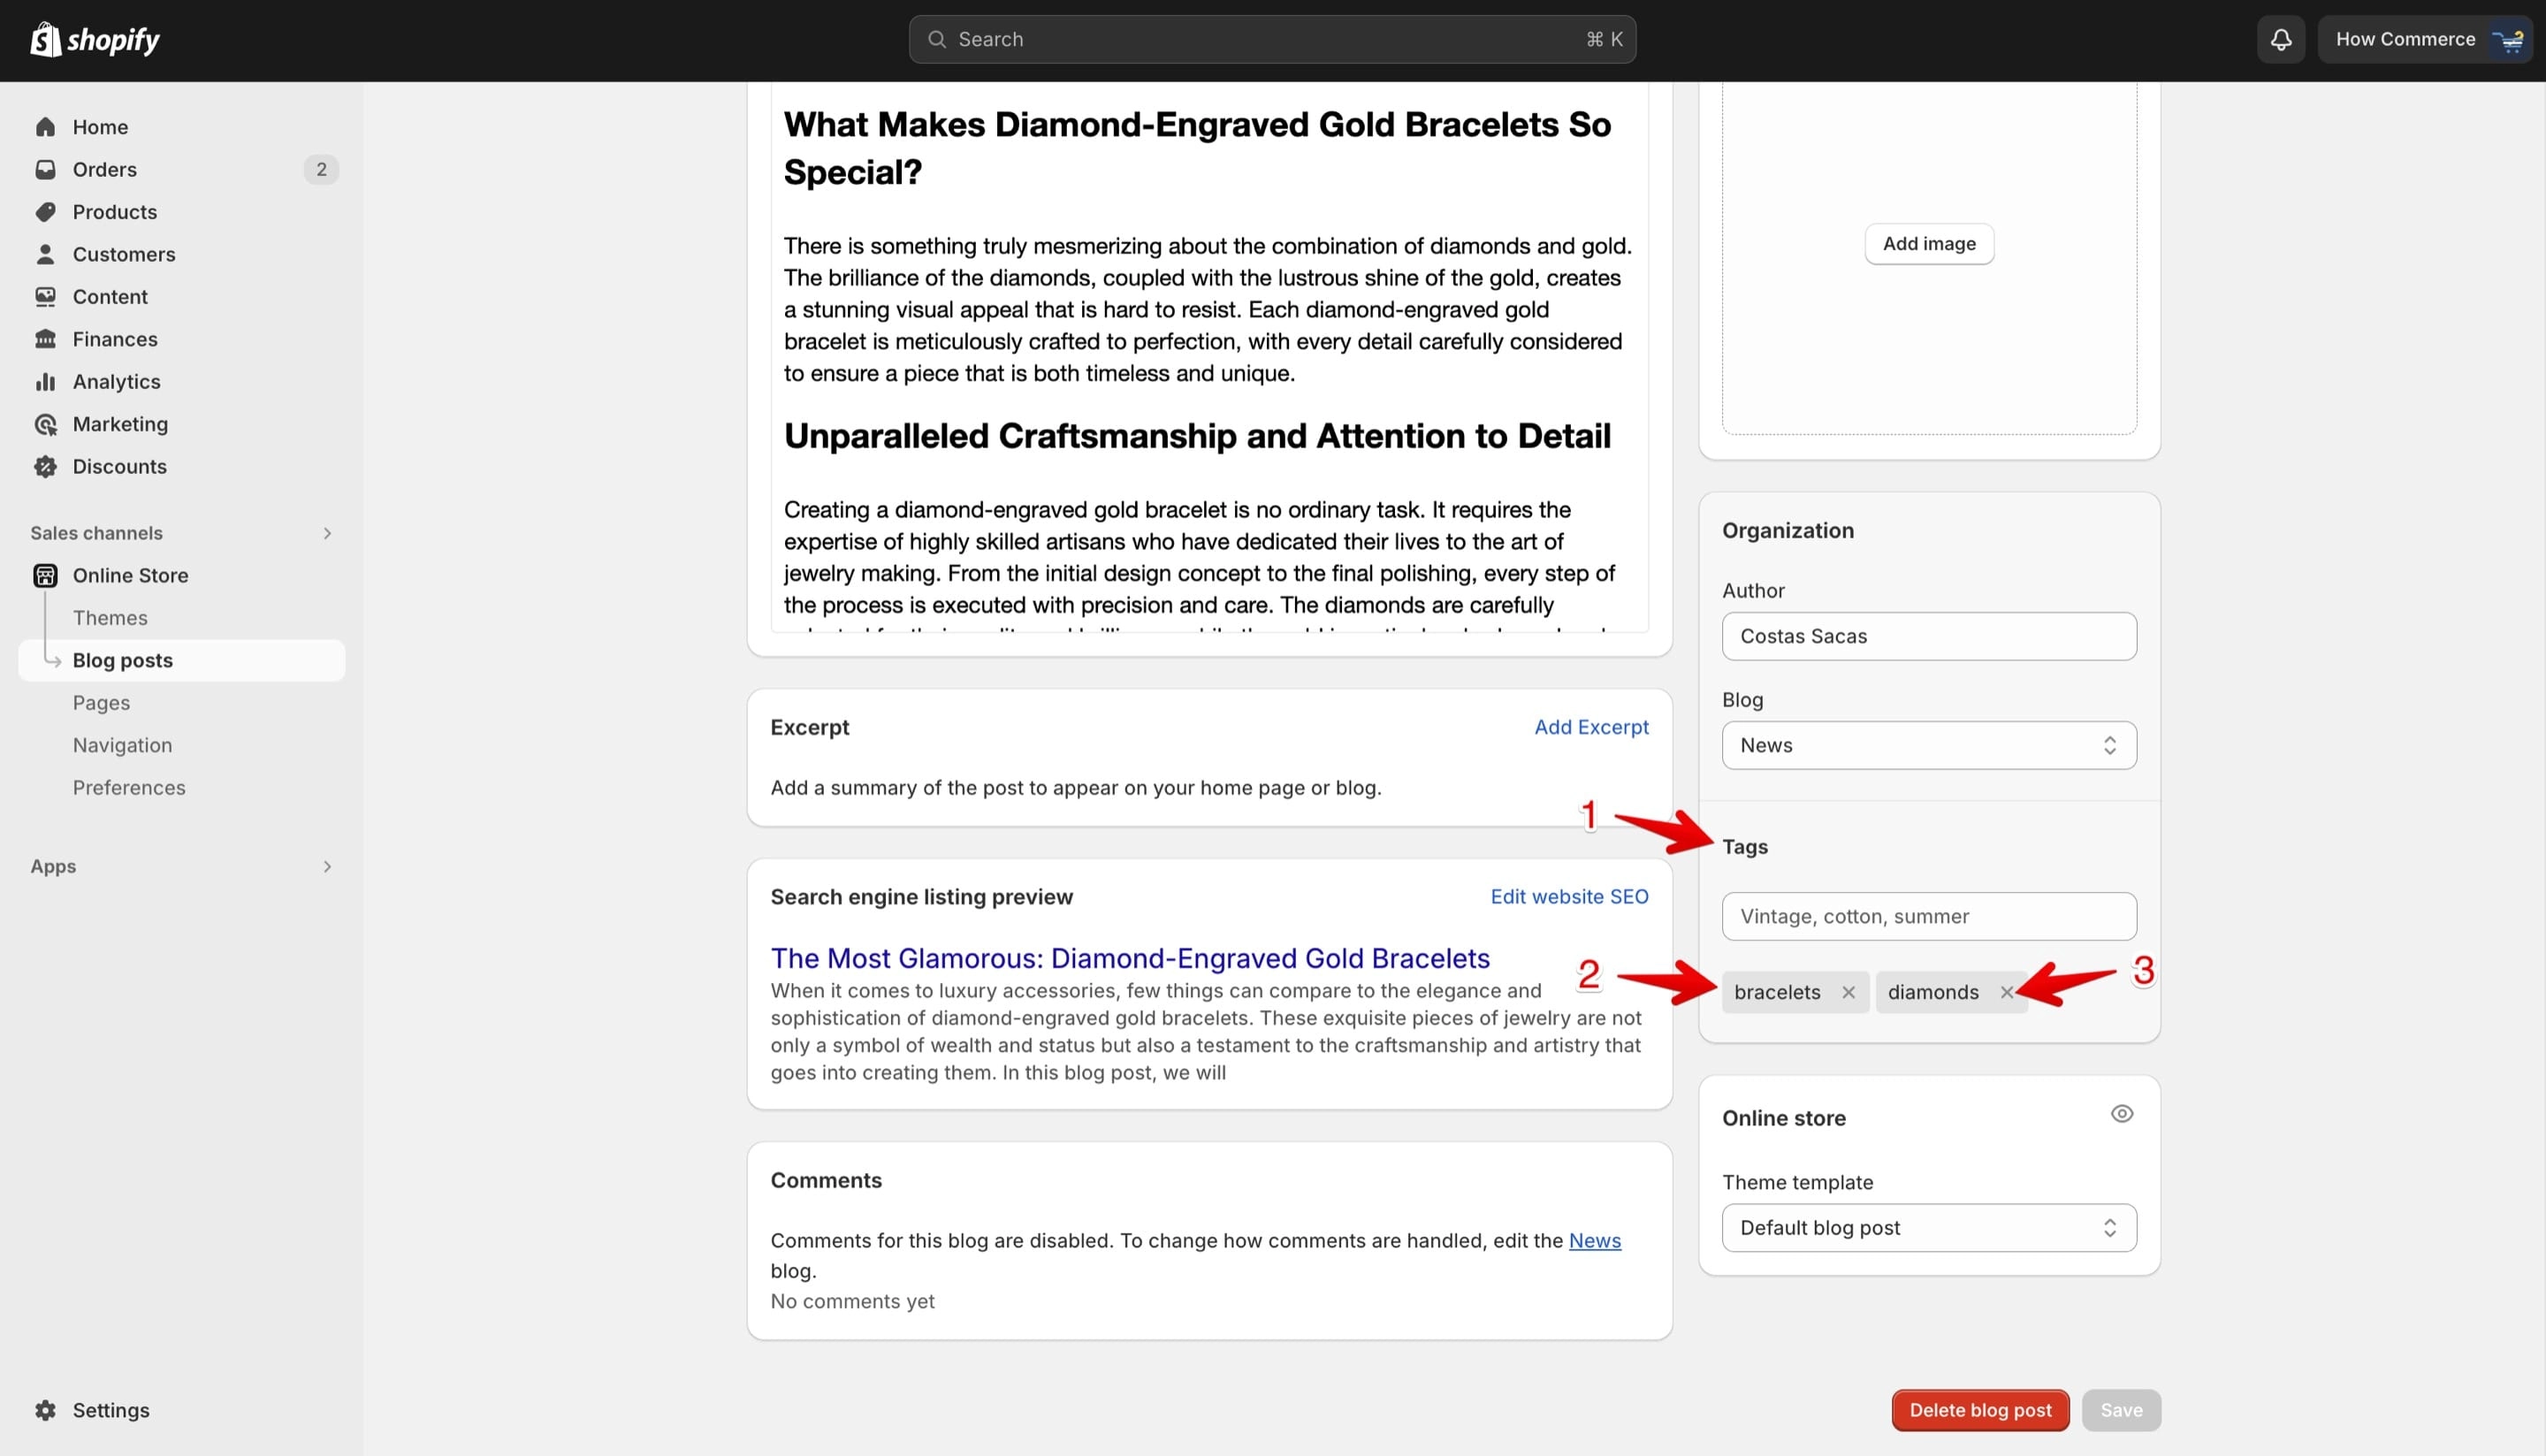
Go to the "Tags" section (marked with 1 in the image below) and you'll see all the tags assigned to this blog post listed (marked with 2 in the image below).
Select the "X" icon (marked with 3 in the image below) to delete the tag from the blog post. Repeat this process for all the tags you want to remove from the selected blog post.
After the operation is complete save your changes.
Delete tags in bulk
Removing tags in bulk is recommended when you need to remove the same tag for multiple products.
Delete product tags in bulk
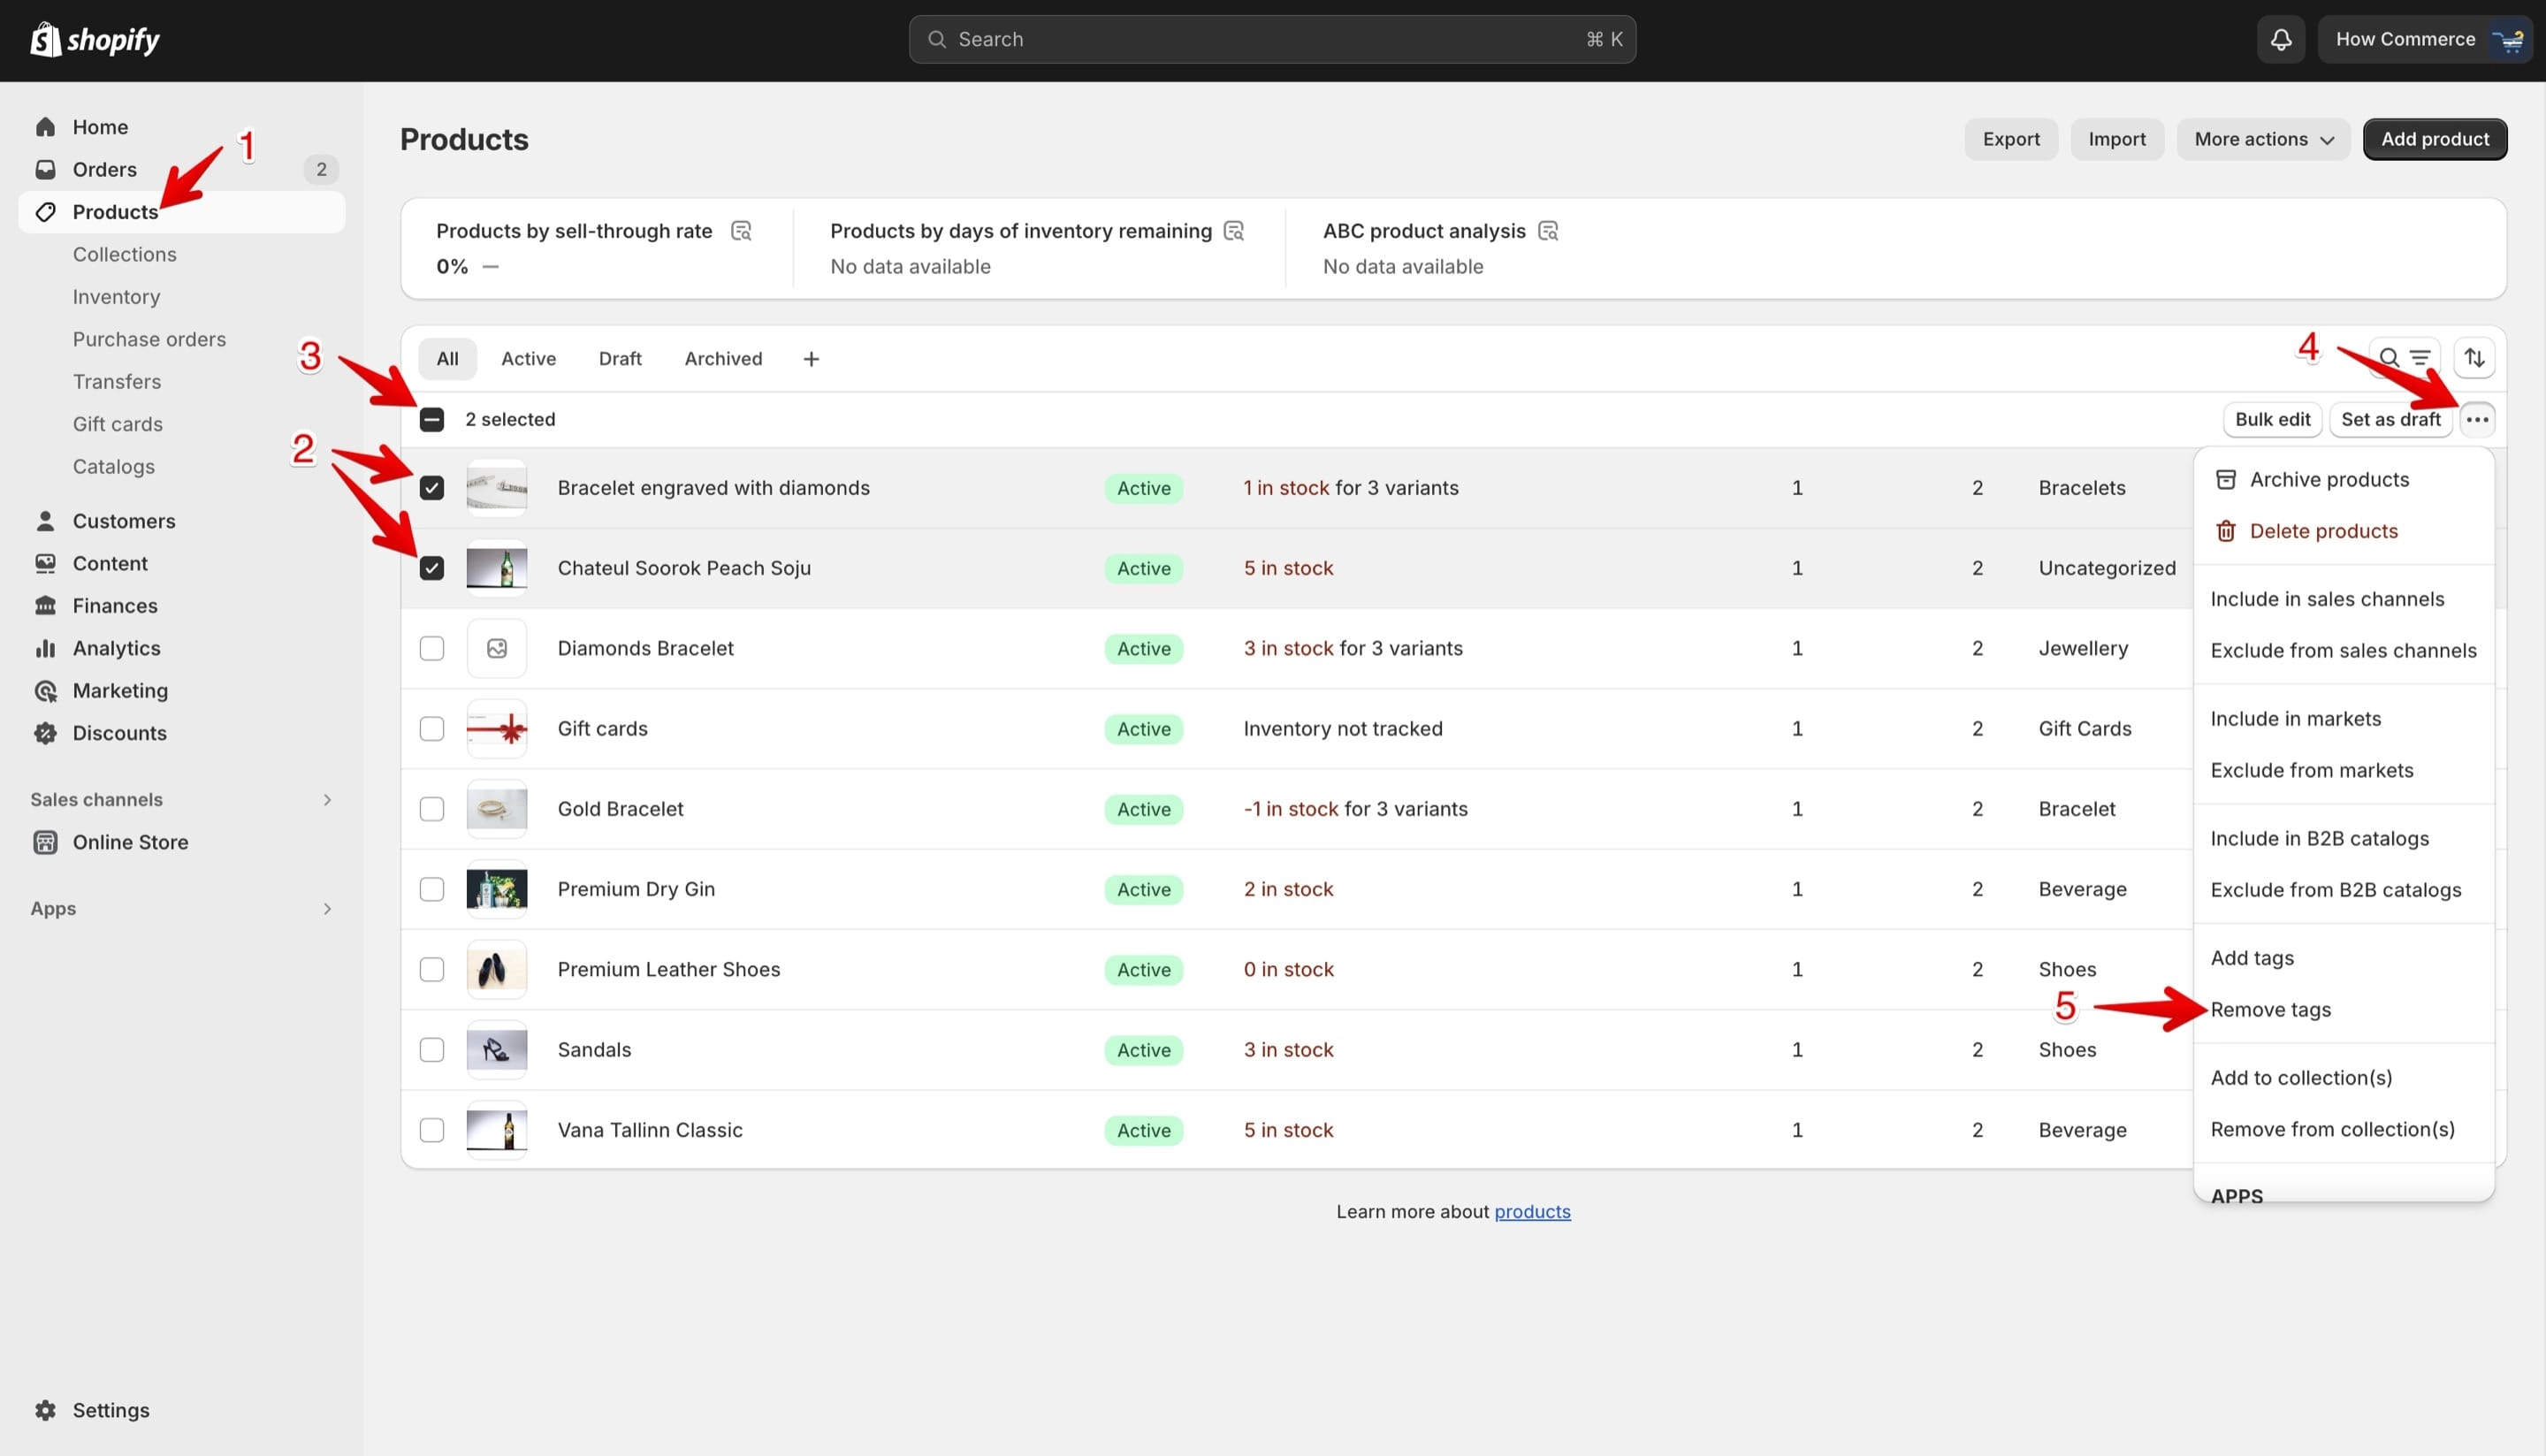
Go to the “Products listing” page (marked with 1 in the image below).
Select all the products that you want to remove the tag from (marked with 2 in the image below).
You can see how many products you have selected (marked with 3 in the image below). From there you can also deselect all the selected products.
Click on the “...” (marked with 4 in the image below).
You'll see a drop-down menu, from it select the "Remove tags" option (marked with 5 in the image below).
Delete a tag or tags permanently from the store
Tags will be removed from the section that you’ve selected, but it will stay in the system if it is assigned to another resource type.
If the removed tag is not assigned to any other resource types, in a couple of minutes it will be automatically removed from the Shopify system.
Once Shopify has removed the tag, you need to add it again when you want to use it.
So if you want to remove a tag completely from the system you need to remove it from all the resource types where it is assigned.