

Customer notifications are an important part of the shopping experience.
They keep customers informed about their orders, payments, shipping updates, refunds, and other important events.
Shopify provides ready-to-use email notification templates that work out of the box. However, you can customize them to better reflect your store's branding.
The good news is that you don't need any coding knowledge to make basic changes to your customer notifications.
Shopify offers a simple customization interface where you can upload your logo and adjust the email accent color to match your brand.
While these options are limited, they're enough to give your notifications a more consistent and professional appearance.
Any branding changes you make will automatically apply to all your customer email notification templates, ensuring a consistent look across your communications.
To get started, navigate to Settings in your Shopify admin.
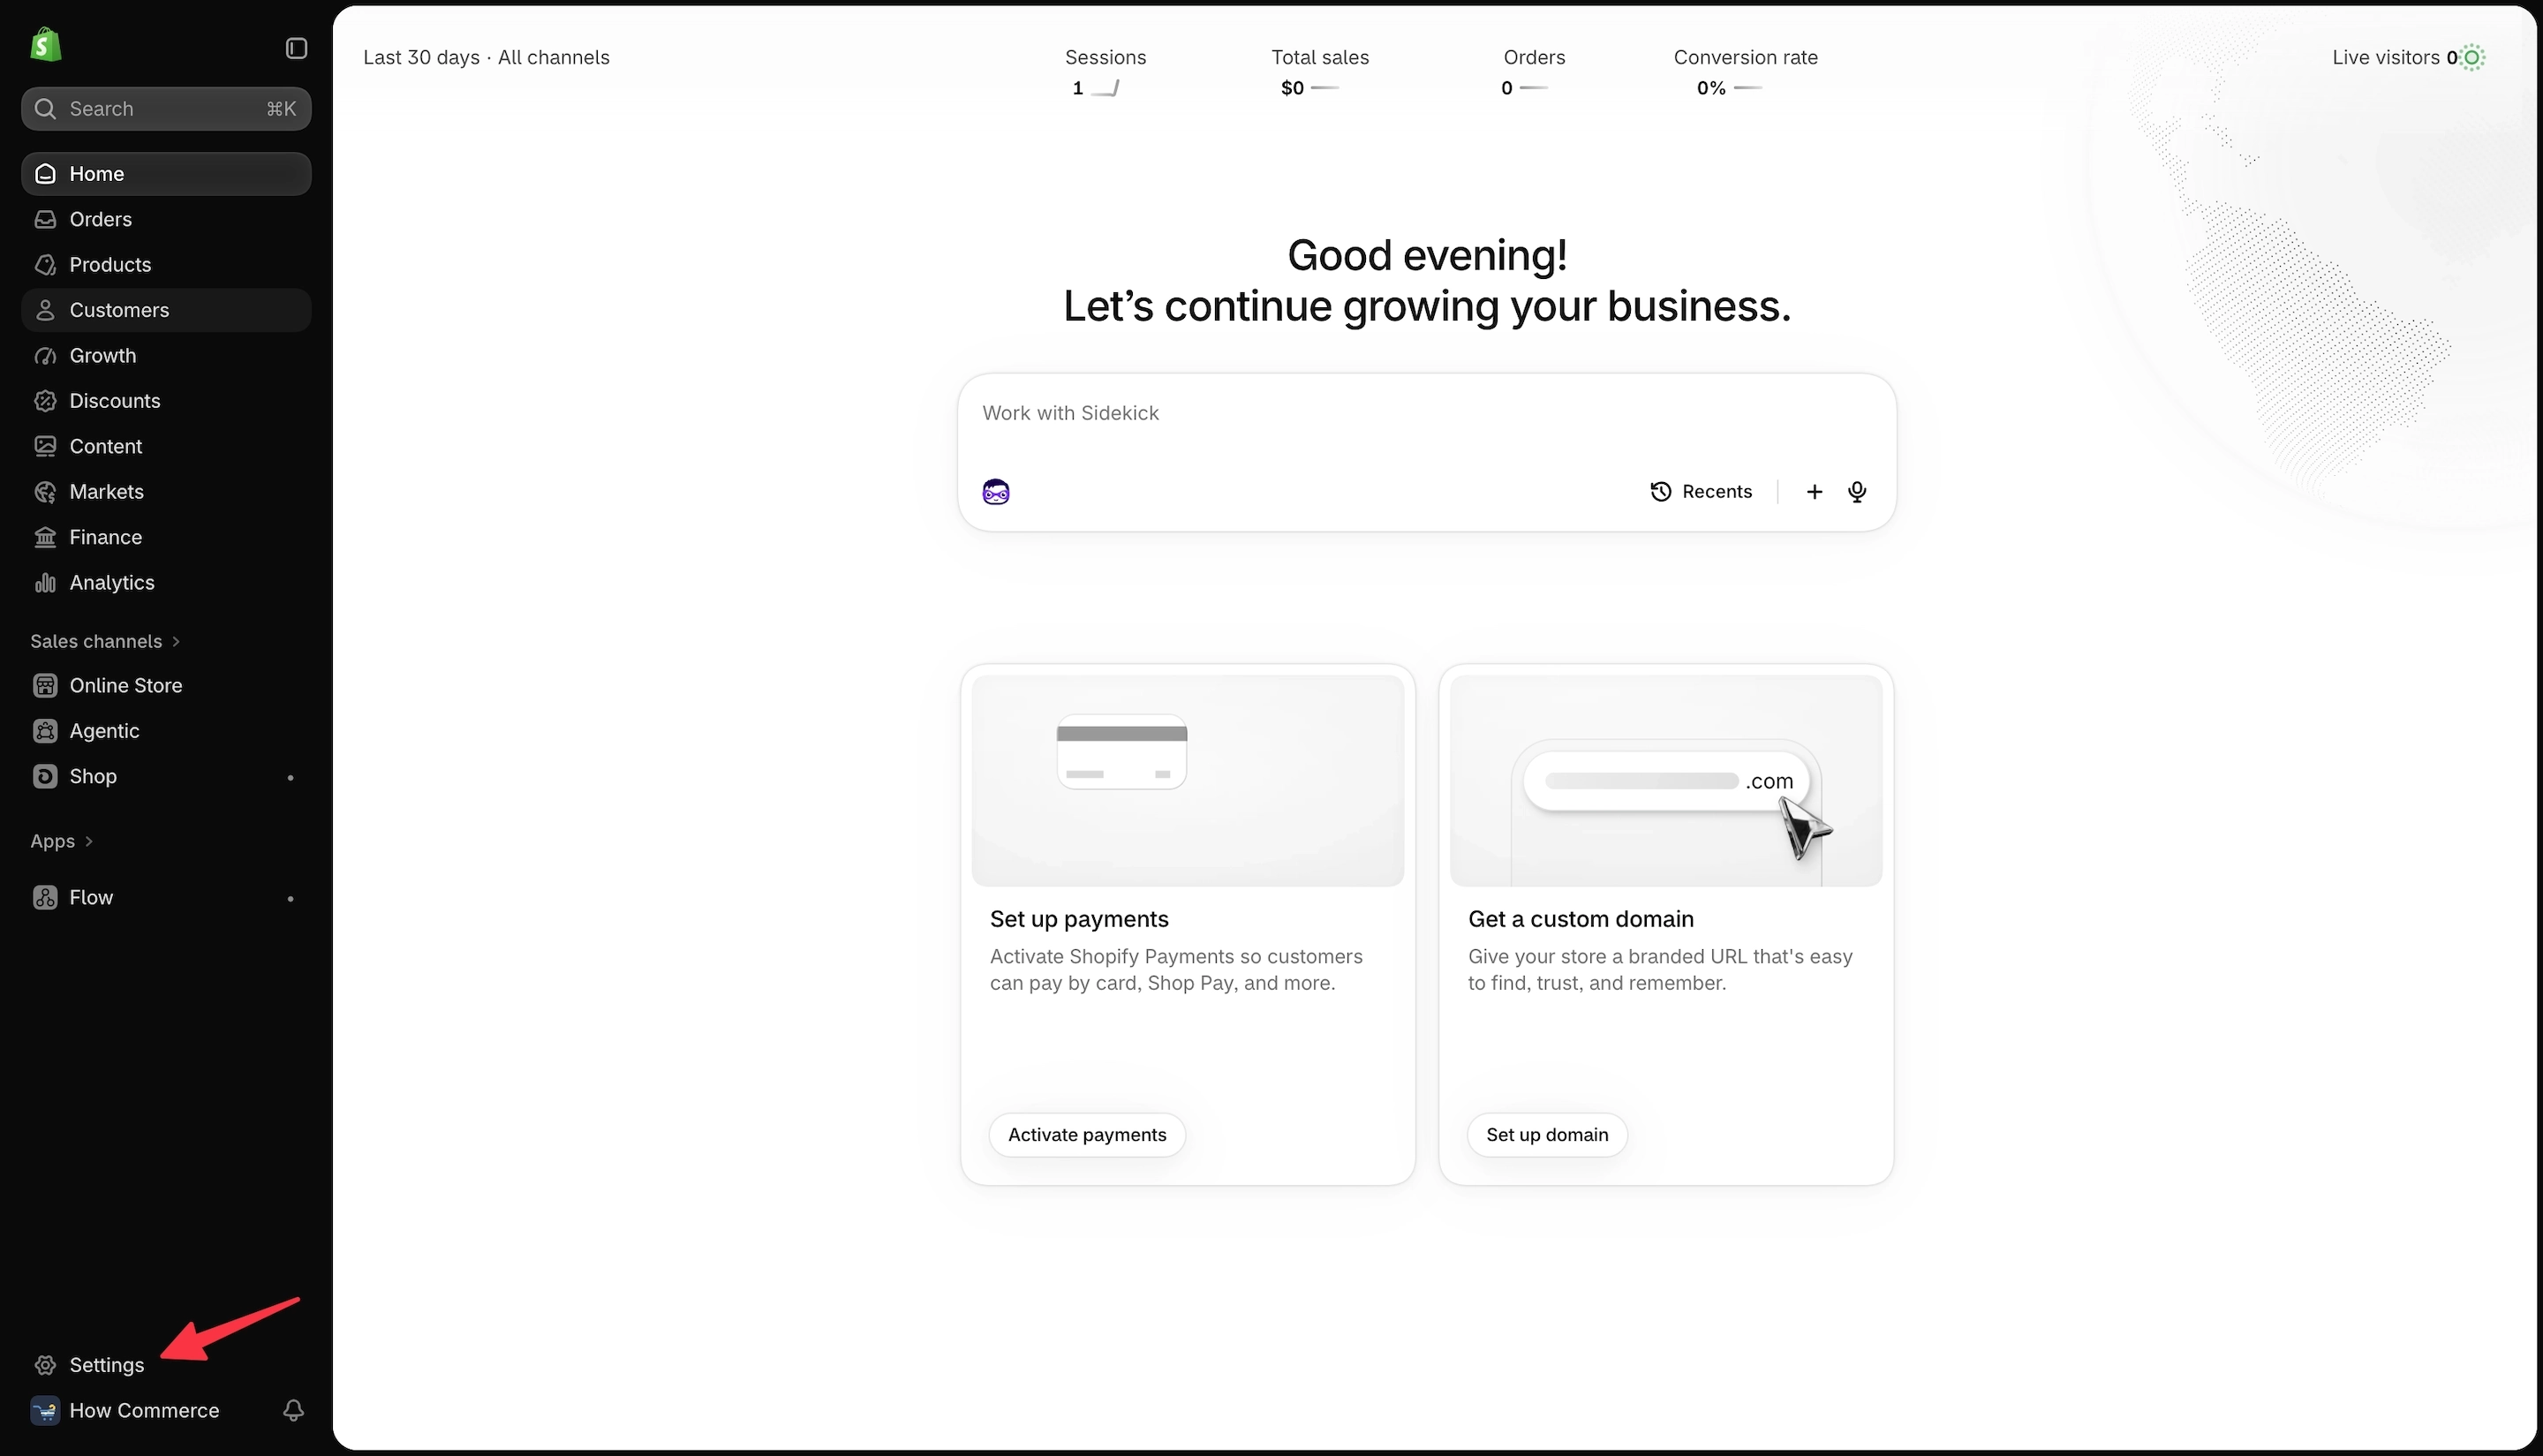
Go to Notifications (marked as 1 in the image below), then click Customer notifications (marked as 2 in the image below).
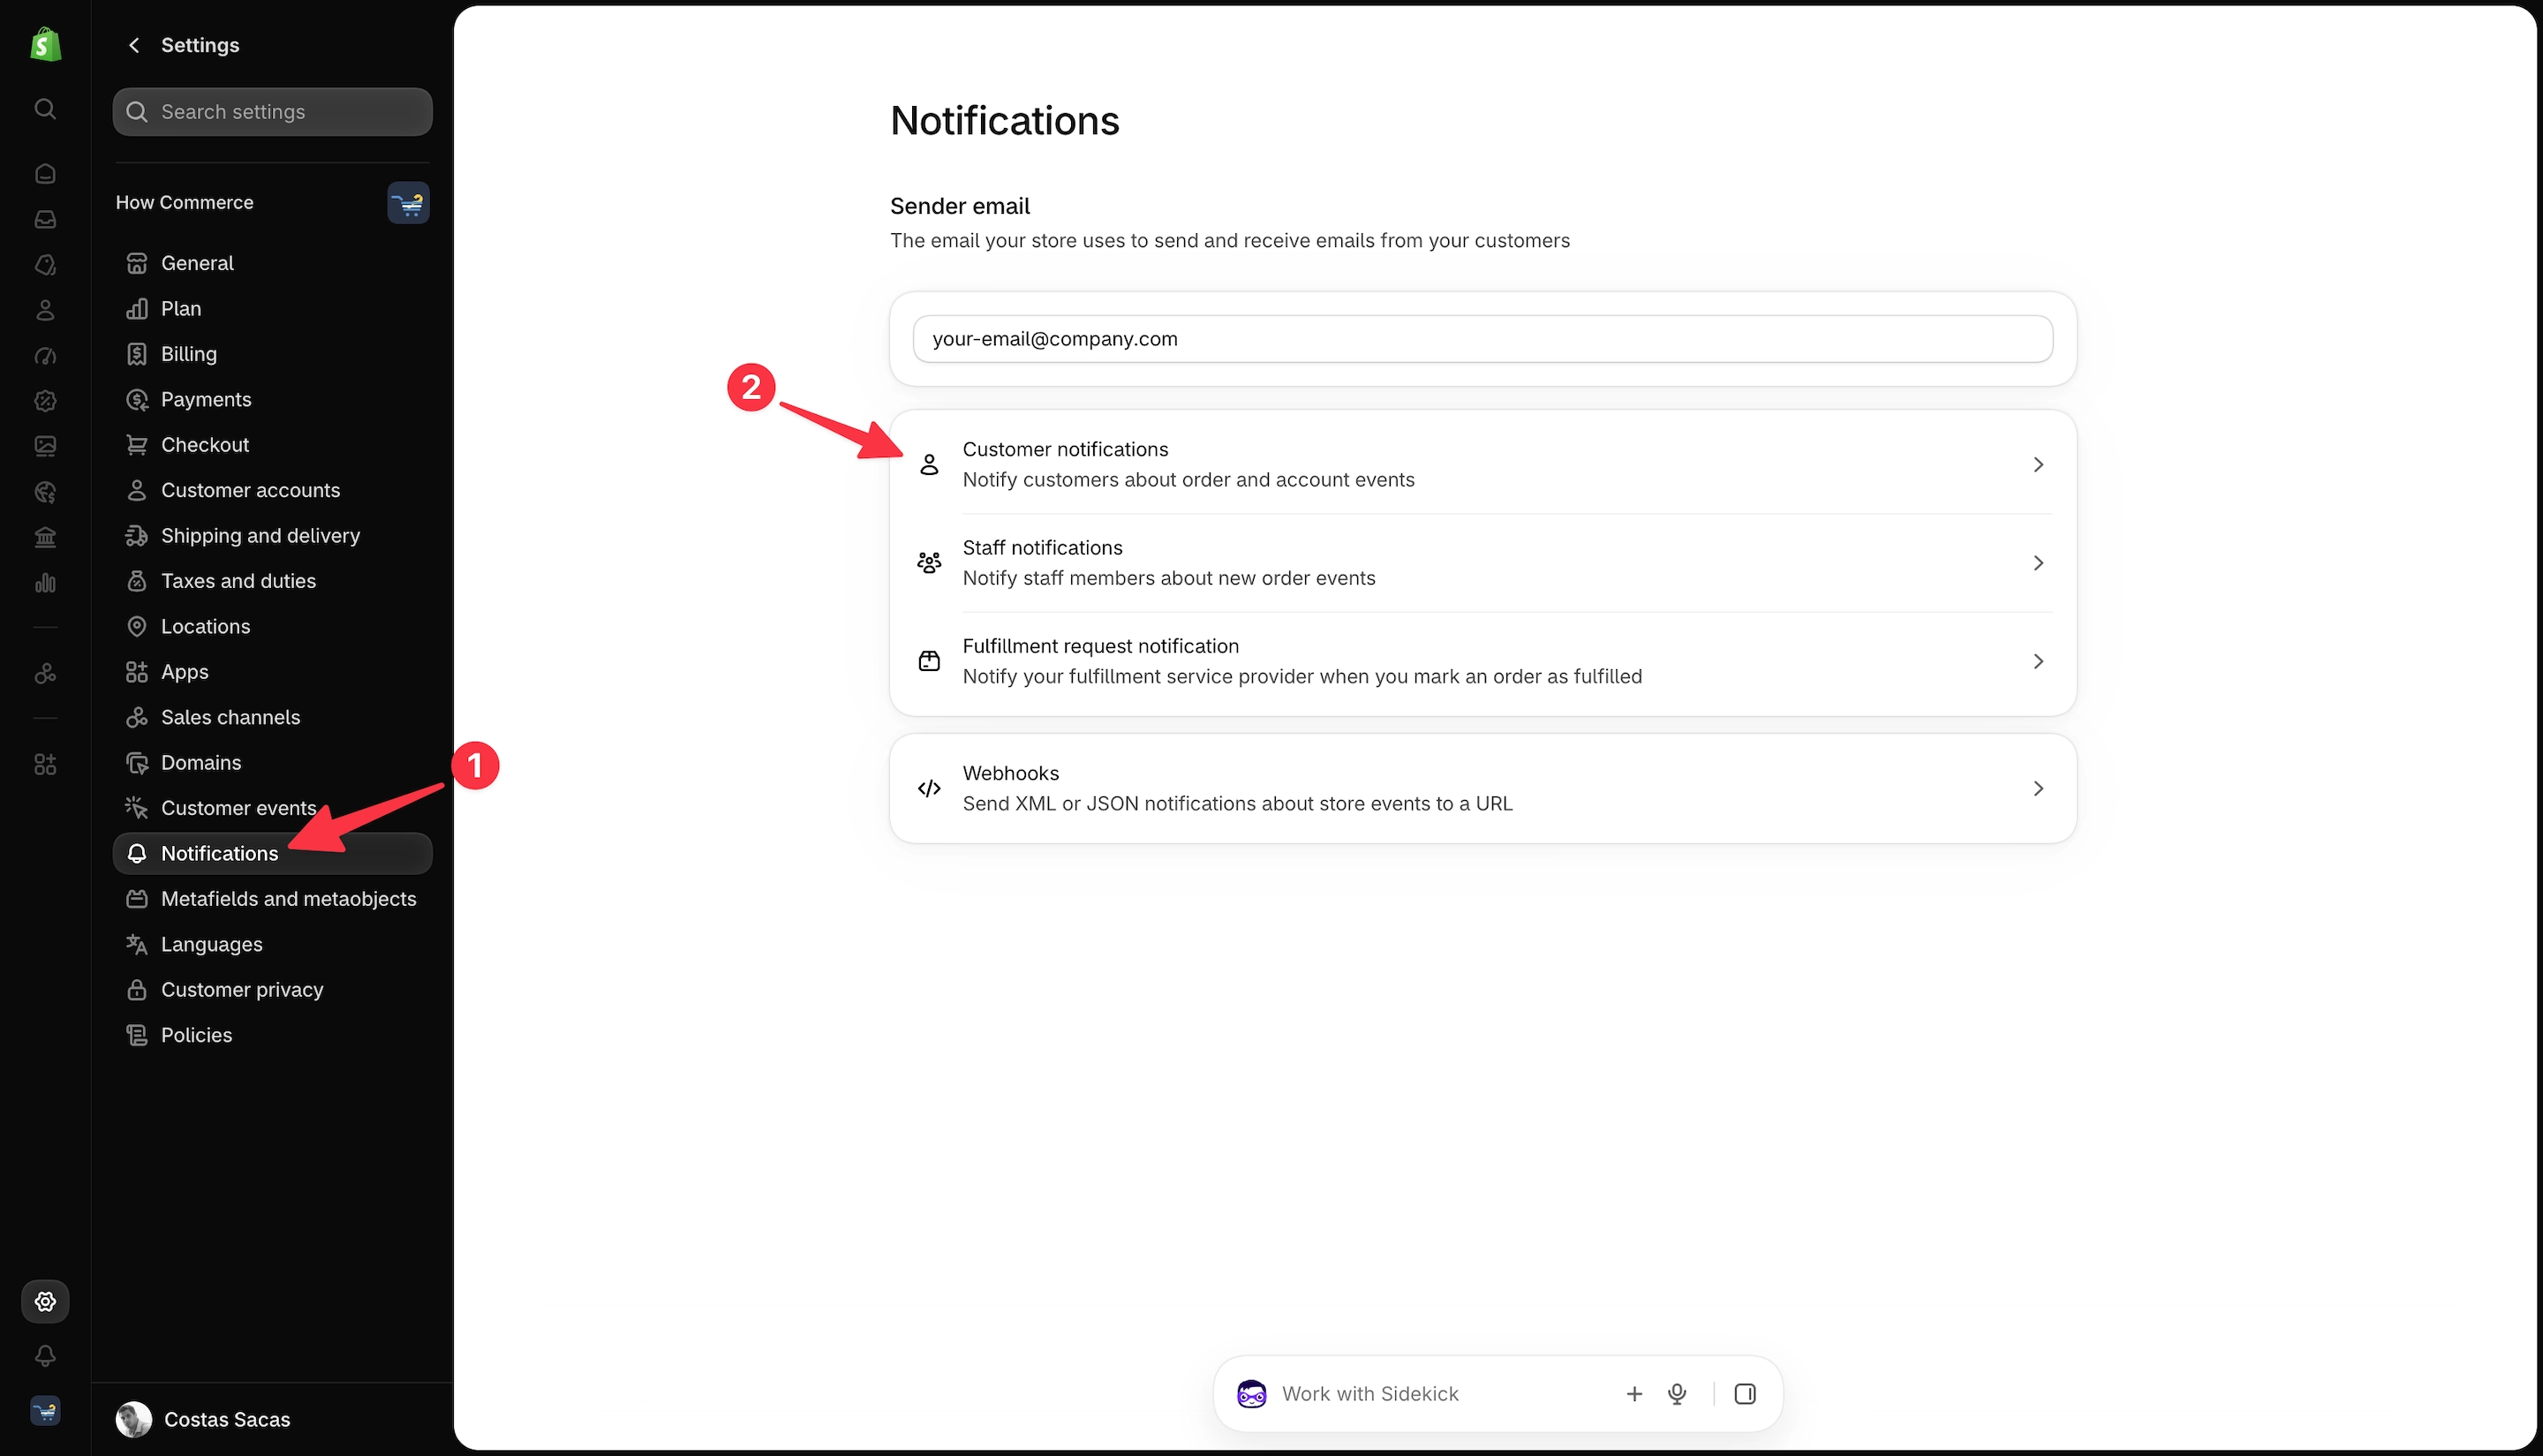
In the top-right corner, click Customize email templates.
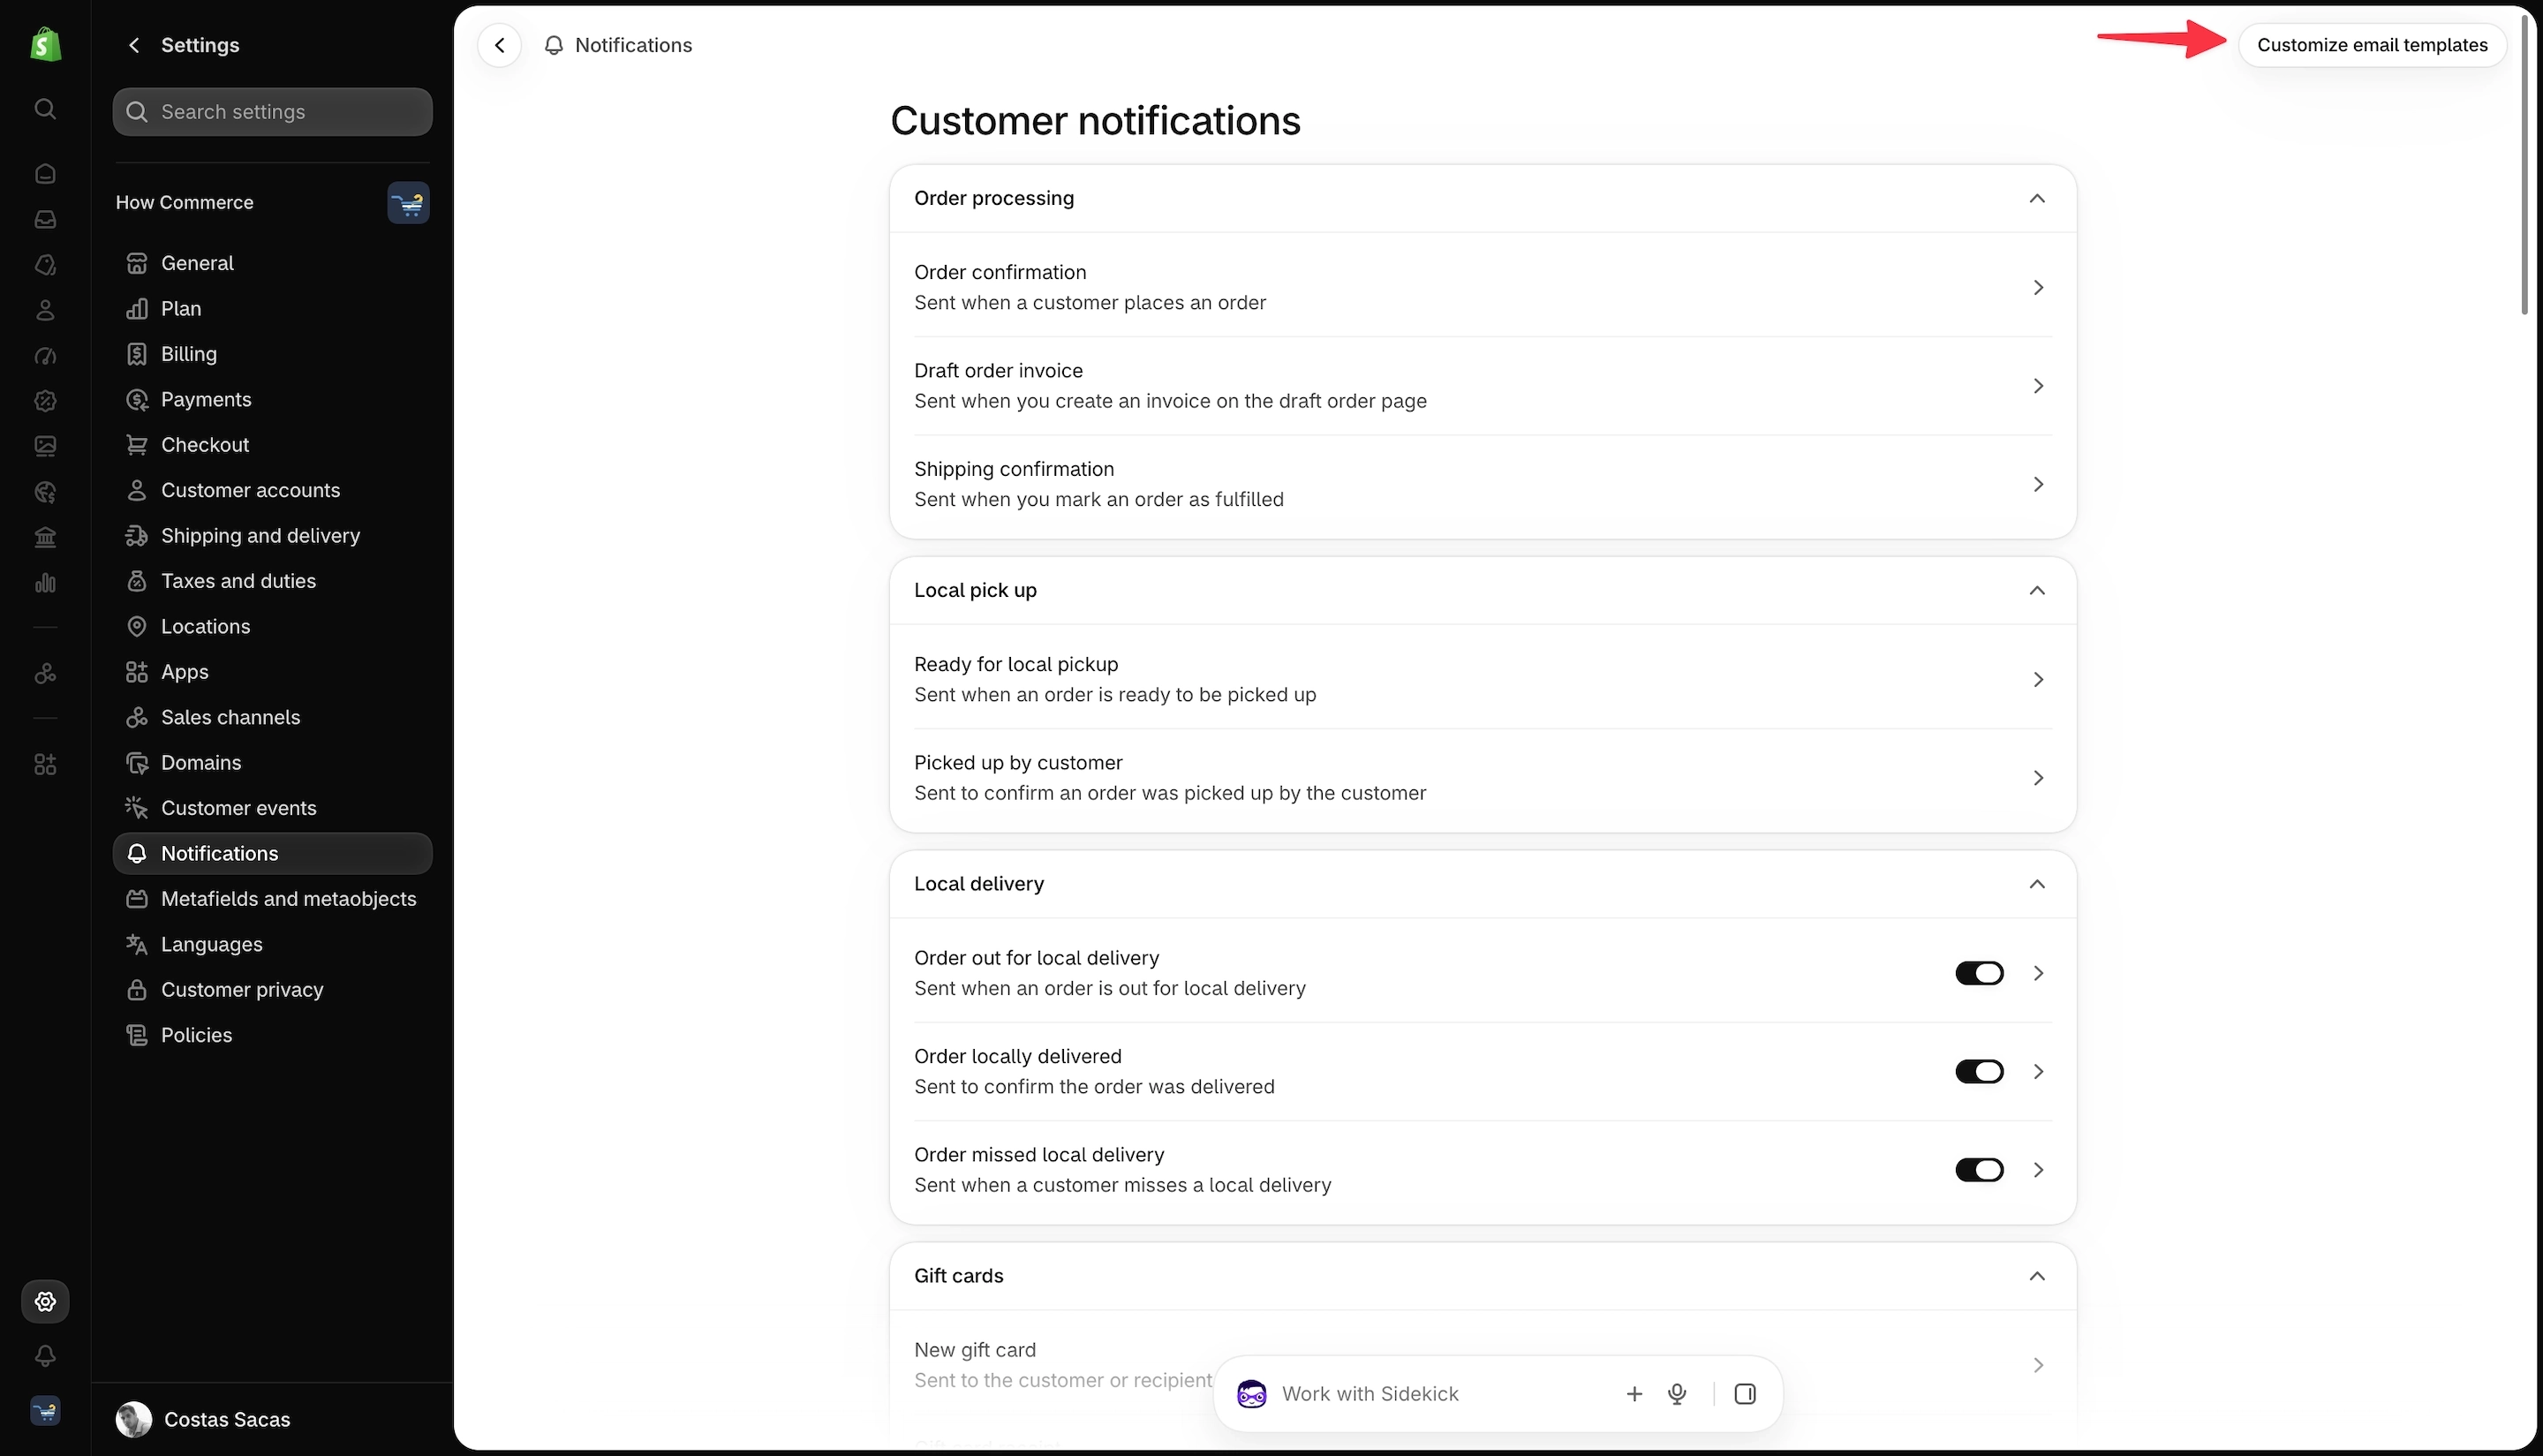
You can now see the email template customizer.
First, you can upload or change your store's logo (marked with 1 in the image below).
Next, under the Branding section, you can change the accent color using the color picker (marked with 2 in the image below).
The accent color is used for buttons, links, and other interactive elements that encourage customers to take action.
Below these settings, you can see a live preview of the Order confirmation email template (marked with 3 in the image below).
The preview updates automatically as you make changes, allowing you to see how your notifications will look.
The arrow icons (marked with 4 in the image below) allow you to switch between different notification templates and preview how your branding changes will appear in each one.
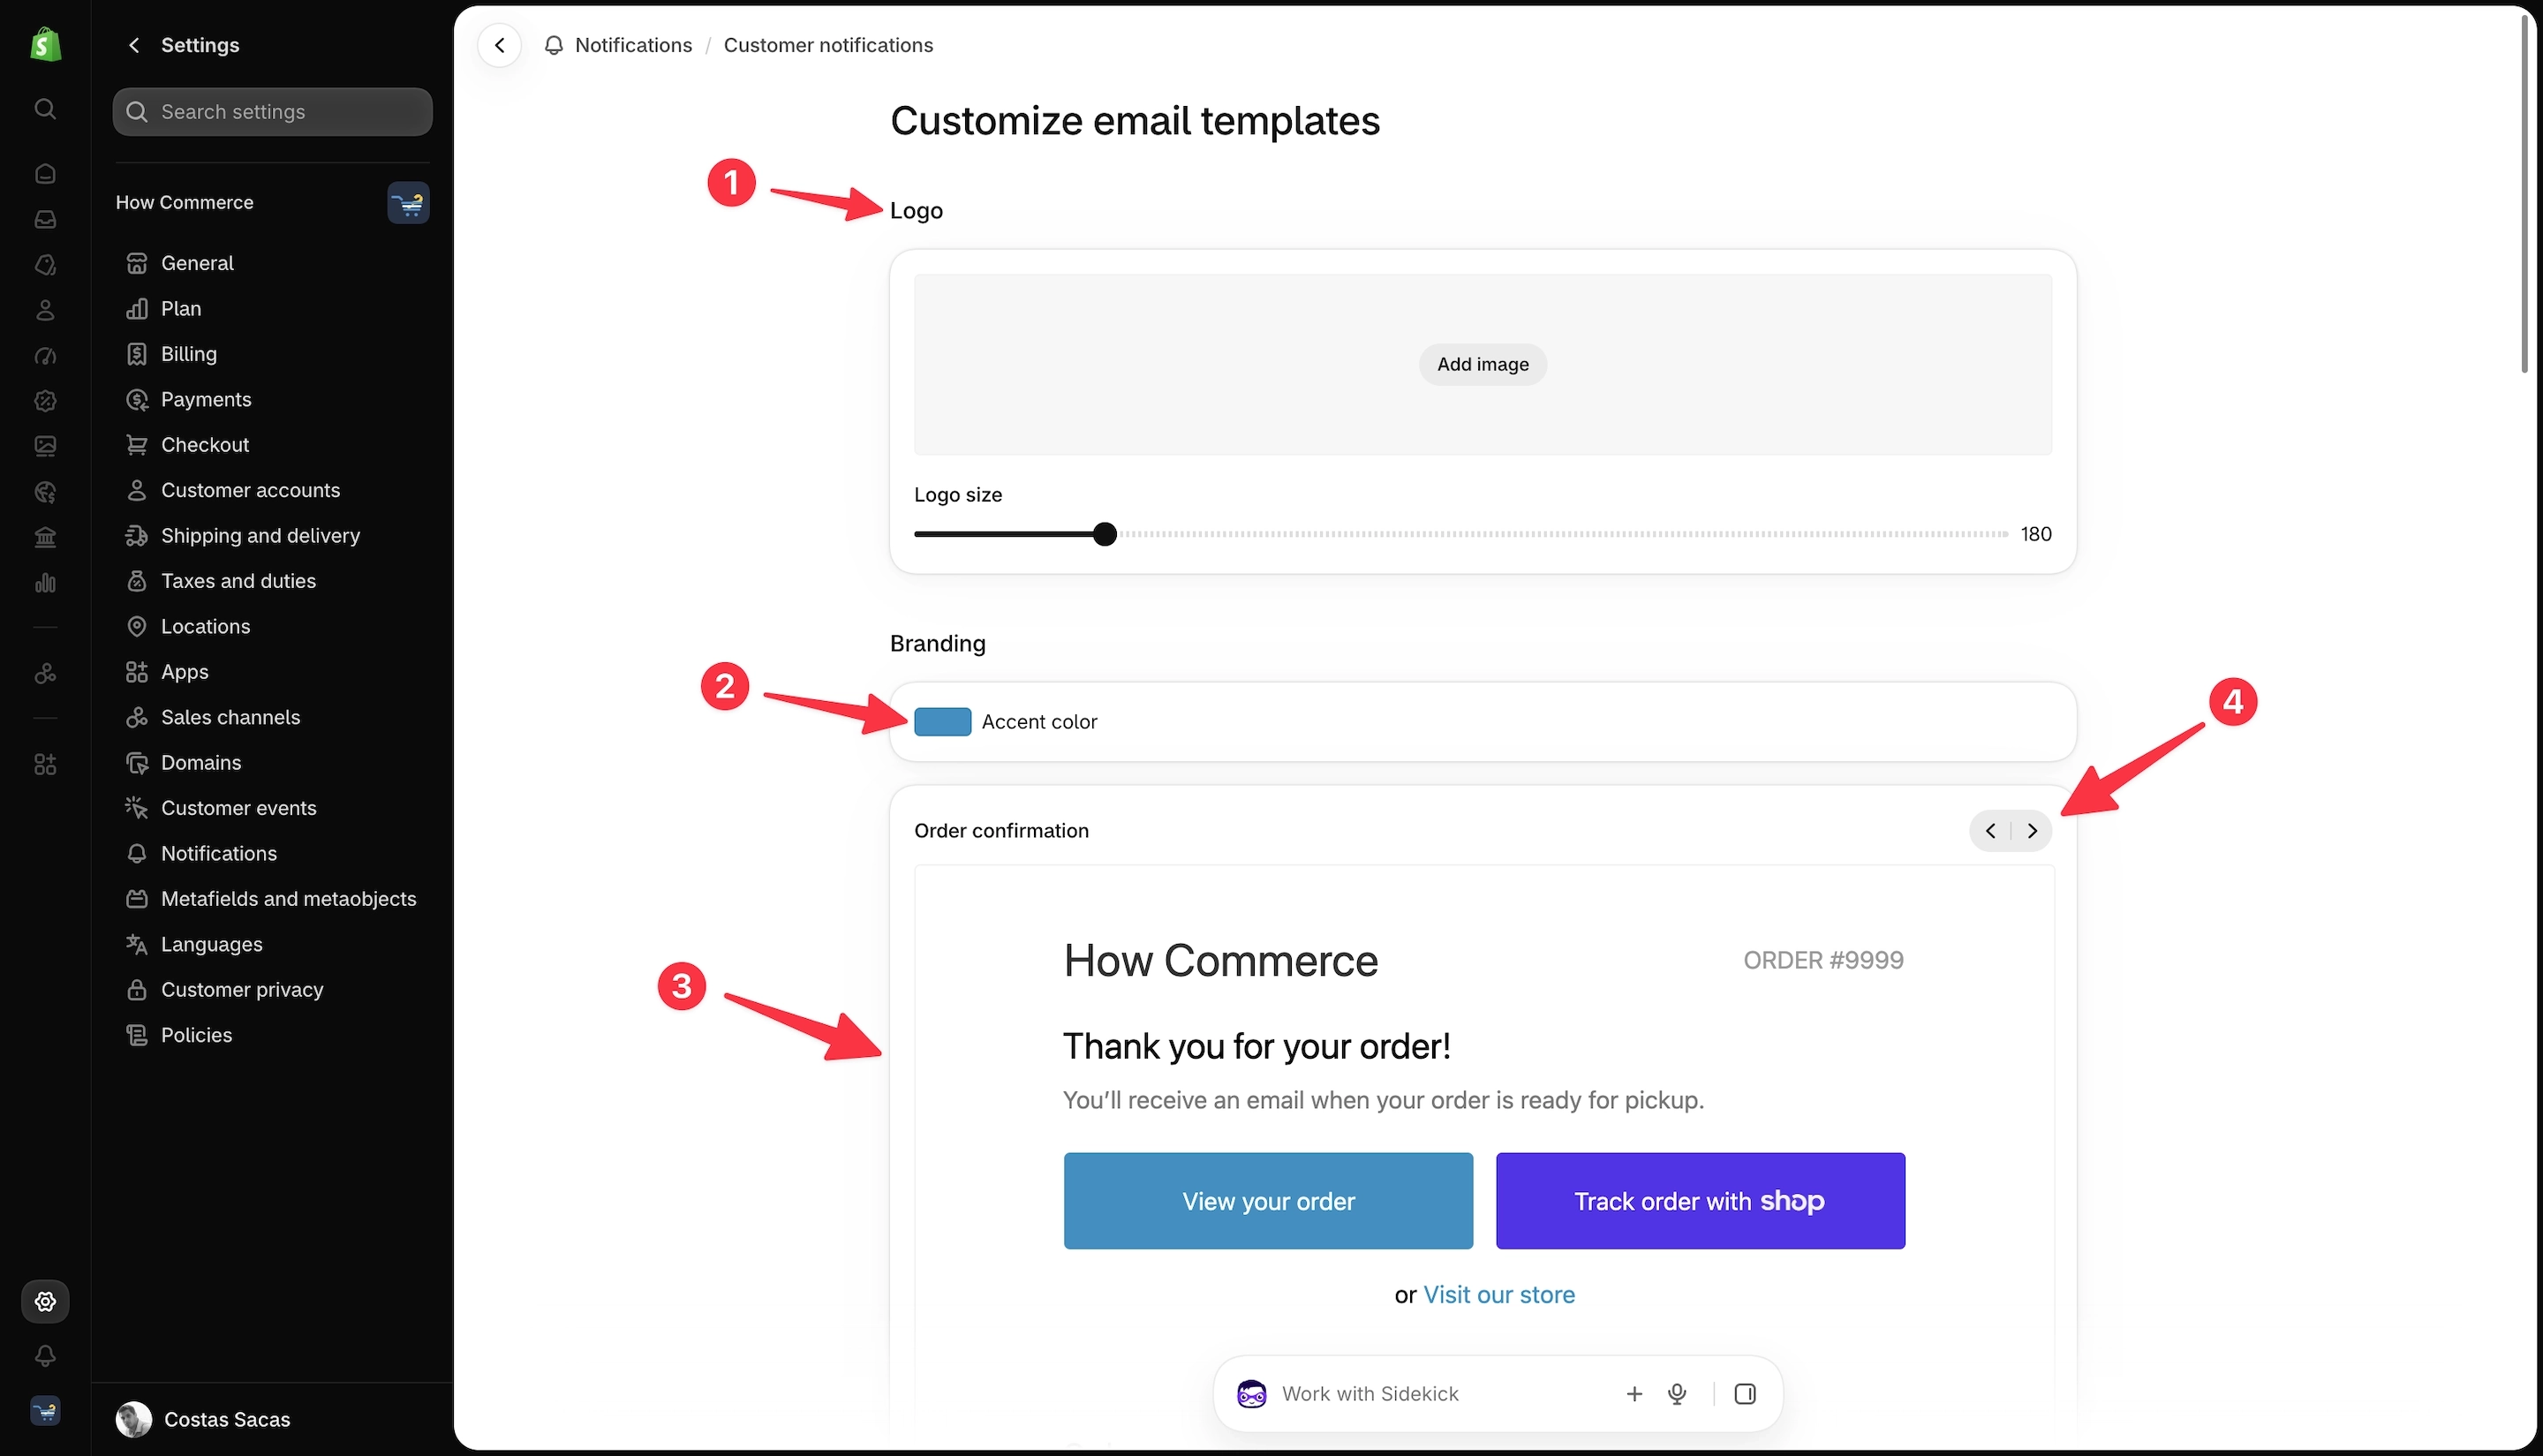
Add your store logo
Adding your store's logo makes your emails more recognizable and helps customers identify your brand immediately.
Use a clear, high-quality version of your logo and check how it appears in the email preview.
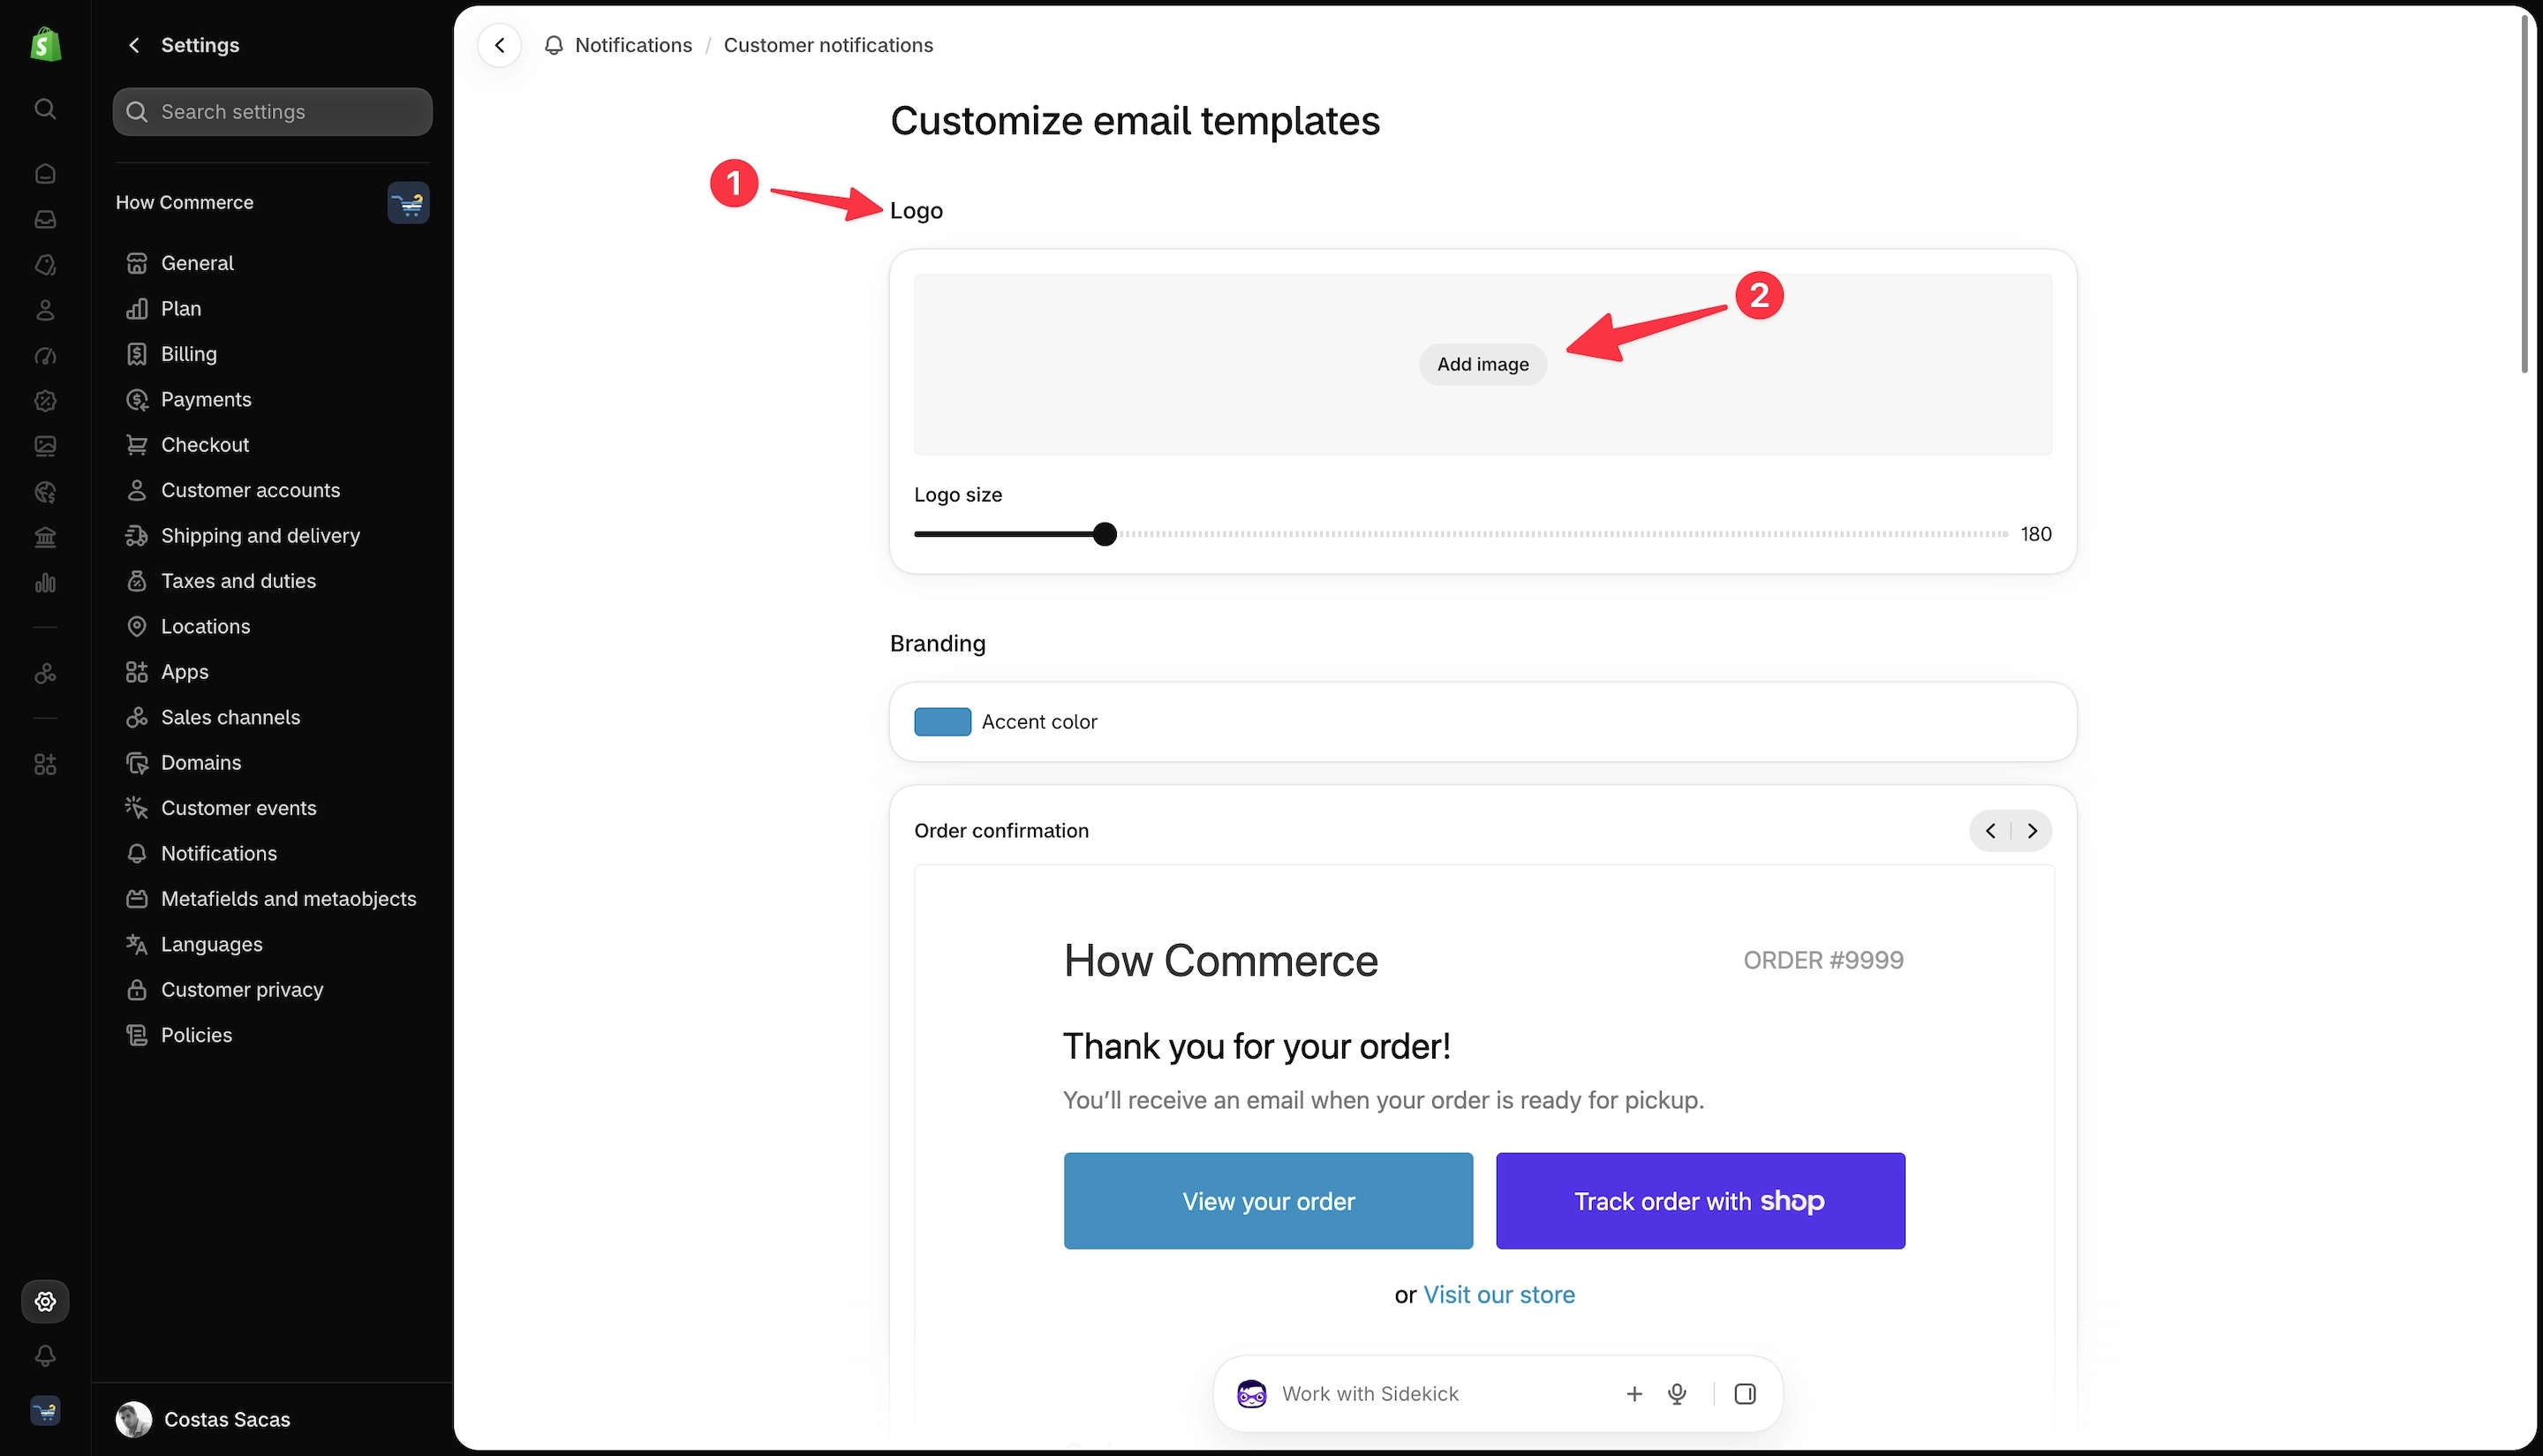
To add your logo, go to the Logo section (marked with 1 in the image below).
Click Add image (marked with 2 in the image below) to open the media selector.
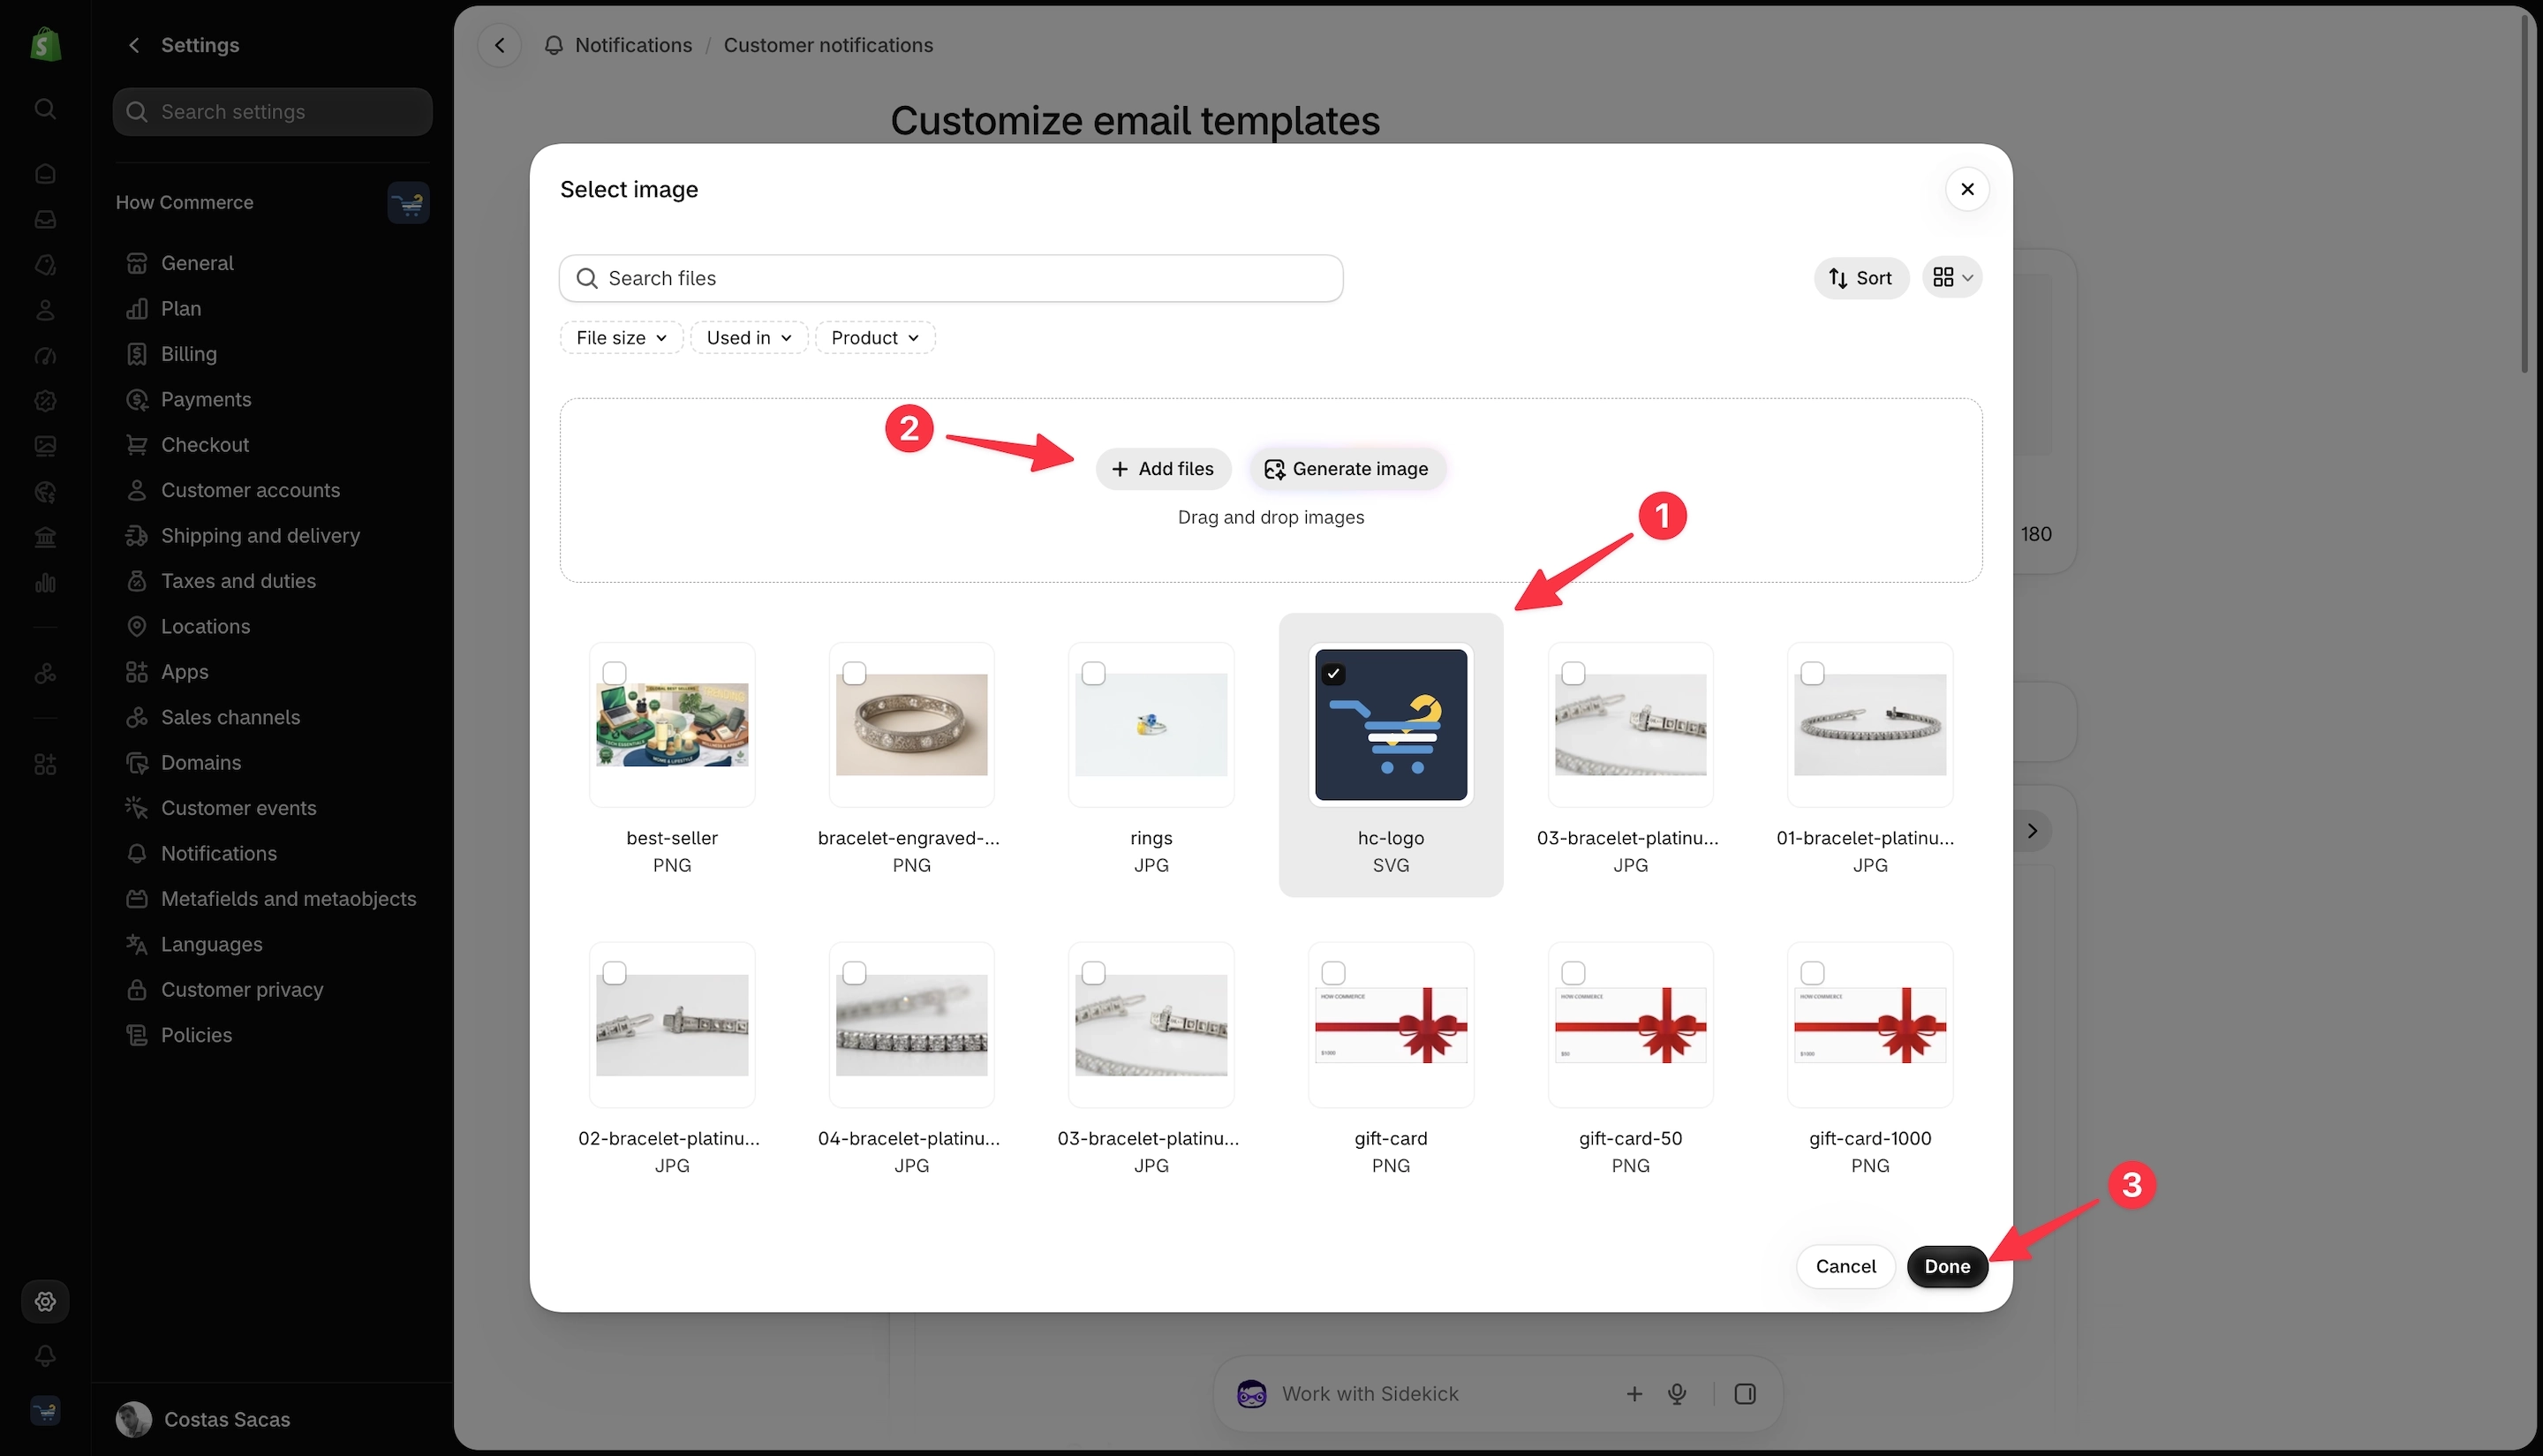
A pop-up window will open, displaying all the files you've uploaded to Shopify.
If you've already uploaded your logo to Shopify, as shown in my example (marked with 1 in the image below), simply select it.
If your logo hasn't been uploaded yet, click Add files (marked with 2 in the image below) to upload it.
Once you've selected your logo, click Done (marked with 3 in the image below) to confirm your selection.
Change the accent color
The accent color is used for elements such as buttons and links in your notification emails.
Choose a color that matches your store's branding, but make sure it provides enough contrast so customers can easily read and interact with these elements.
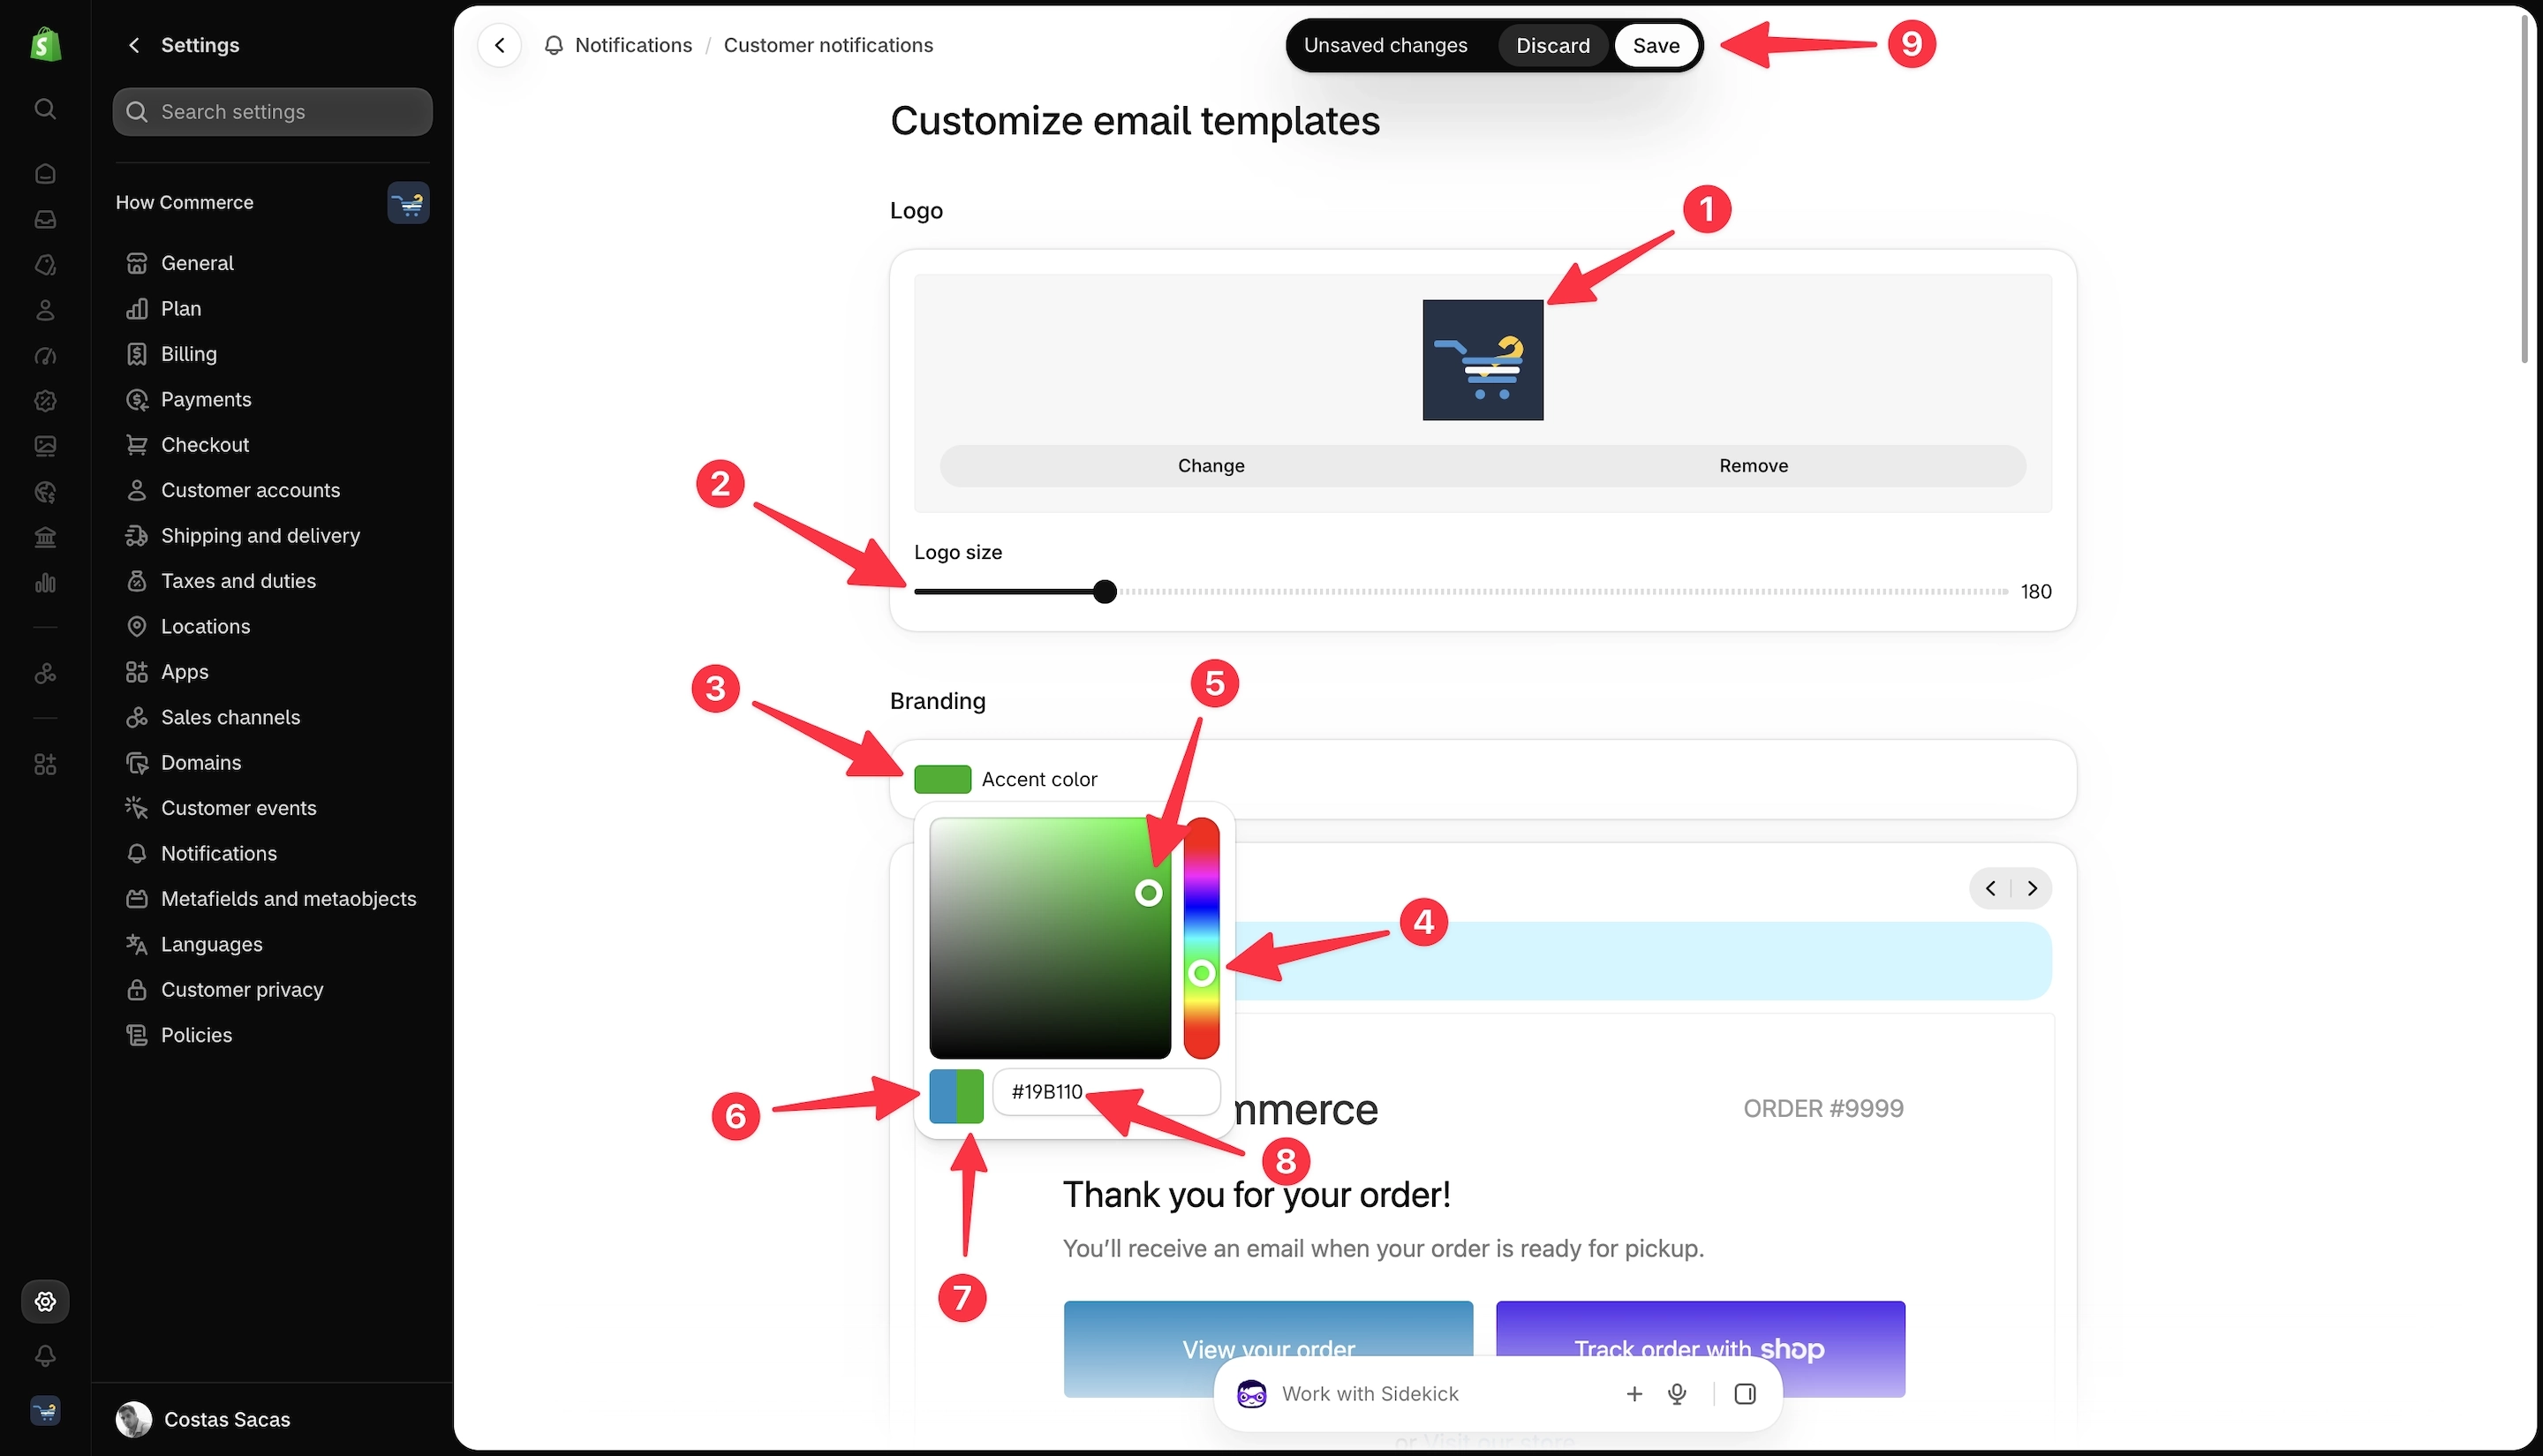
At this stage, your logo is already in place (marked with 1 in the image below).
You can adjust its size using the Logo size slider (marked with 2 in the image below).
However, I recommend avoiding this option, as it may affect how professional your logo looks.
If you need to resize your logo, it's better to adjust the original image file before uploading it.
Under the Branding section, you'll find the accent color picker (marked with 3 in the image below).
Start by selecting a color from the color selection area (marked with 4 in the image below), then fine-tune its shade using the adjustment slider (marked with 5 in the image below).
You can also see your previous color (marked with 6 in the image below), making it easy to revert to your original choice, alongside your newly selected color (marked with 7 in the image below).
If you need the exact hexadecimal (HEX) color code, you can find it in the field (marked with 8 in the image below).
Once you're satisfied with your changes, click Save (marked with 9 in the image below) to apply them.
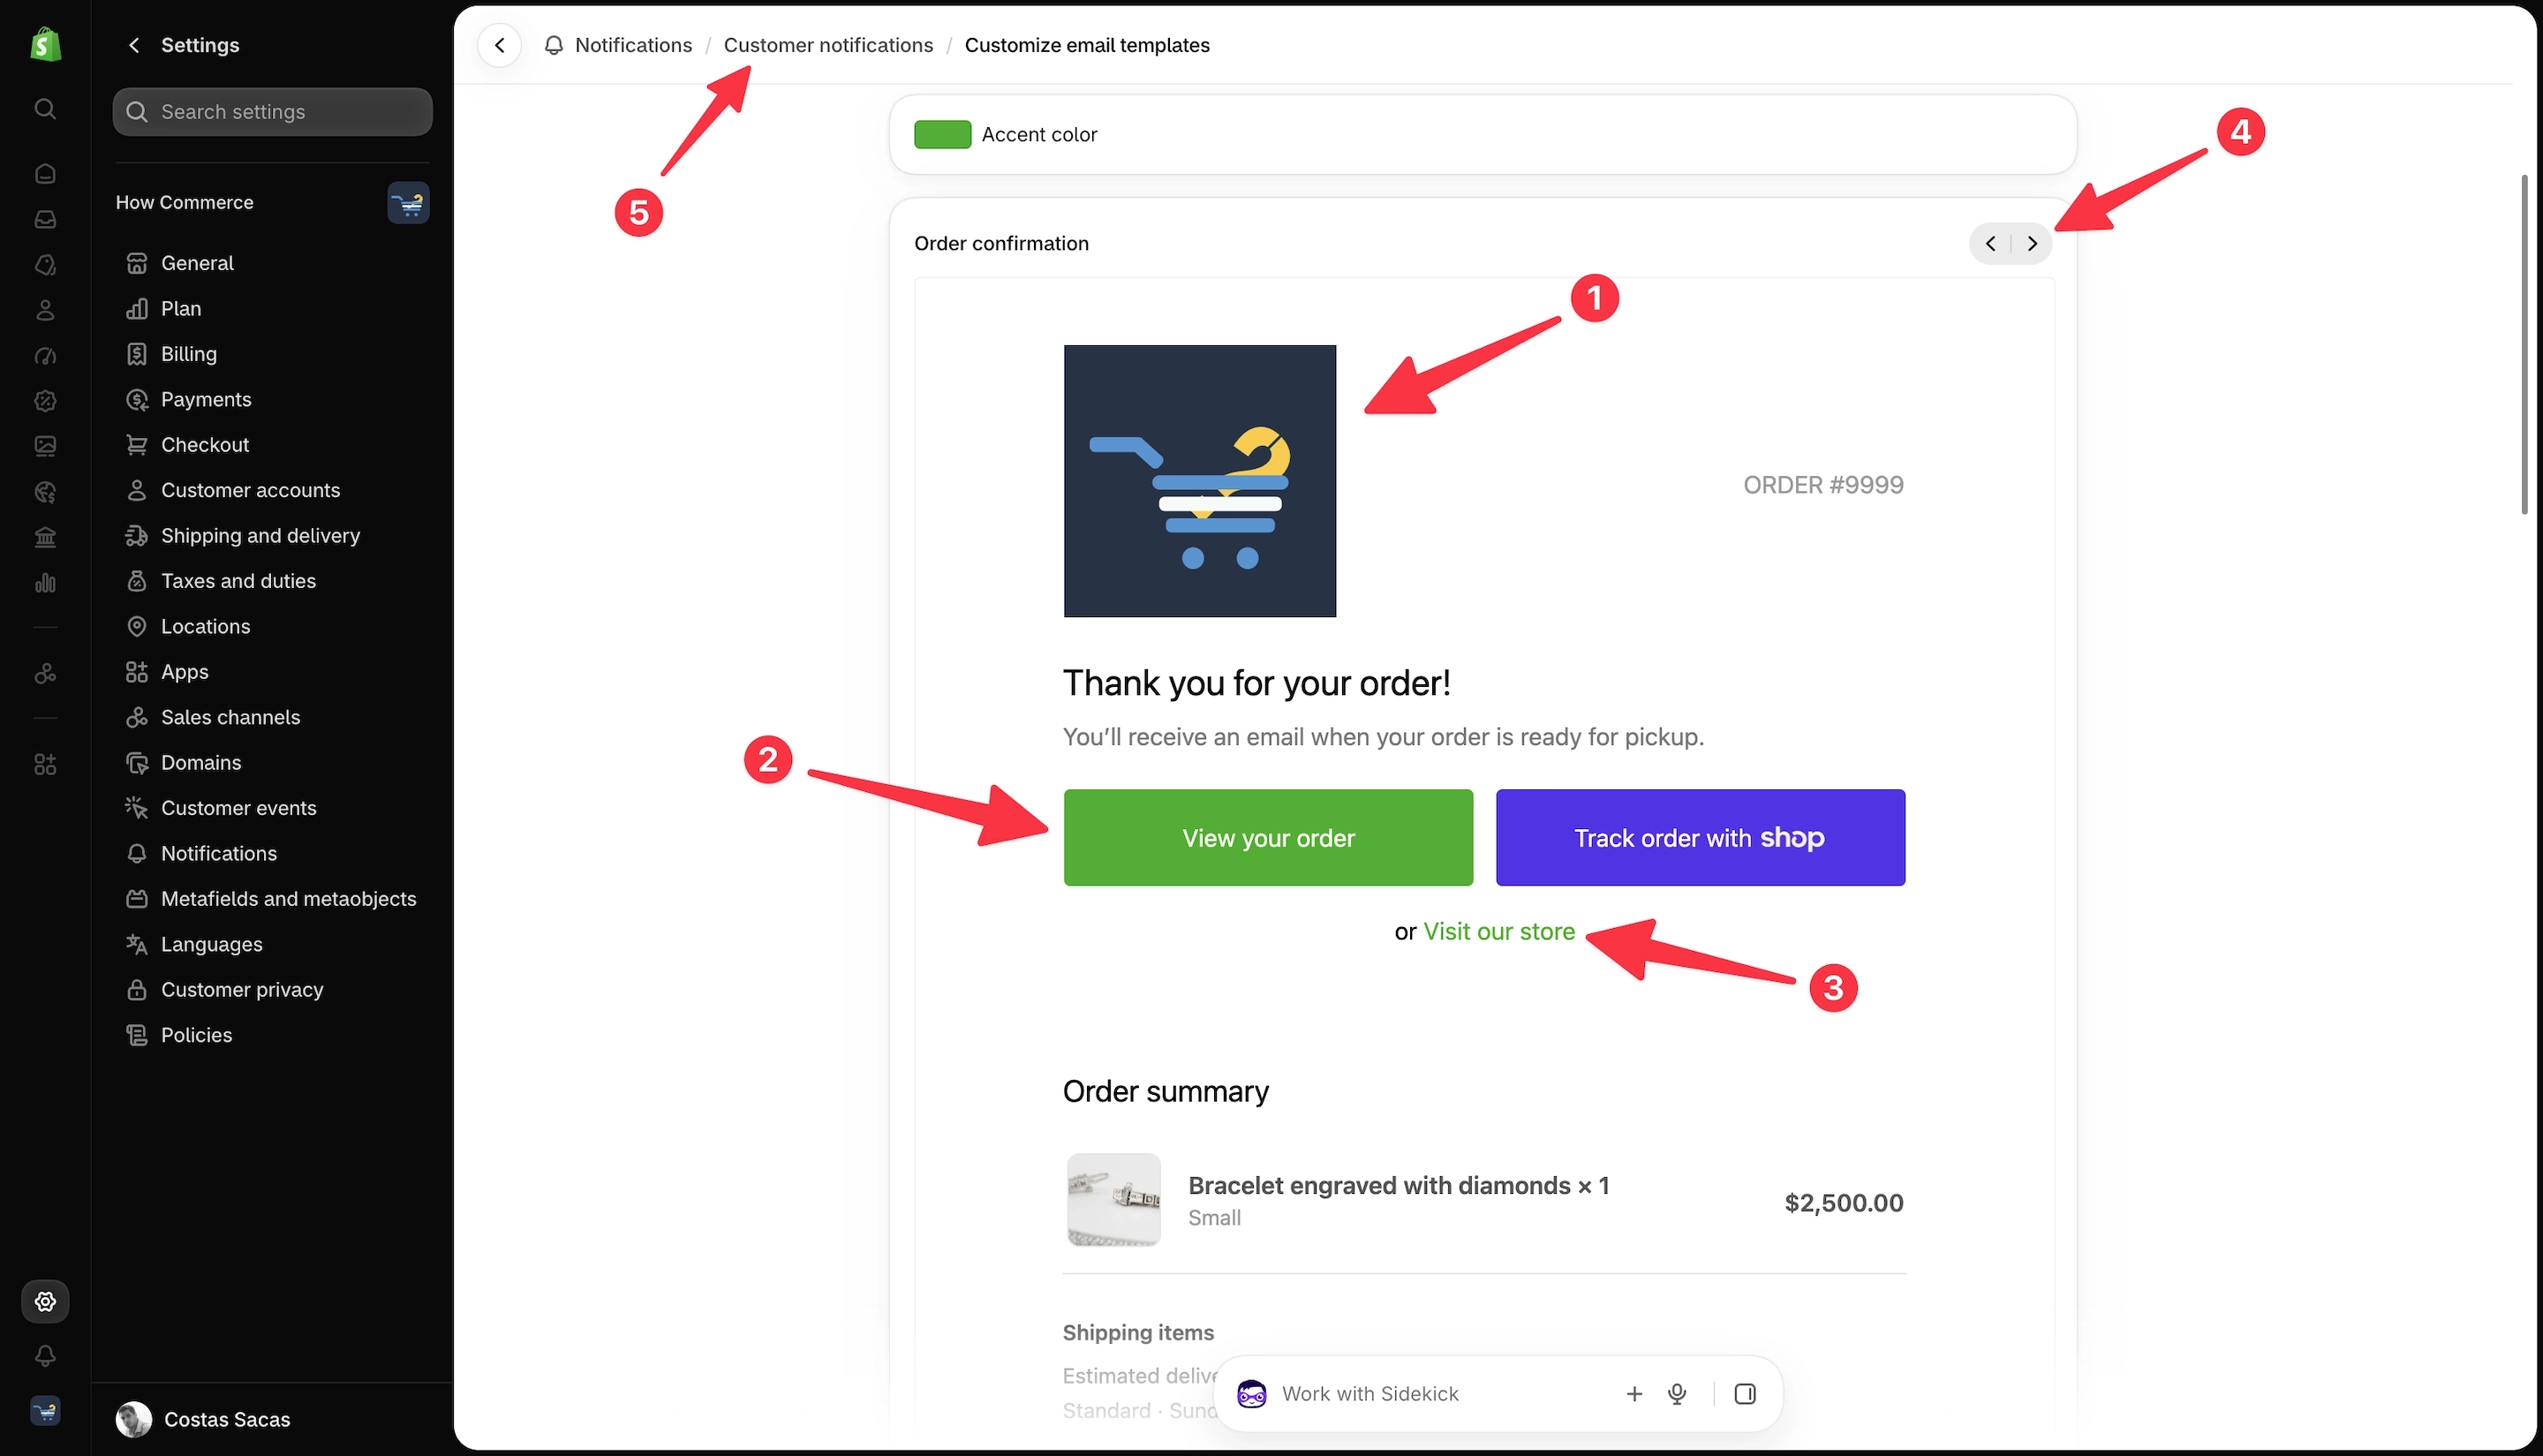
In the template preview section, you can now see your updated logo (marked with 1 in the image below) and your new brand color applied to buttons (marked with 2 in the image below) and links (marked with 3 in the image below).
To preview other notification templates, use the arrow icons (marked with 4 in the image below) to navigate between them.
The next step is to test your notification emails to make sure everything looks and works as expected.
To get started, click Customer notifications in the breadcrumb navigation at the top of the page (marked with 5 in the image below).
Test the changes
This will take you back to the Notifications page.
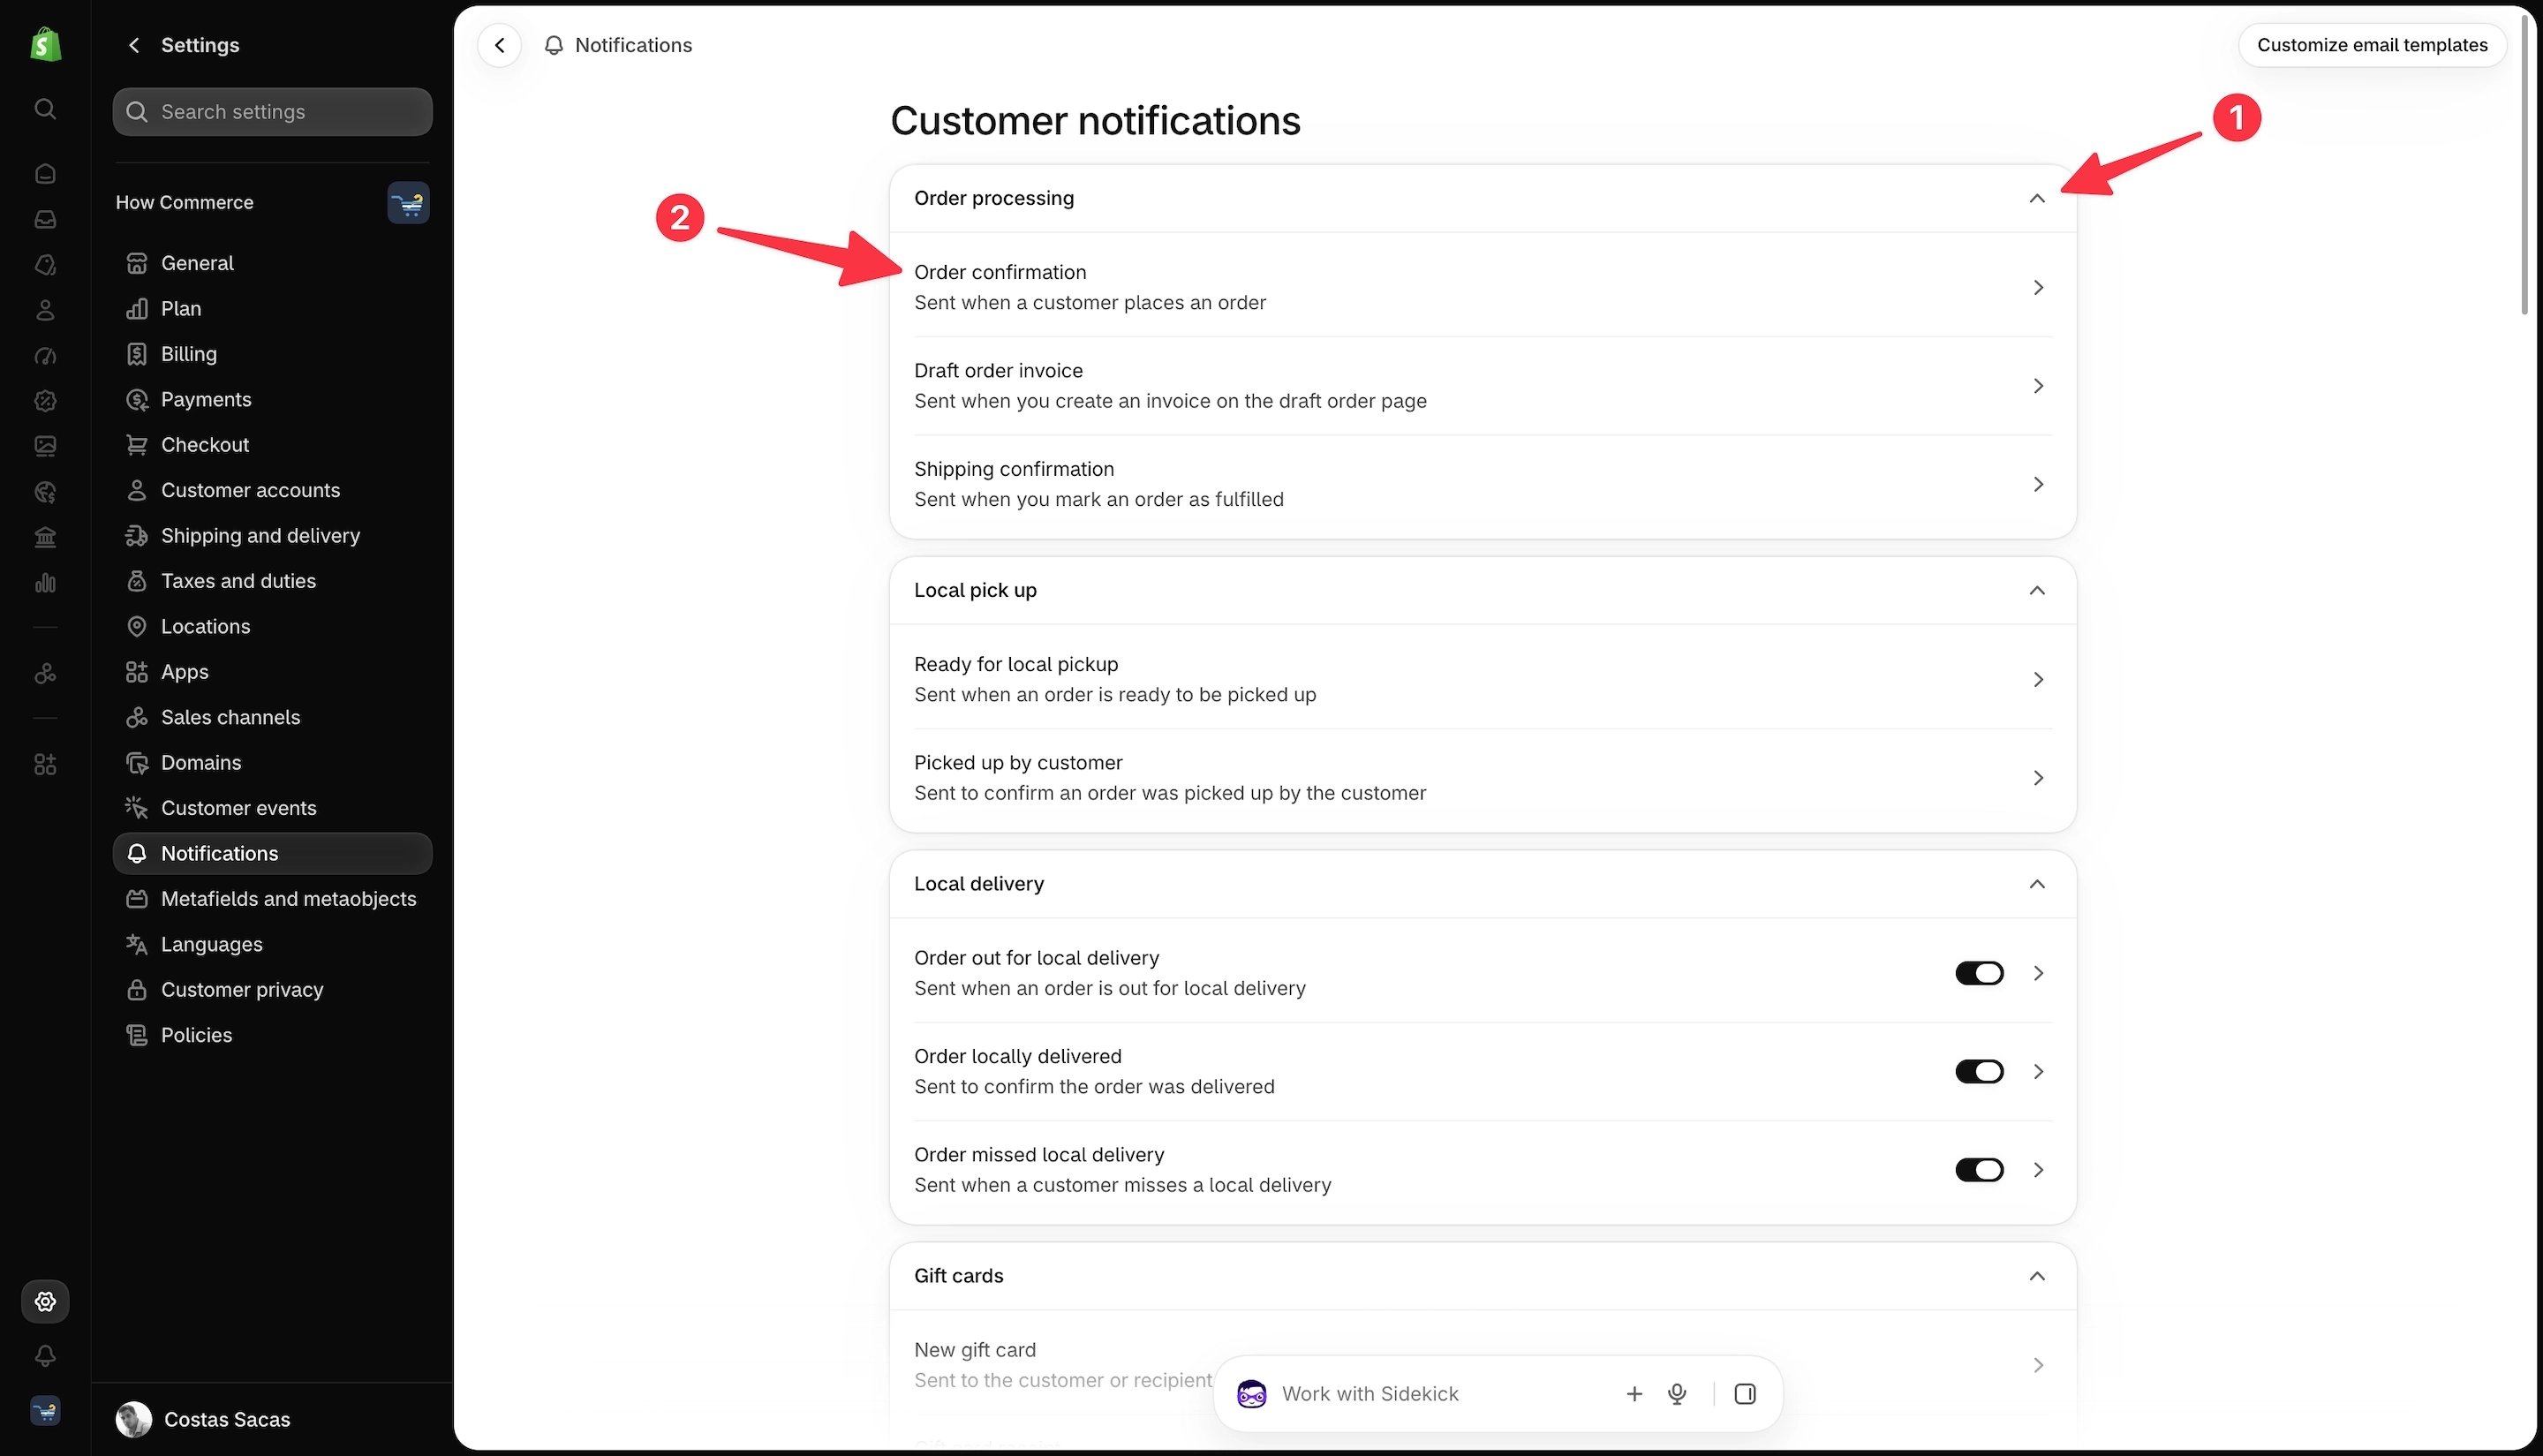
Under Customer notifications, expand the dropdown menu if it isn't already open by clicking the button (marked with 1 in the image below).
Next, select Order confirmation (marked with 2 in the image below).
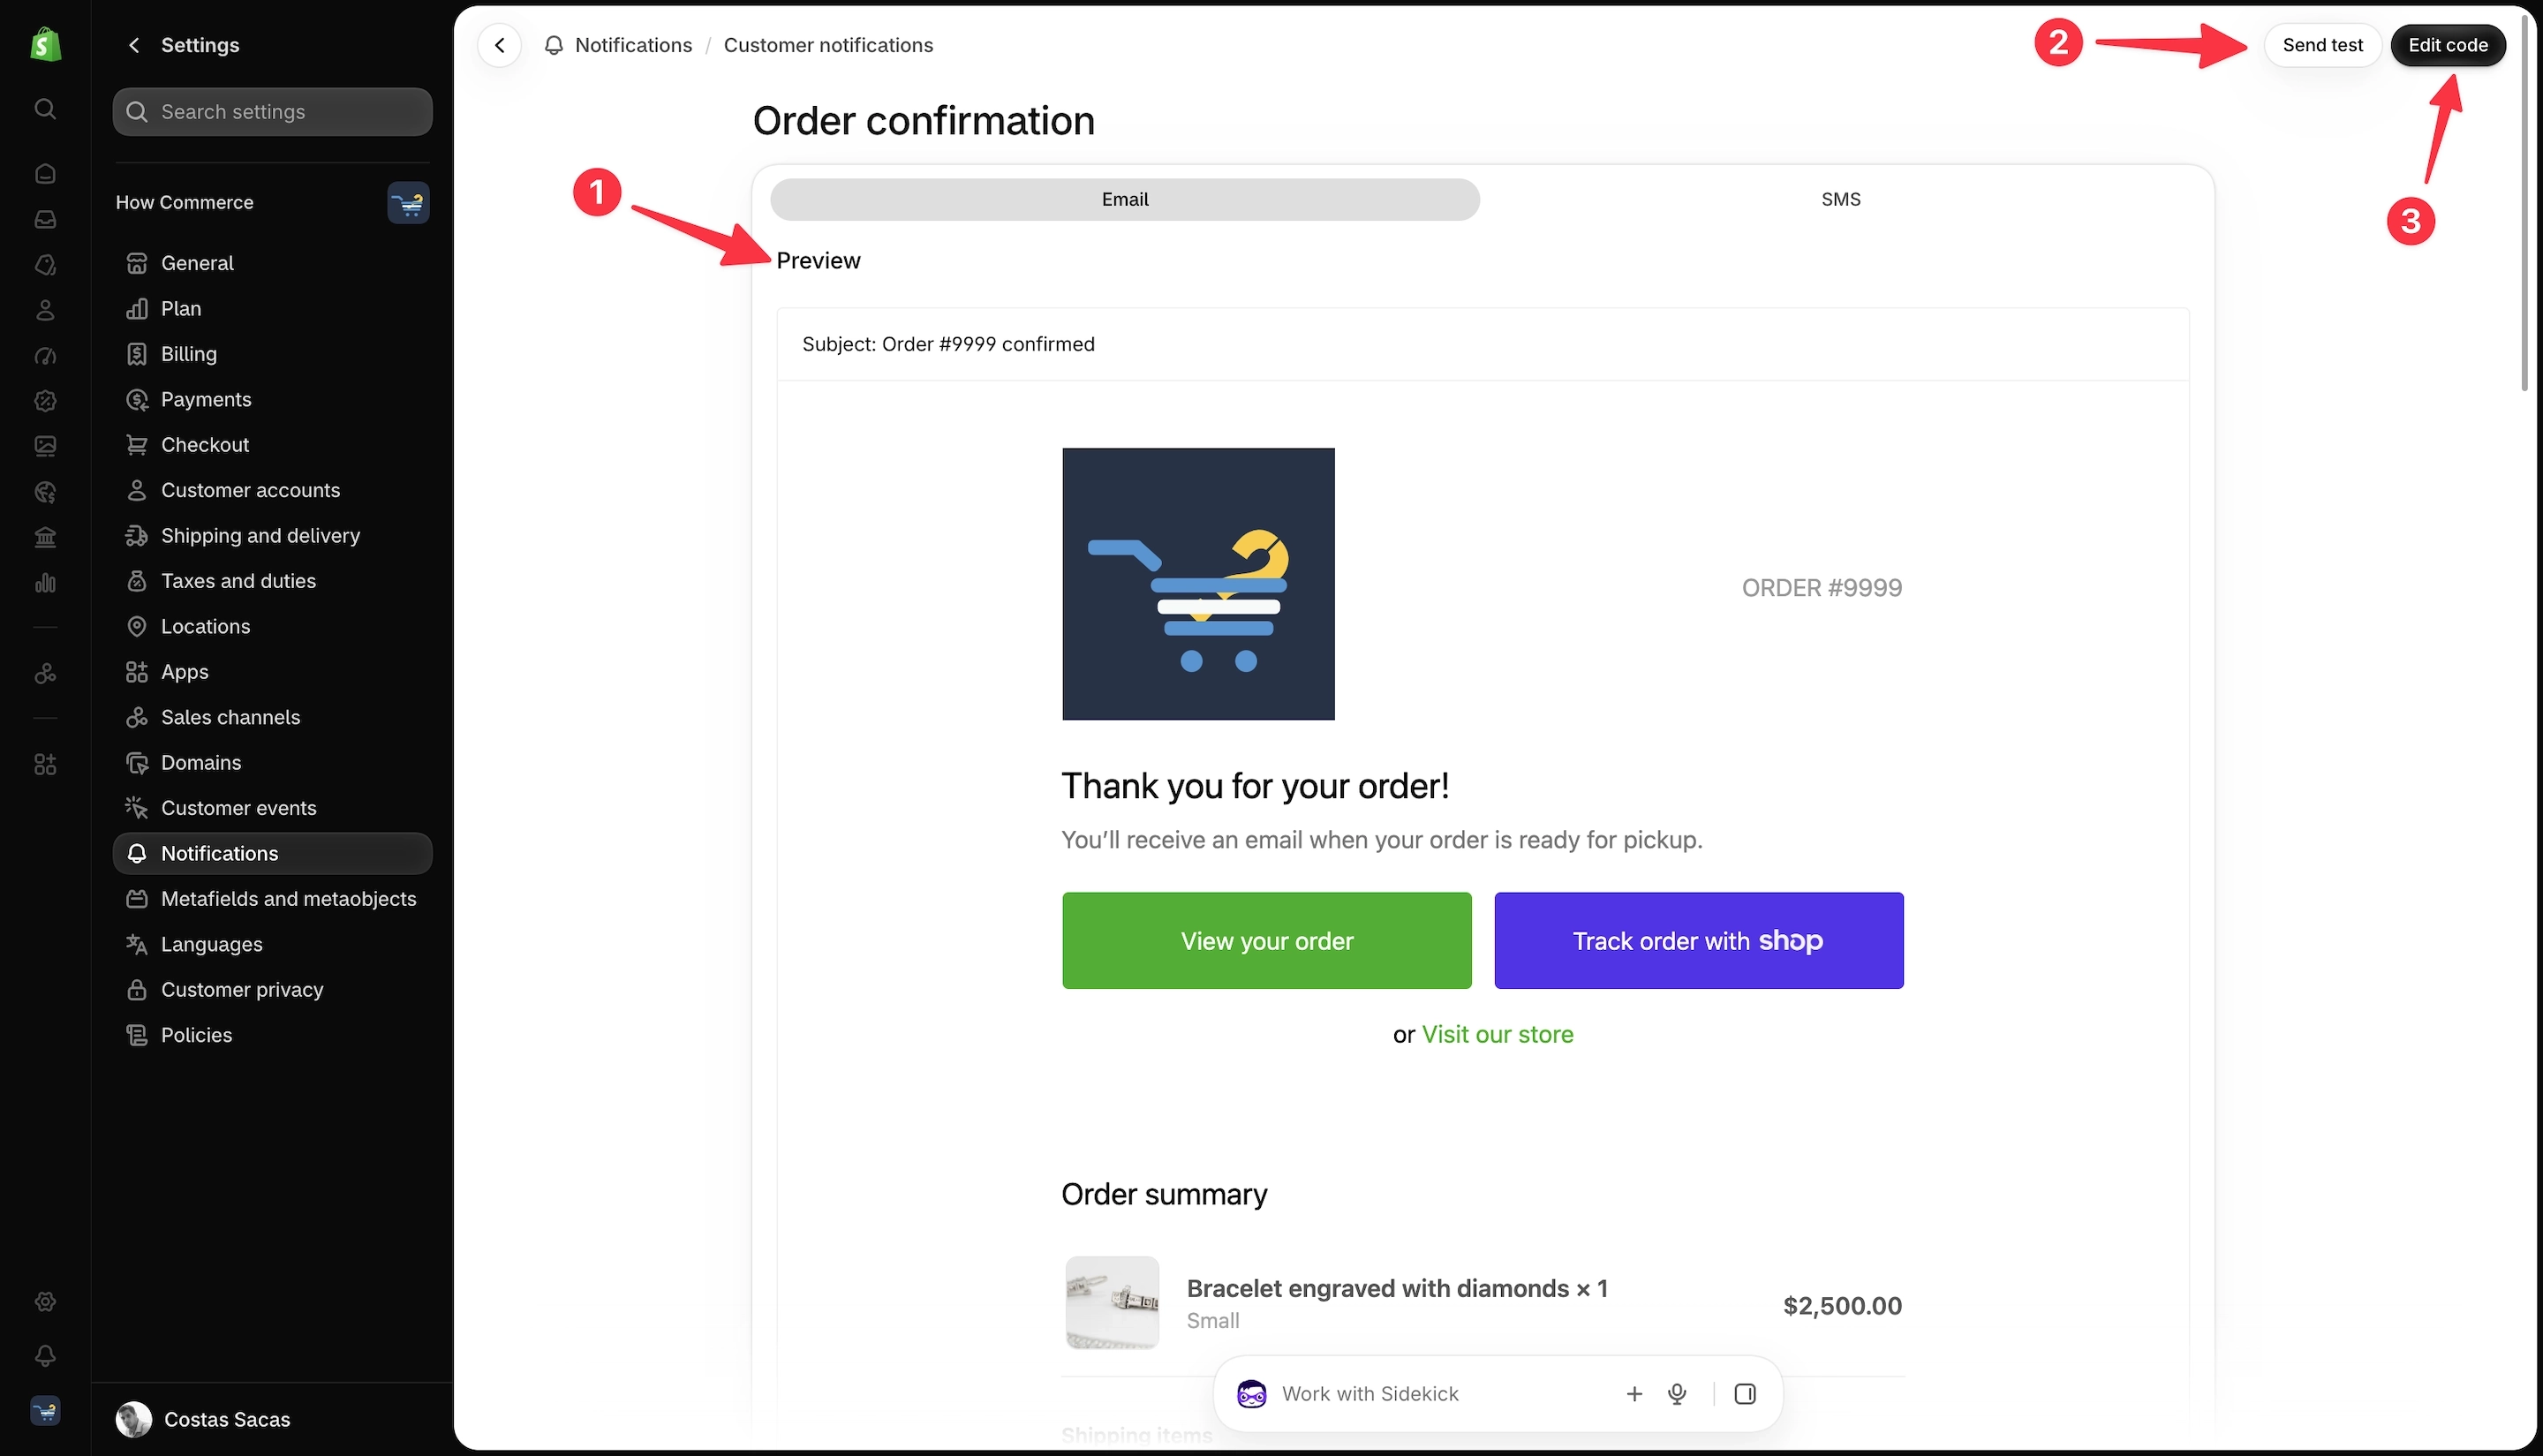
On this page, you can see a full preview of the Order confirmation notification template with your branding changes applied (marked with 1 in the image below).
To send a test email, click Send test (marked with 2 in the image below).
If you want to customize the template's code, you can do so by clicking Edit code (marked with 3 in the image below).
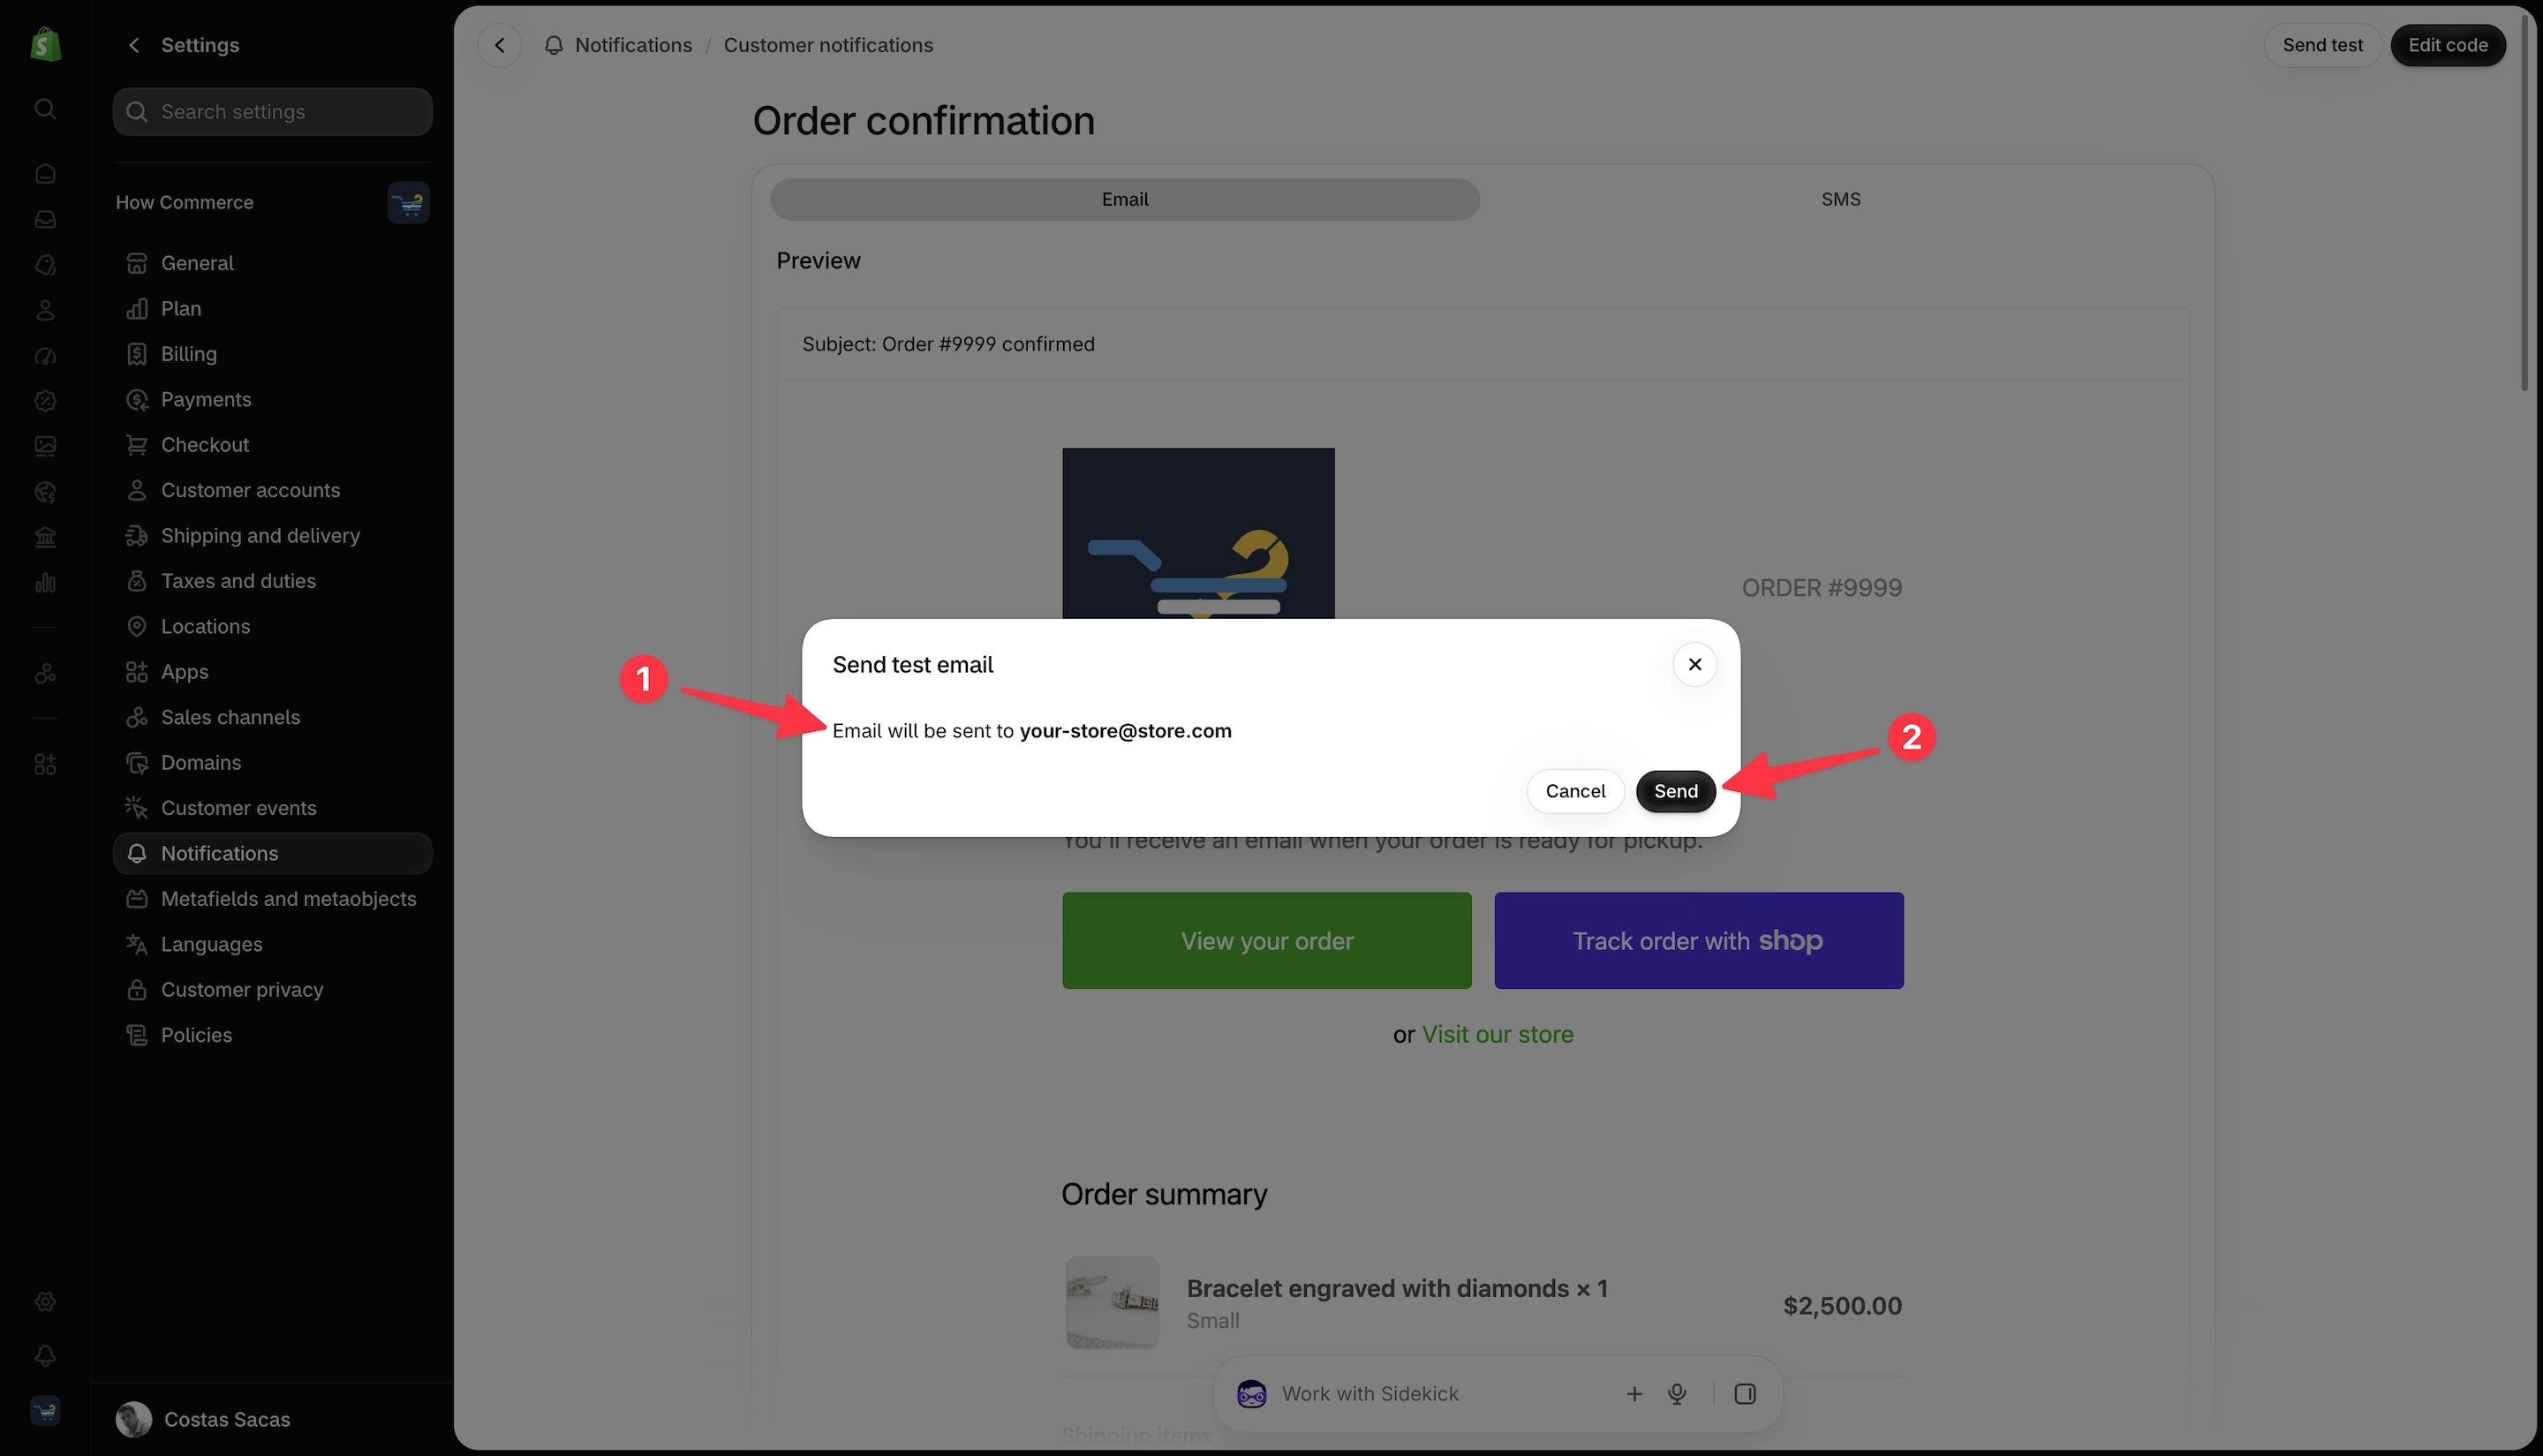
After clicking Send test, a pop-up window will appear, displaying the email address where the test notification will be sent (marked with 1 in the image below).
This is the email address you've configured in your Shopify store settings.
If the email address is correct, click Send (marked with 2 in the image below) to send the test notification.
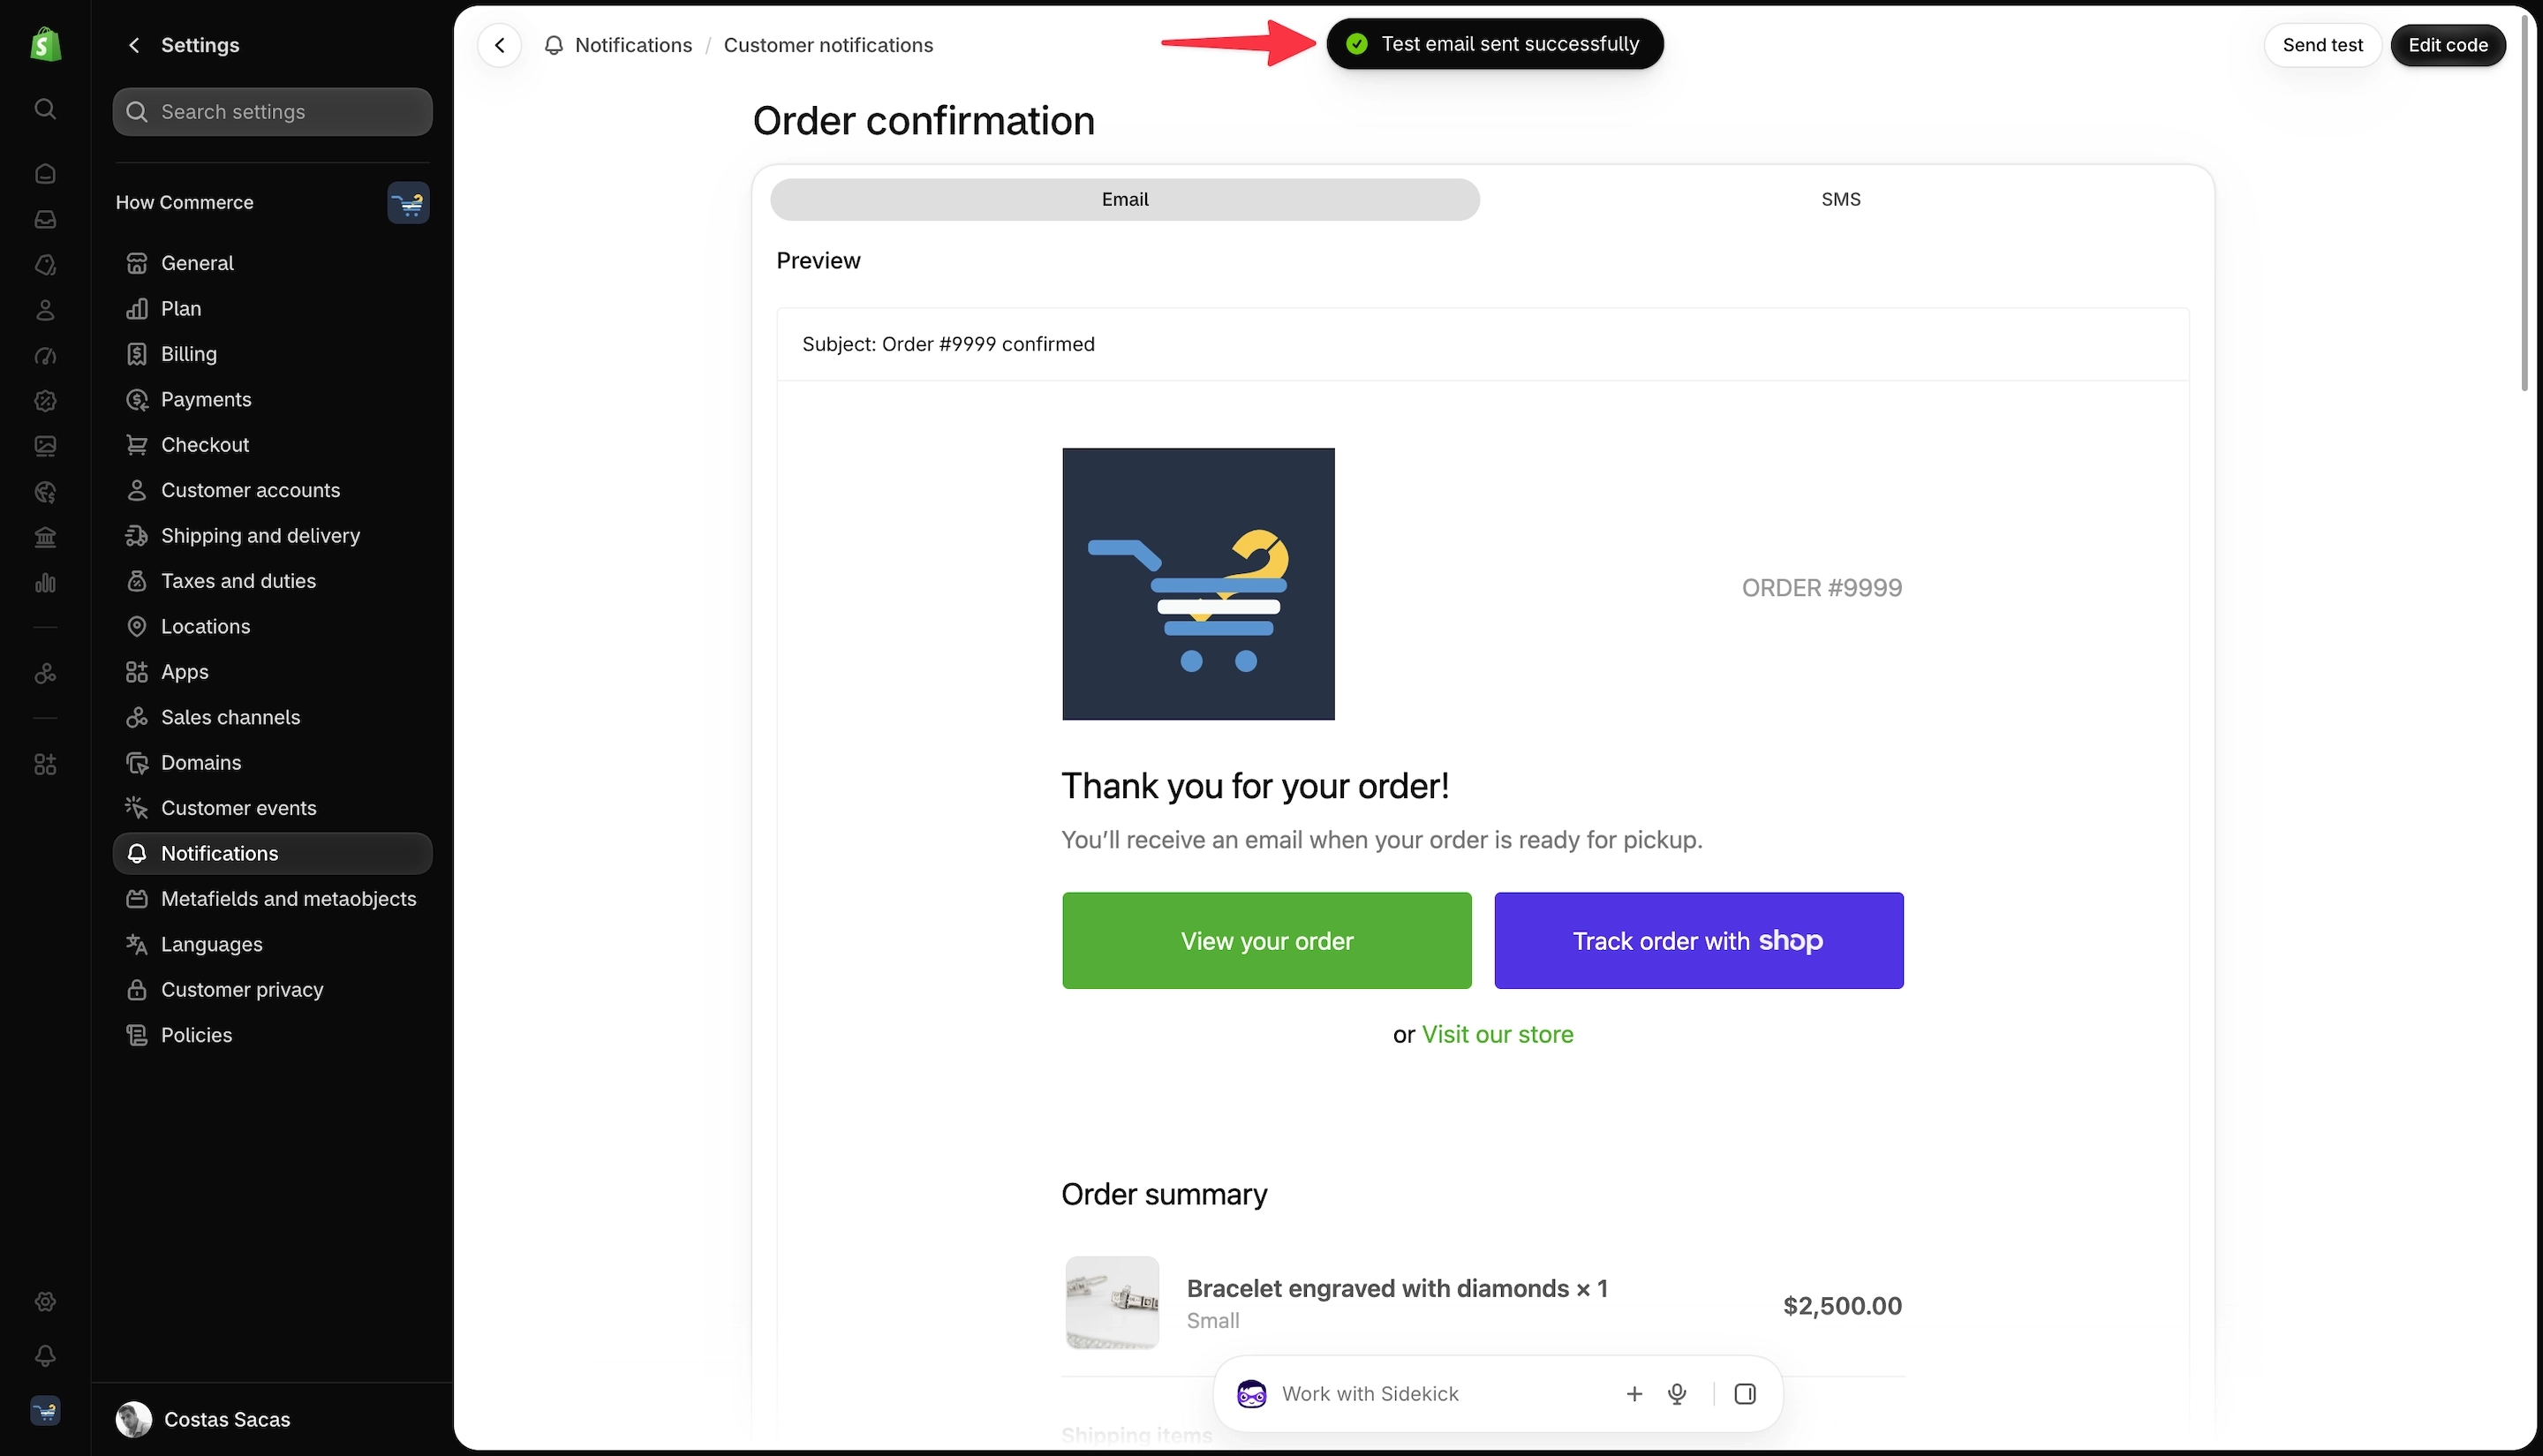
If the test email was sent successfully, you'll see a confirmation message, as shown in the image below.
Now, open your email client and check the inbox of the email address where you sent the test notification.
Test emails are typically delivered within seconds, although occasional delays can occur.
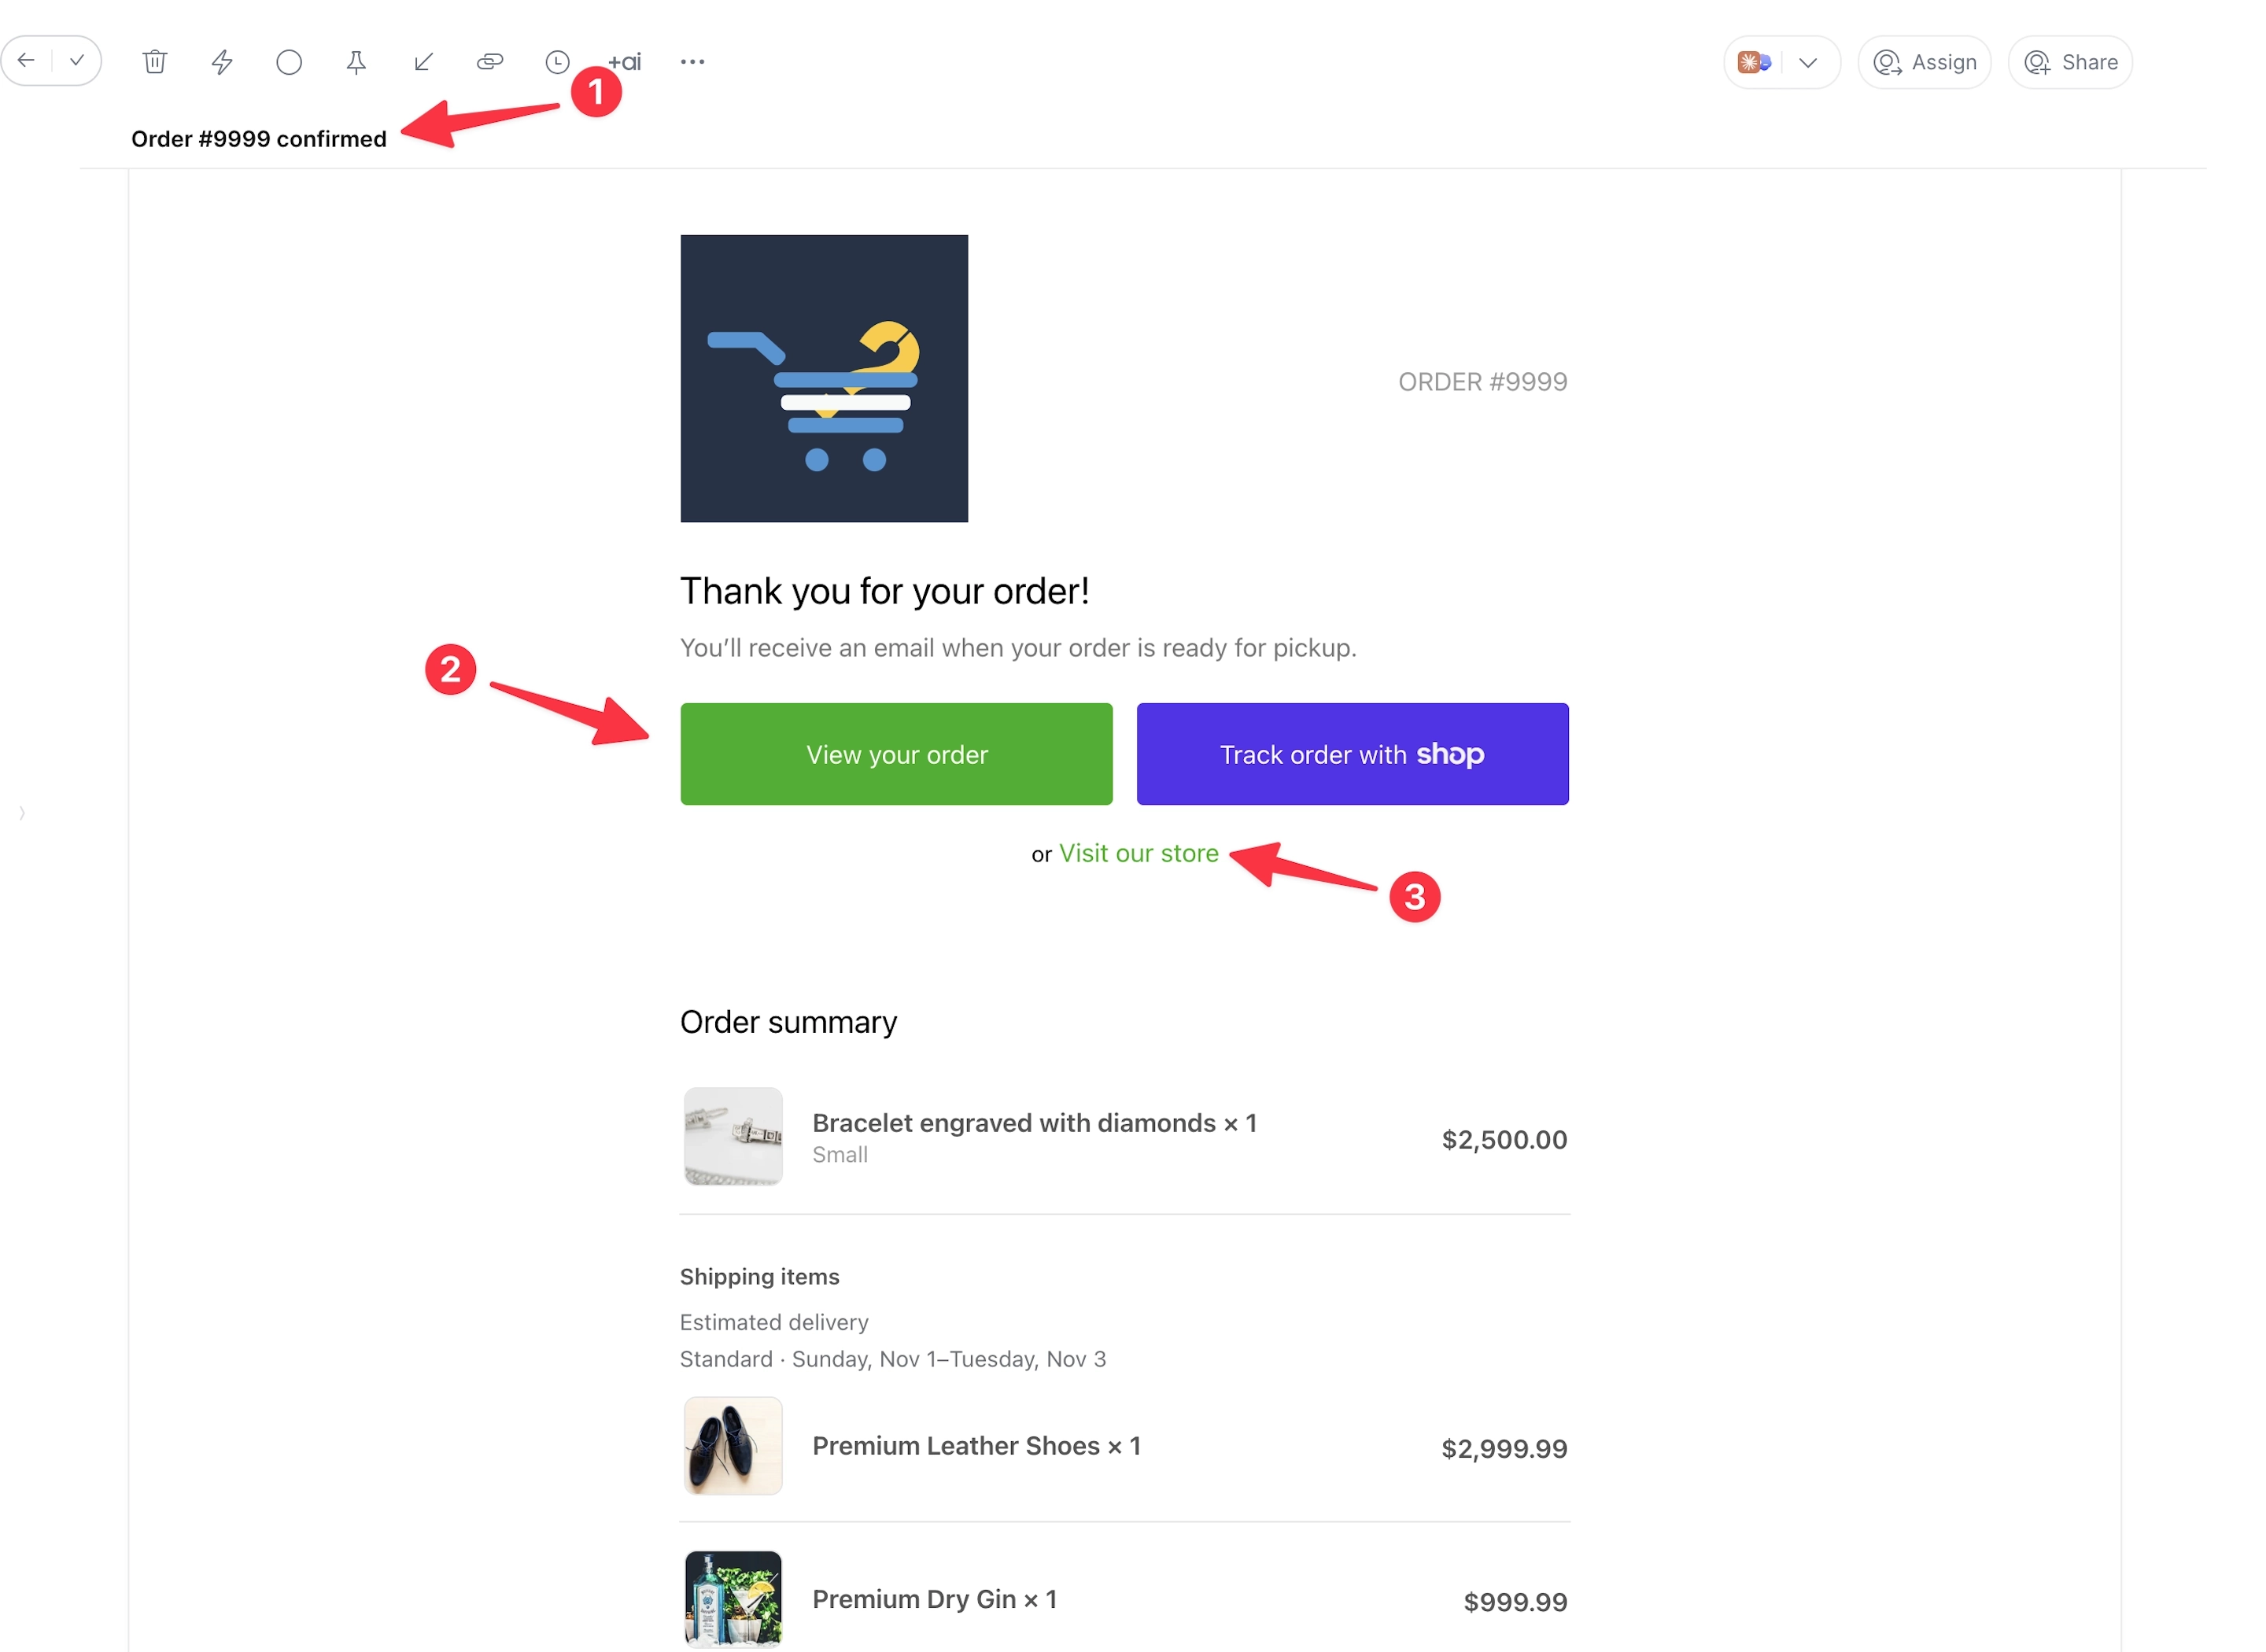
In your inbox, you should see an email with a subject line similar to "Order #9999 confirmed" (marked with 1 in the image below).
Open the email to verify that your store's logo (marked with 2 in the image below) and updated brand color (marked with 3 in the image below) are displayed correctly.
That’s it.
Can you fully customize Shopify notification templates?
Yes, but this requires coding knowledge.
Shopify allows you to edit individual notification templates, including their email subject lines and HTML content.
To fully customize the design and functionality of these emails, you need to understand Liquid, HTML, and CSS.
Liquid is Shopify's template language, used to display dynamic information such as customer names, order details, product information, and shipping updates.
You don't necessarily need to write all the code yourself. AI tools can generate much of it, making advanced customization more accessible.
However, generating code and knowing whether that code is correct are two different things.
You still need to understand what the code does, review it carefully, and test it across different email clients and devices.
Email clients such as Gmail, Outlook, and Apple Mail don't always render HTML and CSS in the same way.
When problems appear, you need to know how to identify and fix them.
Why I recommend keeping Shopify's default templates
Custom coding is not the purpose of this tutorial.
If you're unfamiliar with Liquid, HTML, and CSS, my recommendation is simple: make the basic branding changes and leave the rest of your notification templates as they are.
Shopify's default notification templates are designed to work across different email clients and devices.
Using them reduces the risk of layout issues and broken functionality.
Although no email template can be guaranteed to display perfectly in every email client, Shopify's default templates are a much safer starting point than untested custom code.
There's another important consideration:
Shopify occasionally updates its default notification templates to support new features and changes to its platform.
When you've heavily customized a template, you might need to maintain that code manually to ensure it remains compatible with Shopify's latest functionality.
For most store owners, the additional maintenance and potential risks aren't worth the visual improvements.
A broken order confirmation, missing shipping information, or an incorrectly displayed refund notification can confuse customers, increase support requests, and damage trust in your store.
In some situations, these issues can even cost you sales or money.
If you are on Shopify Plus and you’re doing high figures yearly then customizing these is worth it but on a small store is not worth the investment.
Always preview and test your changes
Even when making simple branding changes, check your notification emails before considering the work finished.
For individual notification templates, Shopify provides Preview and Send test email options.
Use these features to verify that your emails look professional, your branding is consistent, and important information remains easy to read.
If you ever decide to customize the code, test the templates on multiple devices and email clients, including different order scenarios.
Final thoughts
Customer notification emails don't need elaborate designs to be effective.
Their primary purpose is to communicate important information clearly and reliably.
For most Shopify stores, adding your logo and matching the accent color to your brand is enough to create a consistent experience.
However, a professionally designed custom email template is even better, as it can strengthen your brand identity, create a more polished customer experience, and make your store stand out.
The important distinction is that a custom design must be properly developed, tested, and maintained.
A professionally designed email that works reliably is the ideal solution.
Until then, Shopify's default templates are a safer choice than poorly implemented customizations.