

Overview
Creating and linking a web page in Shopify is a straightforward process, suitable for both beginners and experienced web developers.
Shopify, known for its user-friendly interface, allows you to integrate various web pages into your online store with ease.
This guide will walk you through the steps of creating and linking a new web page in Shopify.
Accessing the Shopify admin
First, log in to your Shopify admin panel.
This is where you manage all aspects of your Shopify store.
Check this tutorial if you do not know how to do it: How to log in to your Shopify store?
Create a new template for the new page
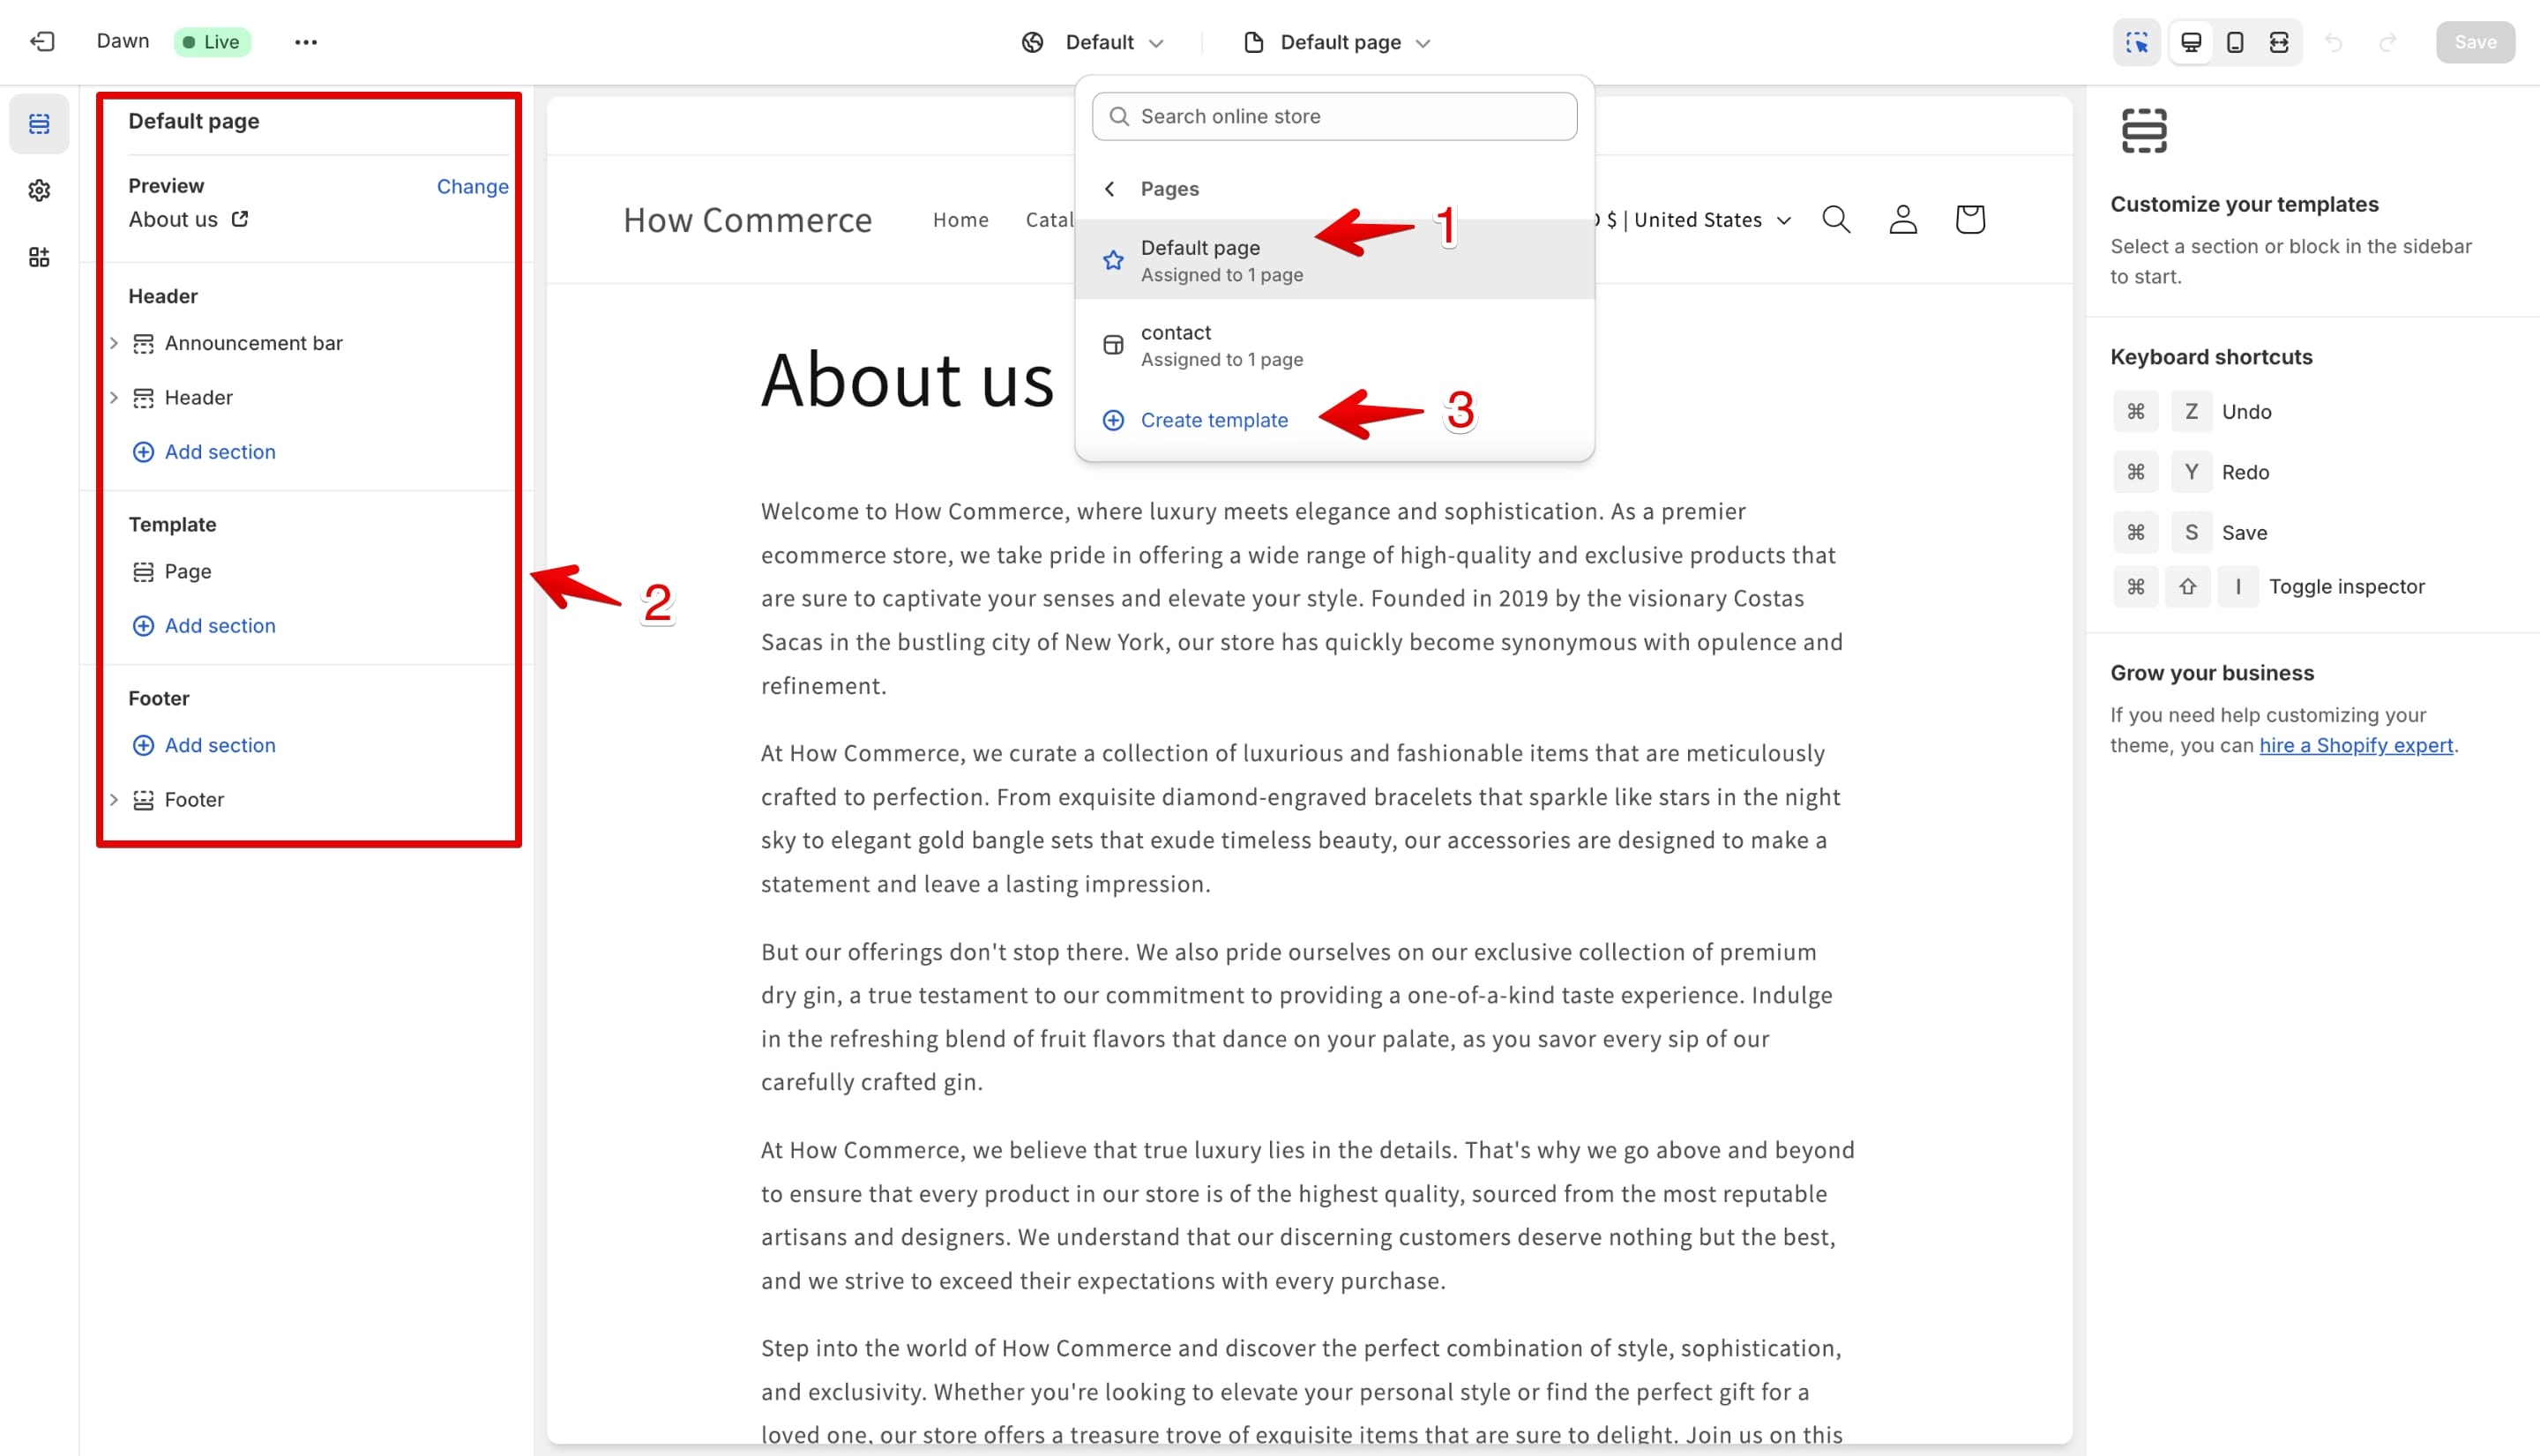
If you do not create a template for the new page, all sections and blocks (marked with 2 in the image below) you assigned to the “Default page” template (marked with 1 in the image below) will display on your custom page as well since the “Default page” template will be assigned by default to any page you create in Shopify if another template is not specified during the page creation.
Click on the "Create template" (marked with 3 in the image below):
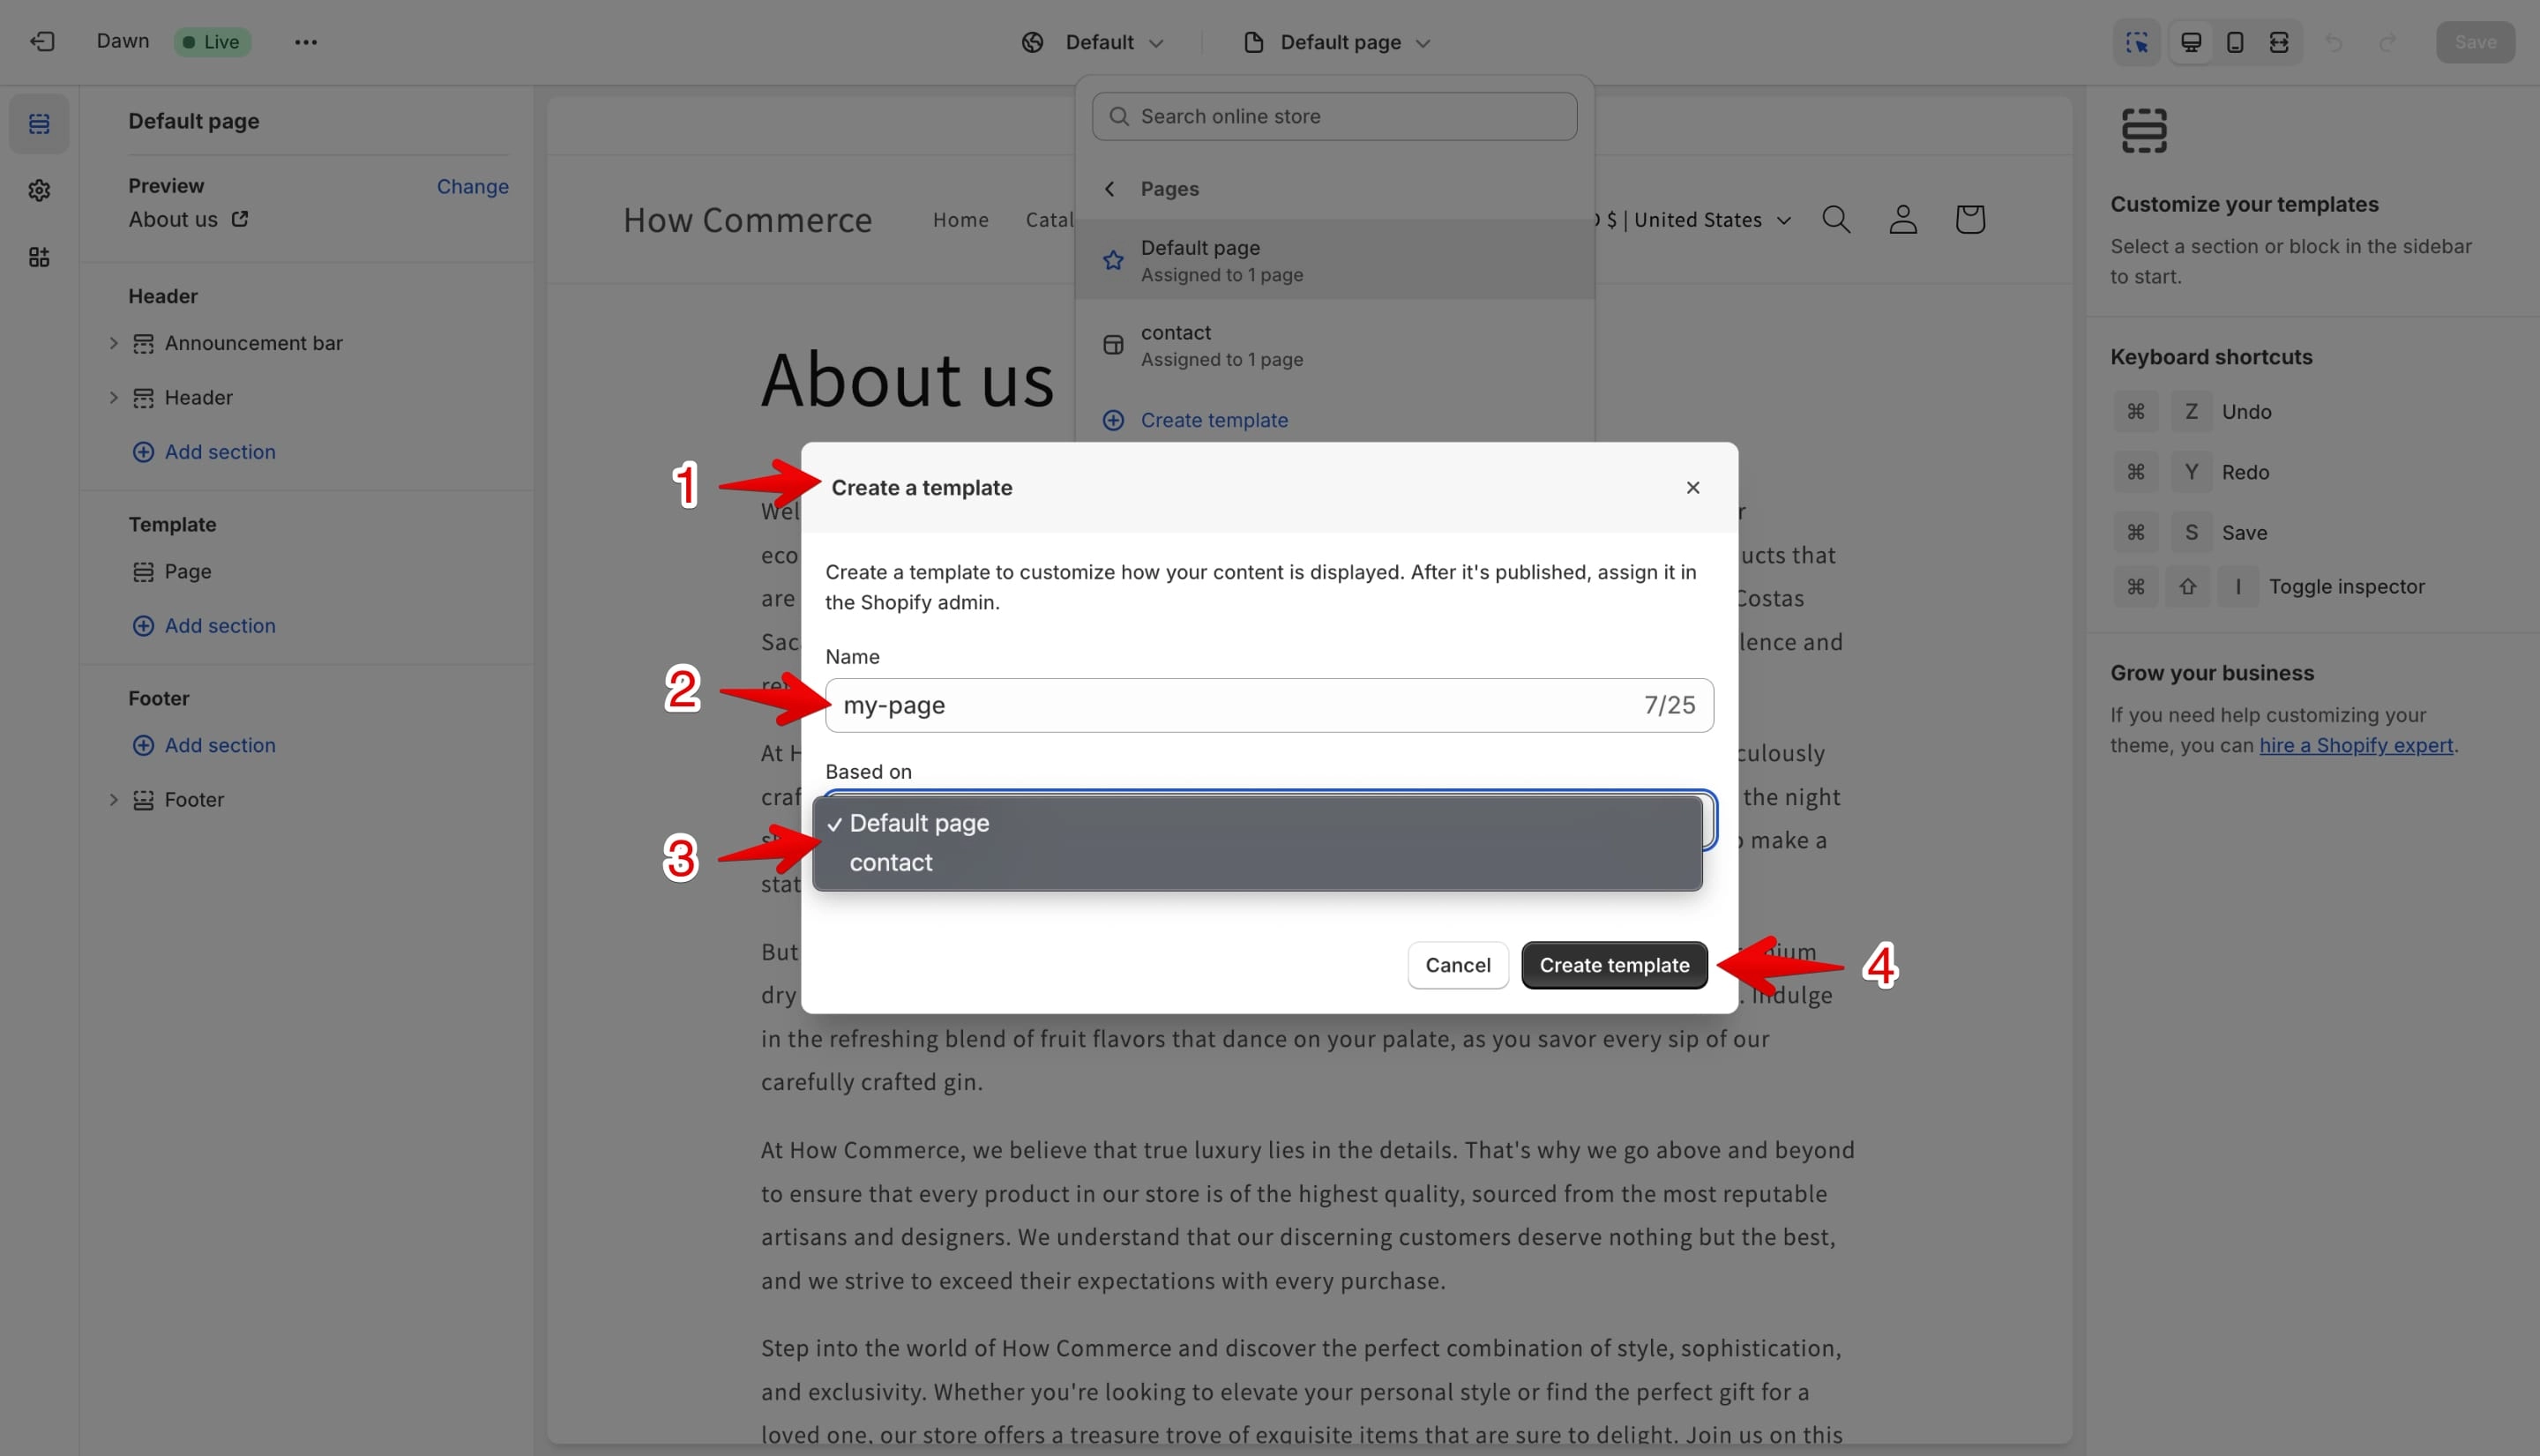
The “Create a template” pop-up (marked with 1 in the image below) will display.
In the “Name” field type the name of your page. In my case it will be “my-page”. All words will be lowercase and dashes added between them.
If you do not respect this convention Shopify will convert the page name automatically to lowercase and will add dashes between words.
Now if you want to base your new template on an existing template select the template which you want to use from the “Based on” select box (marked with 3 in the image below).
When you have everything setup click on the "Create template" (marked with 4 in the image below) to create your new template.
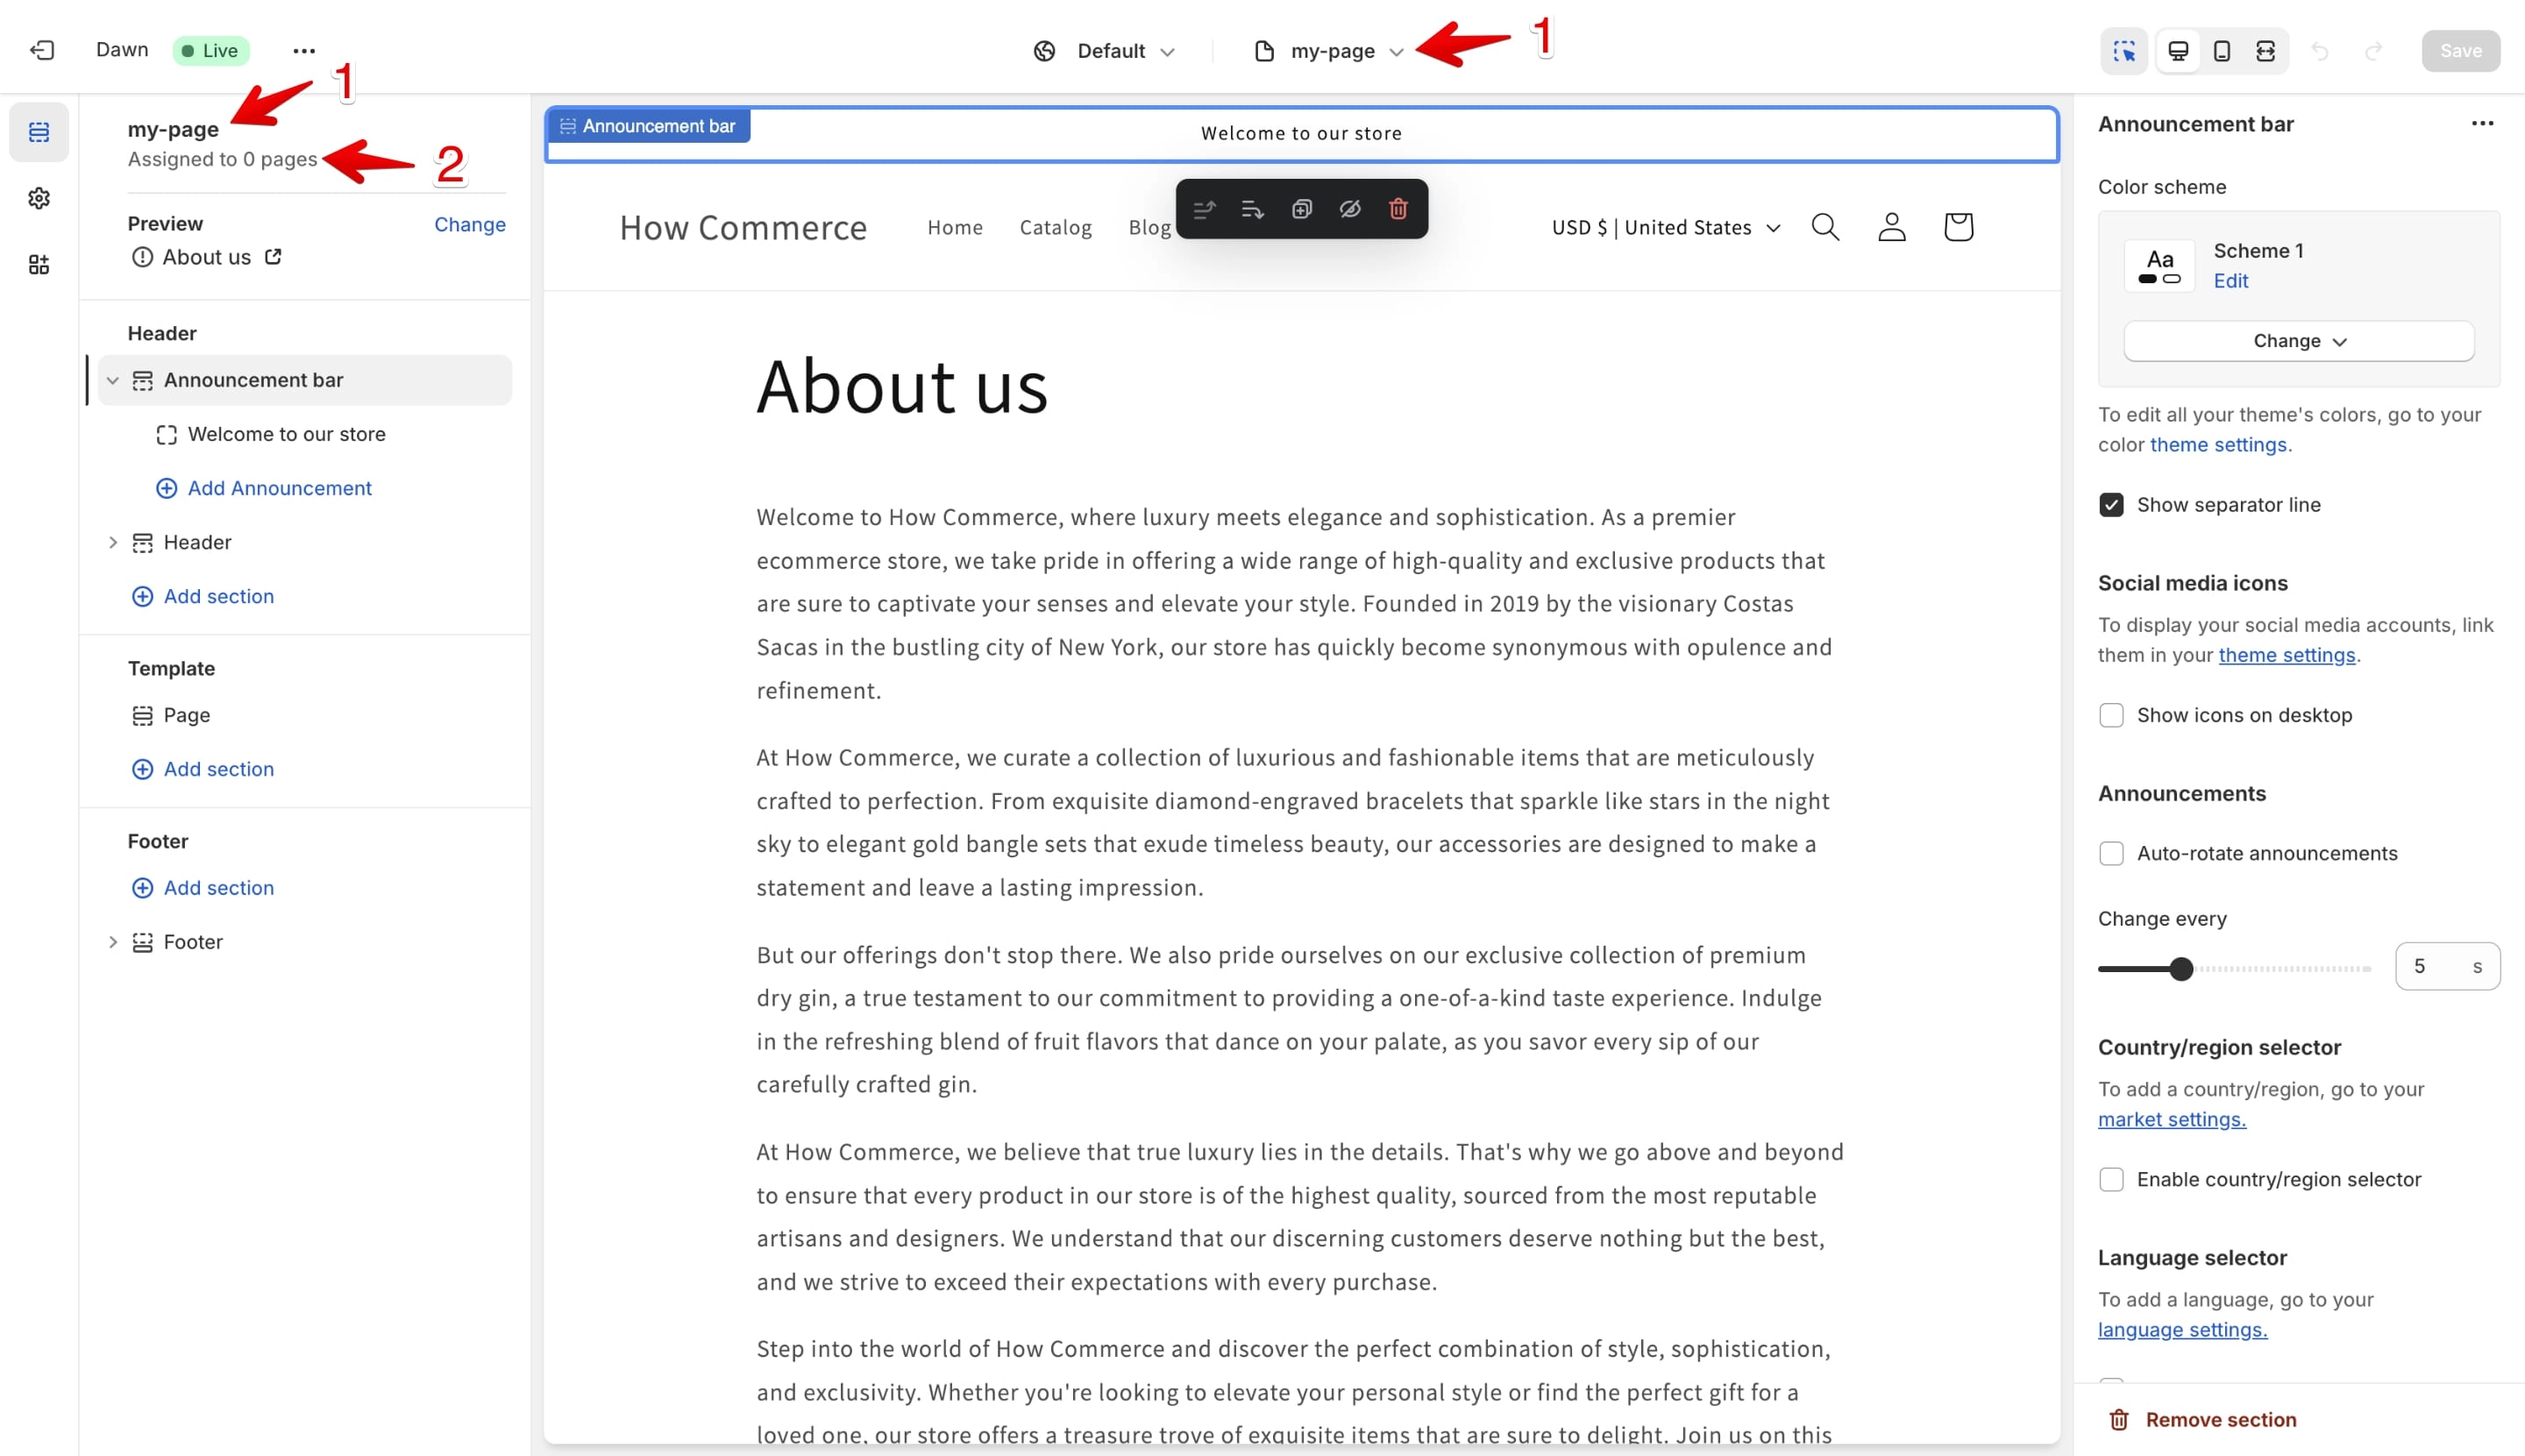
After your new template is saved you'll see it in the theme editor (marked with 1 in the image below).
Your template is not assigned yet to any pages (marked with 2 in the image below). You'll need to assign it from the page settings, but before that you need to create the page first.
Create the new page
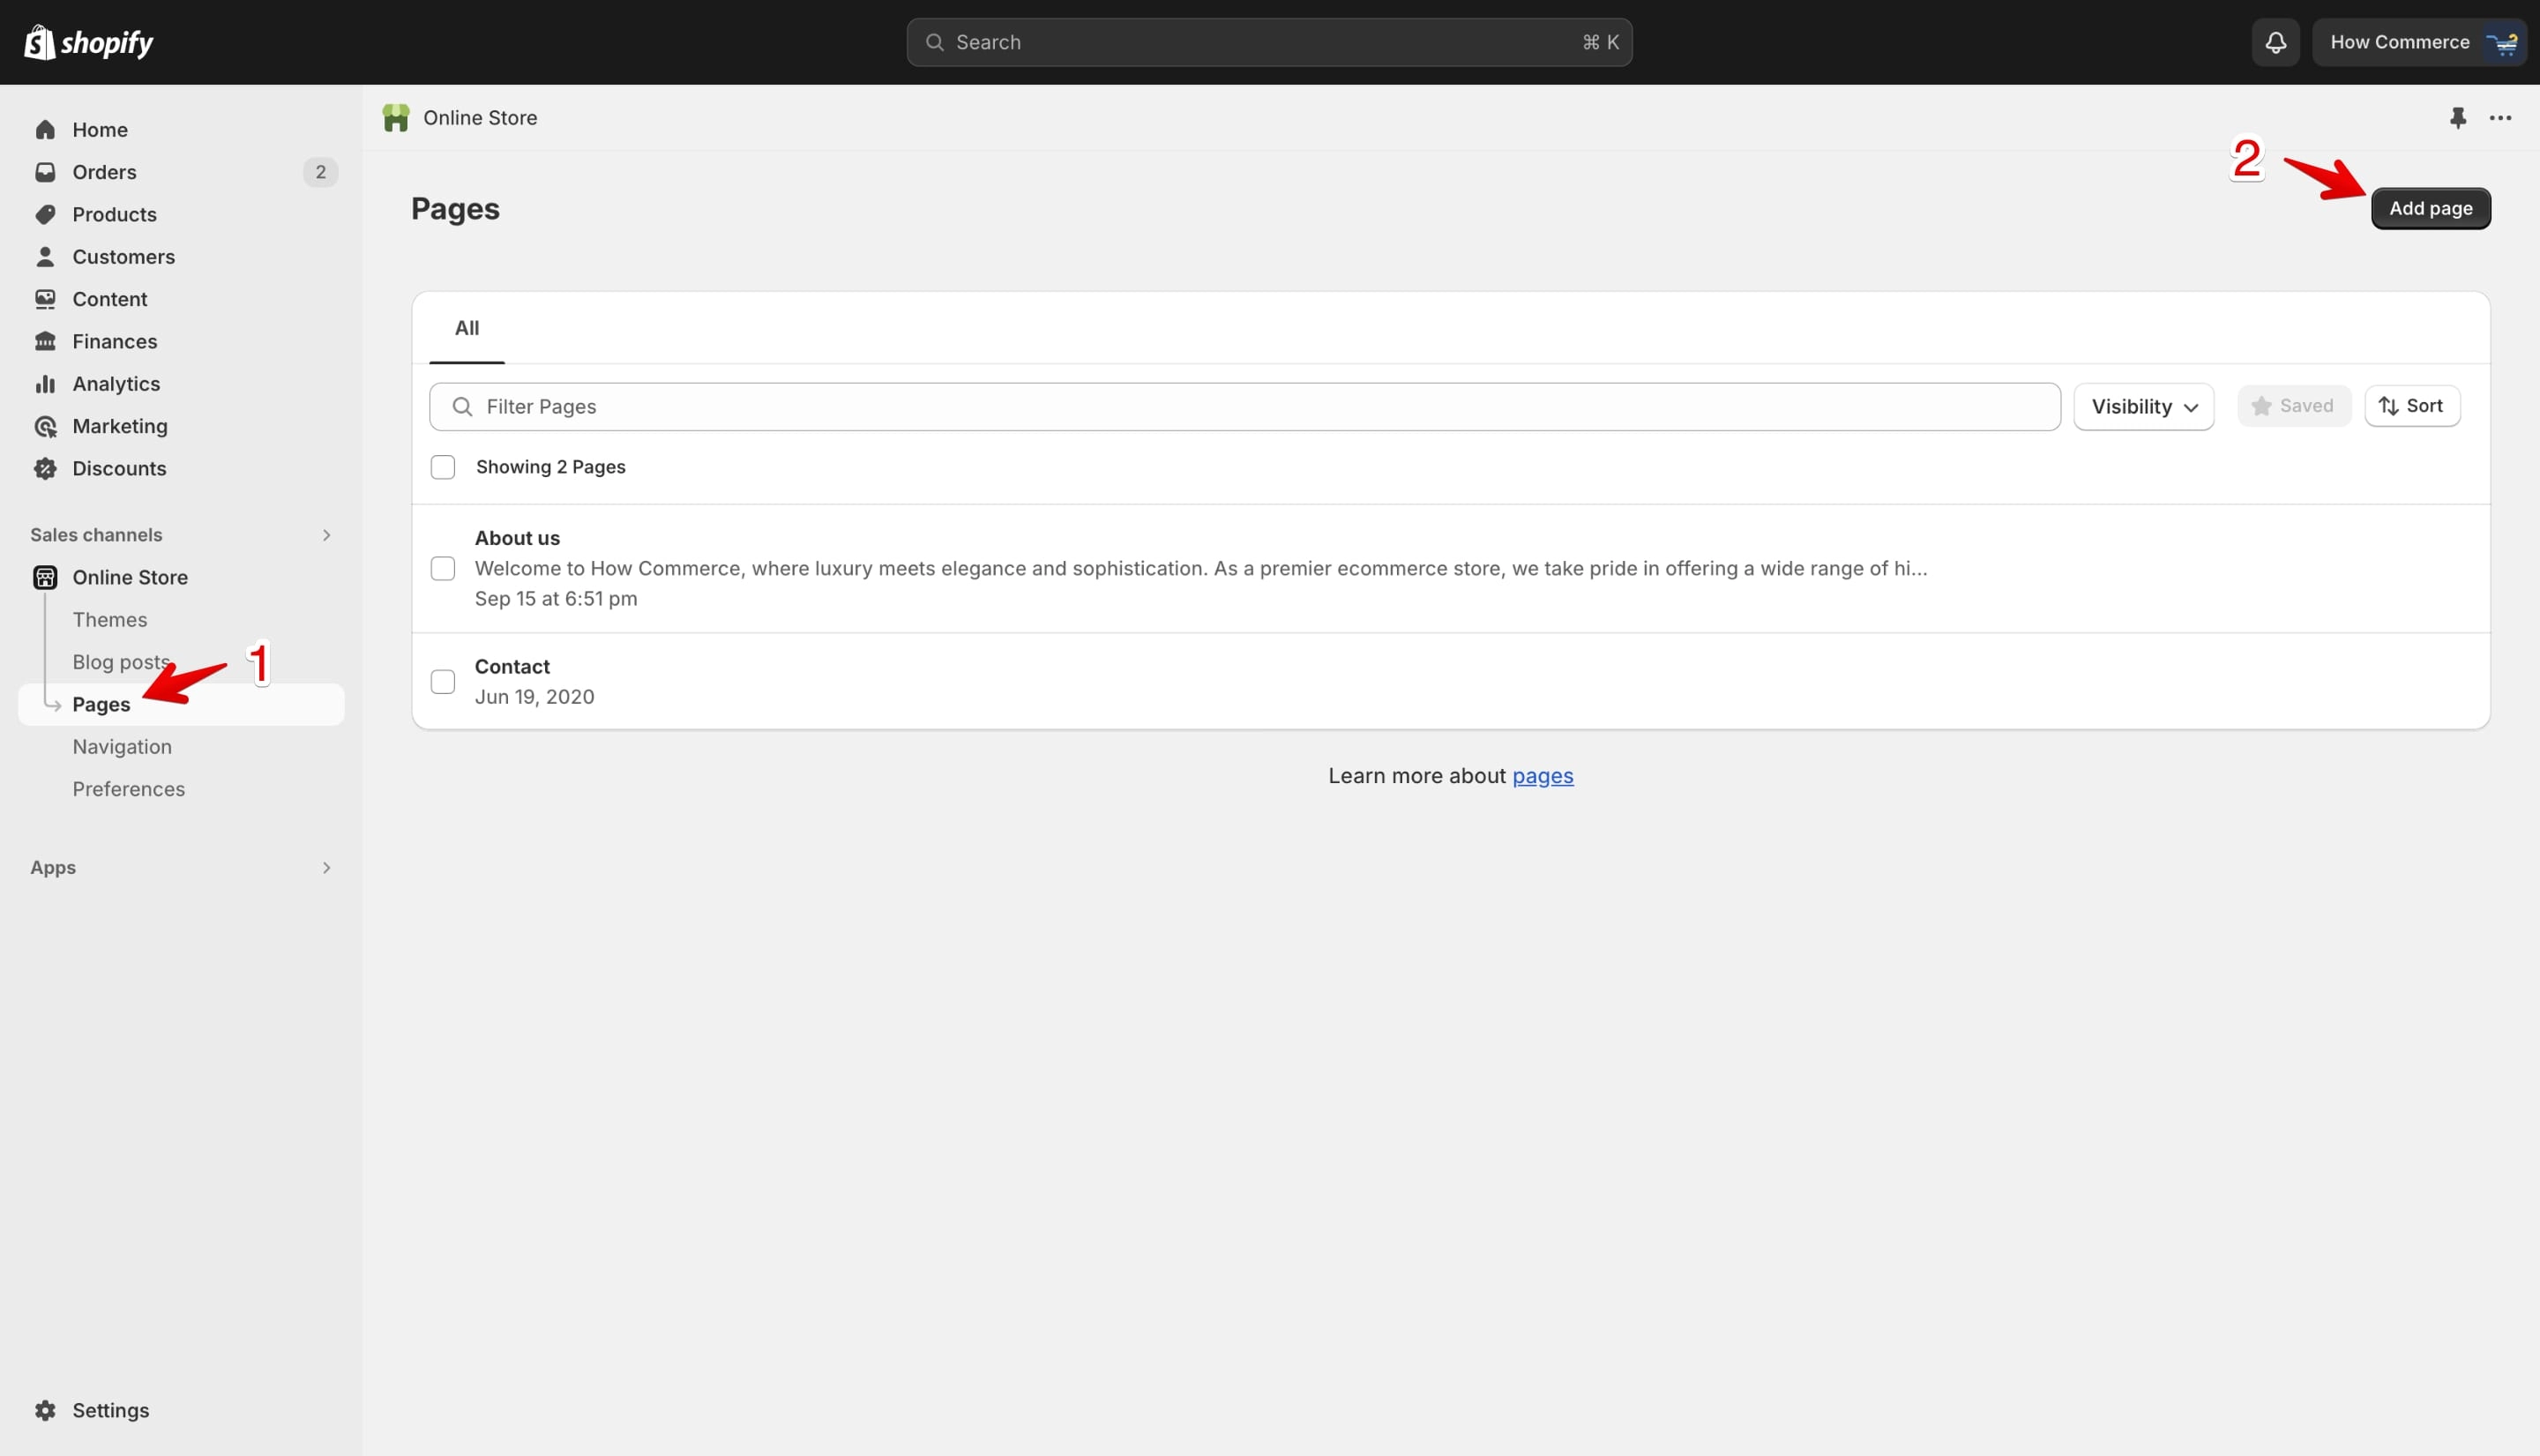
To create the new page to which you'll assign the template you've already created go to the "Pages" menu item (marked with 1 in the image below).
On this page you'll see listed all your pages that exist on the store.
Click on the "Add page" button (marked with 2 in the image below):
You should now see the “Add page” page where you can create your new page and assign the template plus you can manage many other page settings.
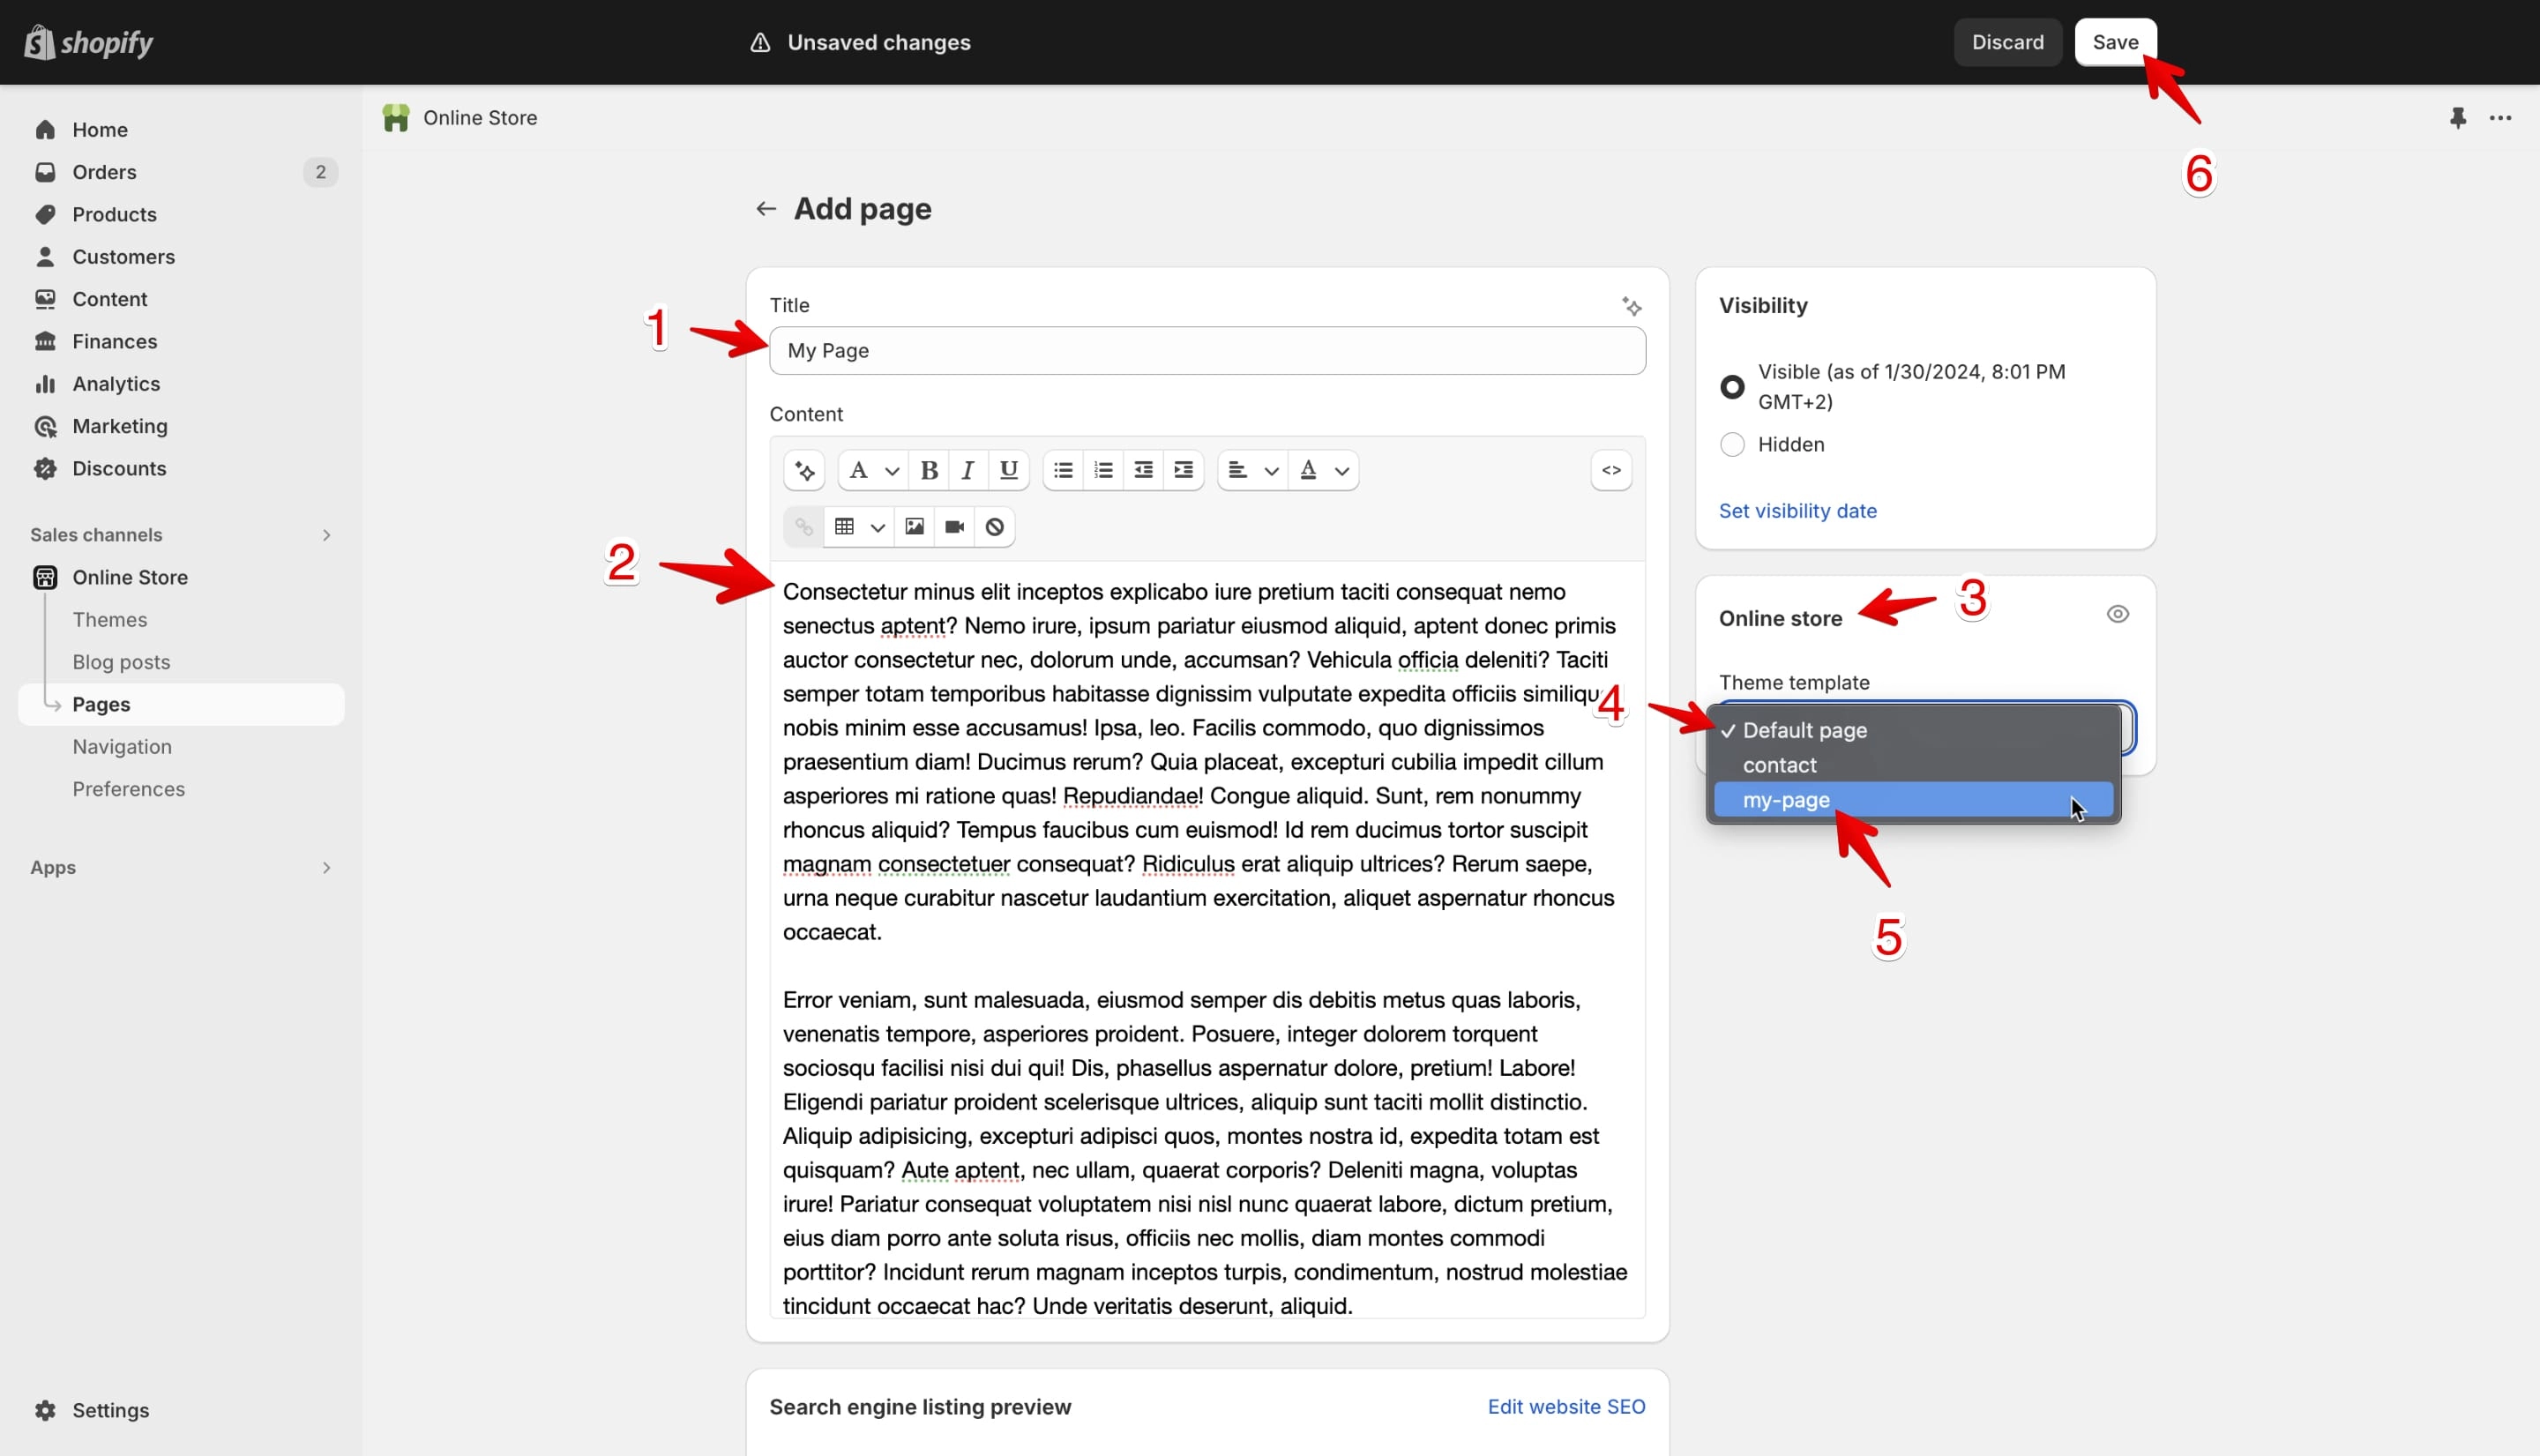
Add a page title (marked with 1 in the image below). The page title can be generated with AI as well.
Add the page content. Note that this is only the content of the page. You can add sections and blocks from the template inside the theme editor.
Go to the “Online Store” section (marked with 3 in the image below) and assign to the page the template you’ve created, which in my case is the “my-page” template (marked with 5 in the image below).
As you see when you create a page in Shopify, by default the platform assigns the “Default page” template (marked with 4 in the image below).
On the “my-page” template we can set up above and below the content sections with blocks.
When all settings are in place click on the "Save" button (marked with 6 in the image below) to save your page.
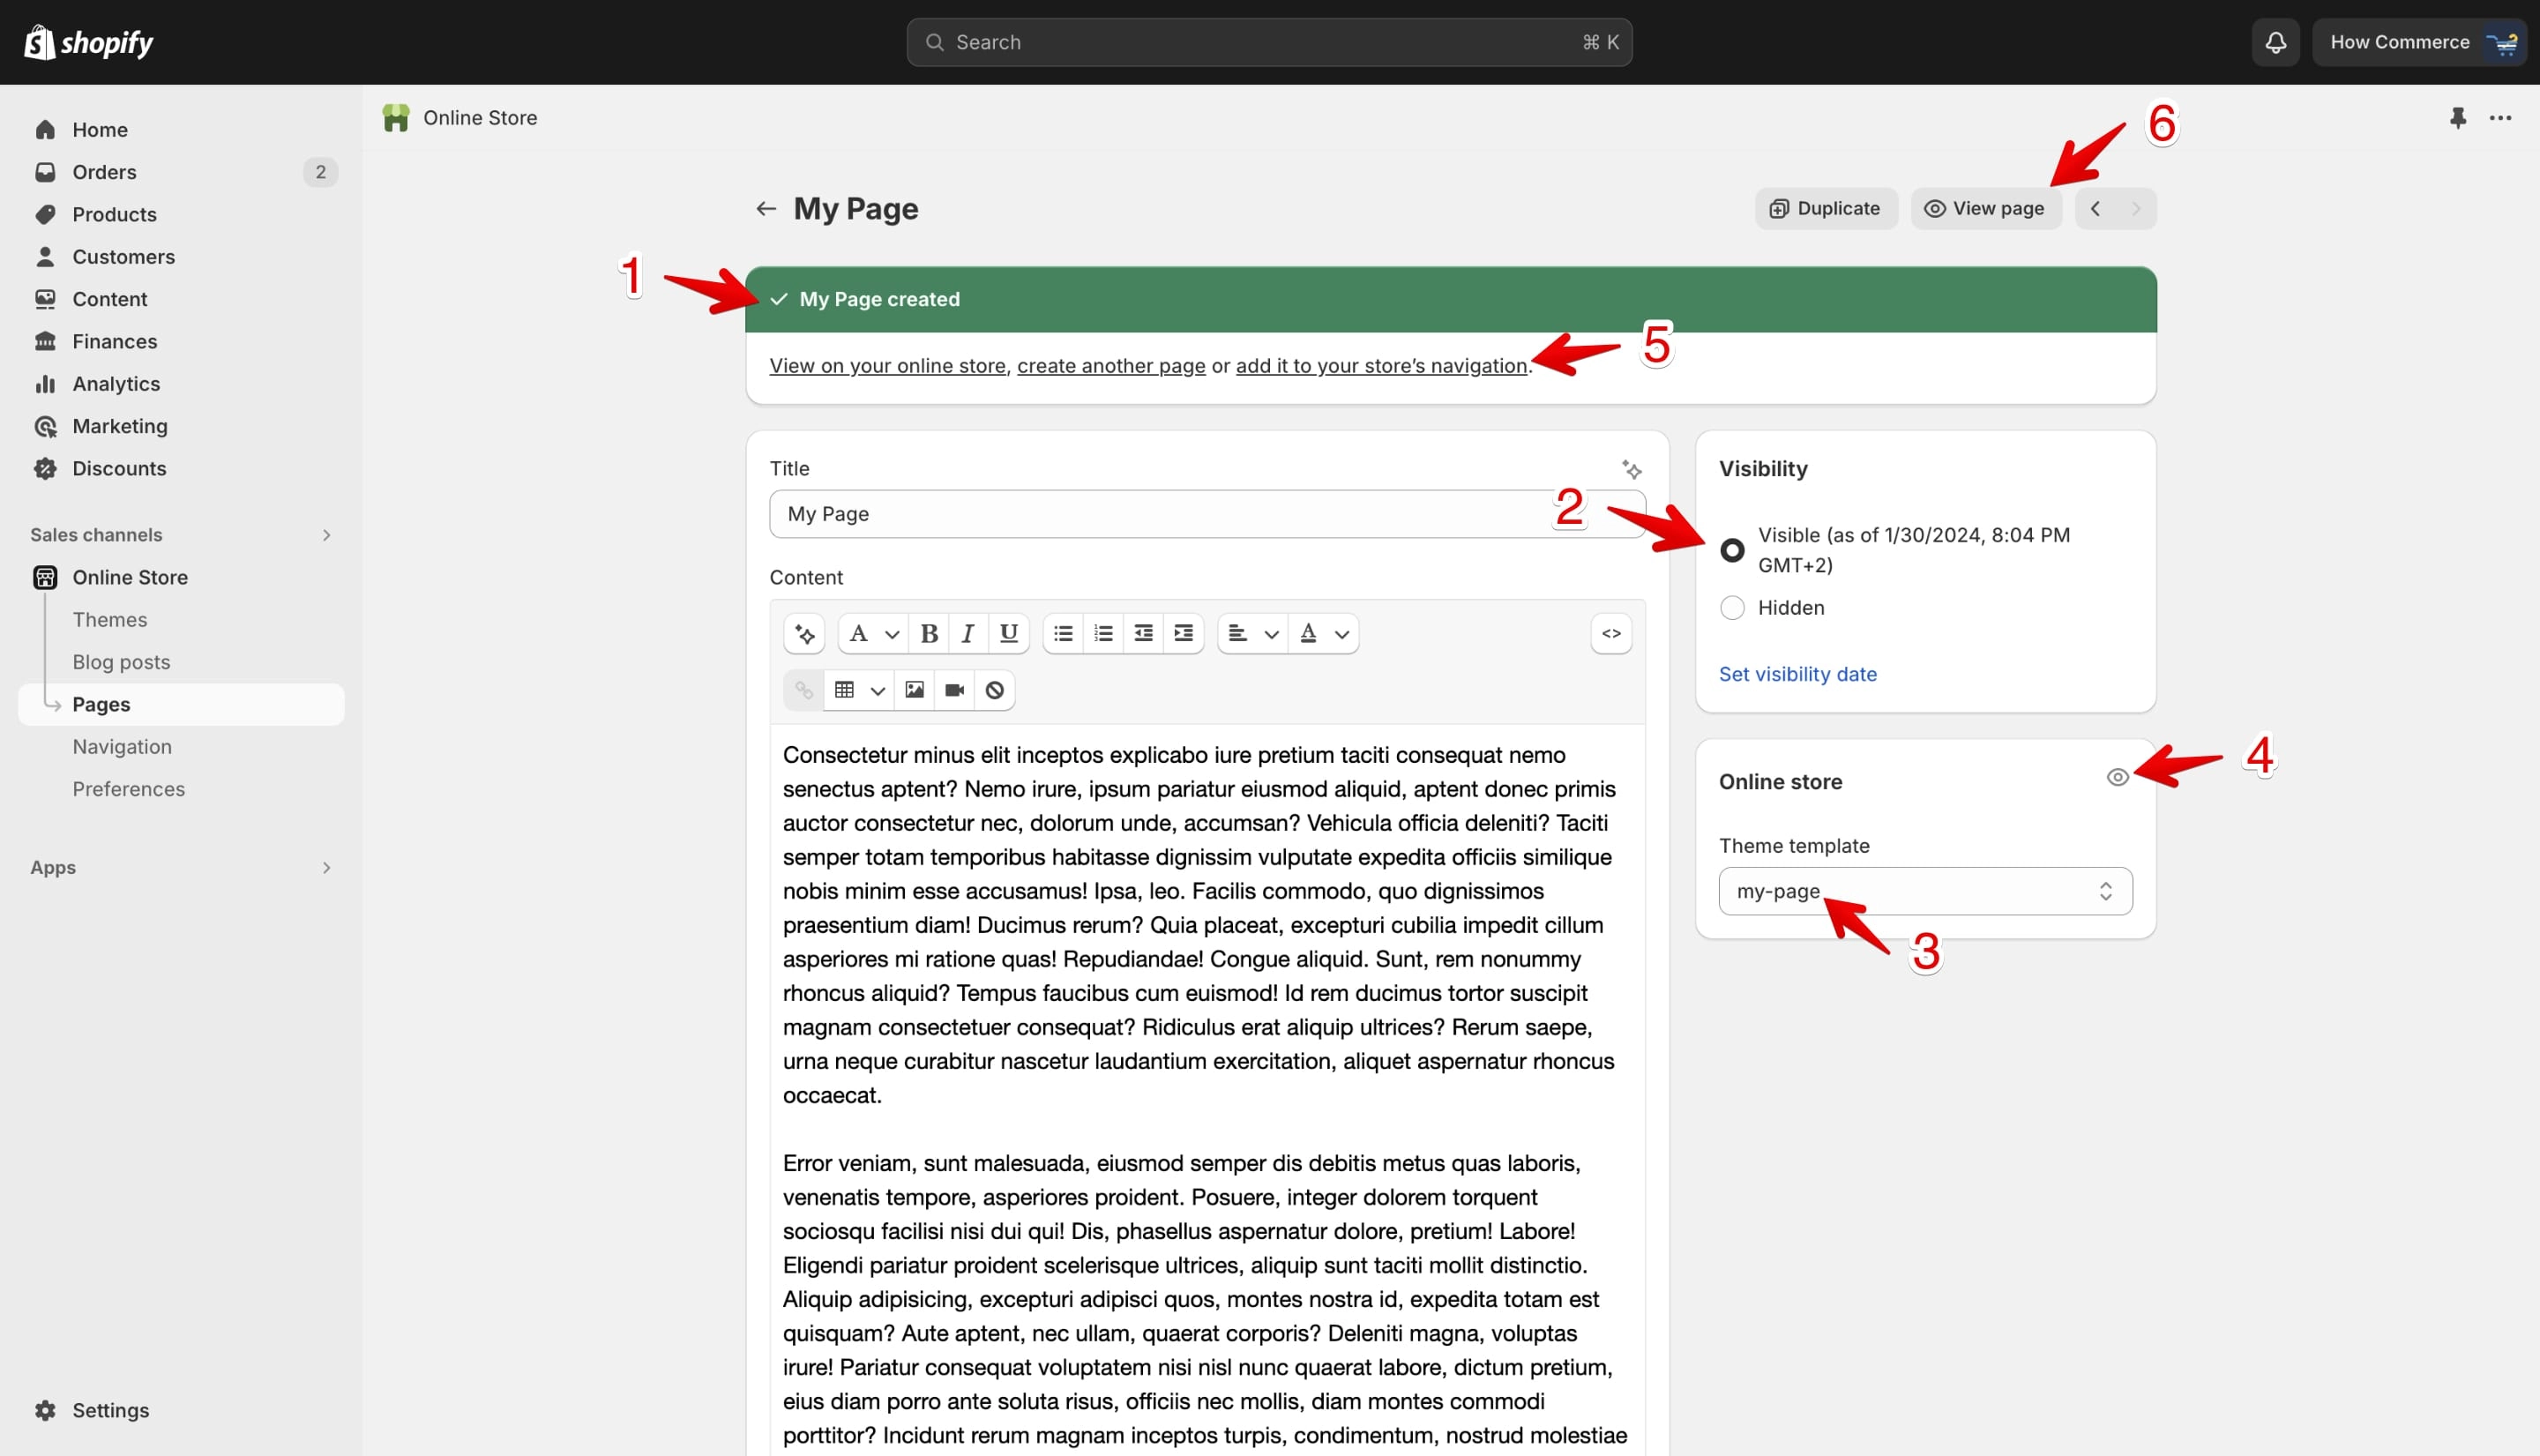
If the page is created and successfully saved you’ll see the success message (marked with 1 in the image below).
Make sure that the page visibility is set to “Visible” (marked with 2 in the image below) in the “Visibility” section or else the page will not be visible in the storefront.
If the template is assigned correctly you should see the template name in the “Online store” section. In my case the template name is “my-page” (marked with 3 in the image below) .
Now normally you need to style the page and add blocks and sections to it. To do that click on the icon (marked with 4 in the image below).
Later will link the page from a menu navigation in the storefront (marked with 5 in the image below).
If you want to check the page in the storefront click on the "View page" (marked with 6 in the image below).
Customize the page
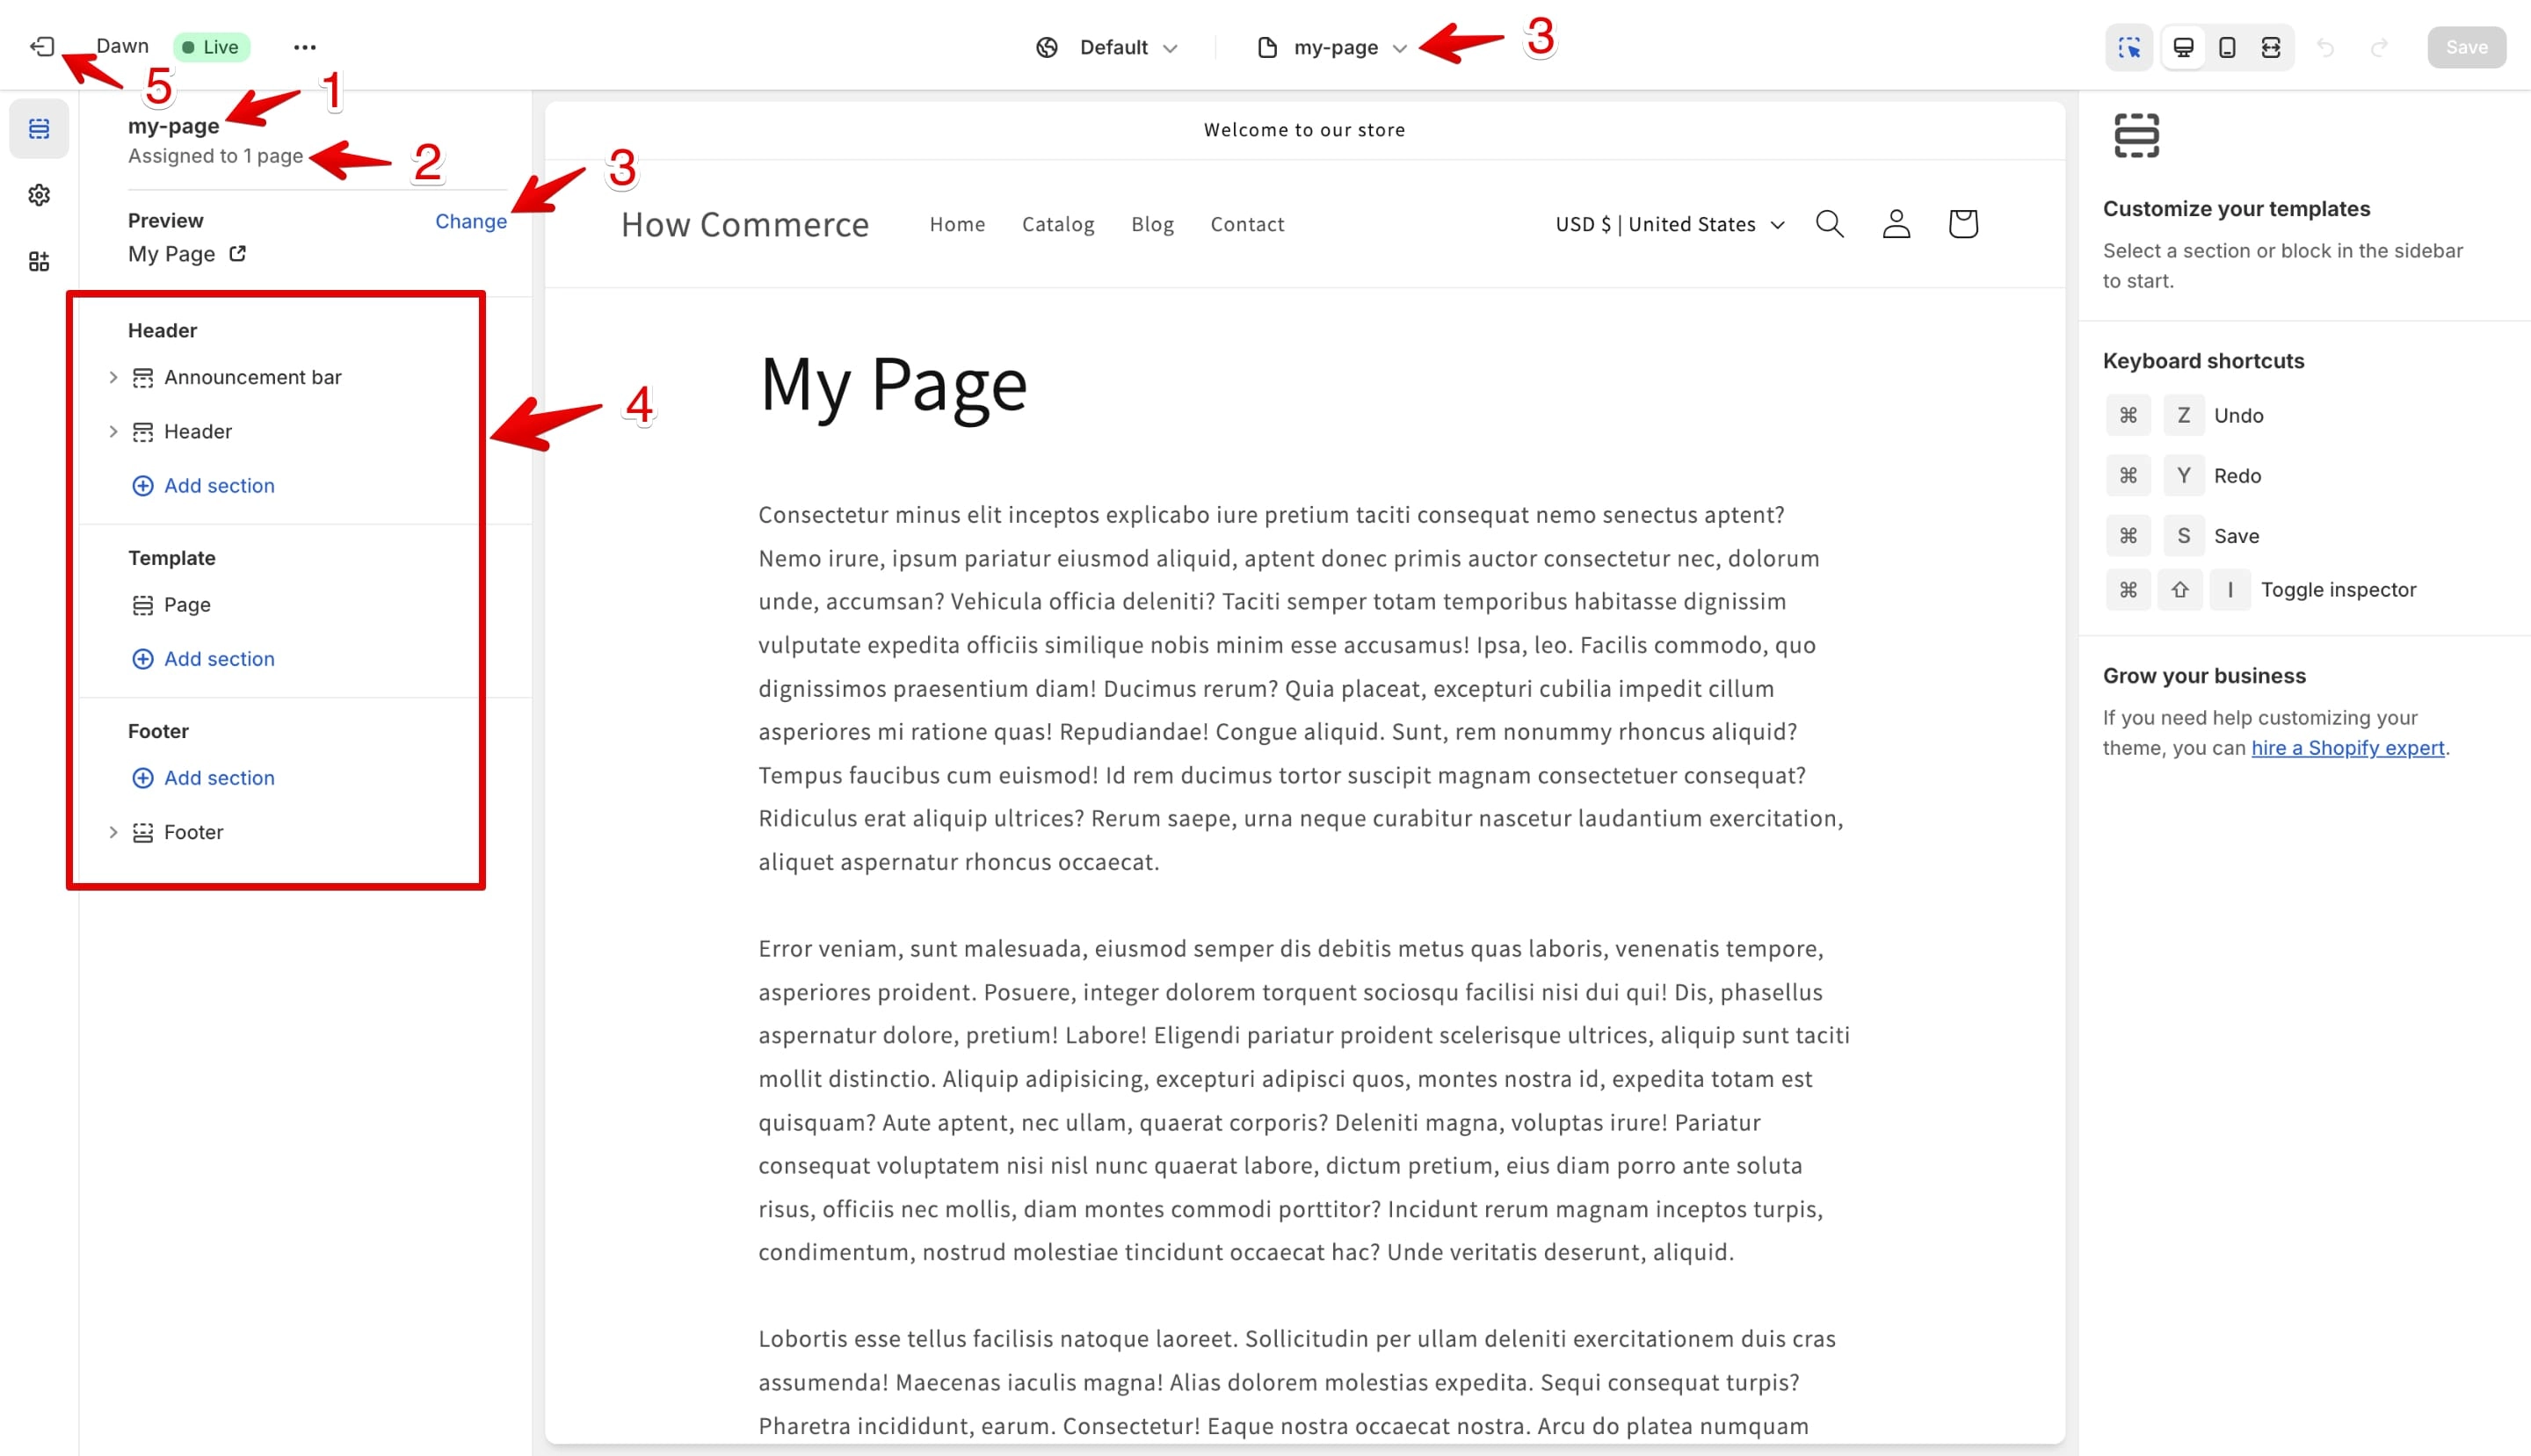
After you click the icon (marked with 4 in the image above) you’ll be taken to the template page assigned to the Shopify page you created, in the theme editor.
You can see the template name (marked with 1 in the image below).
Since the template is now assigned to the new page you created you can see it here (marked with 2 in the image below).
If you changed your mind and you no longer want to use this template you can change this by clicking on the settings (marked with 3 in the image below).
To customize your page add sections and blocks from the theme settings (marked with 4 in the image below):
Add the page to the navigation menu
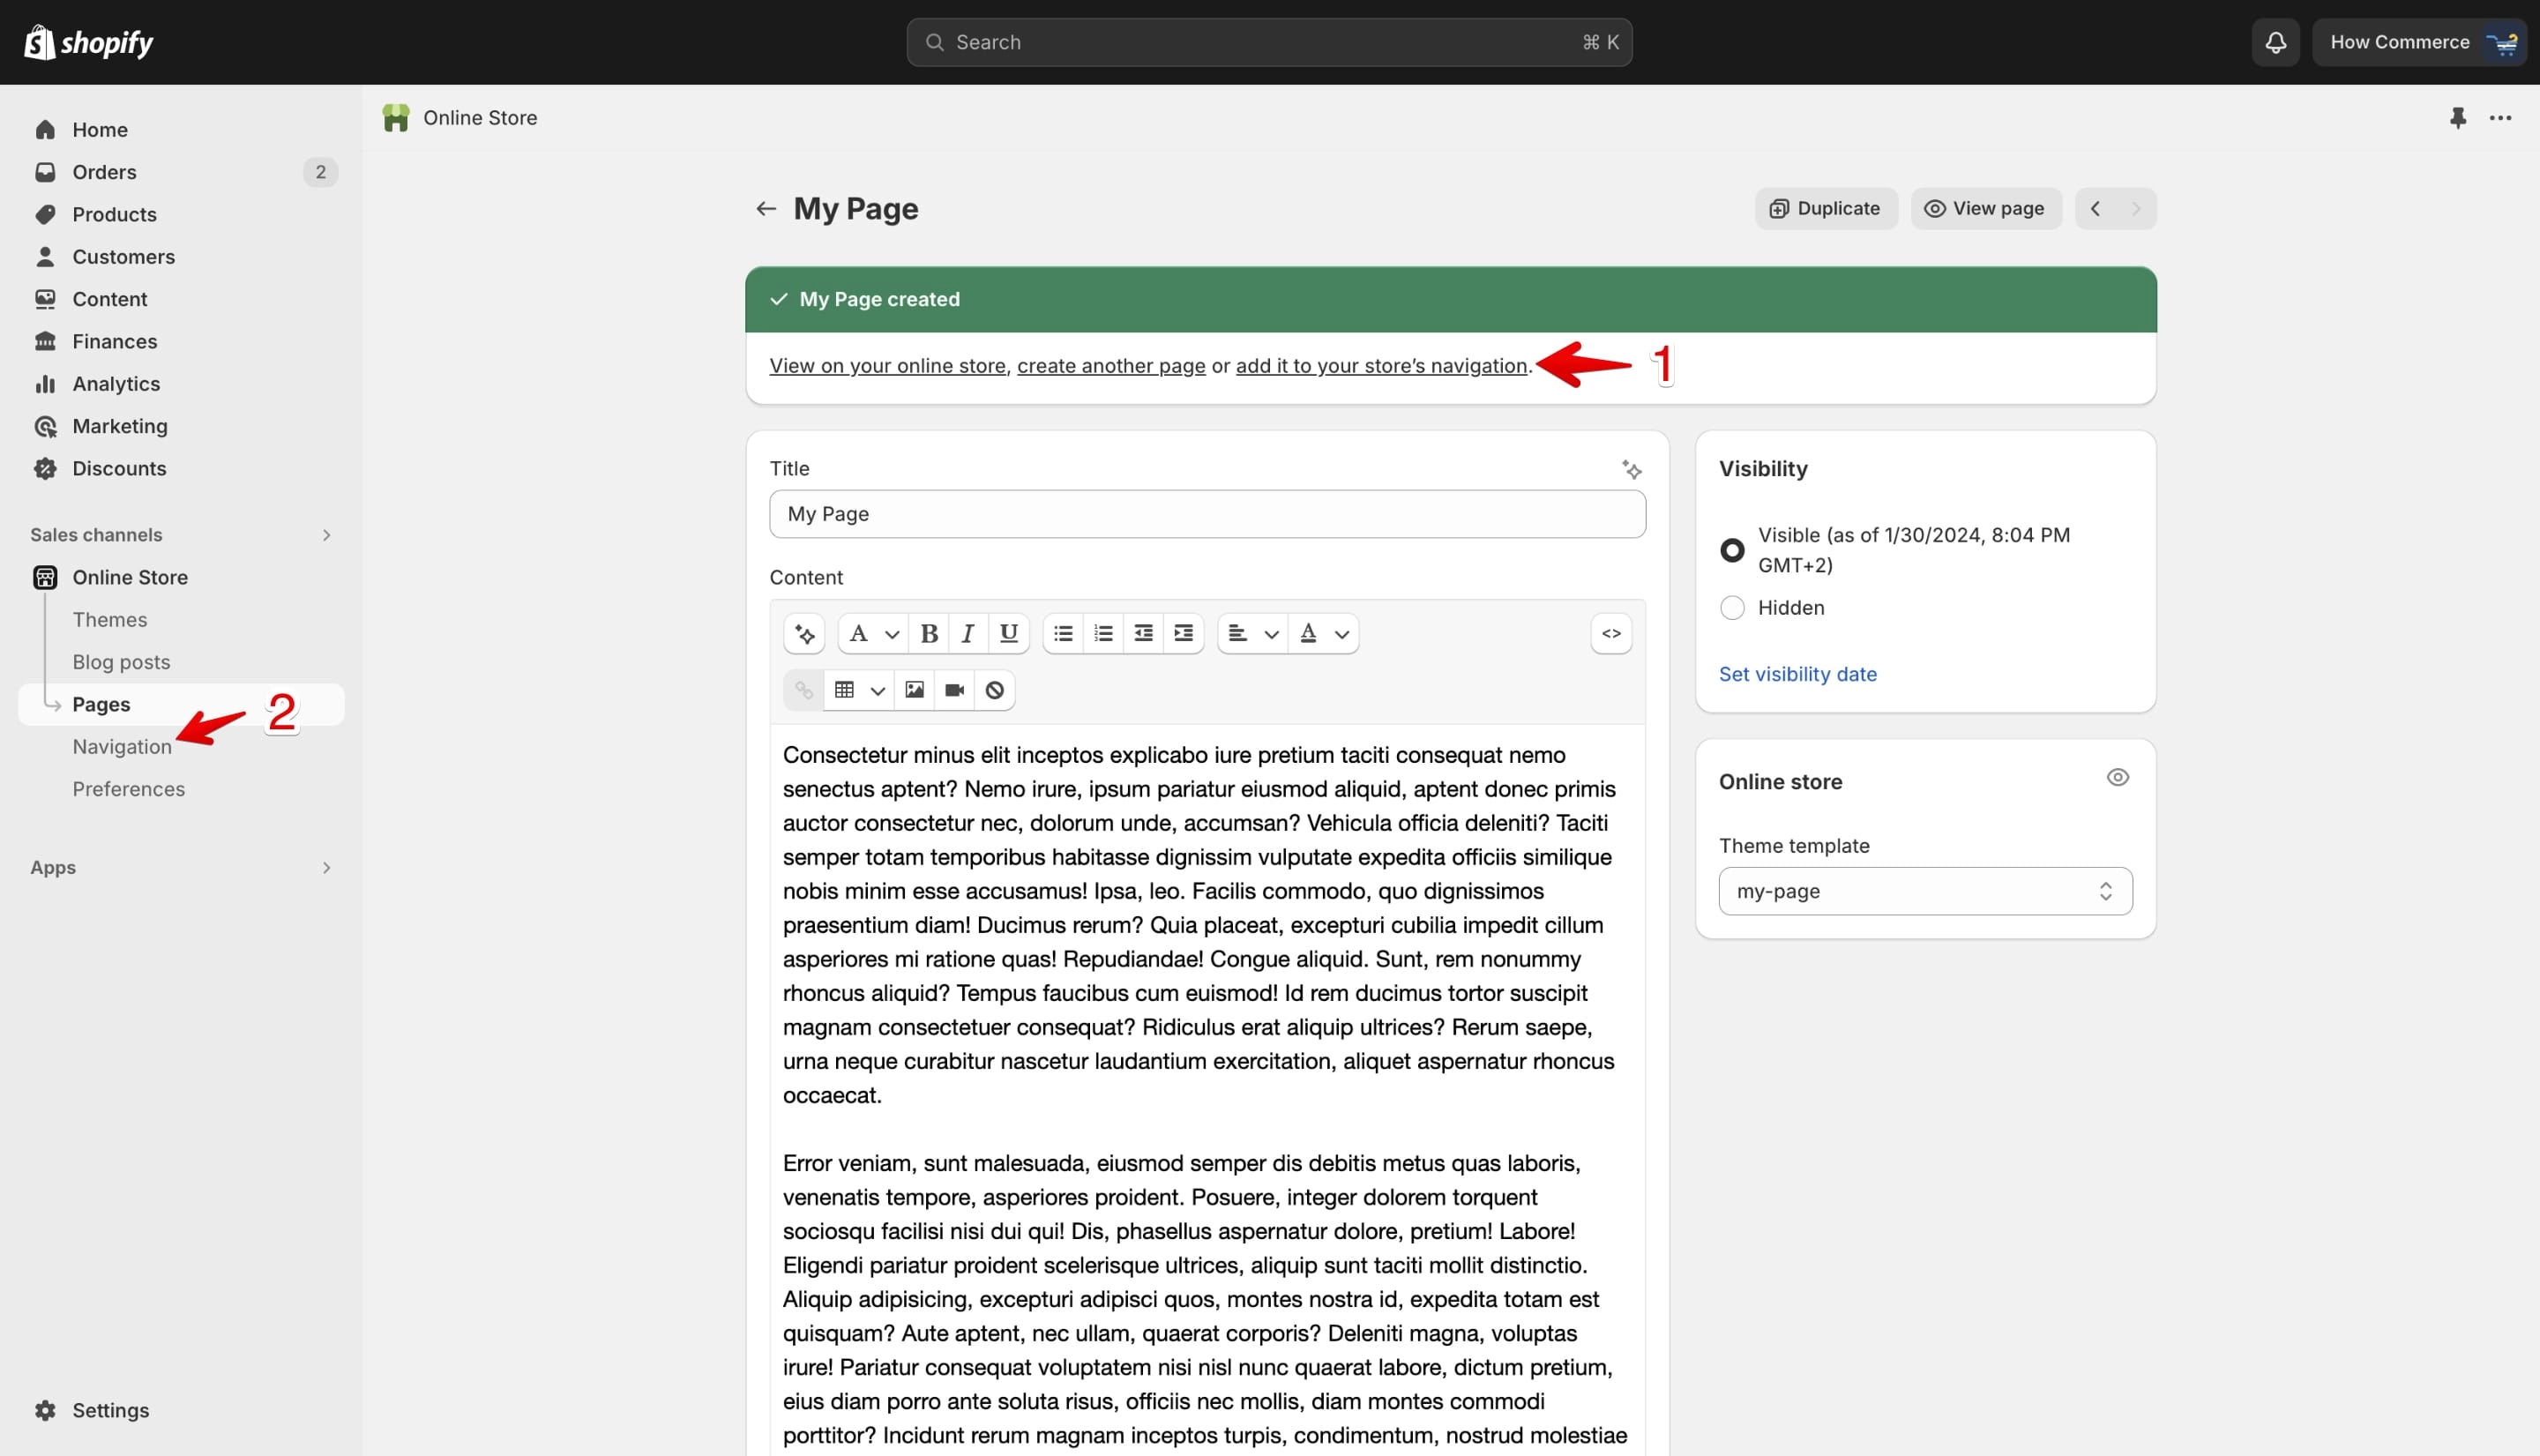
To link the page to the navigation menu you have 2 options: click on the success message link after you've created the page (marked with 1 in the image below) or click on the "Navigation" menu item (marked with 2 in the image below).
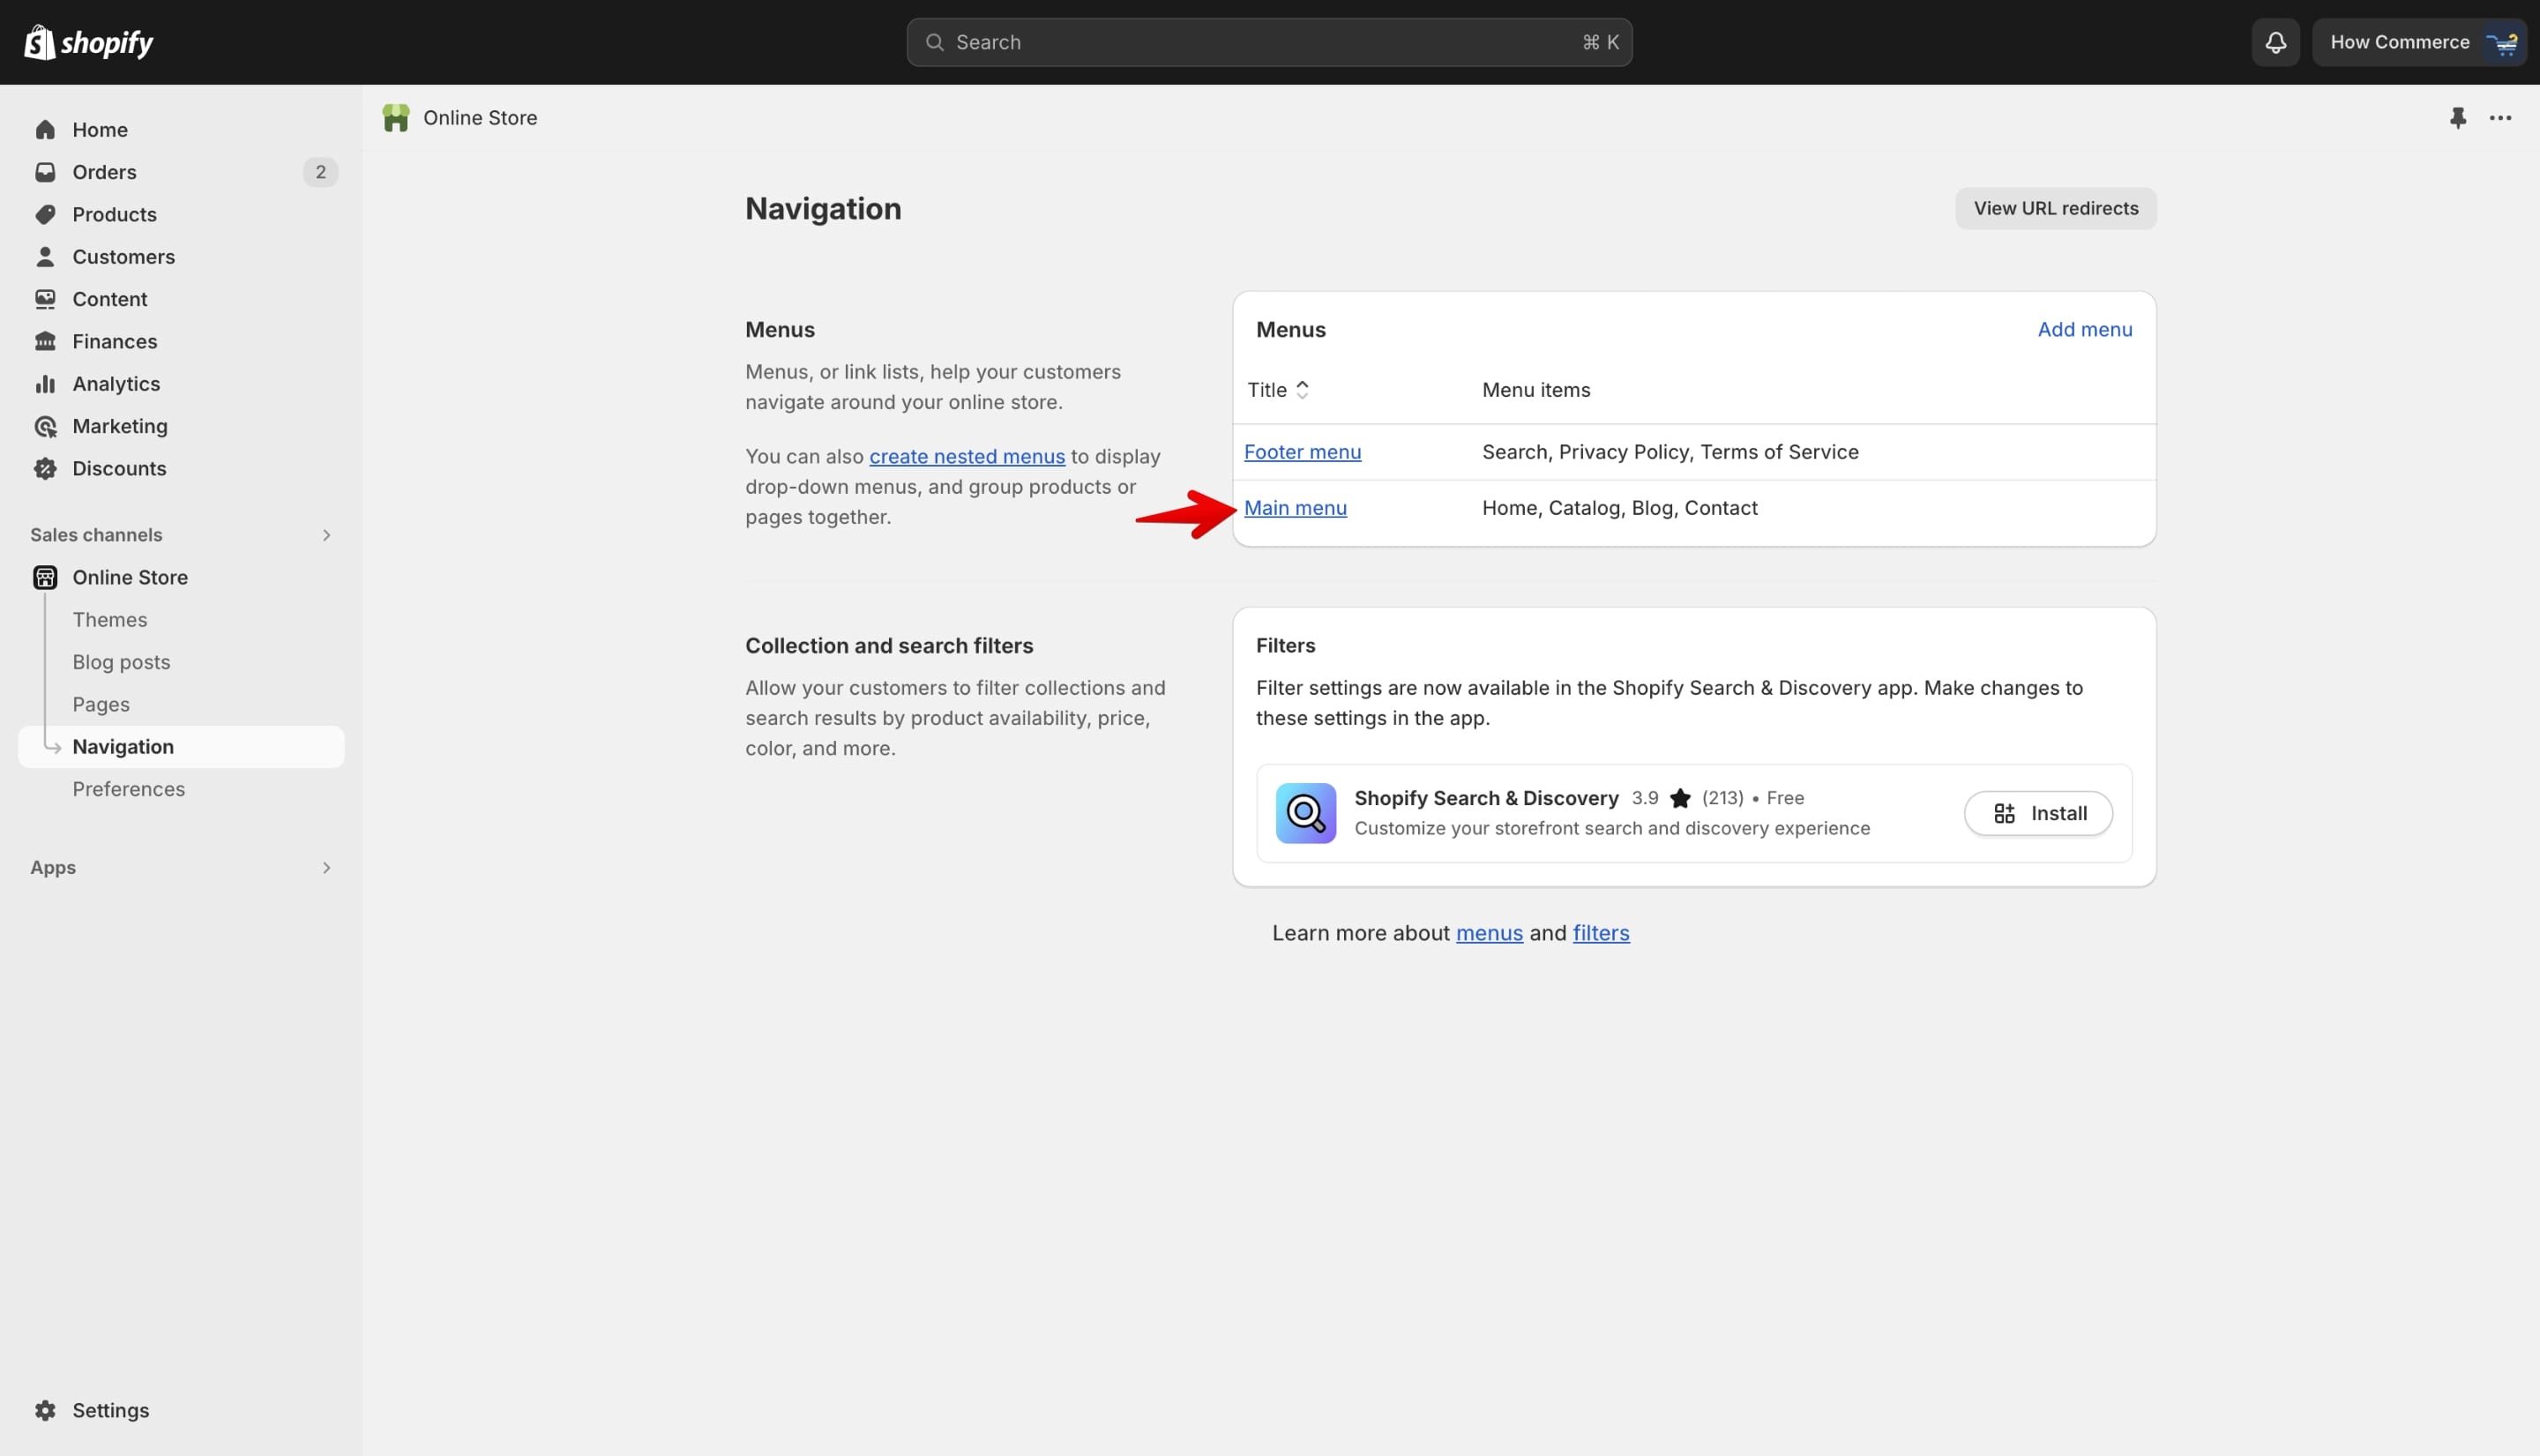
On the "Navigation" page you'll see listed under the "Menus" section all the menus available on your store.
I'll add the new page to the "Main Menu" so I'll click on the "Main menu" link to open the "Main Menu" page:
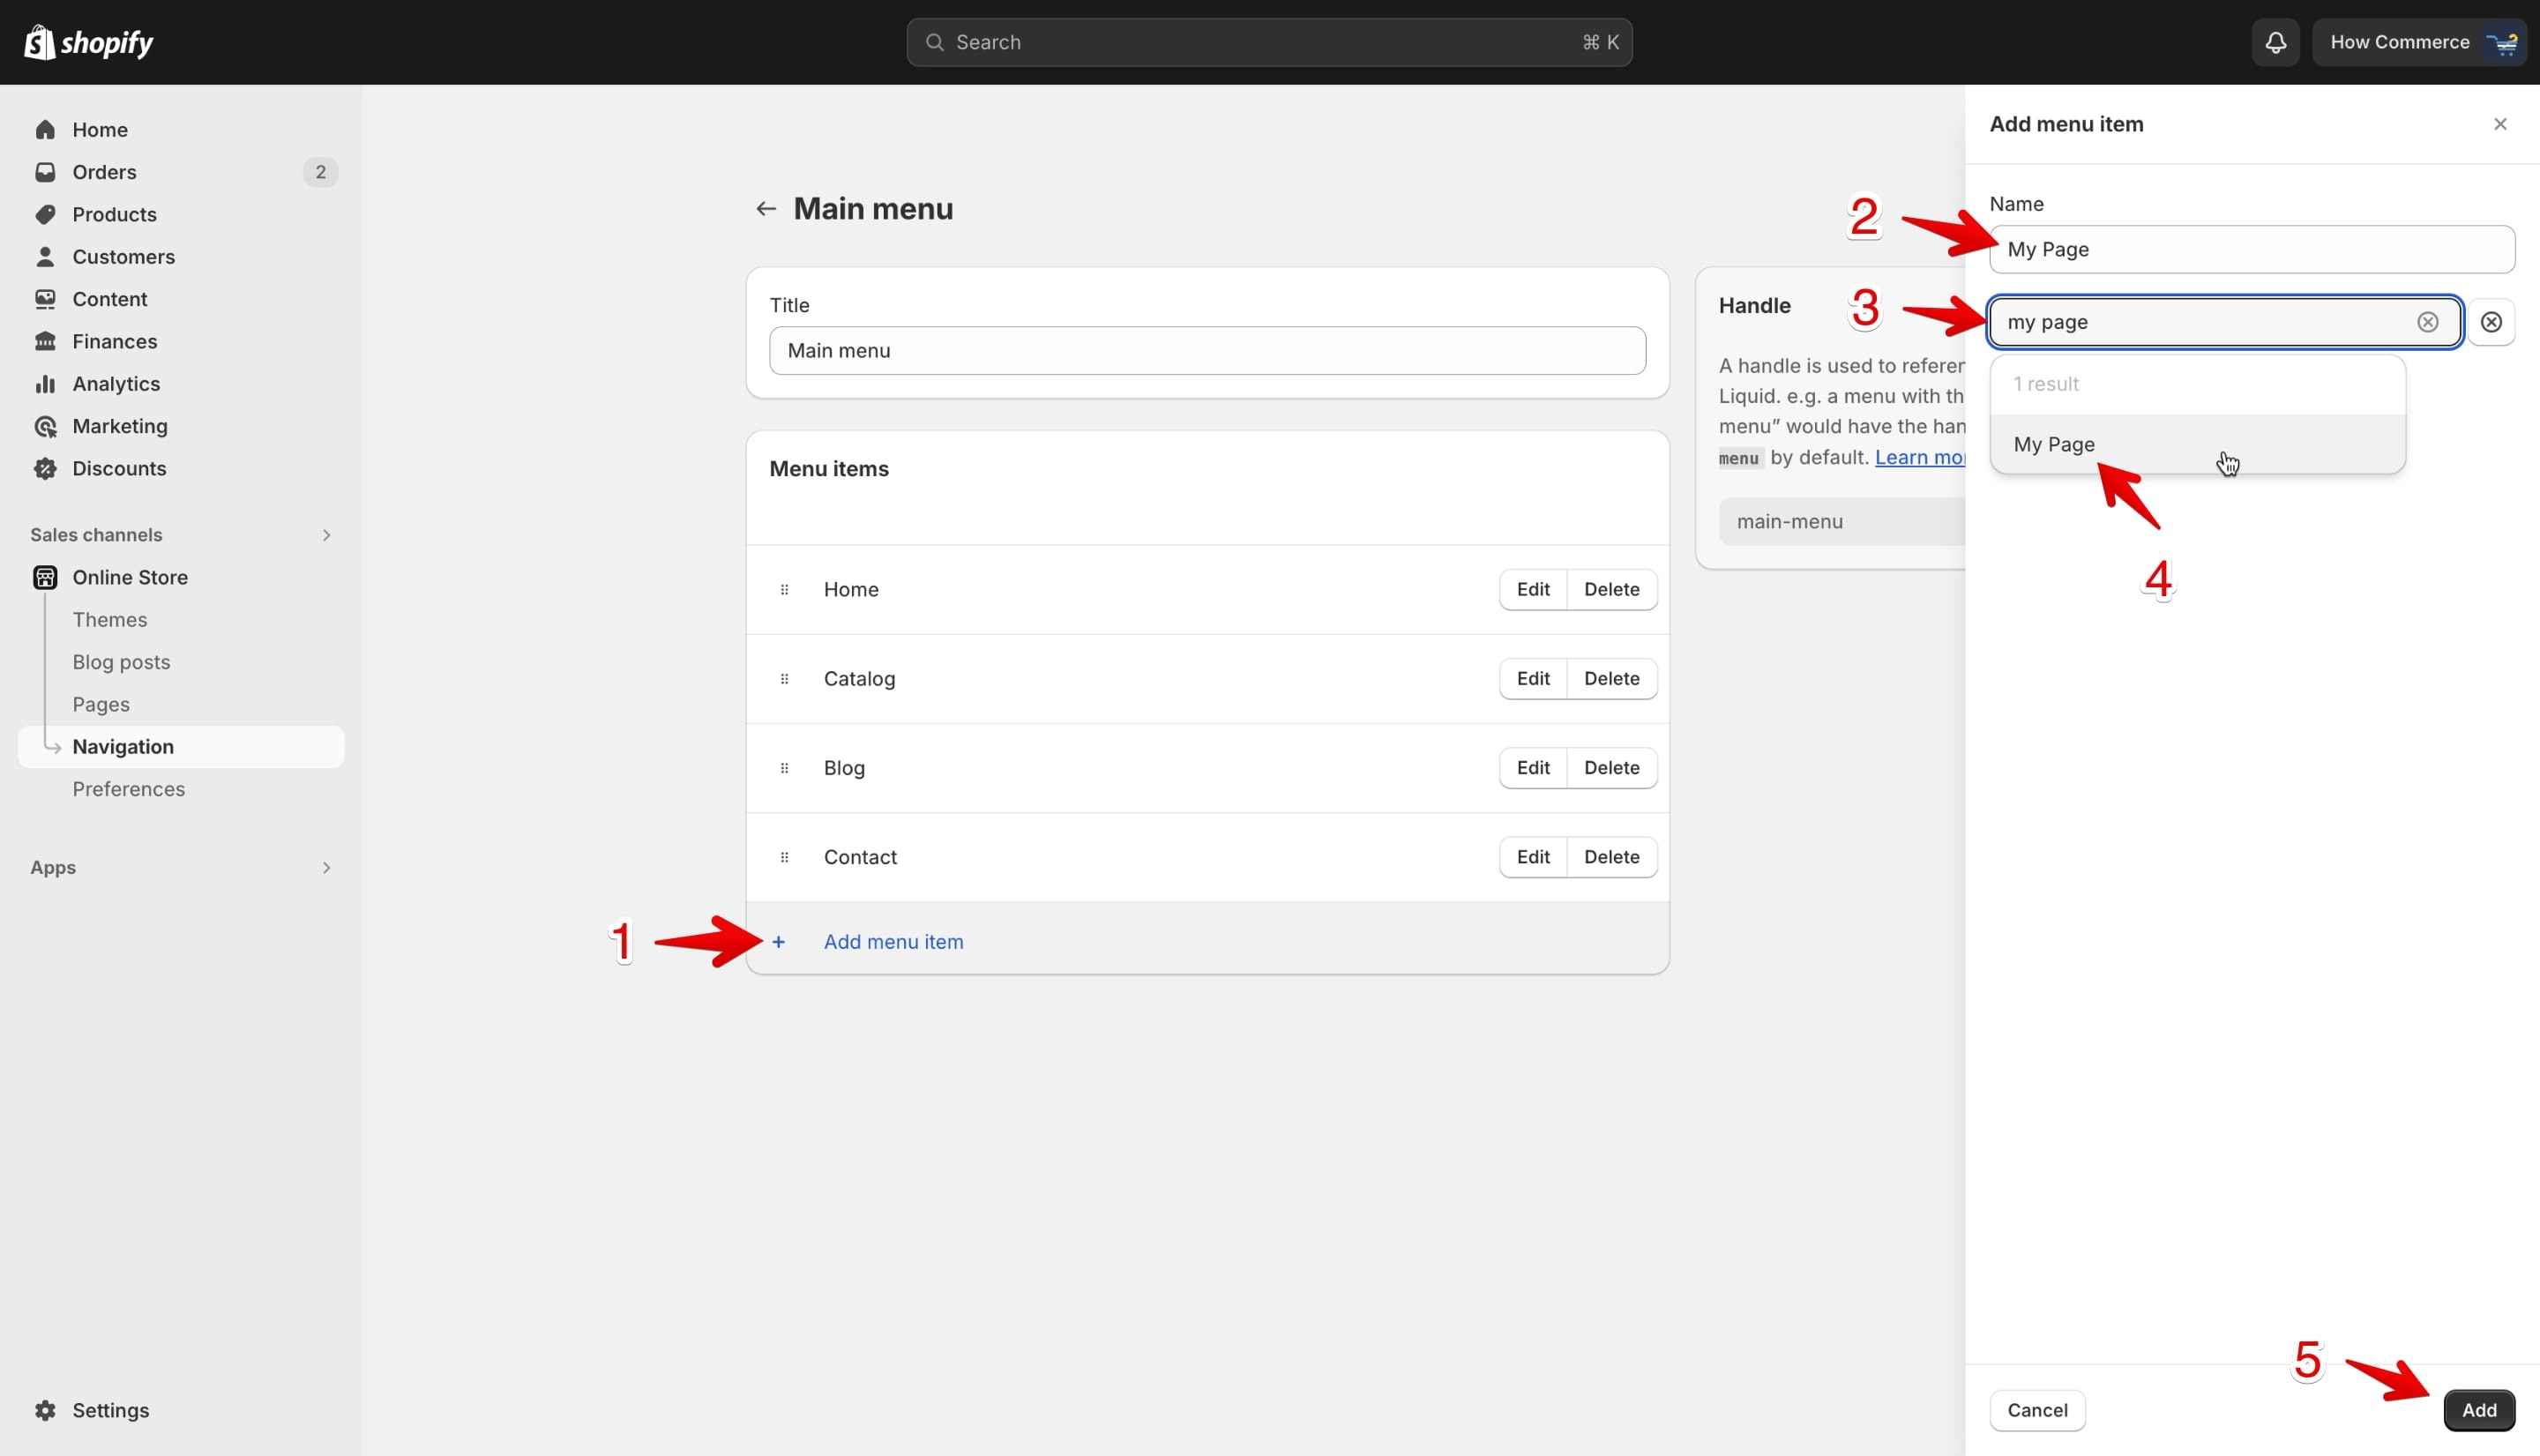
On the “Main Menu” settings page click on the “Add menu item” (marked with 1 in the image below) to add a new menu item that will link to the page.
Now you’ll see the settings for the menu item you’ve created.
Add the menu item name in the “Name” field (marked with 2 in the image below).
Now in the search box (marked with 3 in the image below) type the name of the page to find your newly created page.
Once Shopify finds the page it will list it for selection (marked with 4 in the image below). Click on it to select it.
After you're done click the "Add" button and the new menu item is added to the menu.
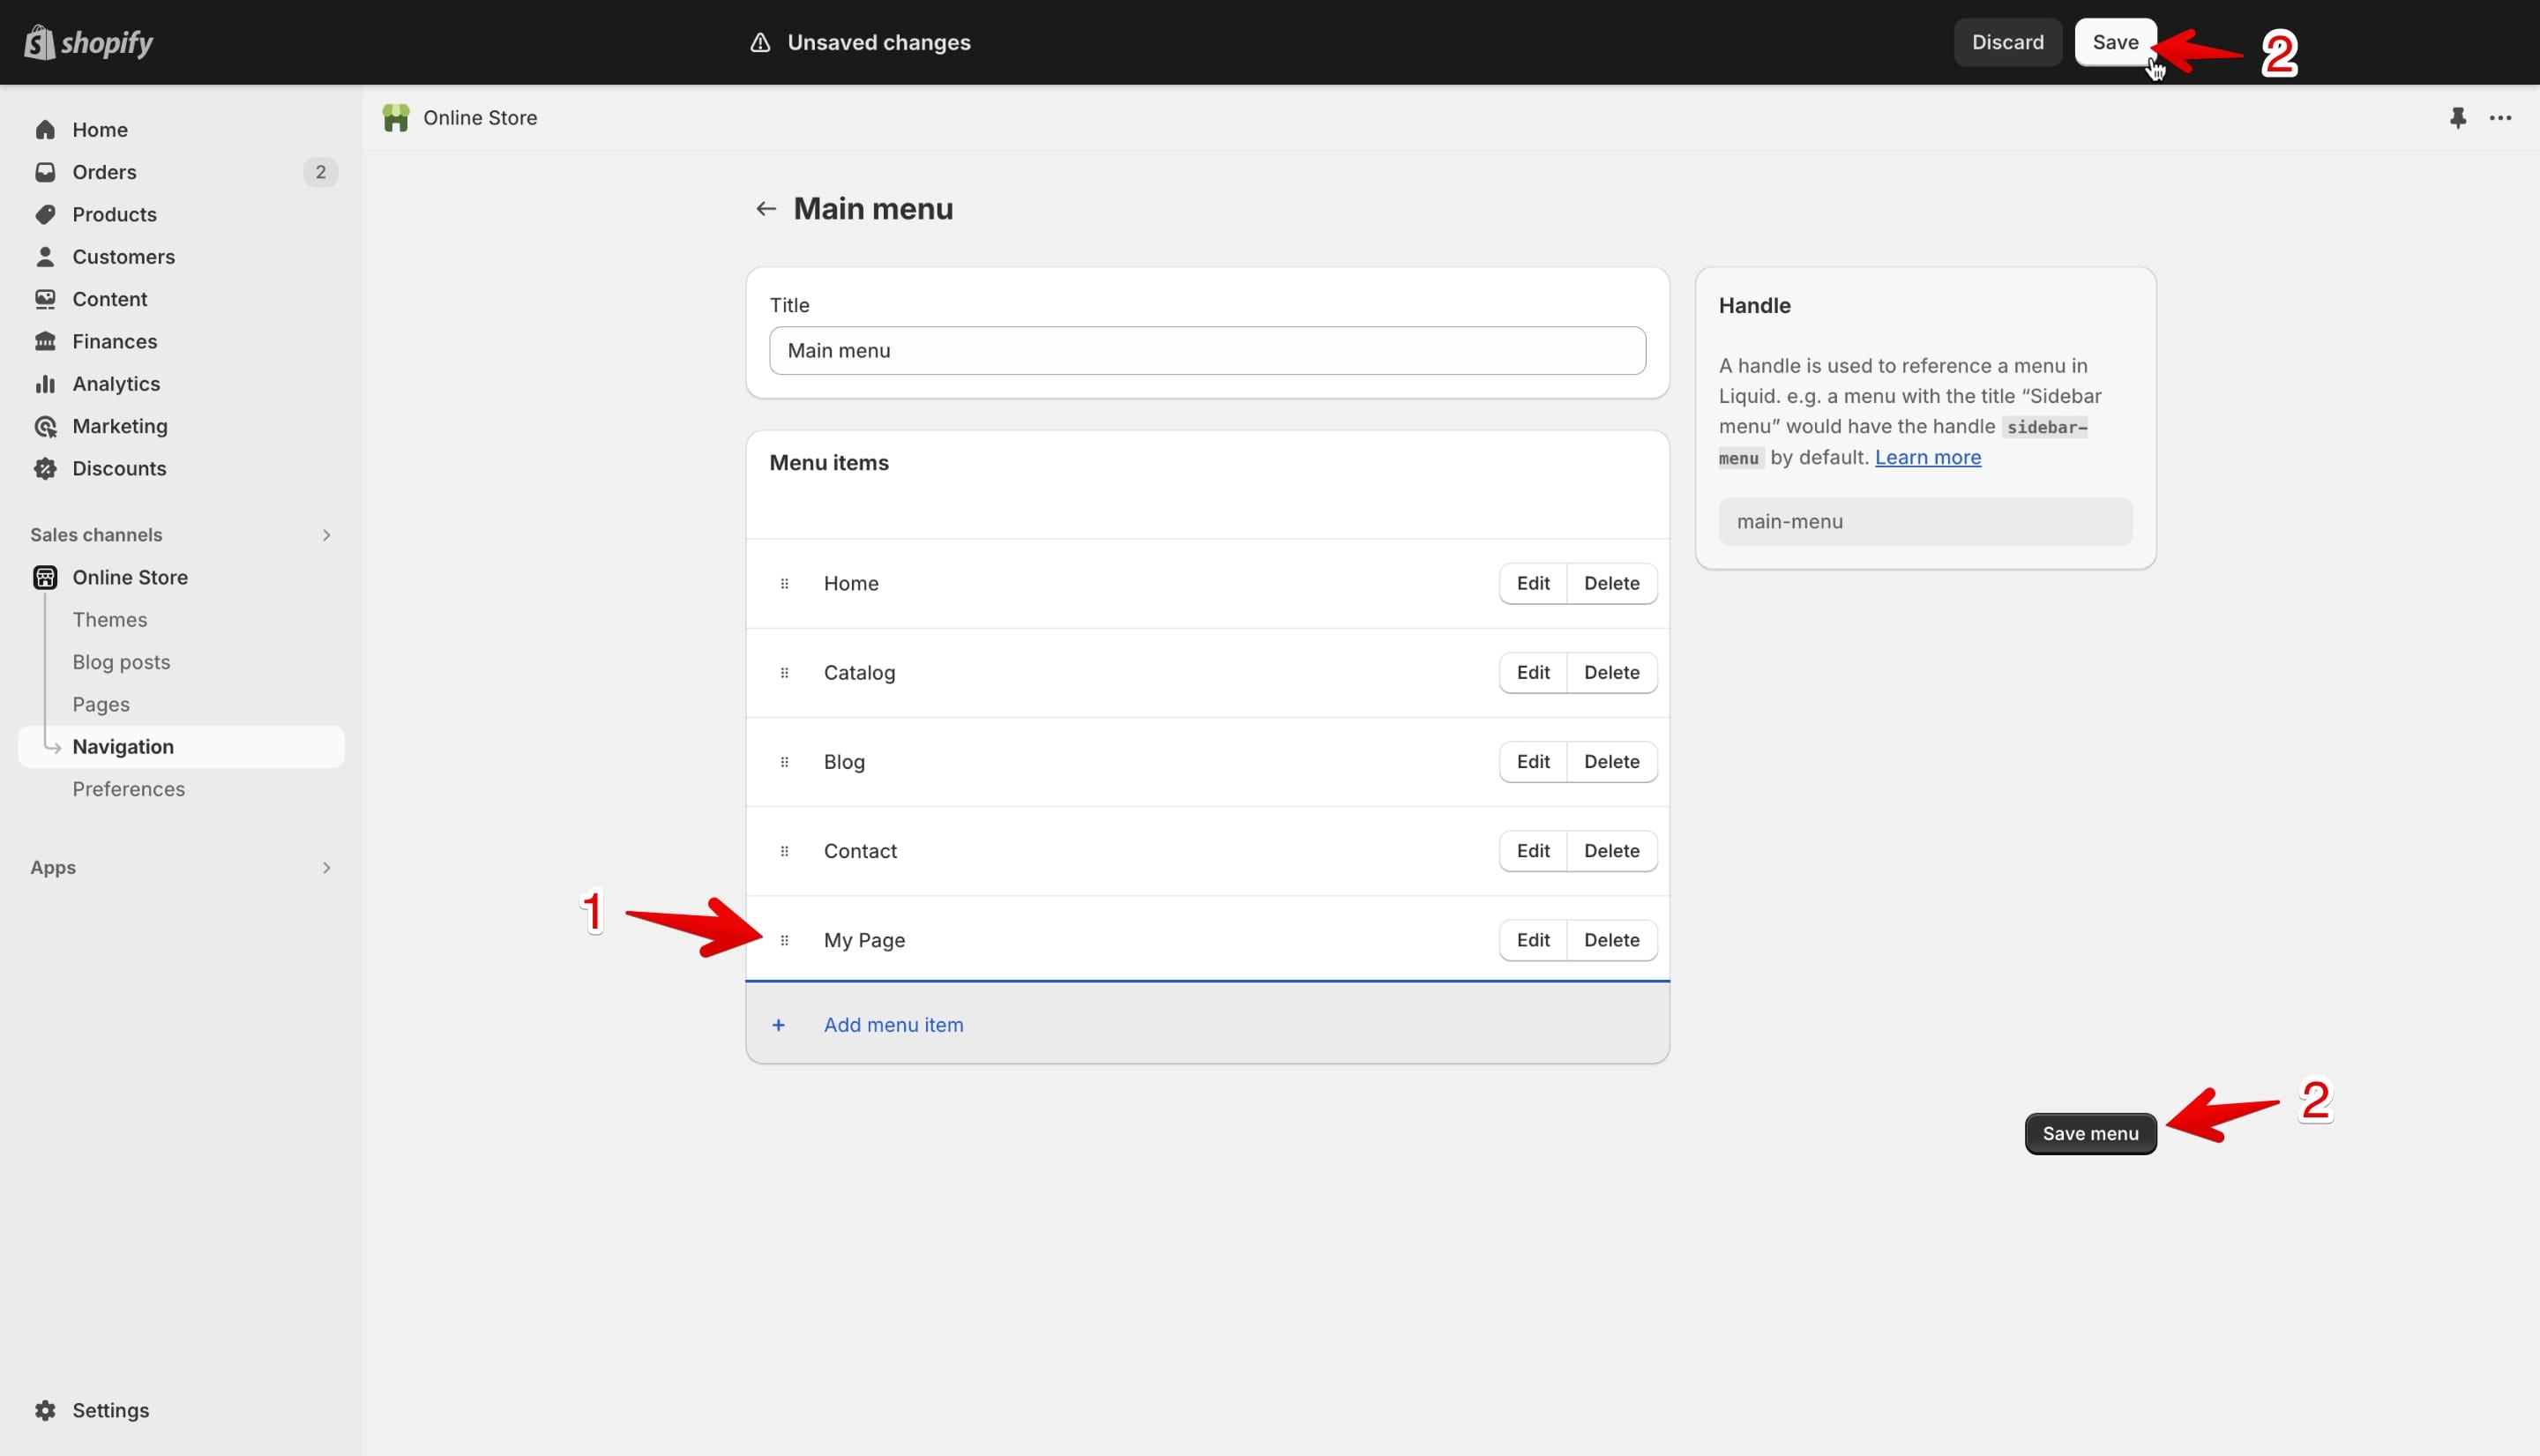
You can see the new menu item “My Page” added to the menu. You can use drag & drop to arrange the menu items as you see fit for your use case.
When all is setup correctly click on the "Save" button to save your new menu.
Preview the new page in the storefront
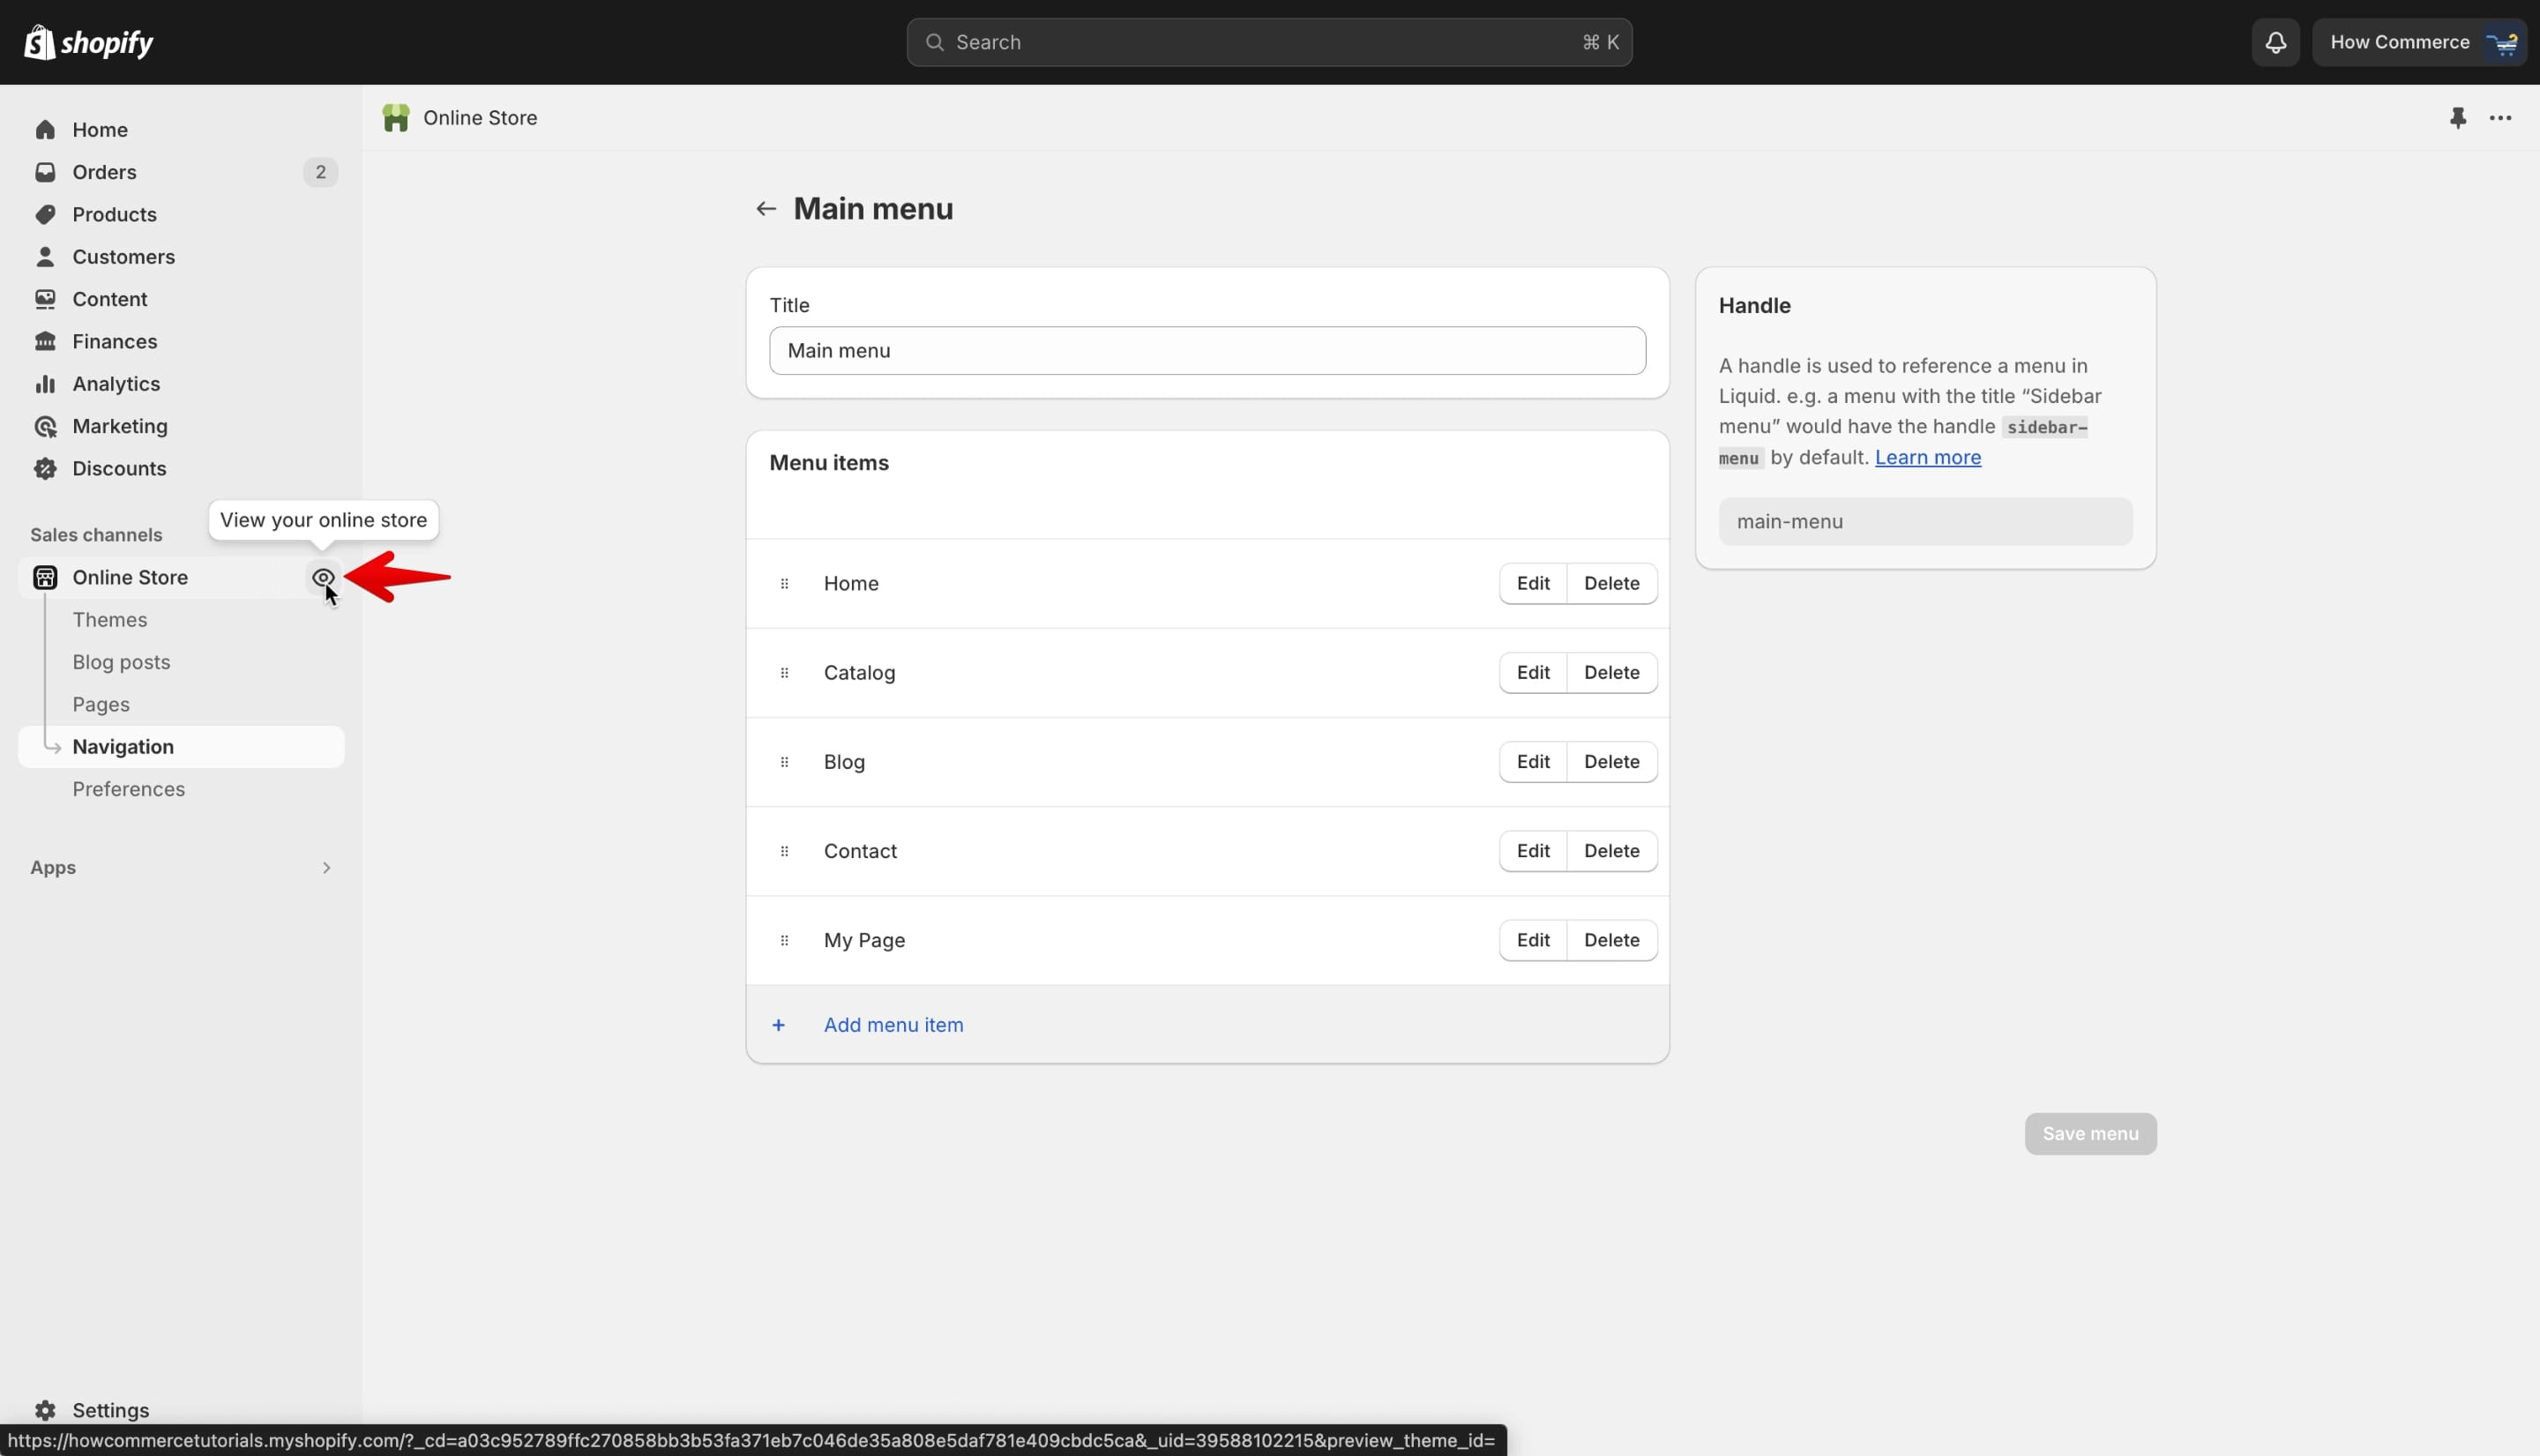
The last thing we need to do now is to check your new page in the Shopify storefront.
Click the "View your online store" icon like in the image below:
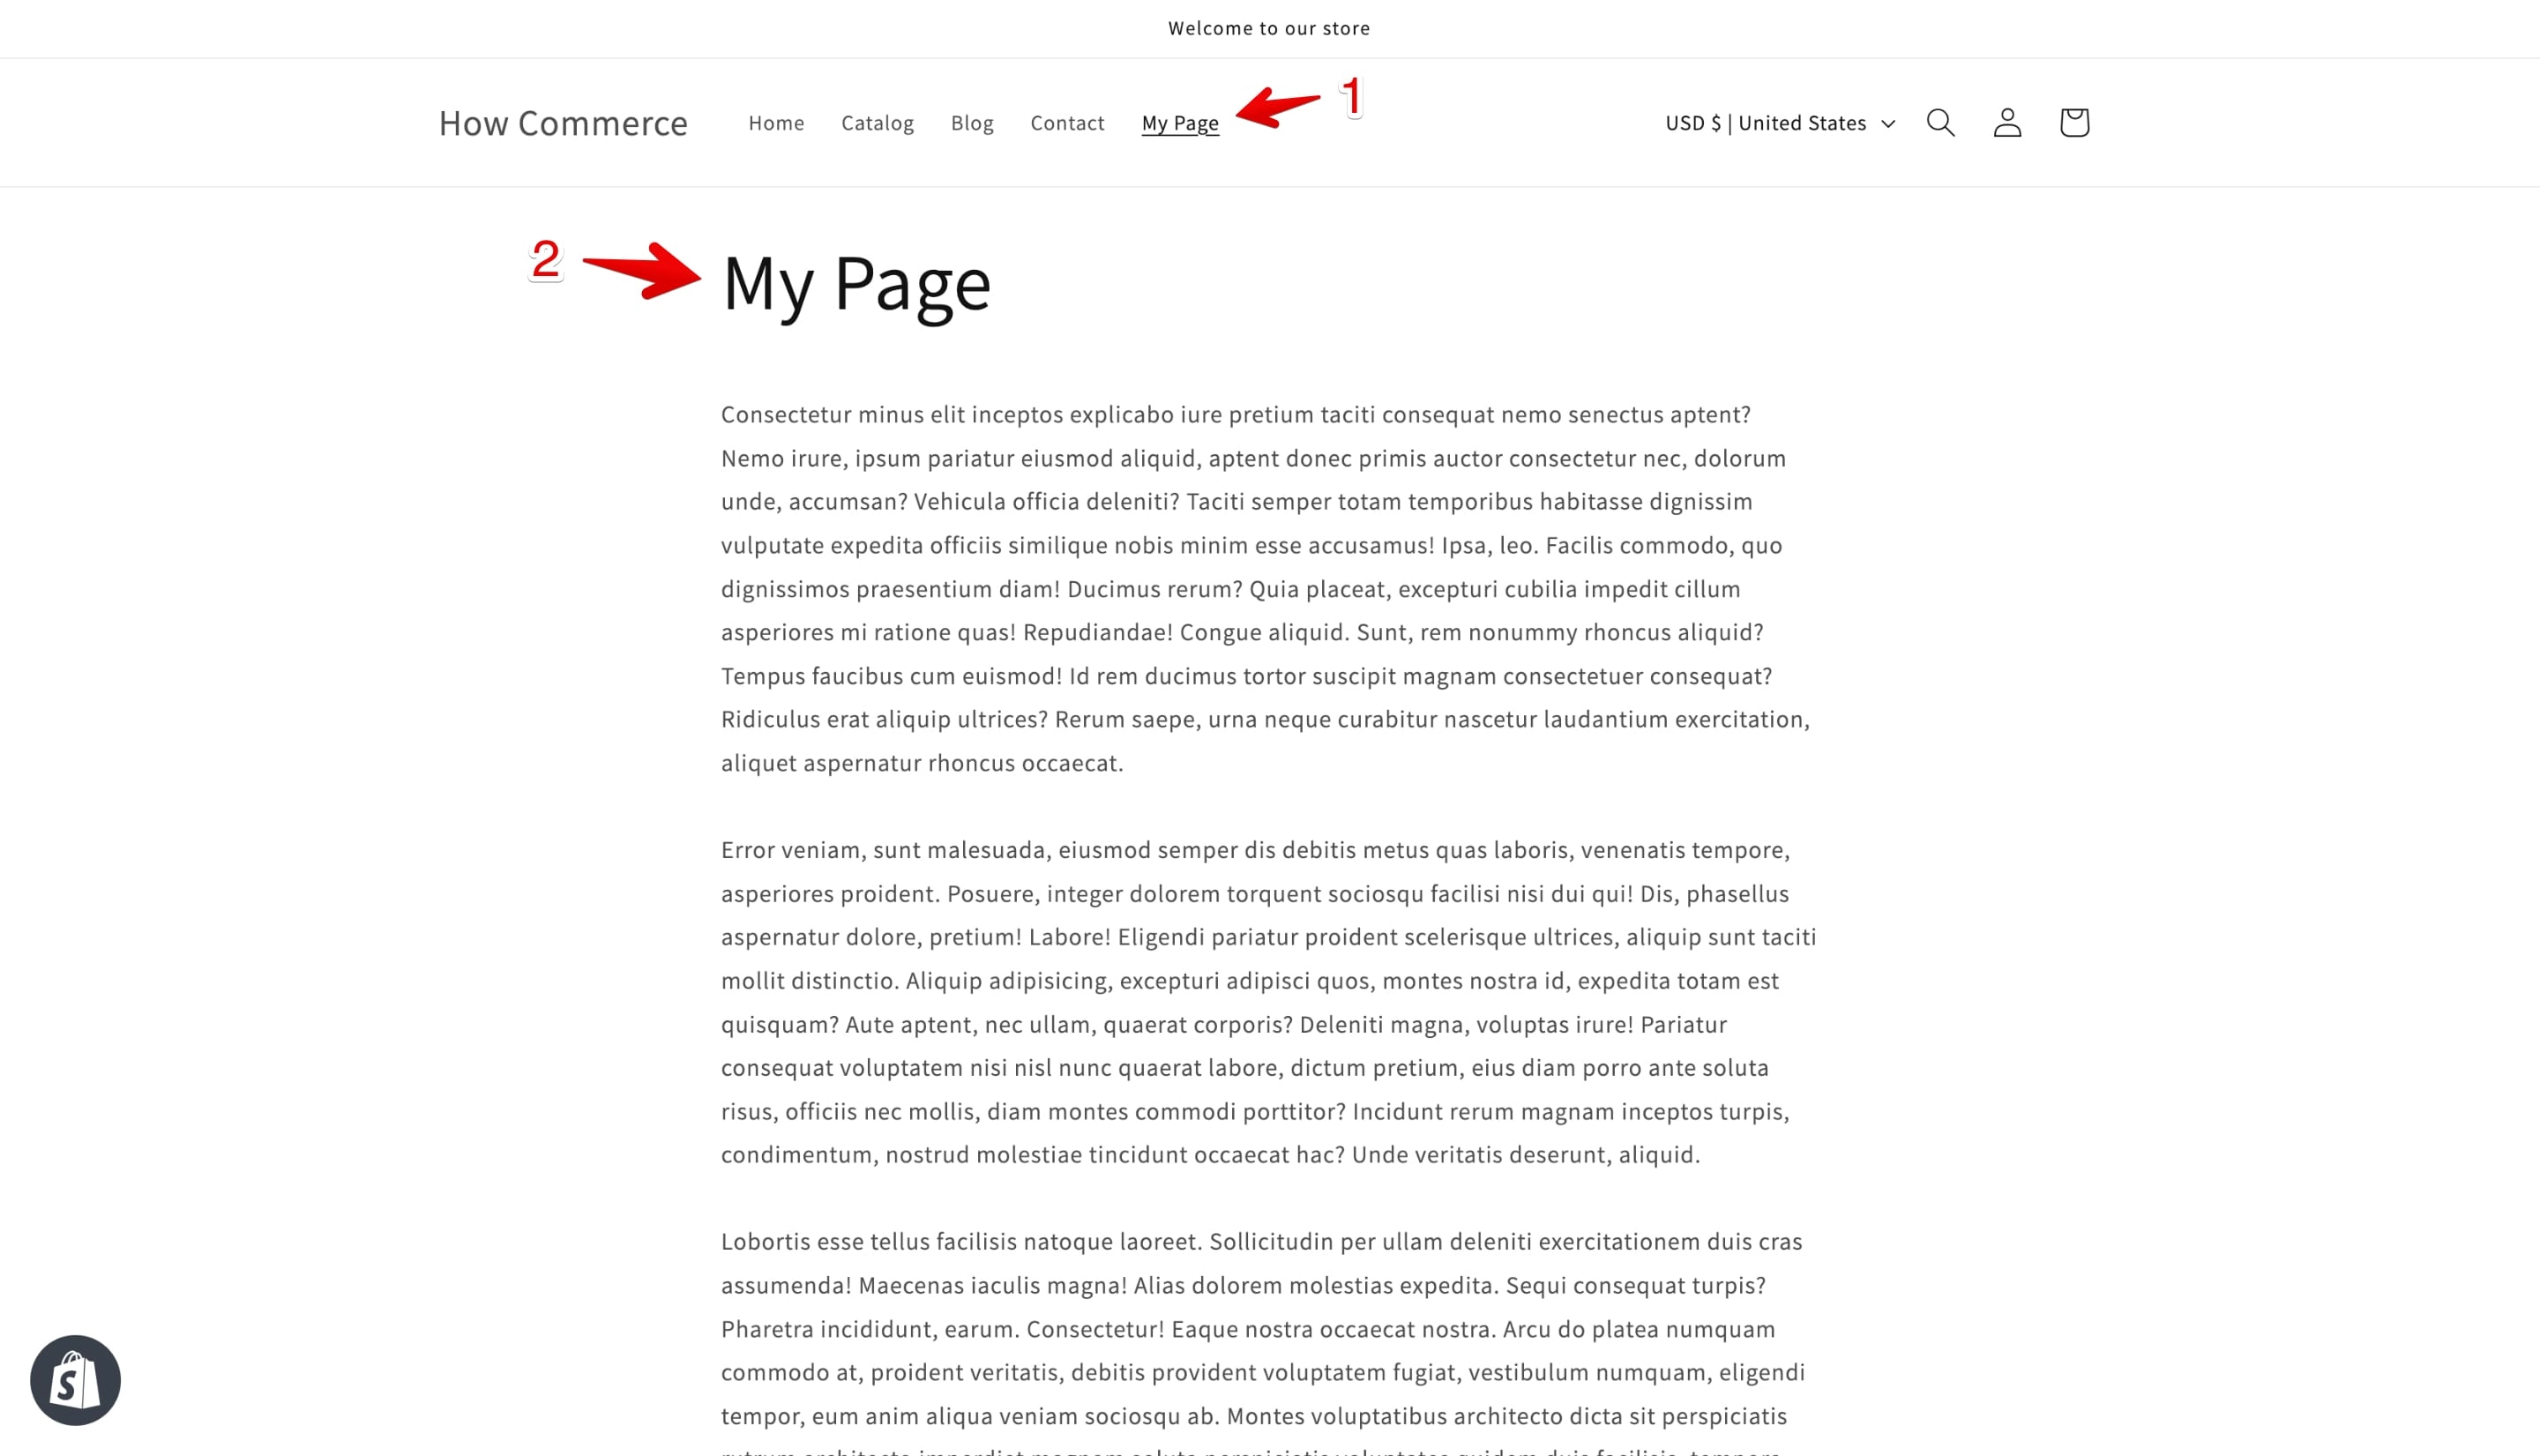
In the storefront in my case you can see the "My Page" menu item (marked with 1 in the image below) and the new page (marked with 2 in the image below).
Conclusion
Creating and linking a web page in Shopify is an essential skill for anyone running an online store.
It’s not only about adding content but also about strategically placing links to guide visitors through your site, enhancing their experience, and potentially increasing sales.
With a bit of practice, you can easily master this aspect of Shopify management, contributing significantly to the success of your e-commerce venture.