

Why use AI-generated images
High-quality product photos are still best shot and edited by a professional, but when you’re testing ideas, building demos, or creating placeholder visuals, AI-generated images can save you a lot of time and money.
With today’s AI tools, you can quickly create free images for your Shopify store that are good enough for mockups, product page drafts, or marketing concept tests, without touching a camera.
In this guide, I’ll show you how to use Shopify's built-in options to create demo-ready visuals in minutes.
The product image is the number one factor for conversion, followed by the product description.
Customers can’t touch or test your product when the experience is digital, they can only see it, read about it, and that’s almost it.
Make sure you have top-notch professional images, or else you’ll kill your product and store before you even start.
Since most of the premium or free Shopify themes you purchase do not come with the demo images you see in the developer’s demo, generating demo images with Shopify’s AI is a great solution.
Without images, the theme will look empty, just some sections and blocks.
Many of you might be frustrated with theme developers because premium themes don’t come with those beautiful demo images.
Here’s why:
The majority of theme developers do not have the licenses to sub-license those images to you. Either the image owner doesn’t allow sublicensing, or it is prohibitively expensive. If that cost were passed down to the customer, your theme could cost 10x more.
Adding demo images will help you visualize how your store will look once the theme is installed. This is one practical use case.
Another scenario is when you need images for blog posts.
Some images may not need to be specific to your products, those can be generated by Shopify’s AI and used on your blog.
Generate images with AI for products
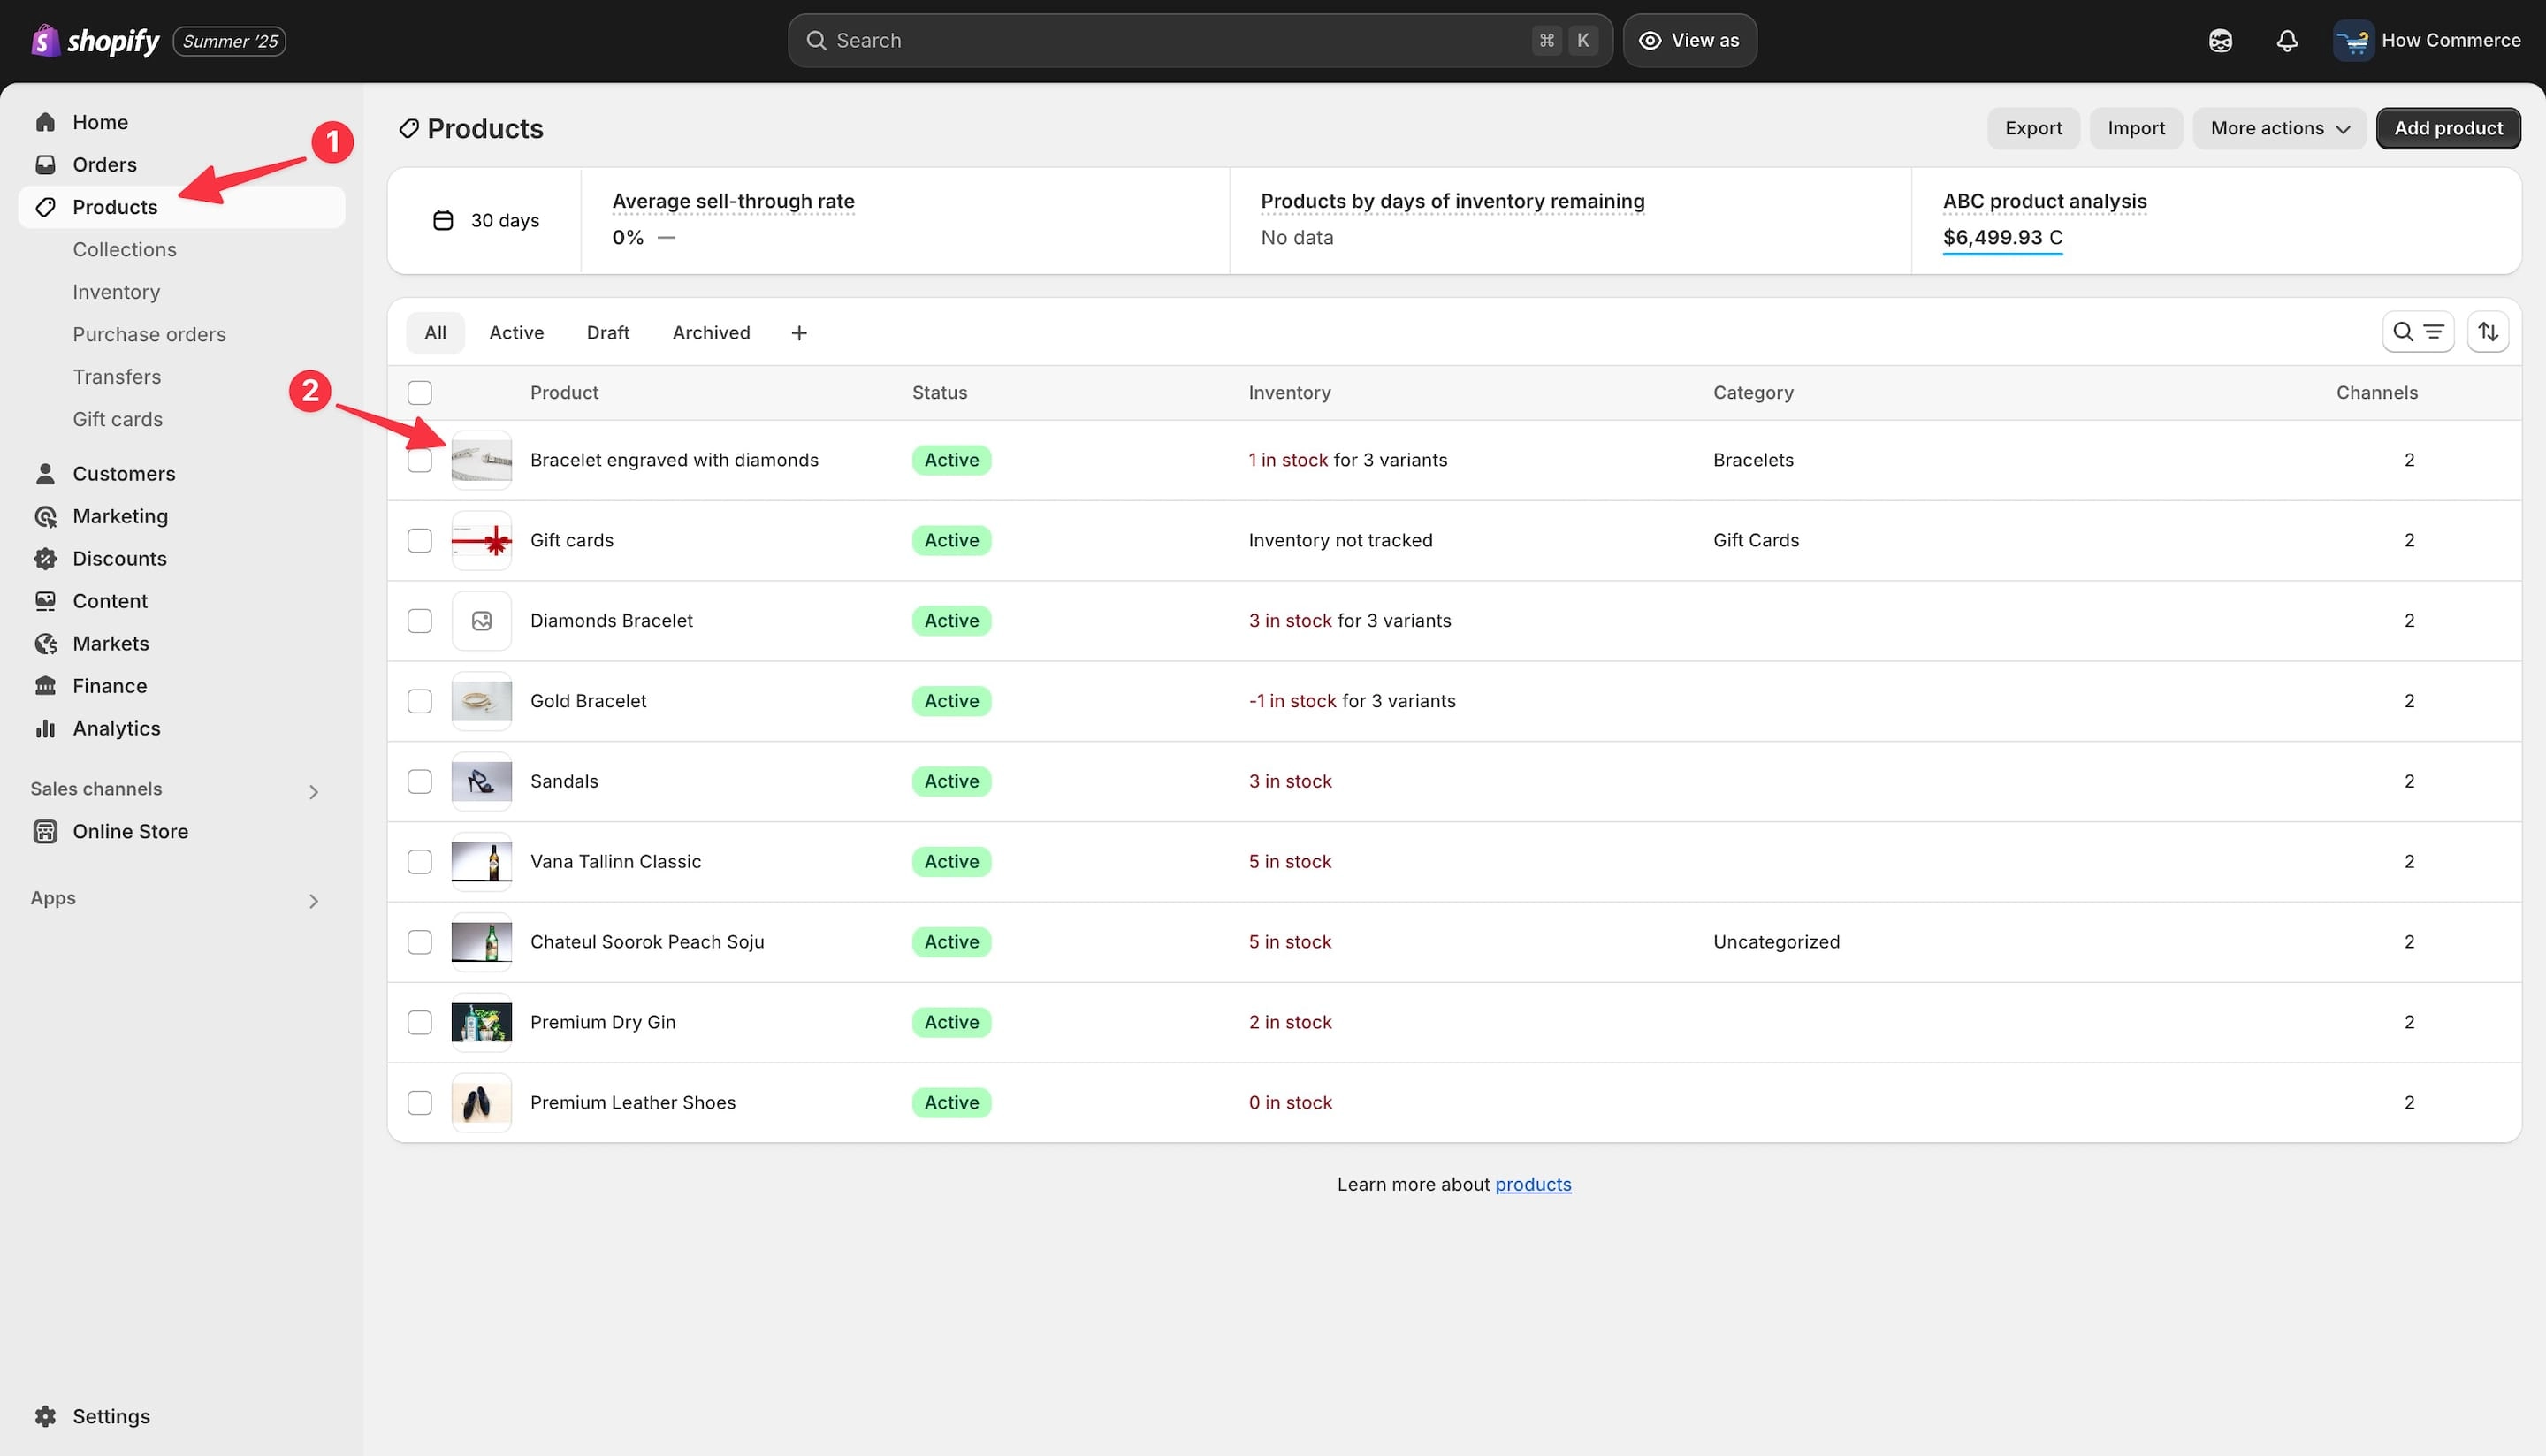
Go to “Products” (marked with 1 in the image below) and select a product to open (marked with 2 in the image below).
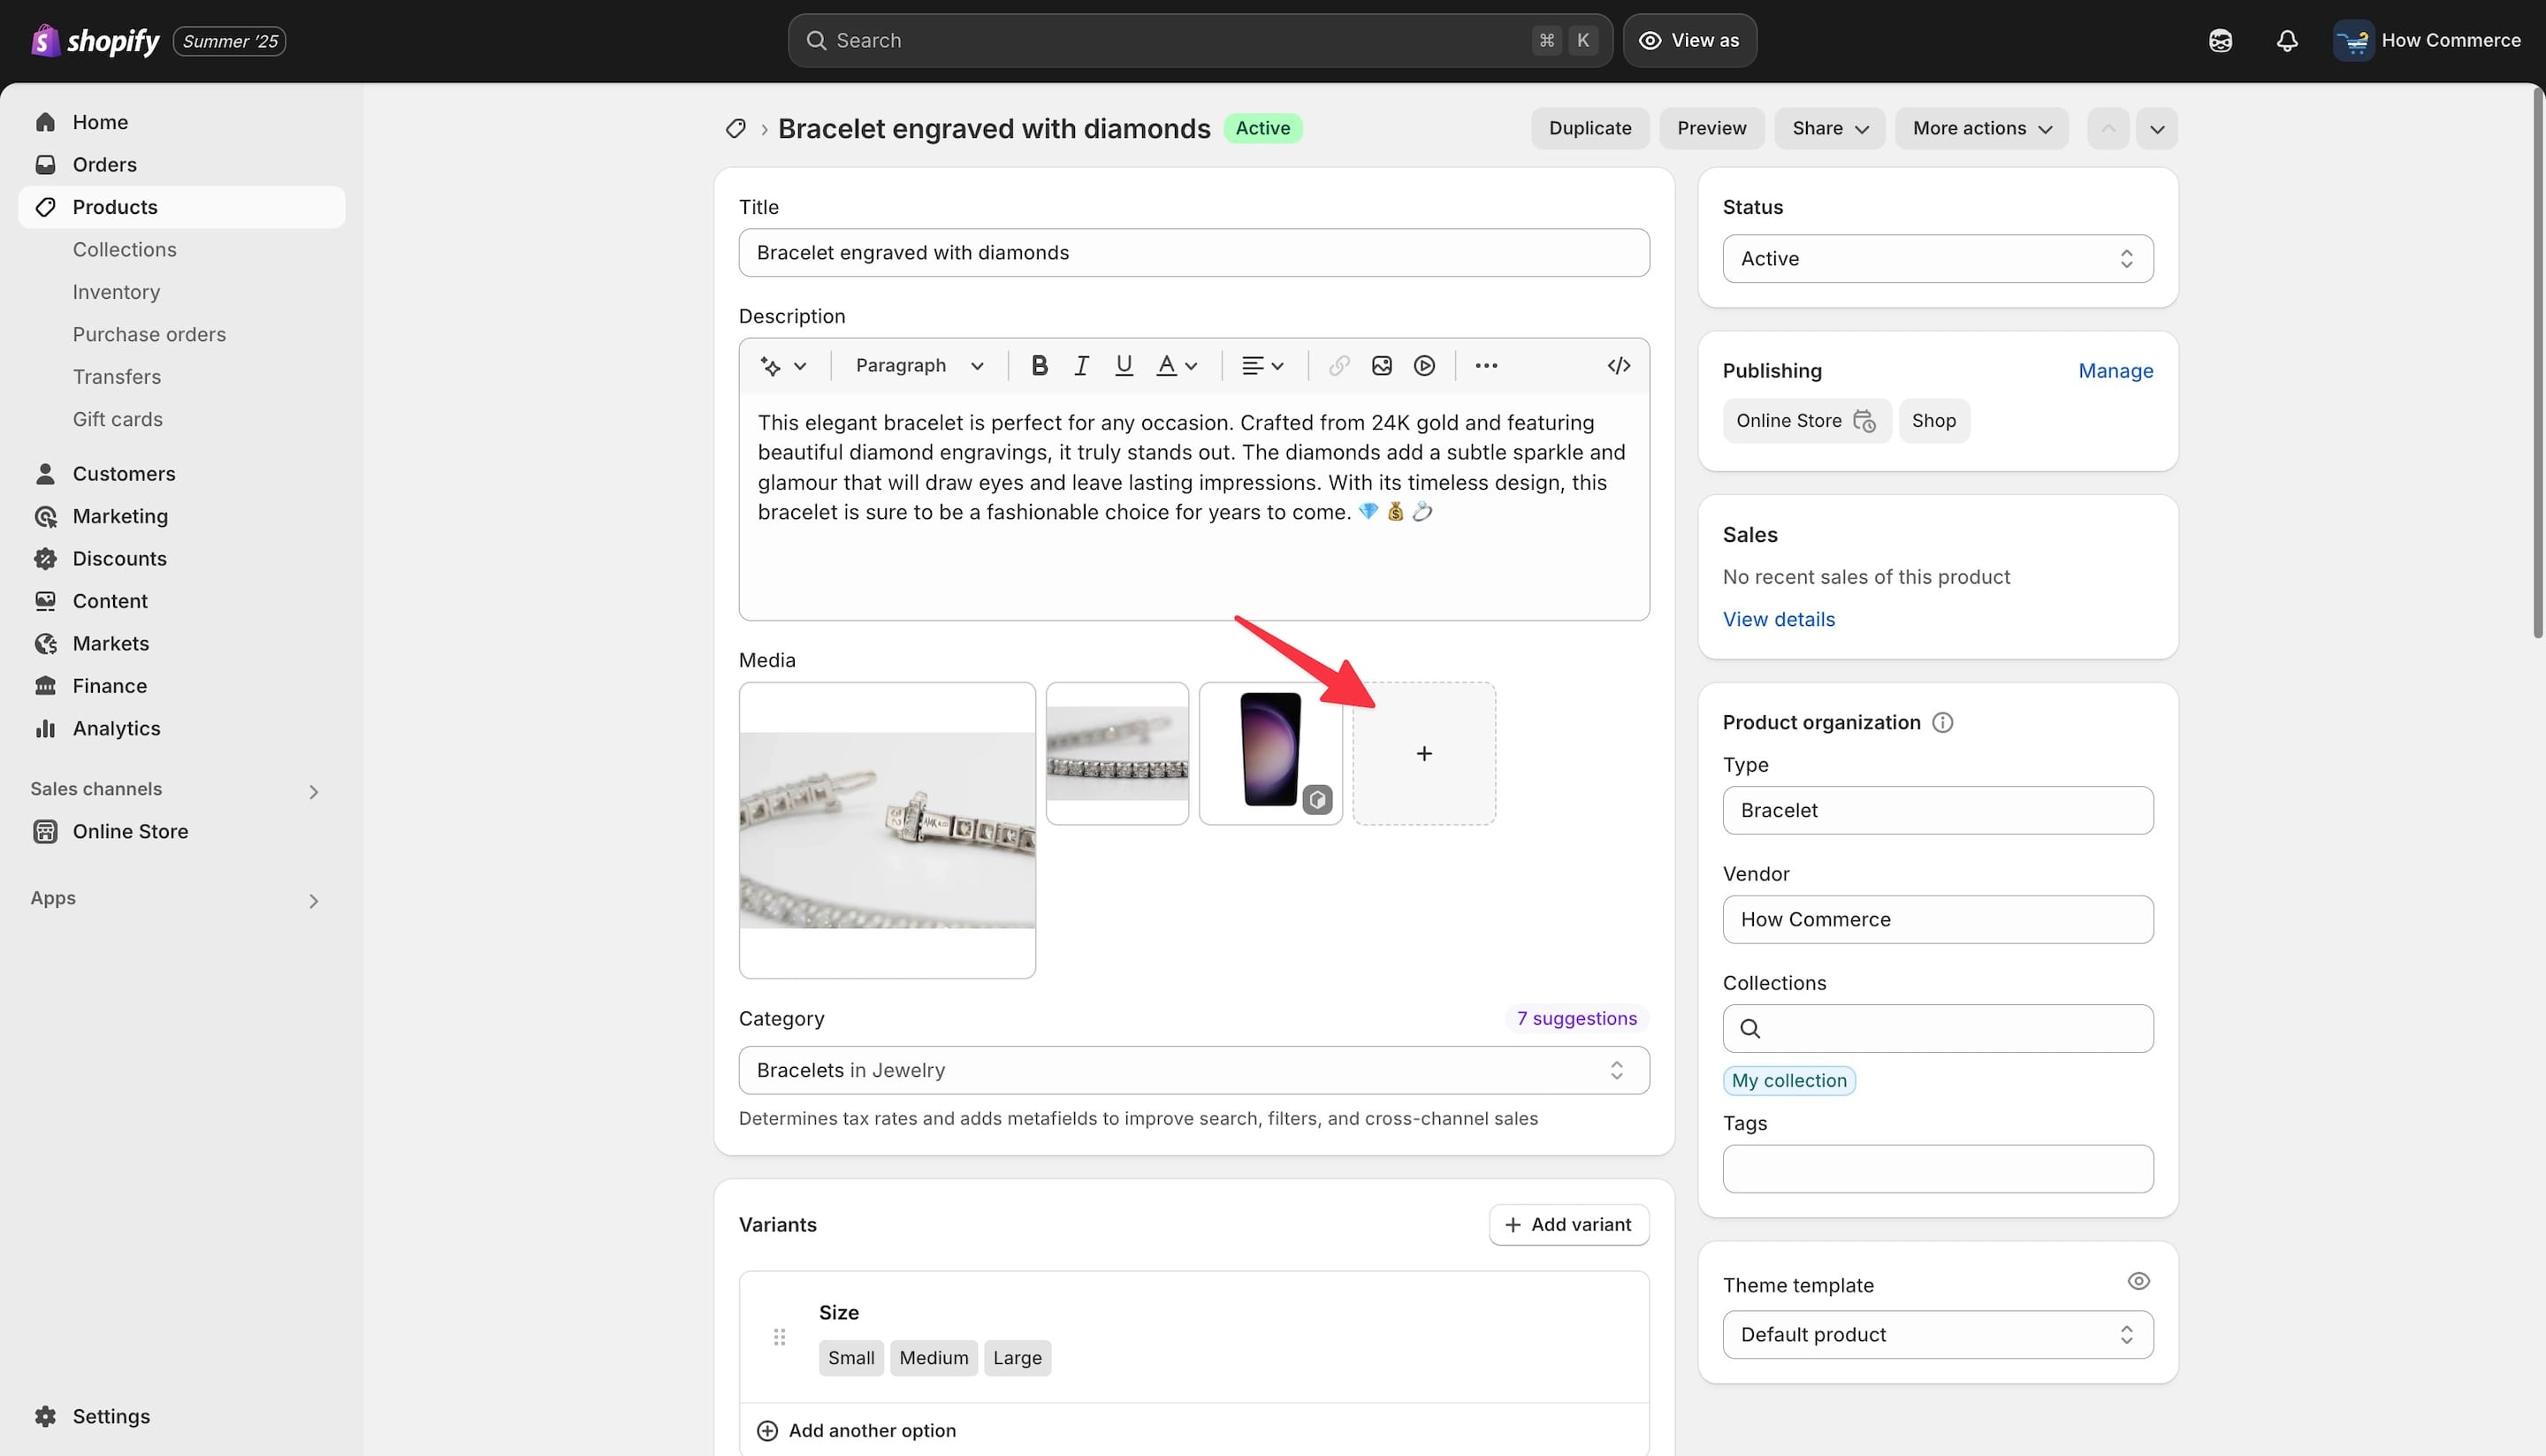
In the “Media” section, click the plus sign to add a new image, as shown in the image below:
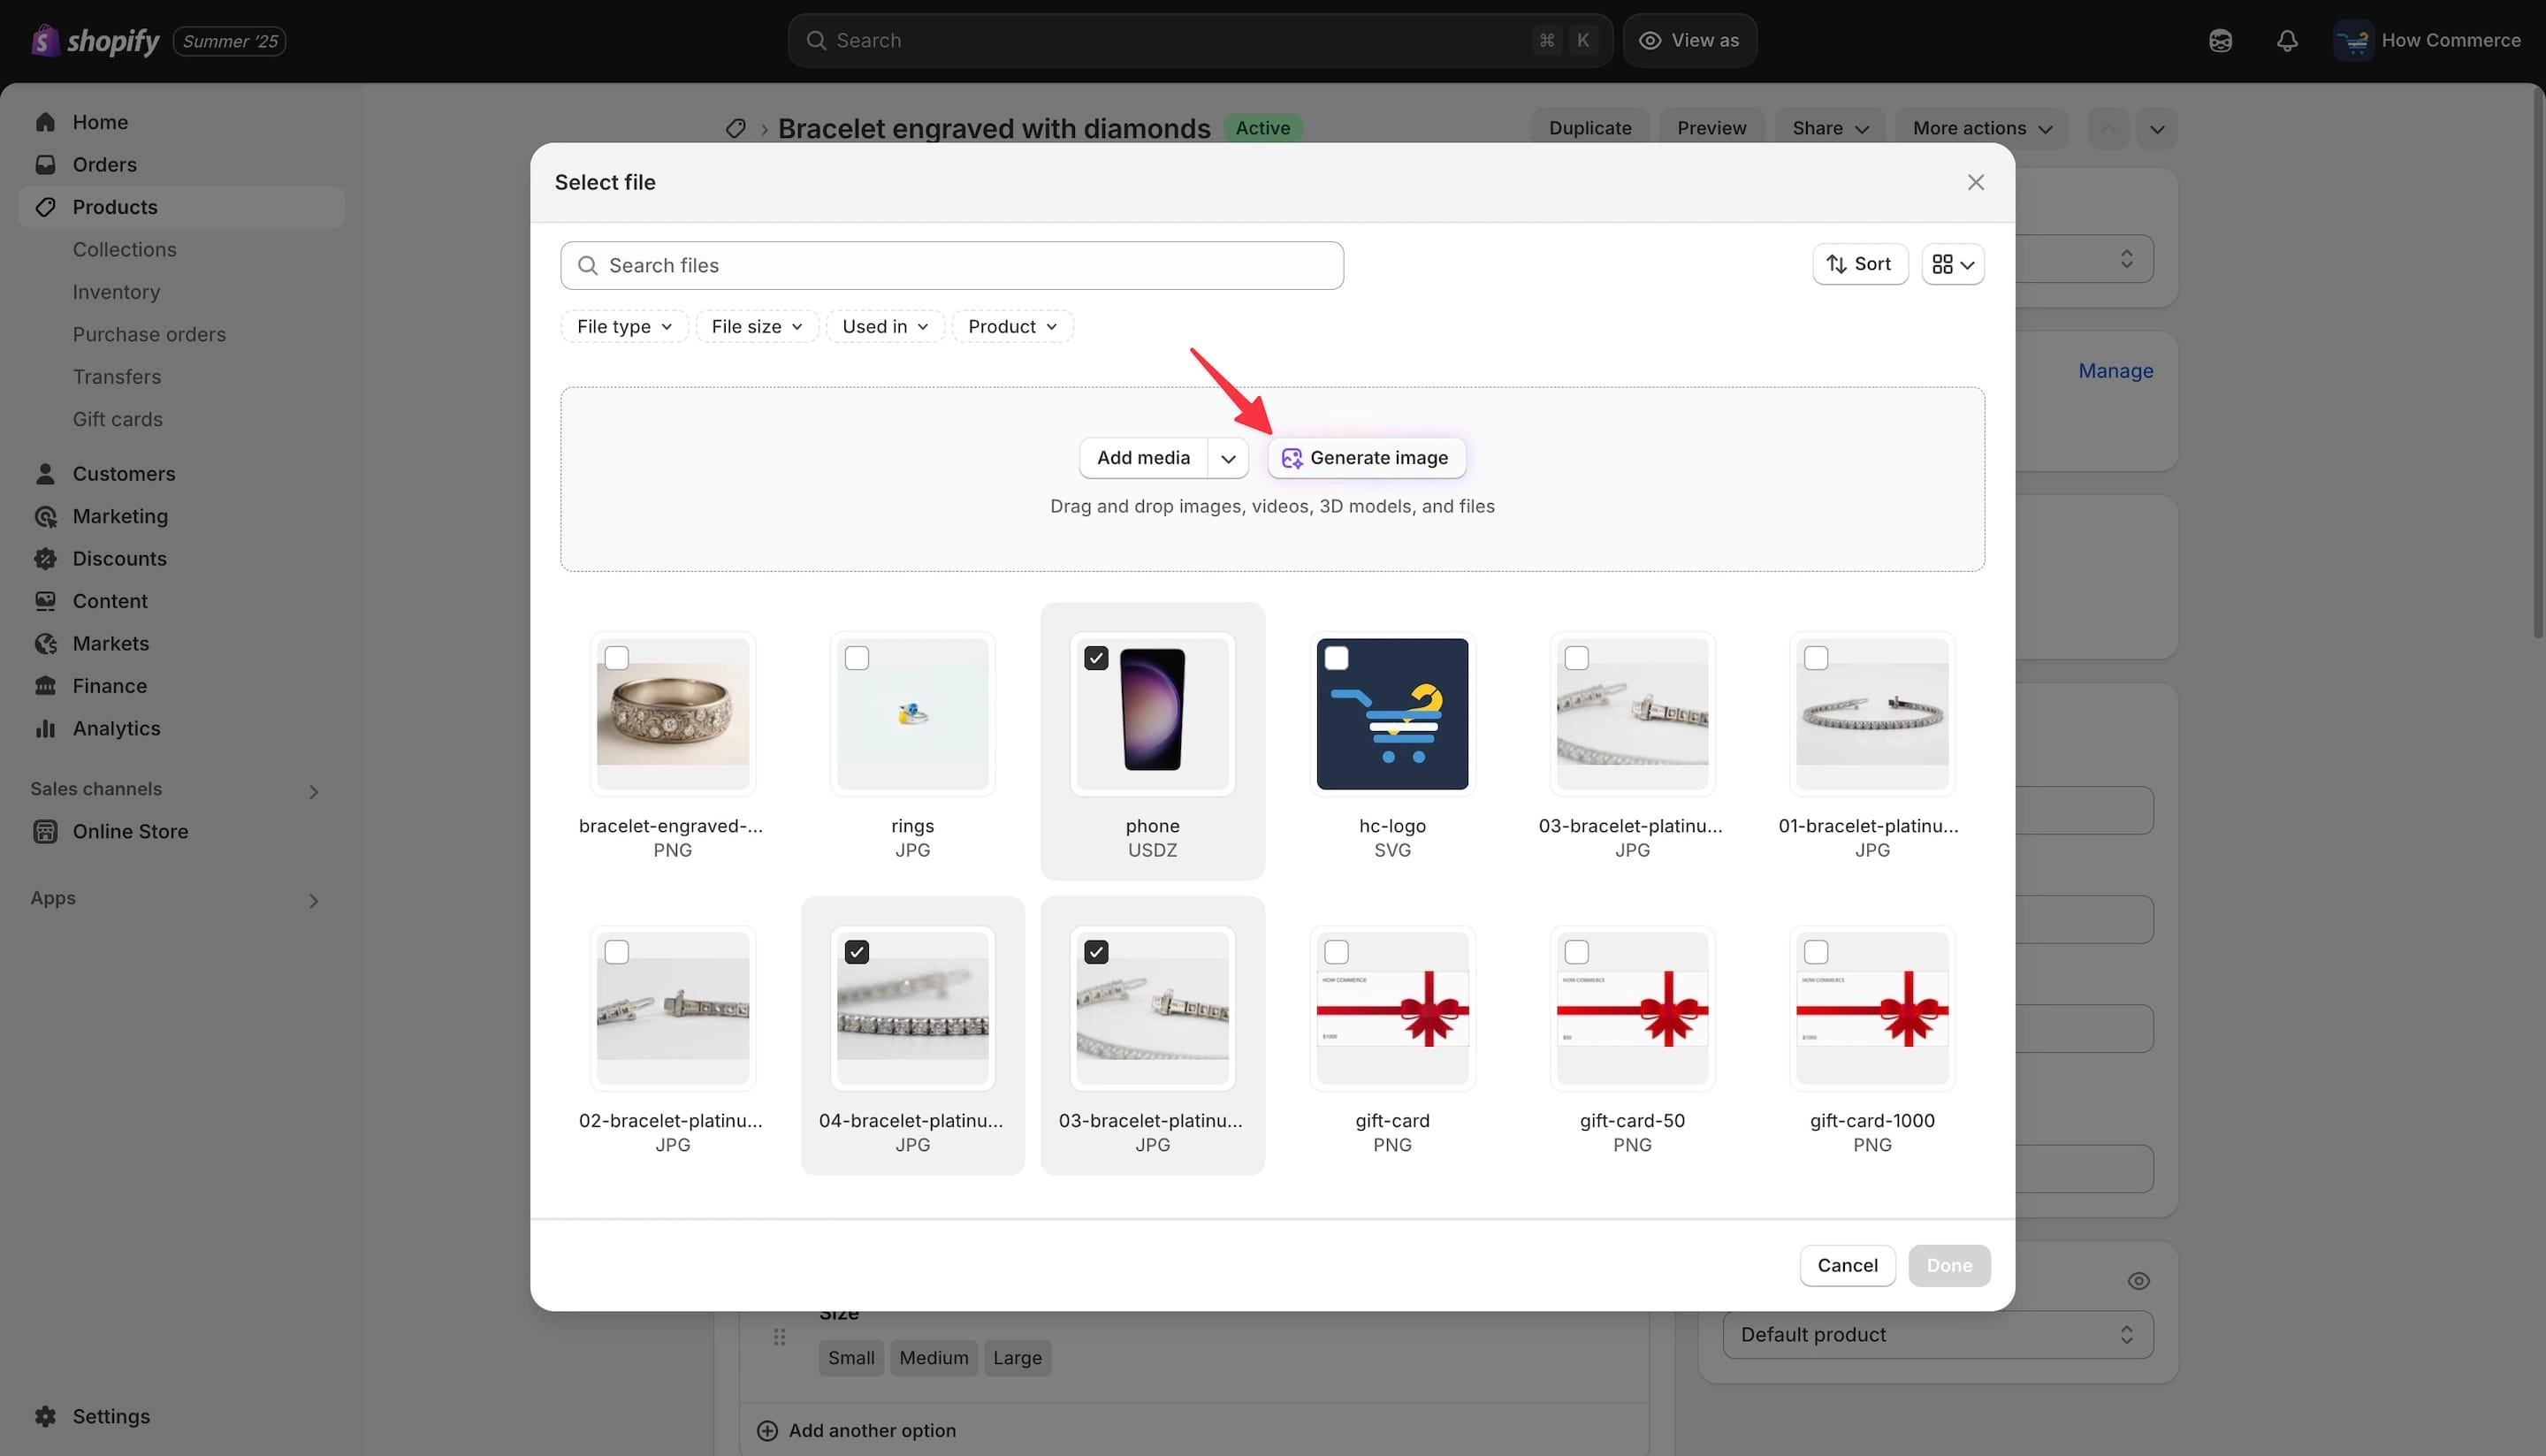
Click the “Generate image” button shown in the image below:
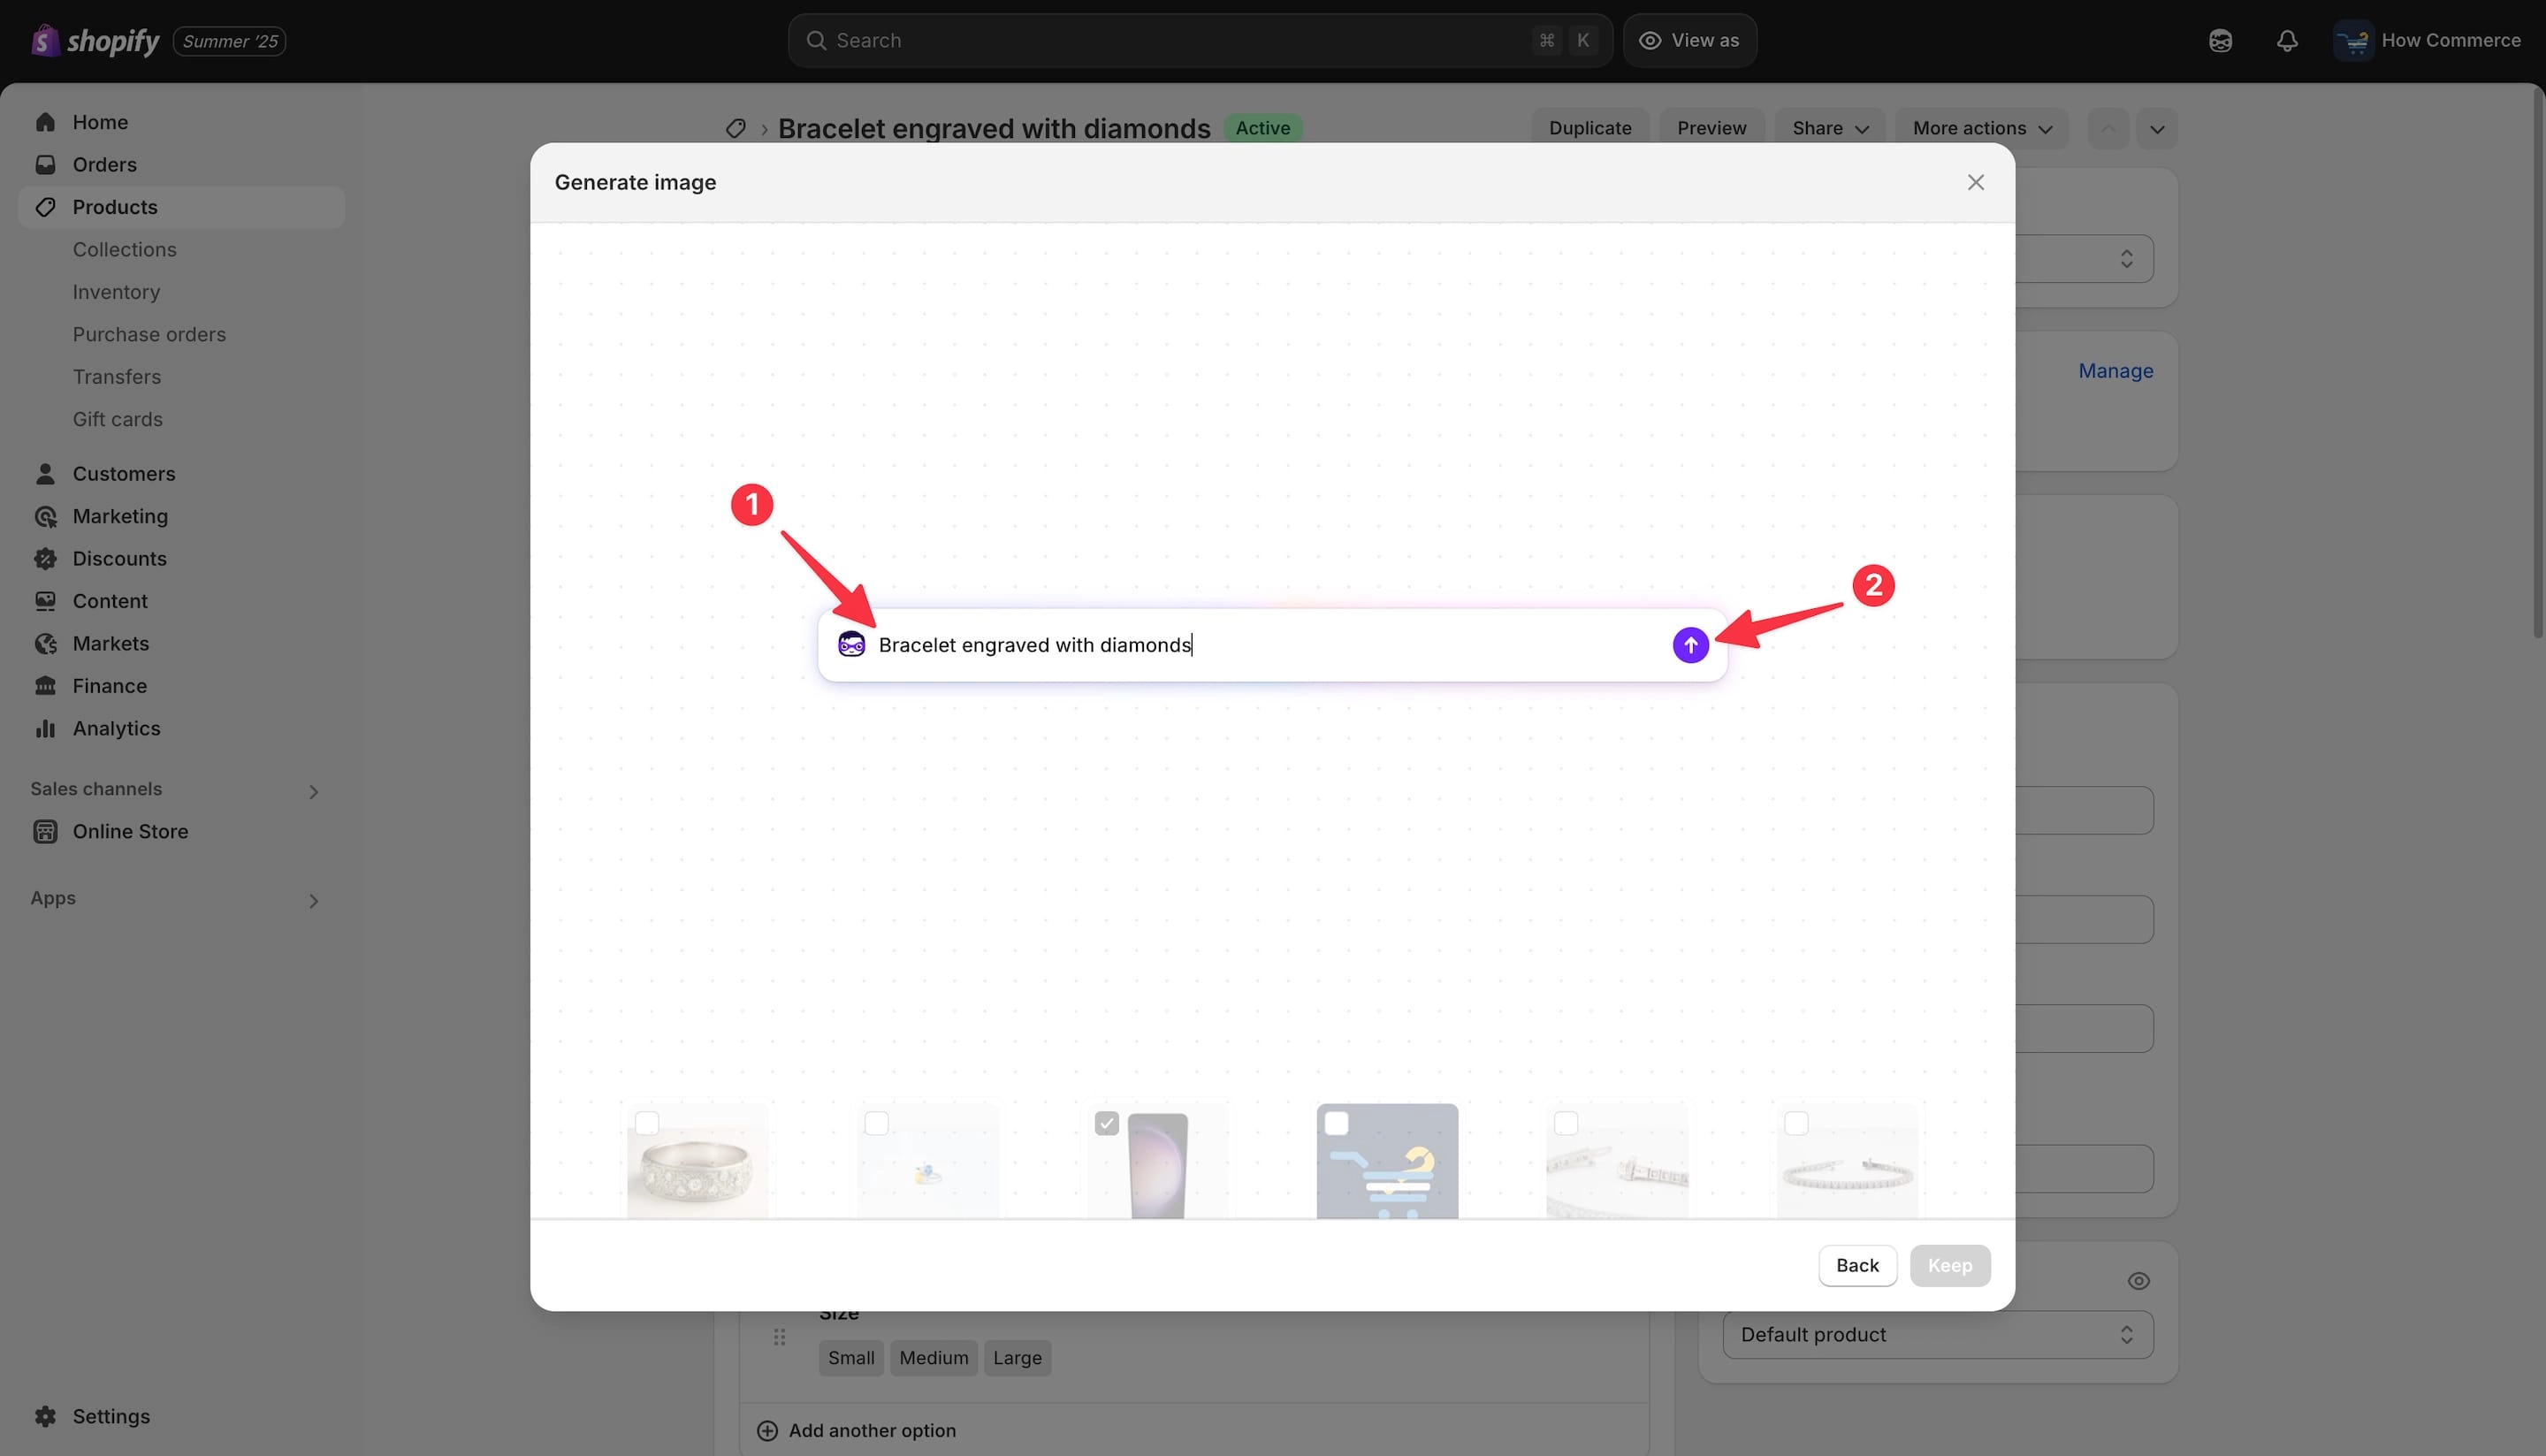
Prepare and type your prompt. Make sure it is very specific and as detailed as possible if you want the generated image to match your needs closely.
For my example, I’ll use a simple prompt: “Bracelet engraved with diamonds” (marked with 1 in the image below).
Even if you do not have an existing image, using the same prompt will not produce an identical result every time. I have tested the same prompt multiple times, and the image was slightly different each time.
Once your prompt is complete, click the “Send” button (marked with 2 in the image below).
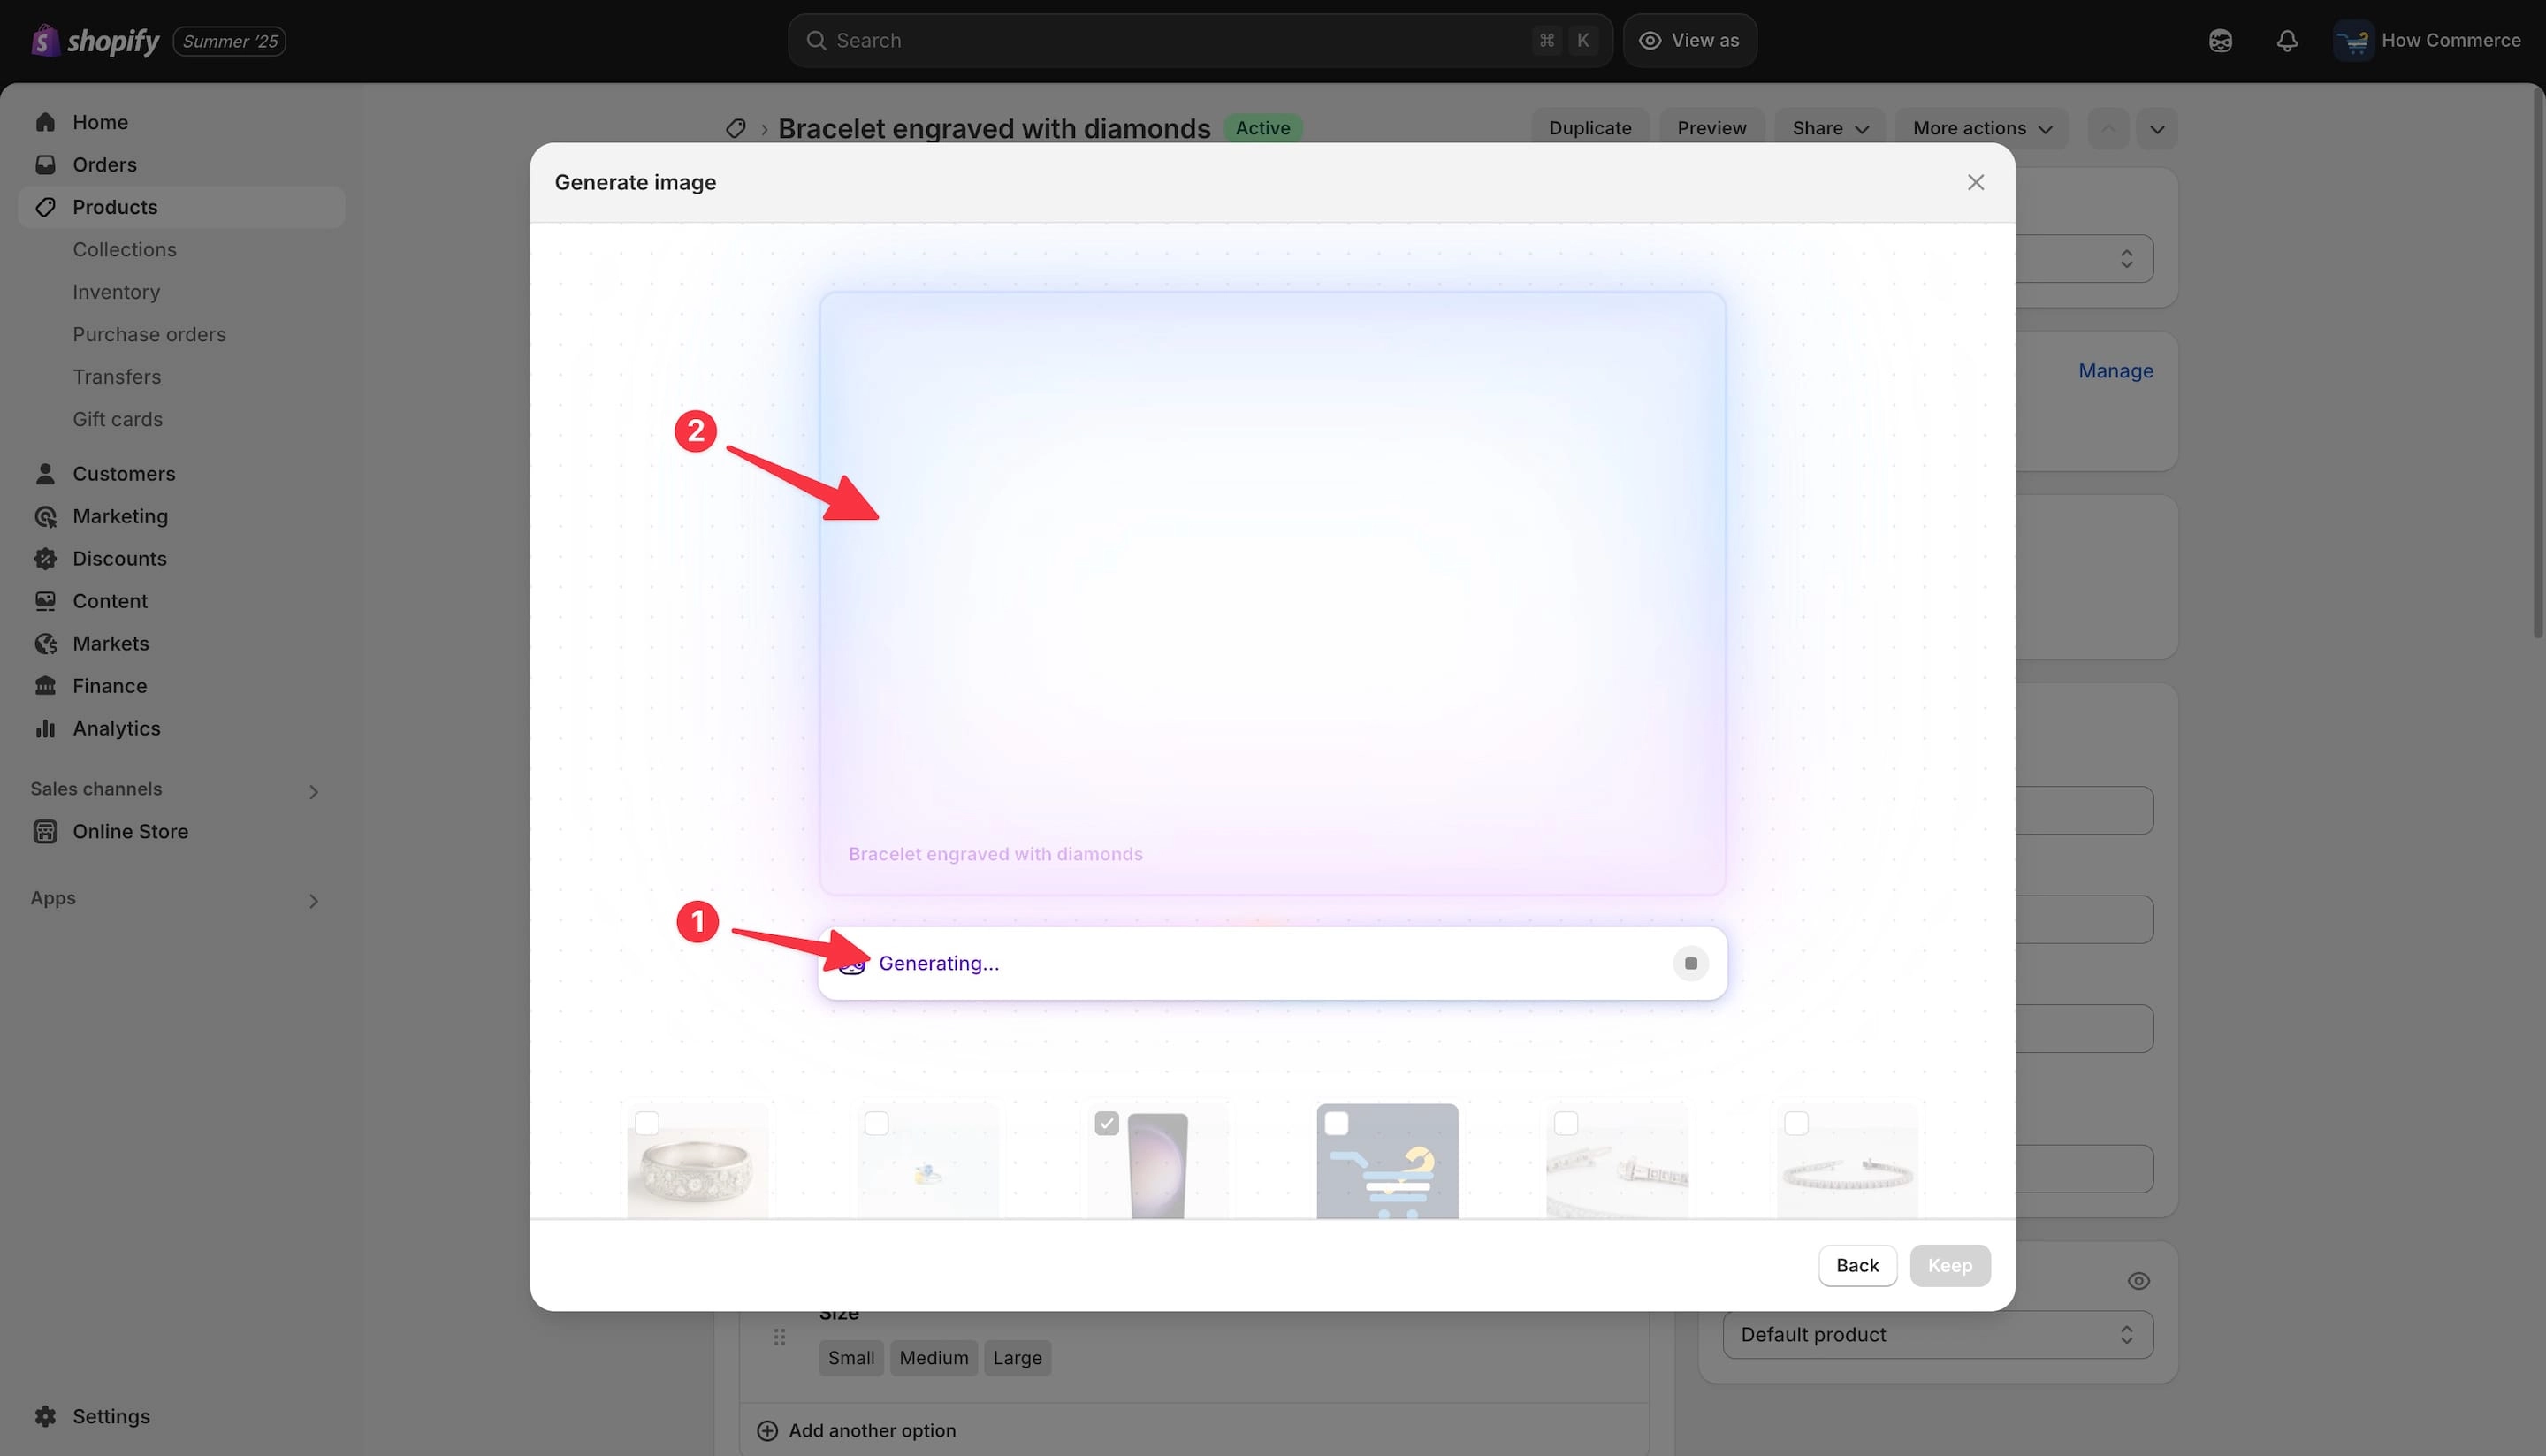
After that, Shopify AI will begin generating the image and display a message (marked with 1 in the image below).
A placeholder will appear while the image is being generated (marked with 2 in the image below).
The process can take anywhere from a few seconds to a few minutes, so patience is required.
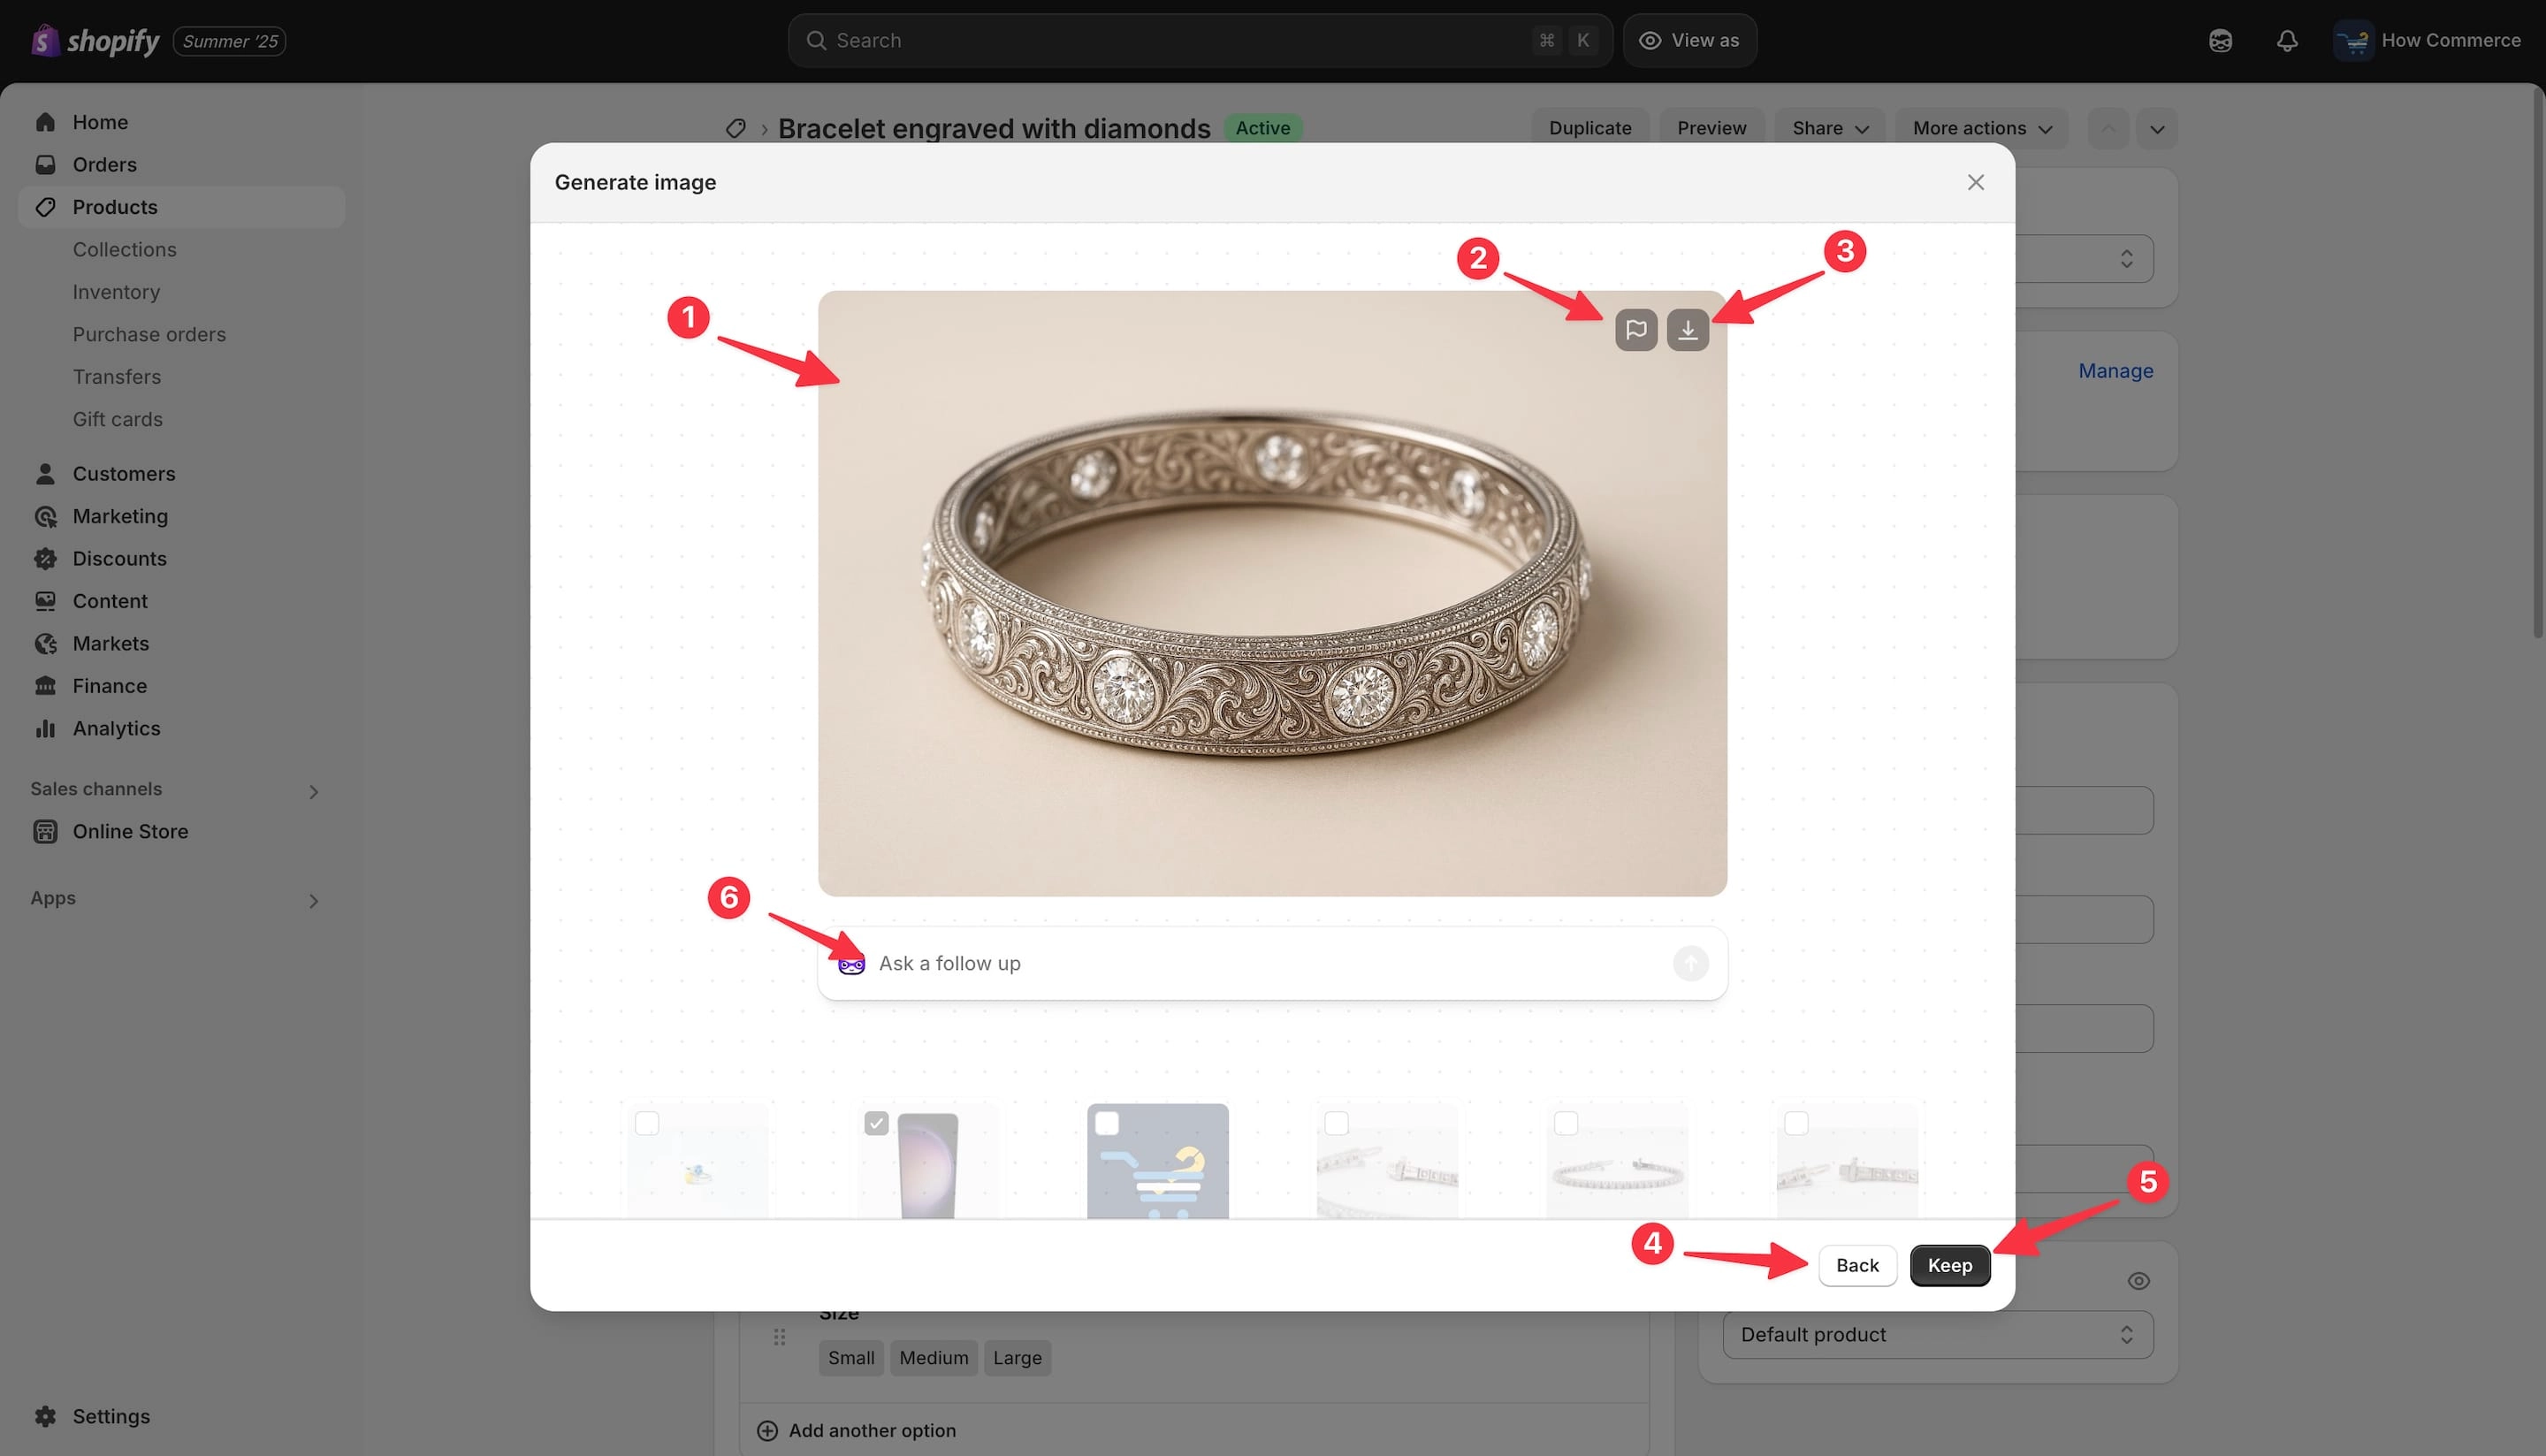
After the image is generated (marked with 1 in the image below), you’ll have several options:
“Flag” (marked with 2) - Report the image to Shopify.
“Download” (marked with 3) - Save the image to your local computer.
“Back” (marked with 4) - Cancel the operation and delete the generated image. Be careful: once you click this, the image will be permanently deleted and cannot be recovered.
“Keep” (marked with 5) - Store the file in your store’s files.
You also have the option to refine the image with follow-up prompts (marked with 6). However, in my experience, this generates a completely different image rather than improving the original prompt.
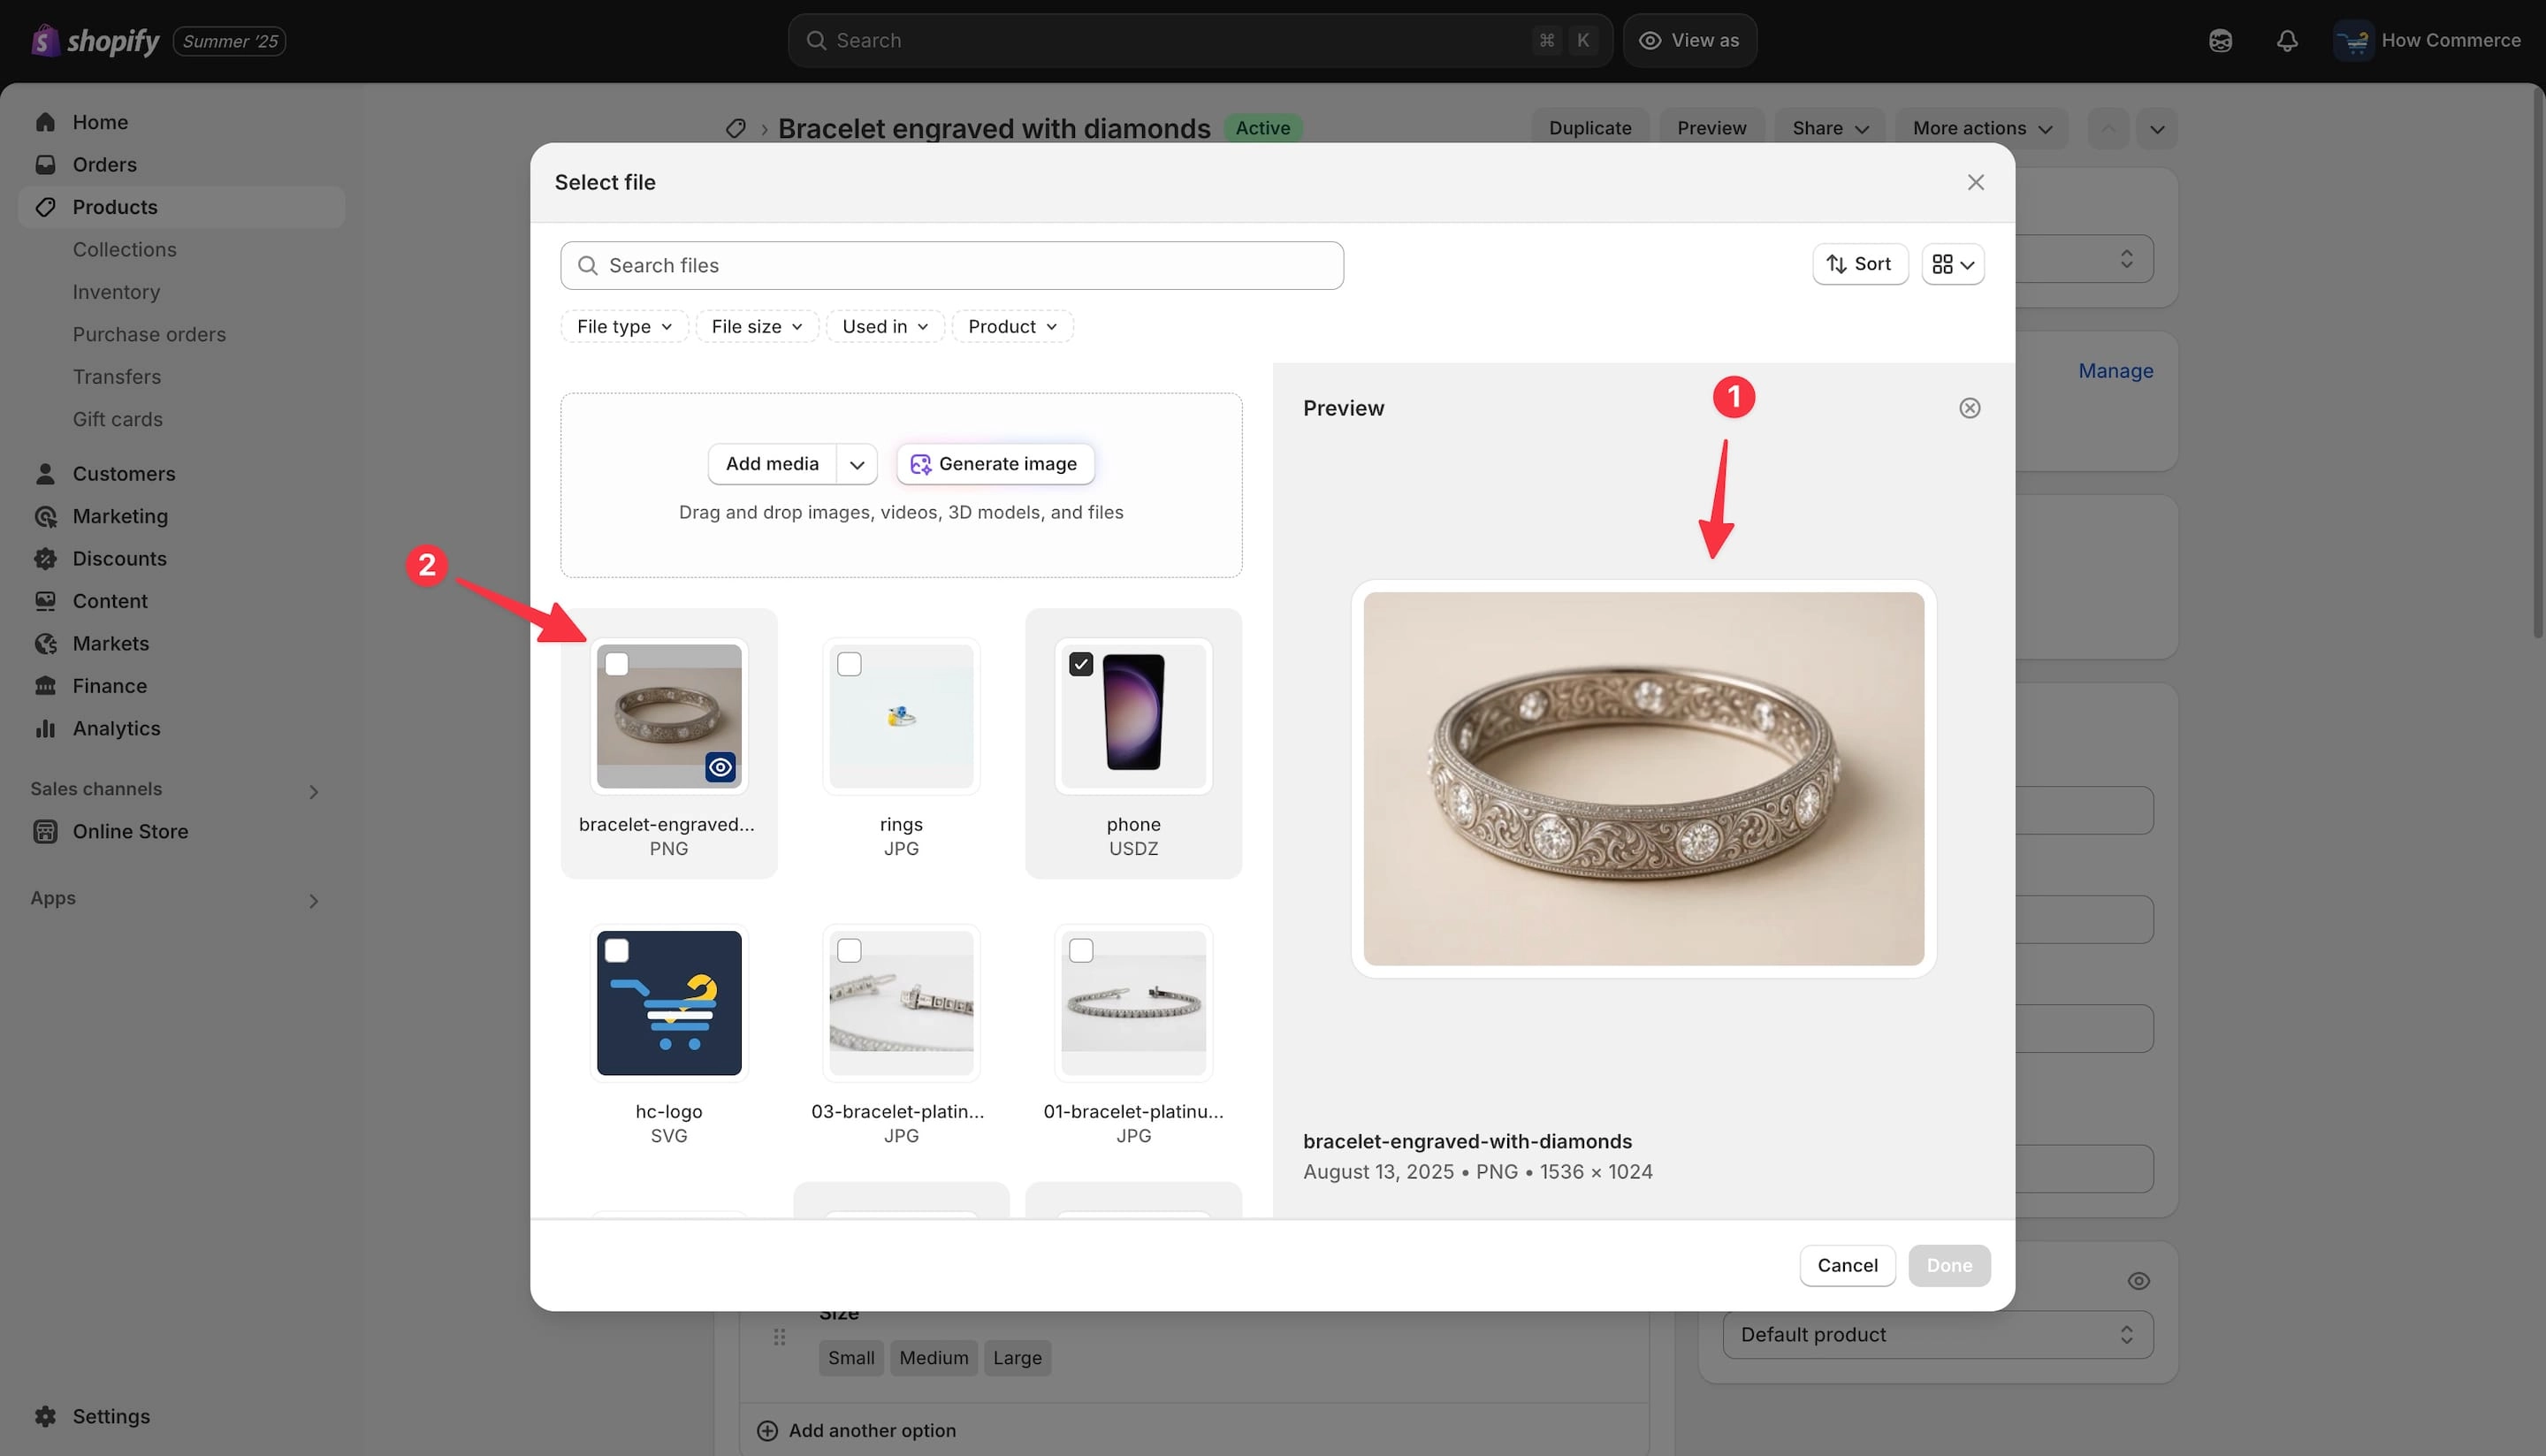
If you select “Keep,” the image will be listed in the file manager (marked with 1 in the image below).
The image will appear unselected (marked with 2). If it is not selected, it cannot be used as a media file for the product.
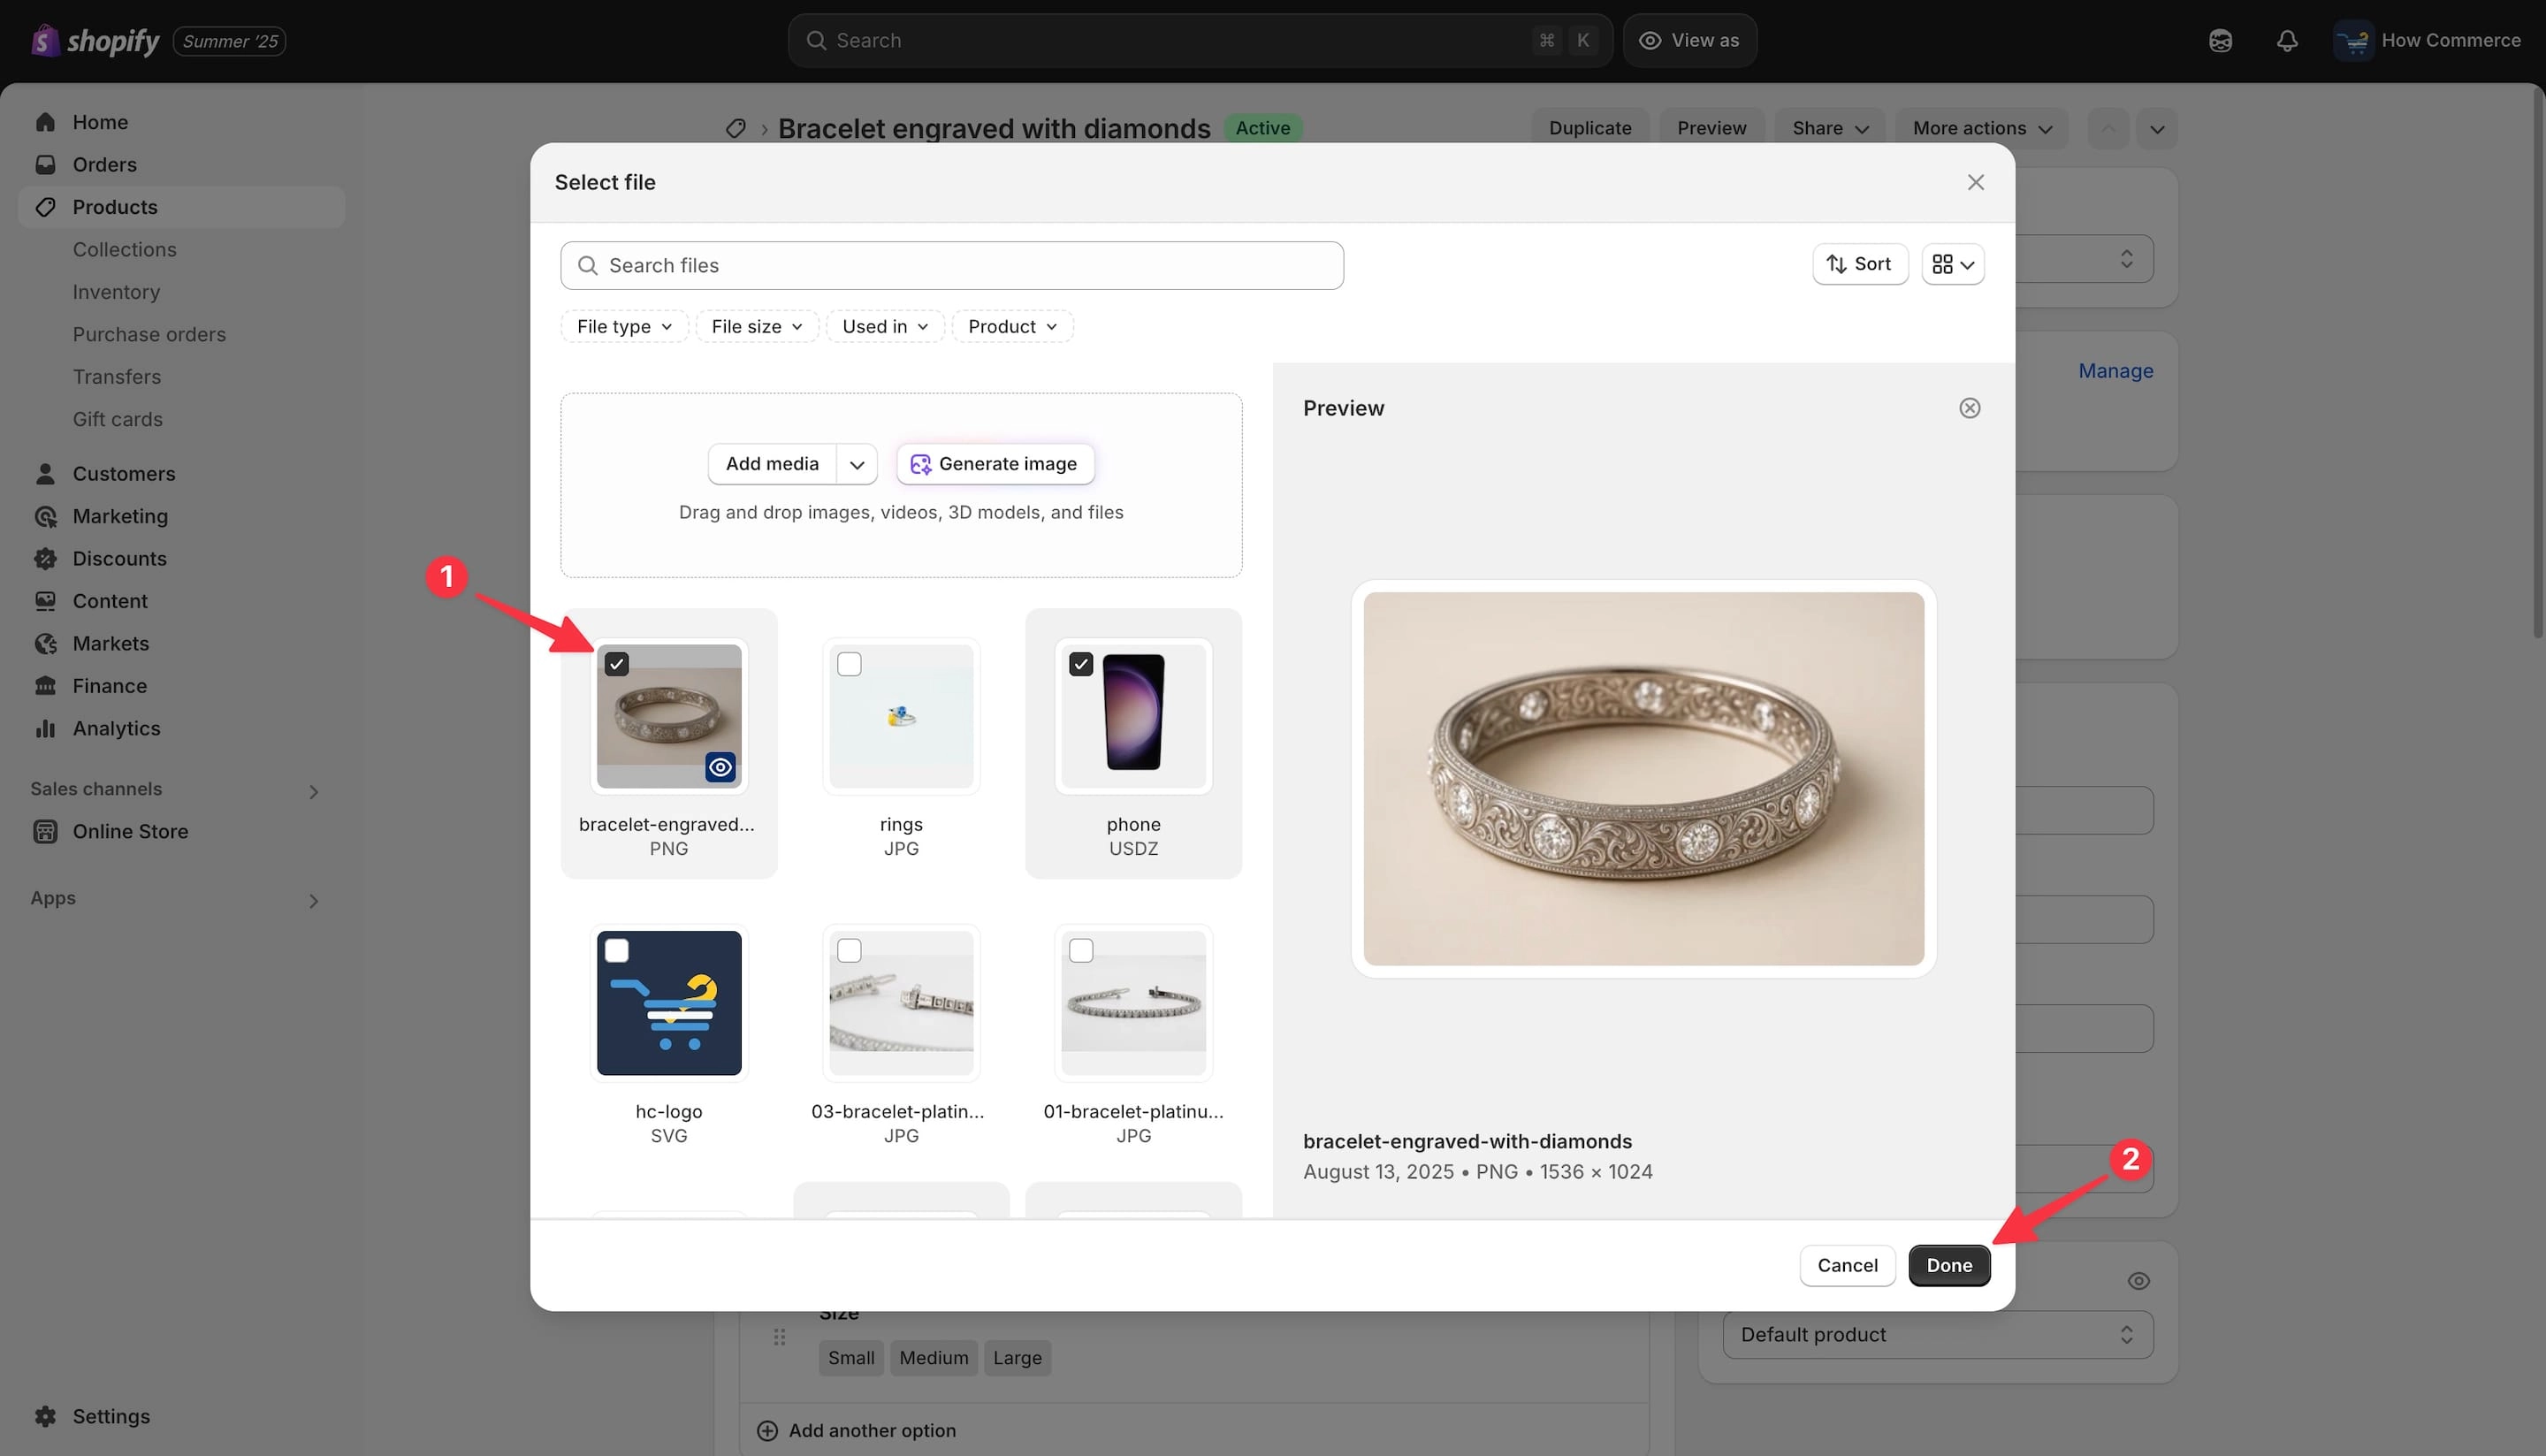
Select the image (marked with 1 in the image below) to add it to the product.
Click the “Done” button (marked with 2 in the image below).
Now the image is added to the product media files, meaning it will be listed on the storefront for this specific product.
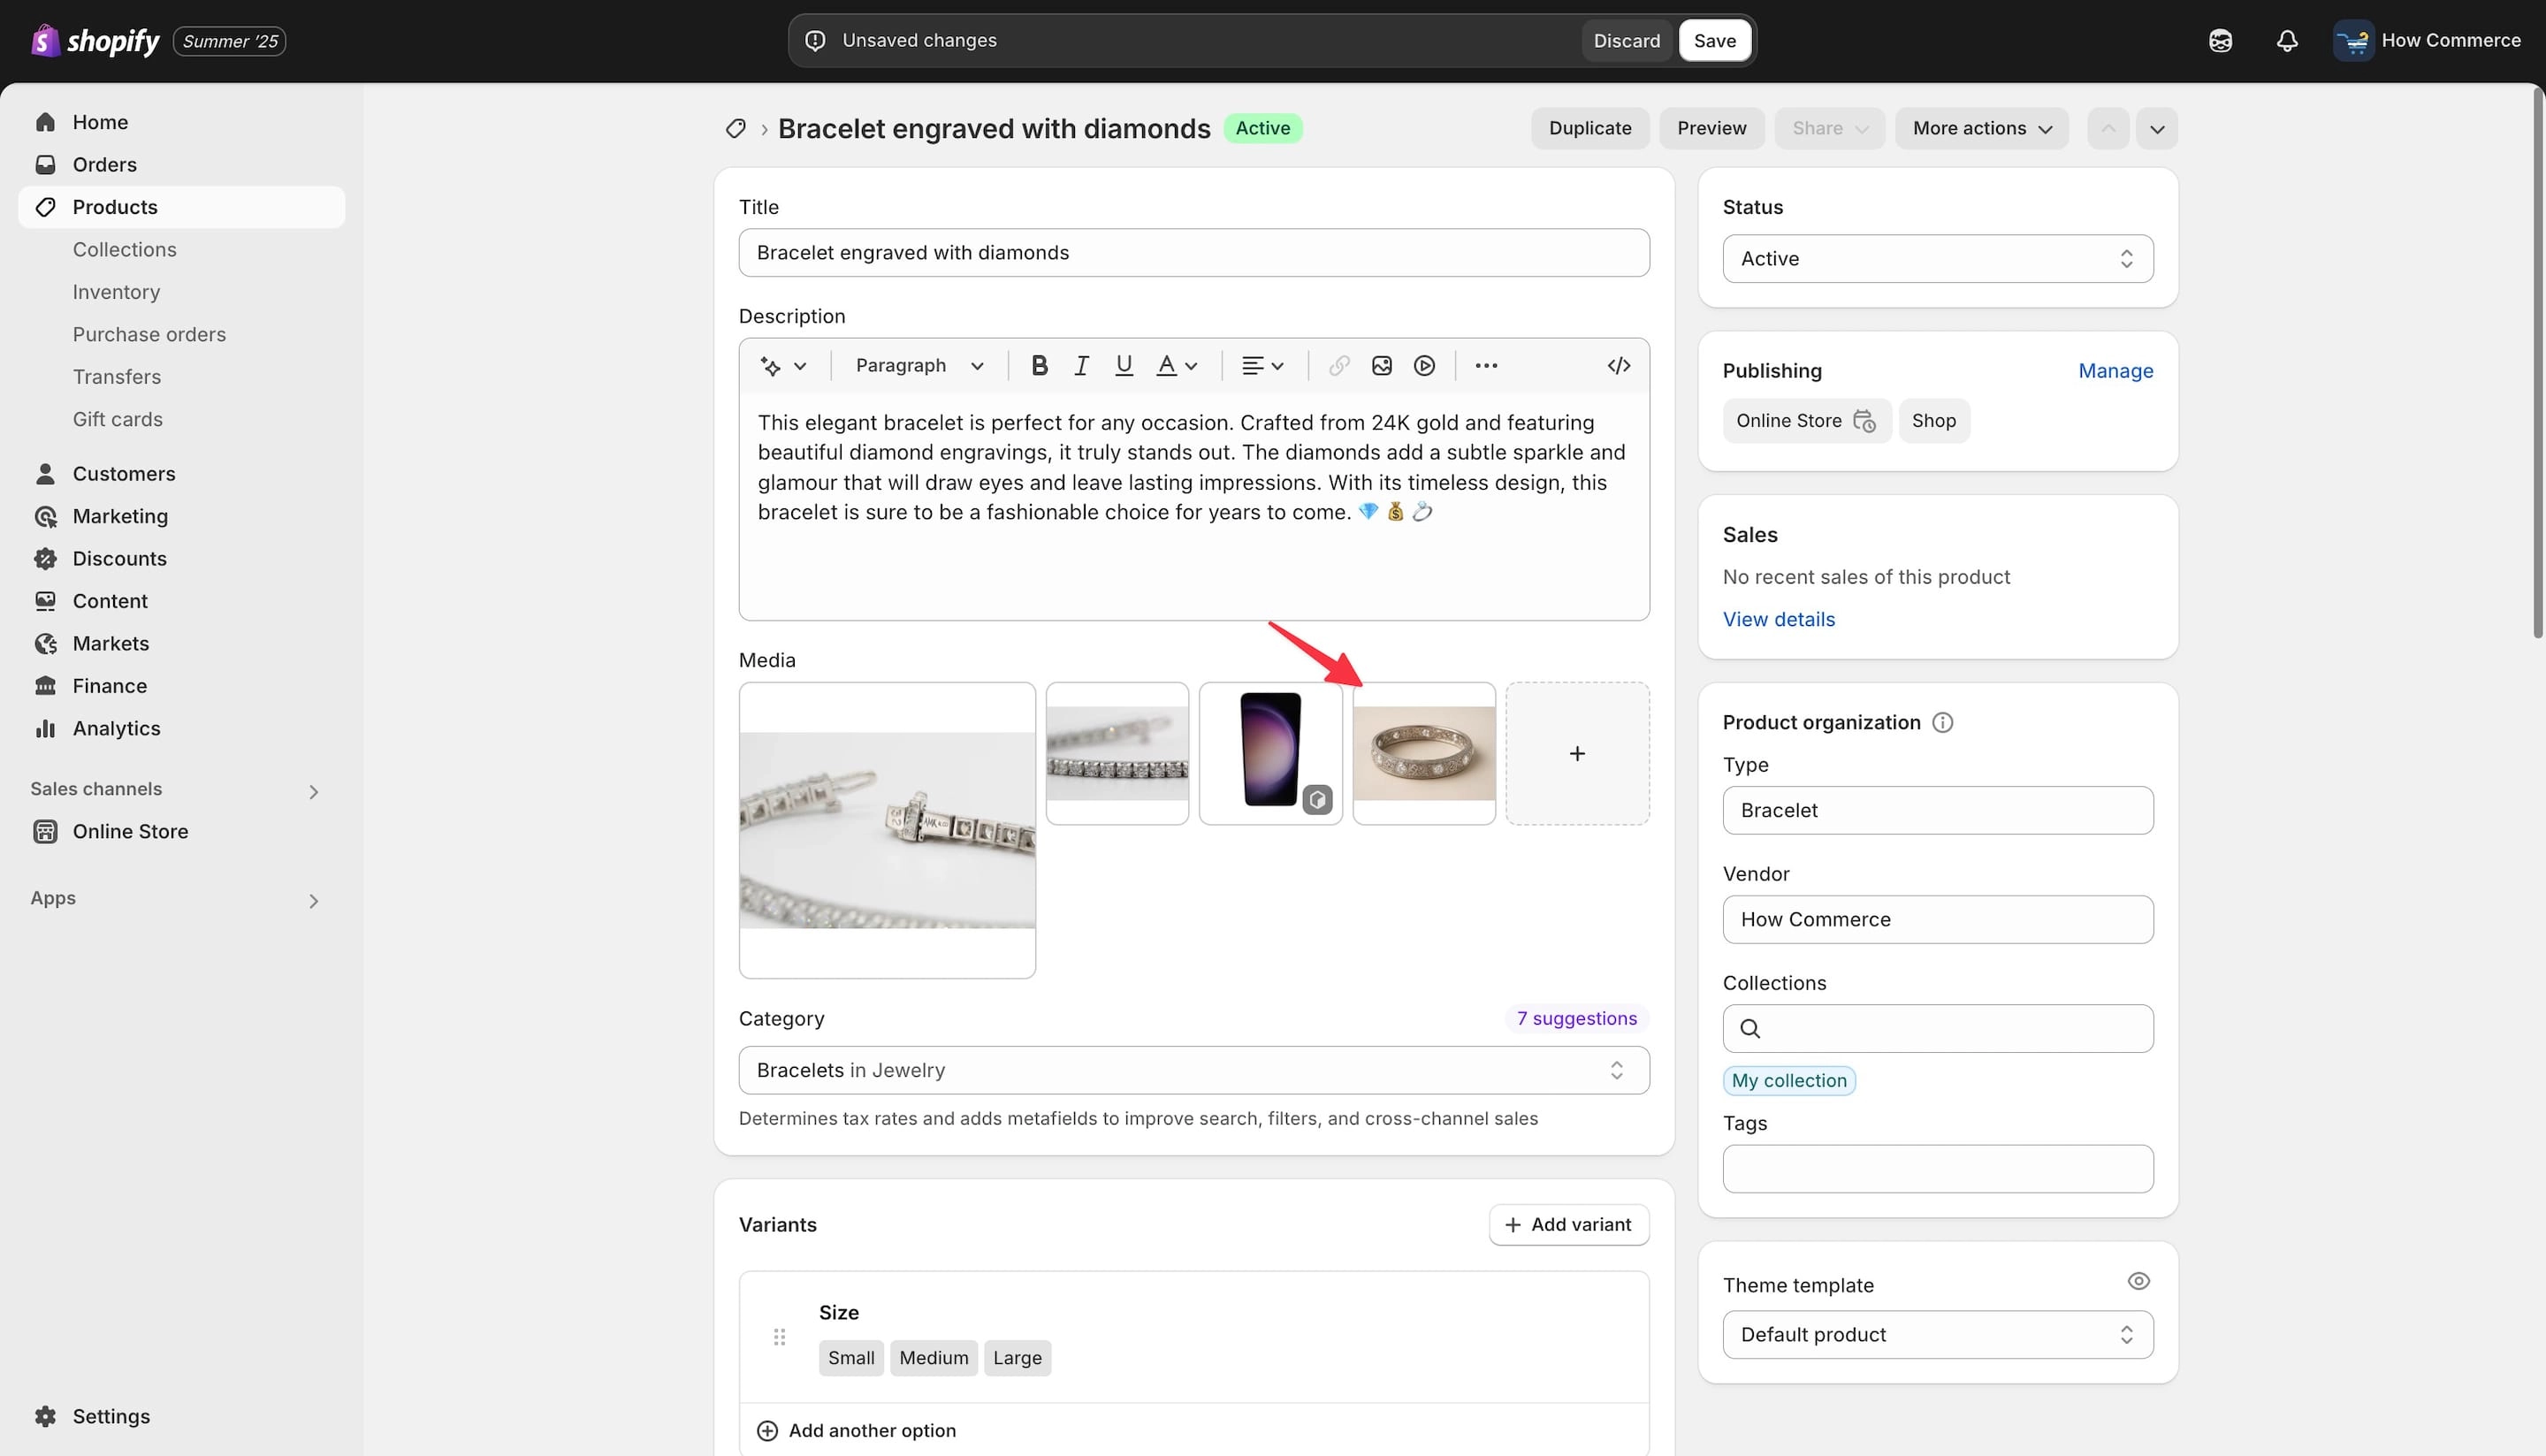
If you click on the image, a modal will open where you can see the name of the file (marked with 1 in the image below) and the ALT text (marked with 2 in the image below).
Both the file name and ALT text are generated based on your AI prompt.
My prompt is short, so the entire name of the file is my entire prompt.
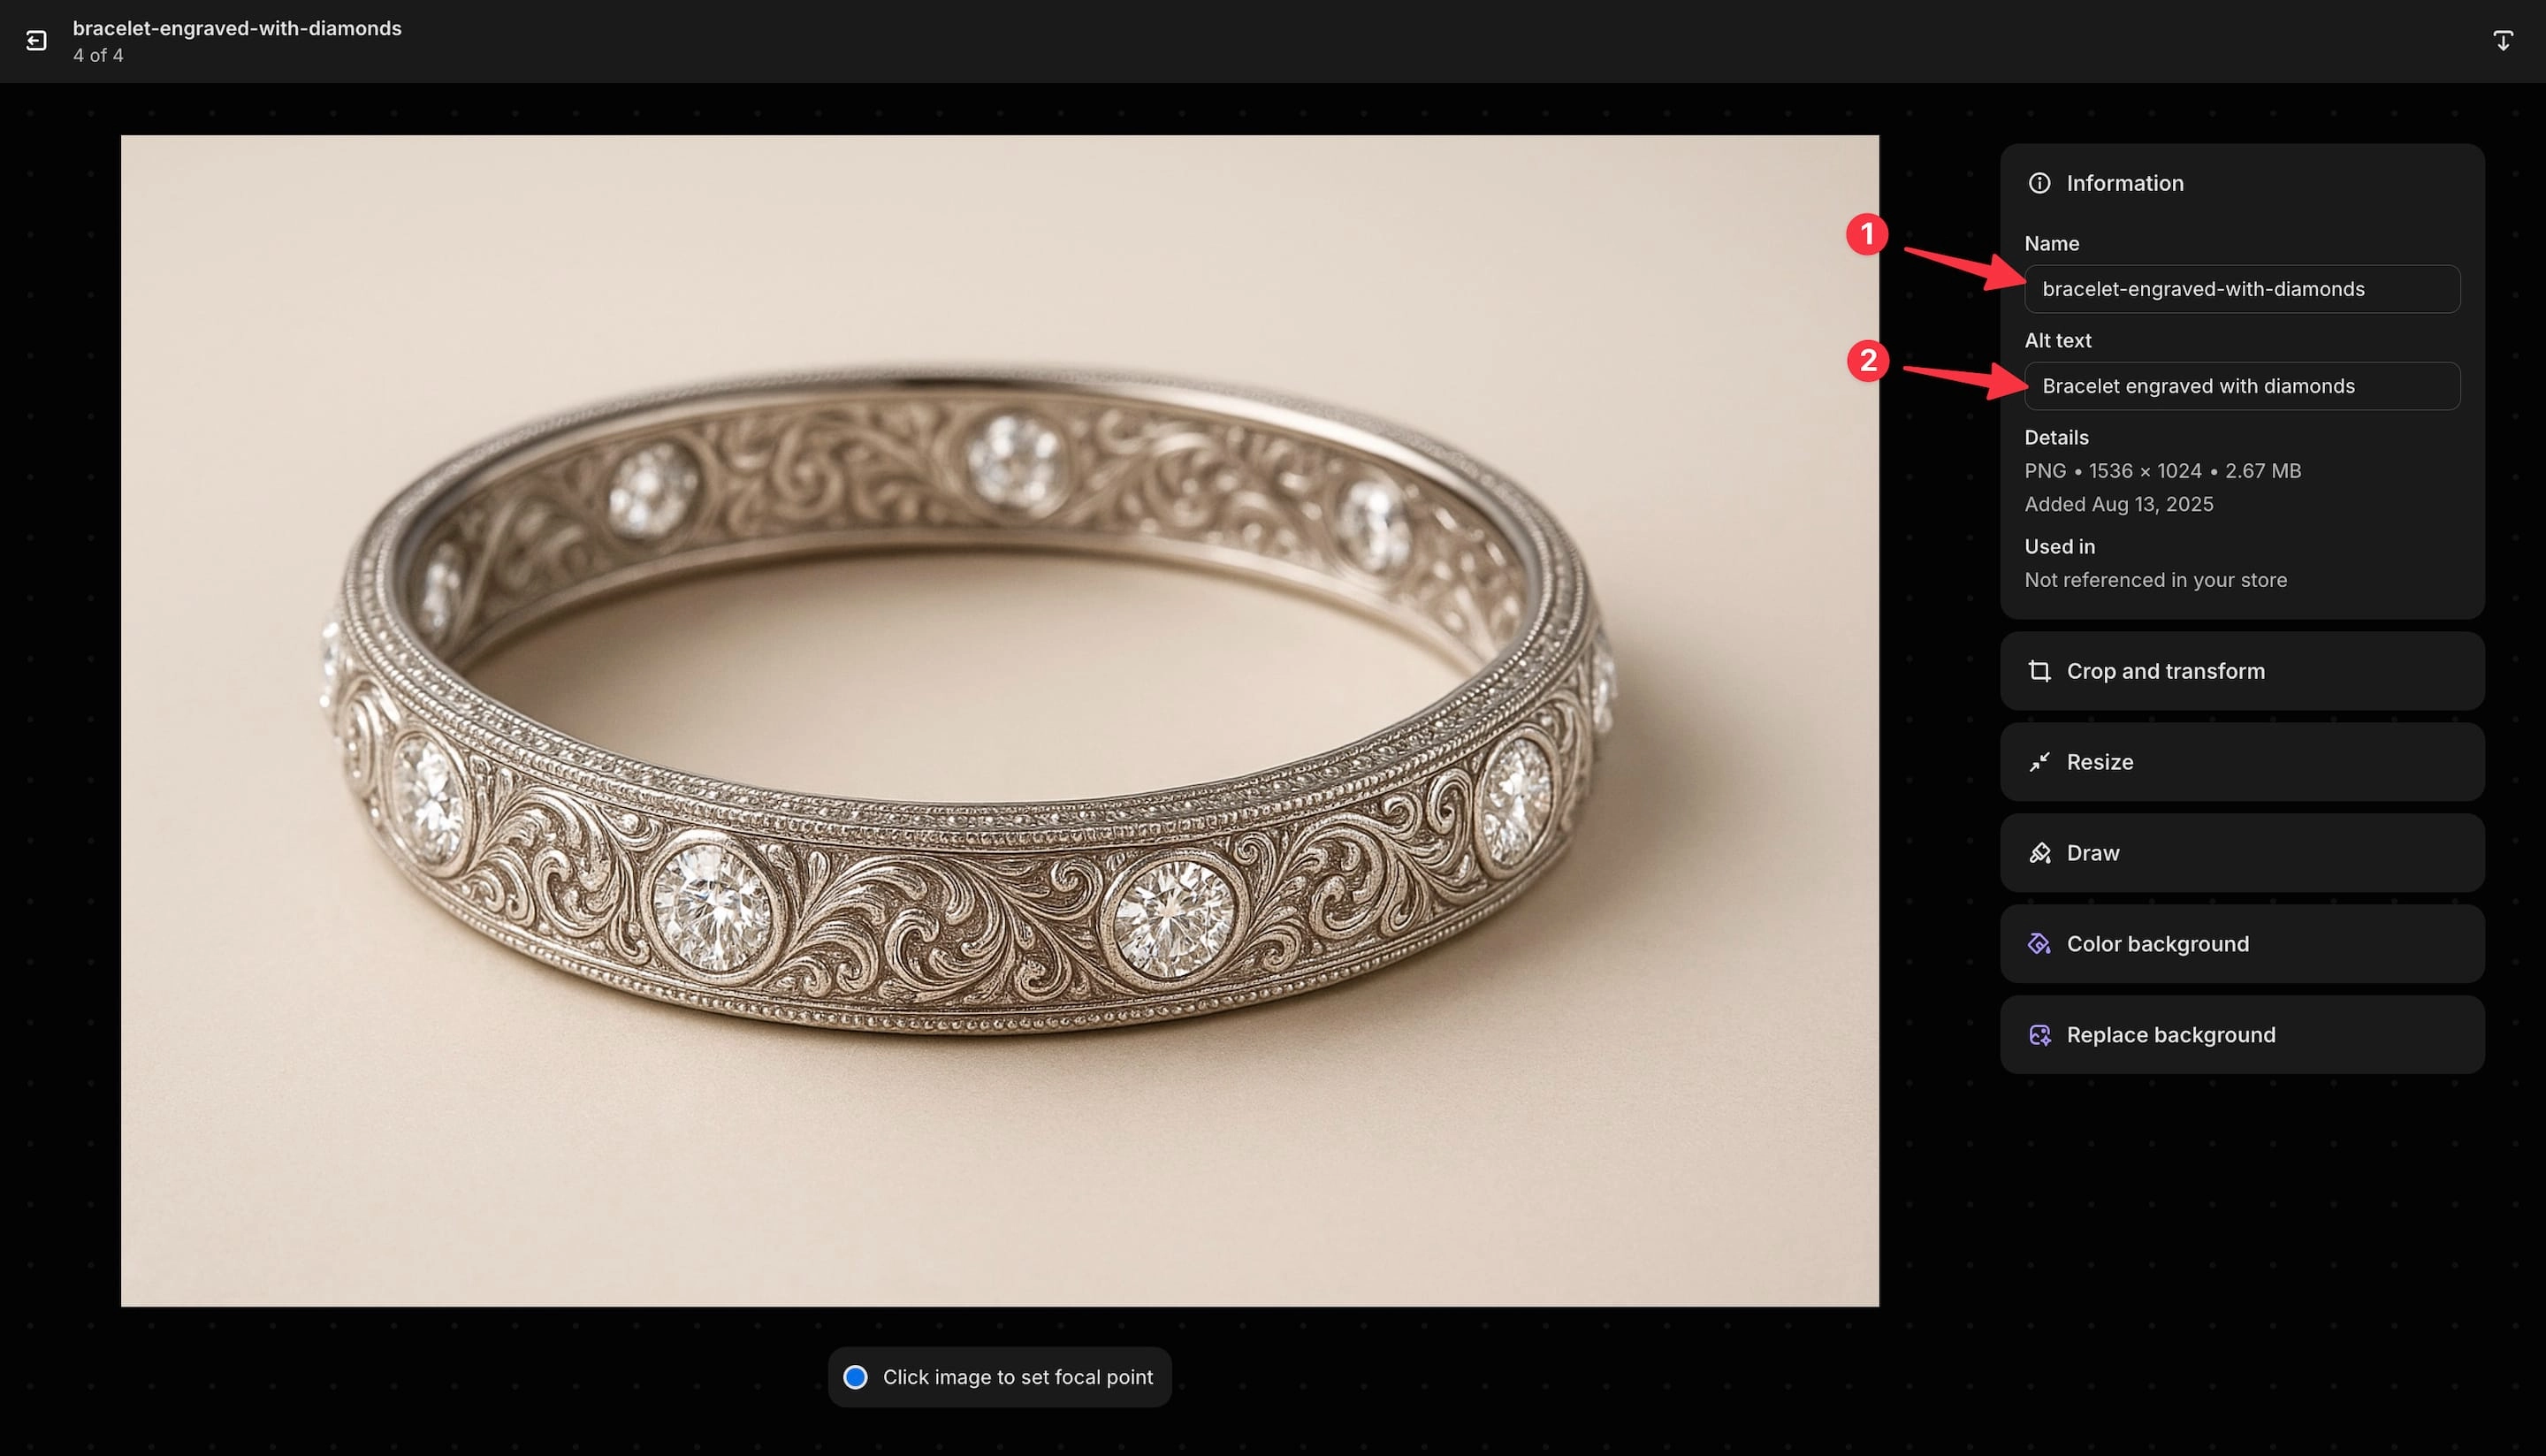
Now go back to the product page and click on the “Save” button to save your changes.
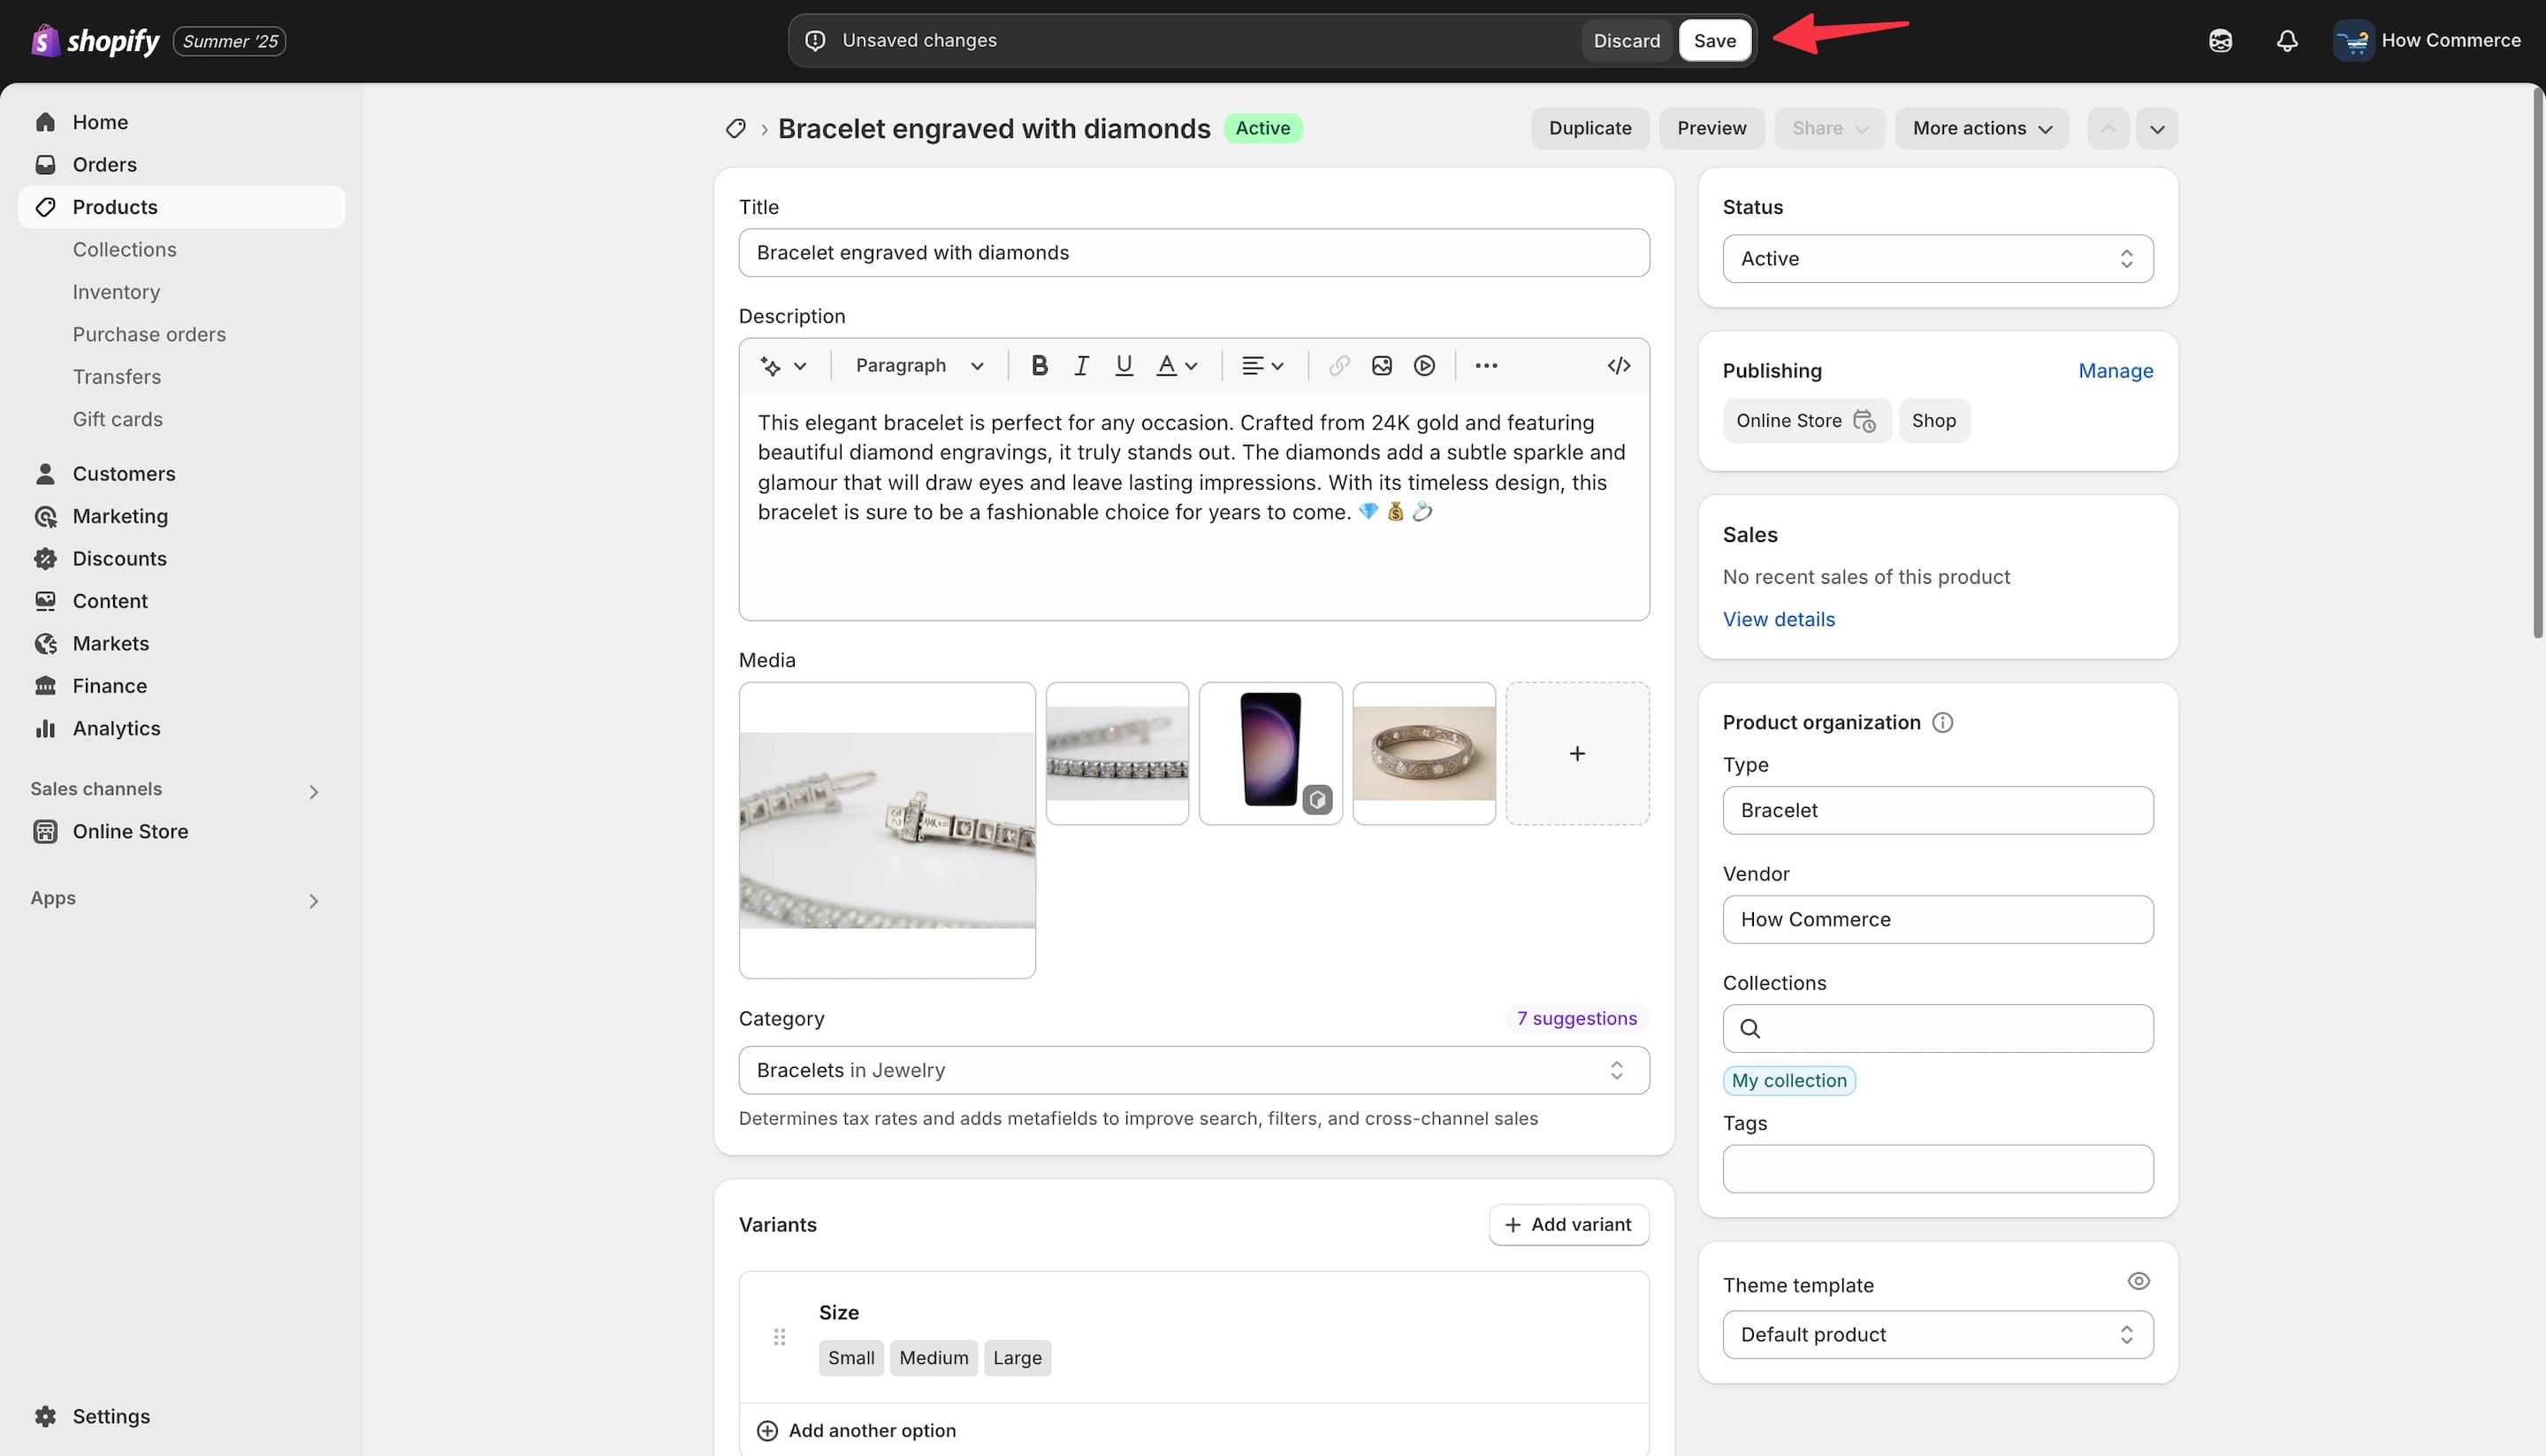
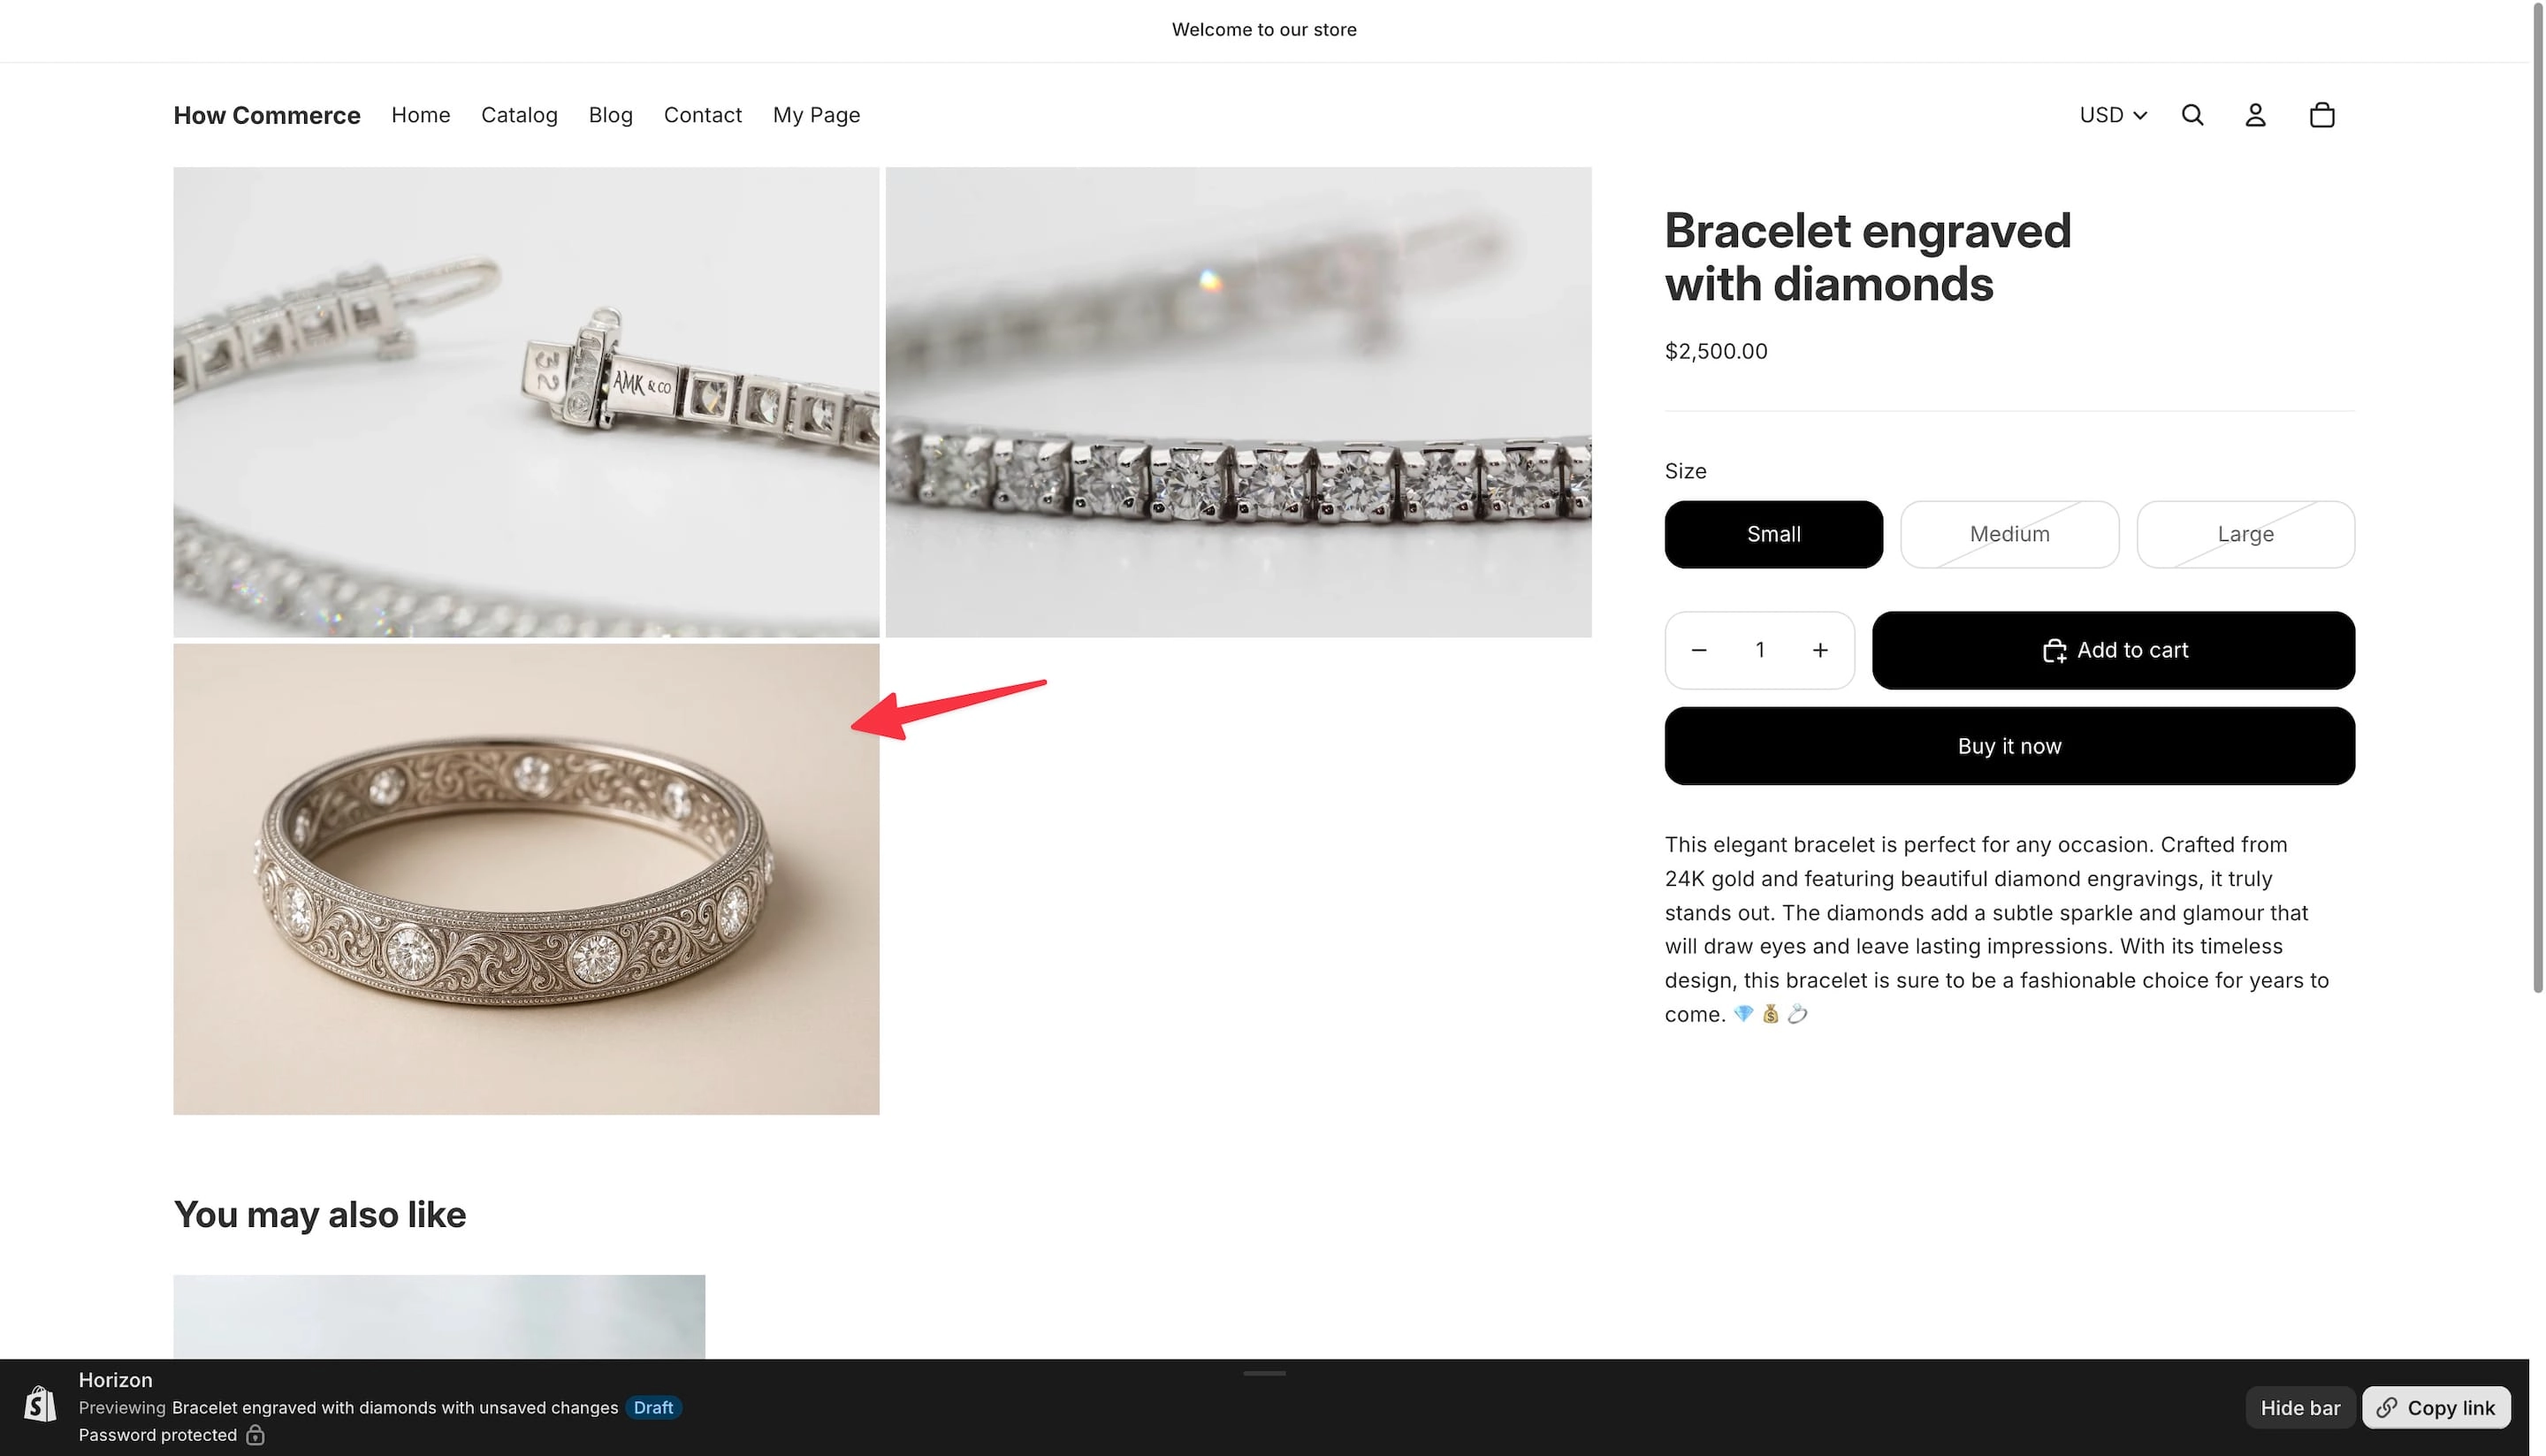
To see the new image generated with Shopify AI, click on the “Preview” button and this will take you to the storefront.
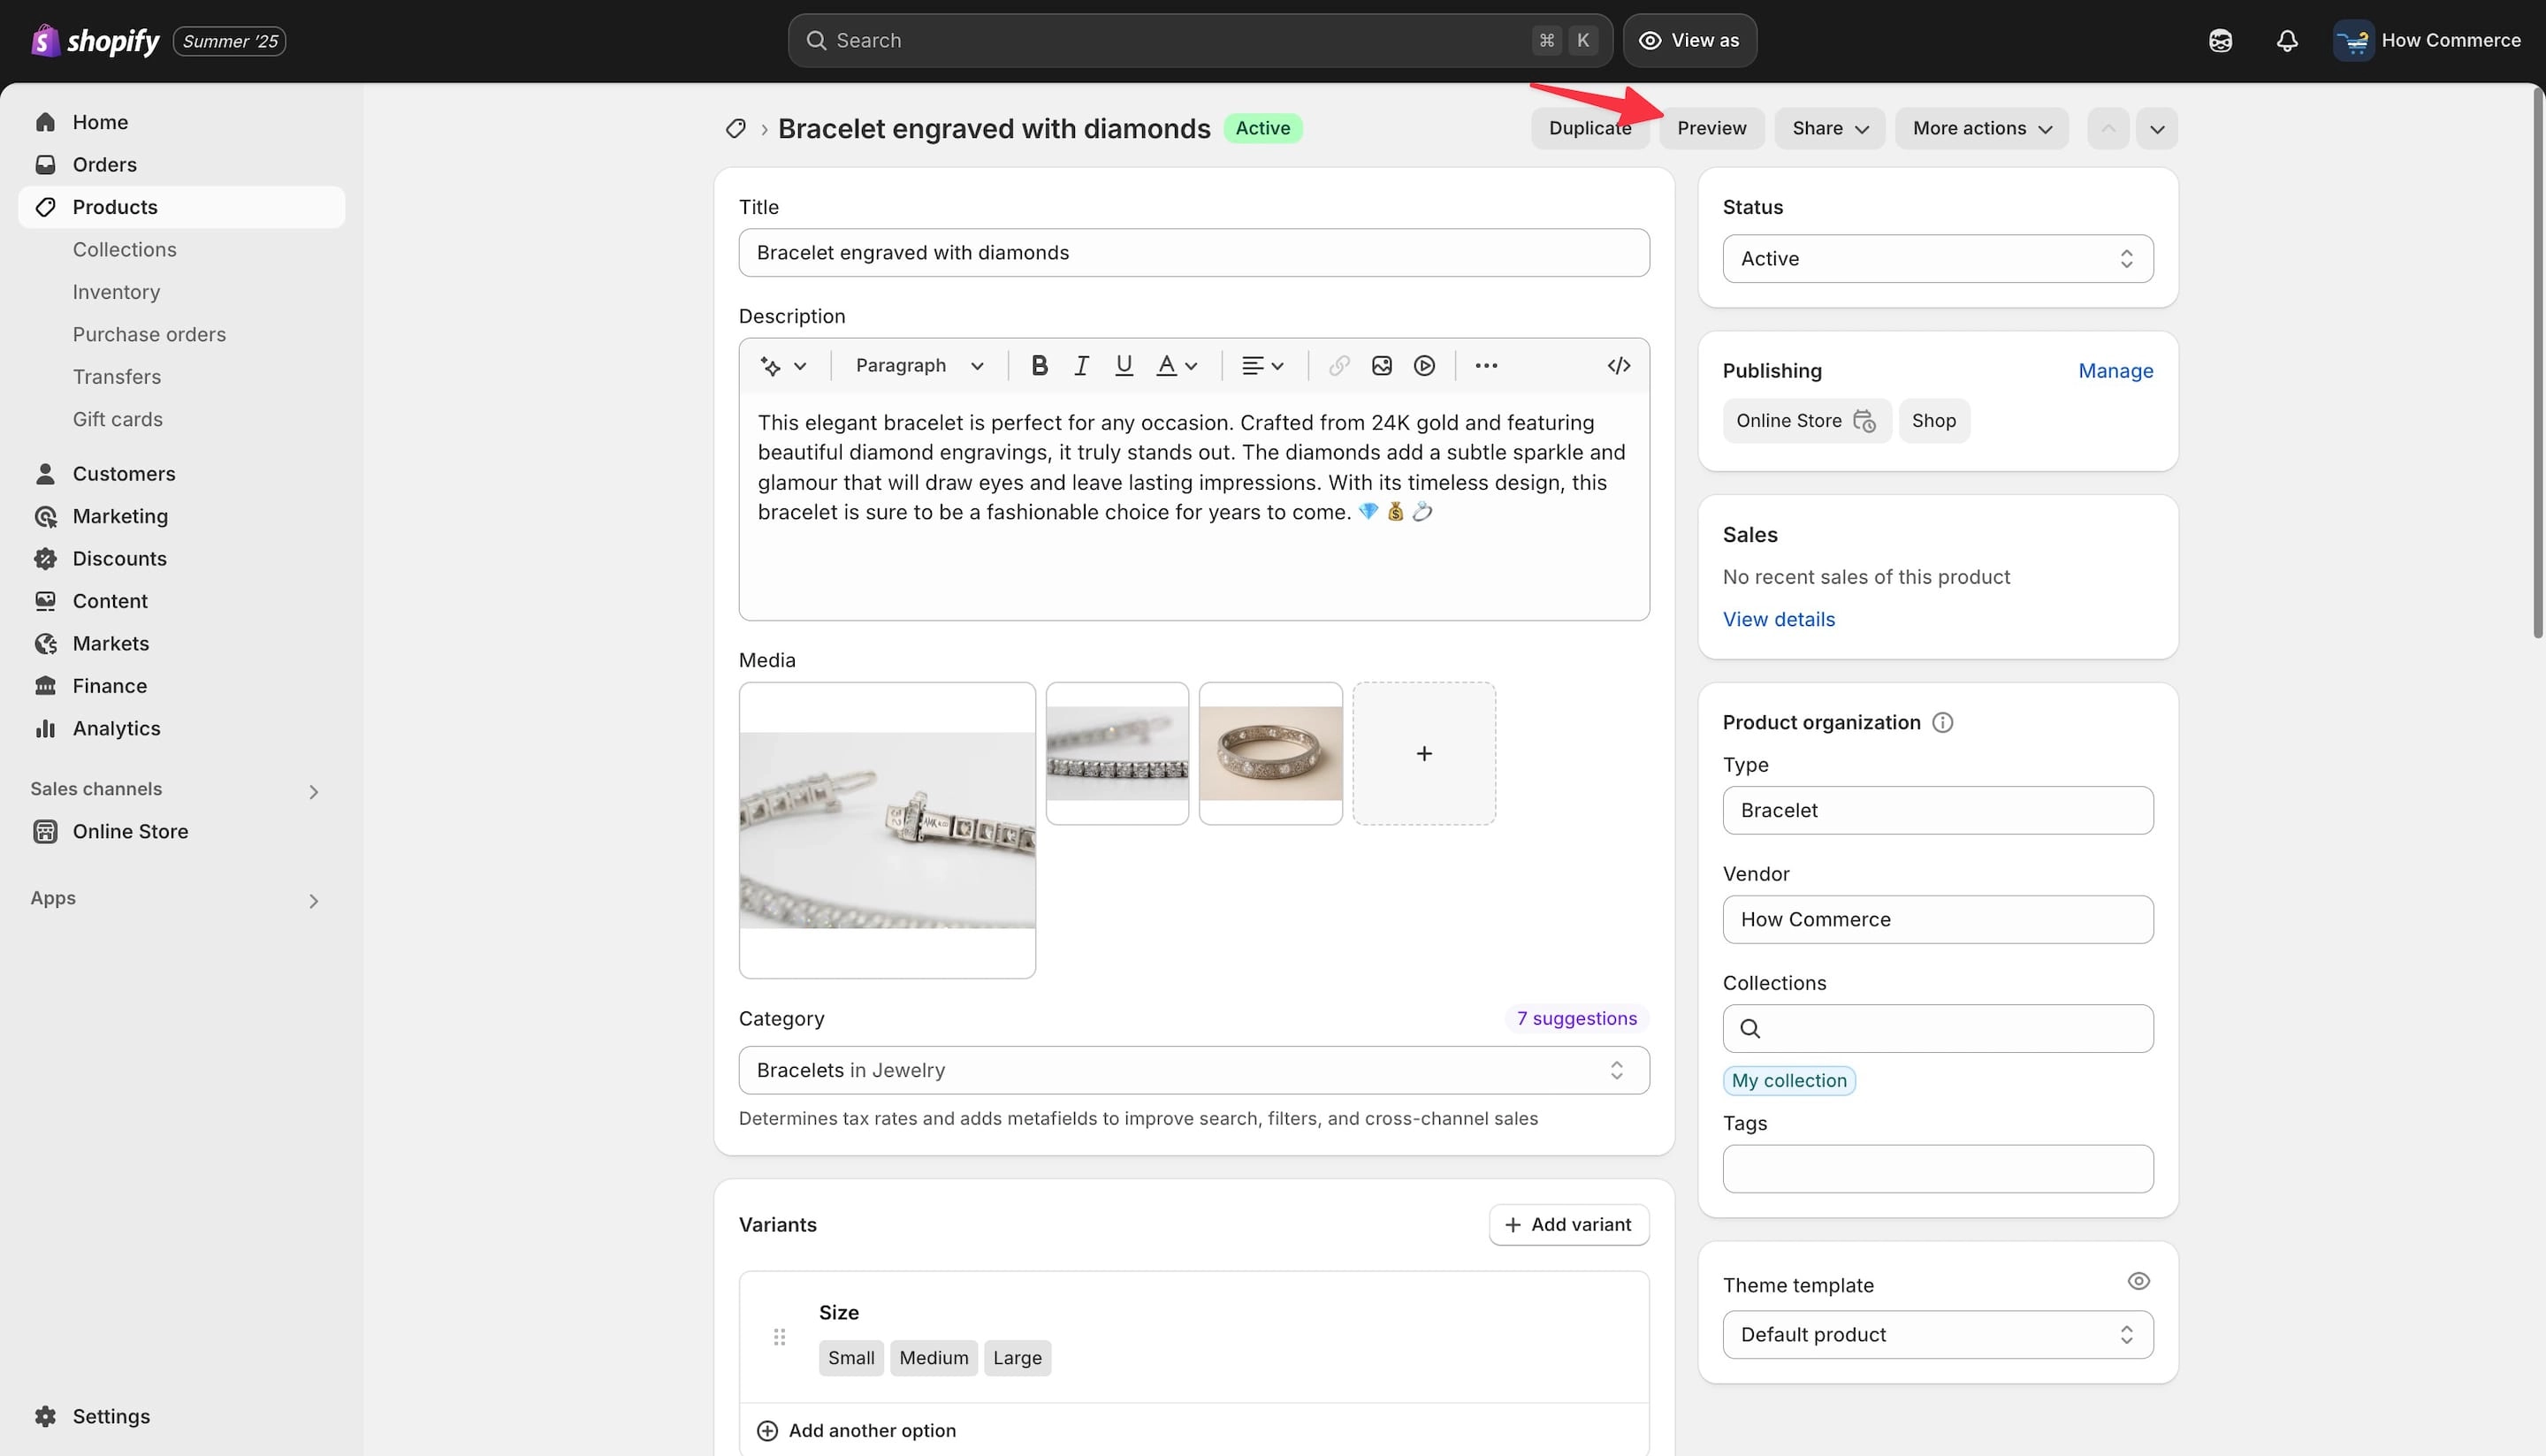
On the storefront, you can see your new image generated with the Shopify AI image generator alongside the other images.
Generate images with AI inside theme editor
In general, wherever there is a file picker inside the theme editor, you can generate an image with Shopify AI.
Conclusion
In conclusion, Shopify’s built-in AI image generator is a practical tool for quickly creating demo-ready visuals, whether for products, blog posts, or theme setup.
While it’s not a replacement for professional photography when selling products, it can save significant time and effort during the development, testing, and design phases of your store.