
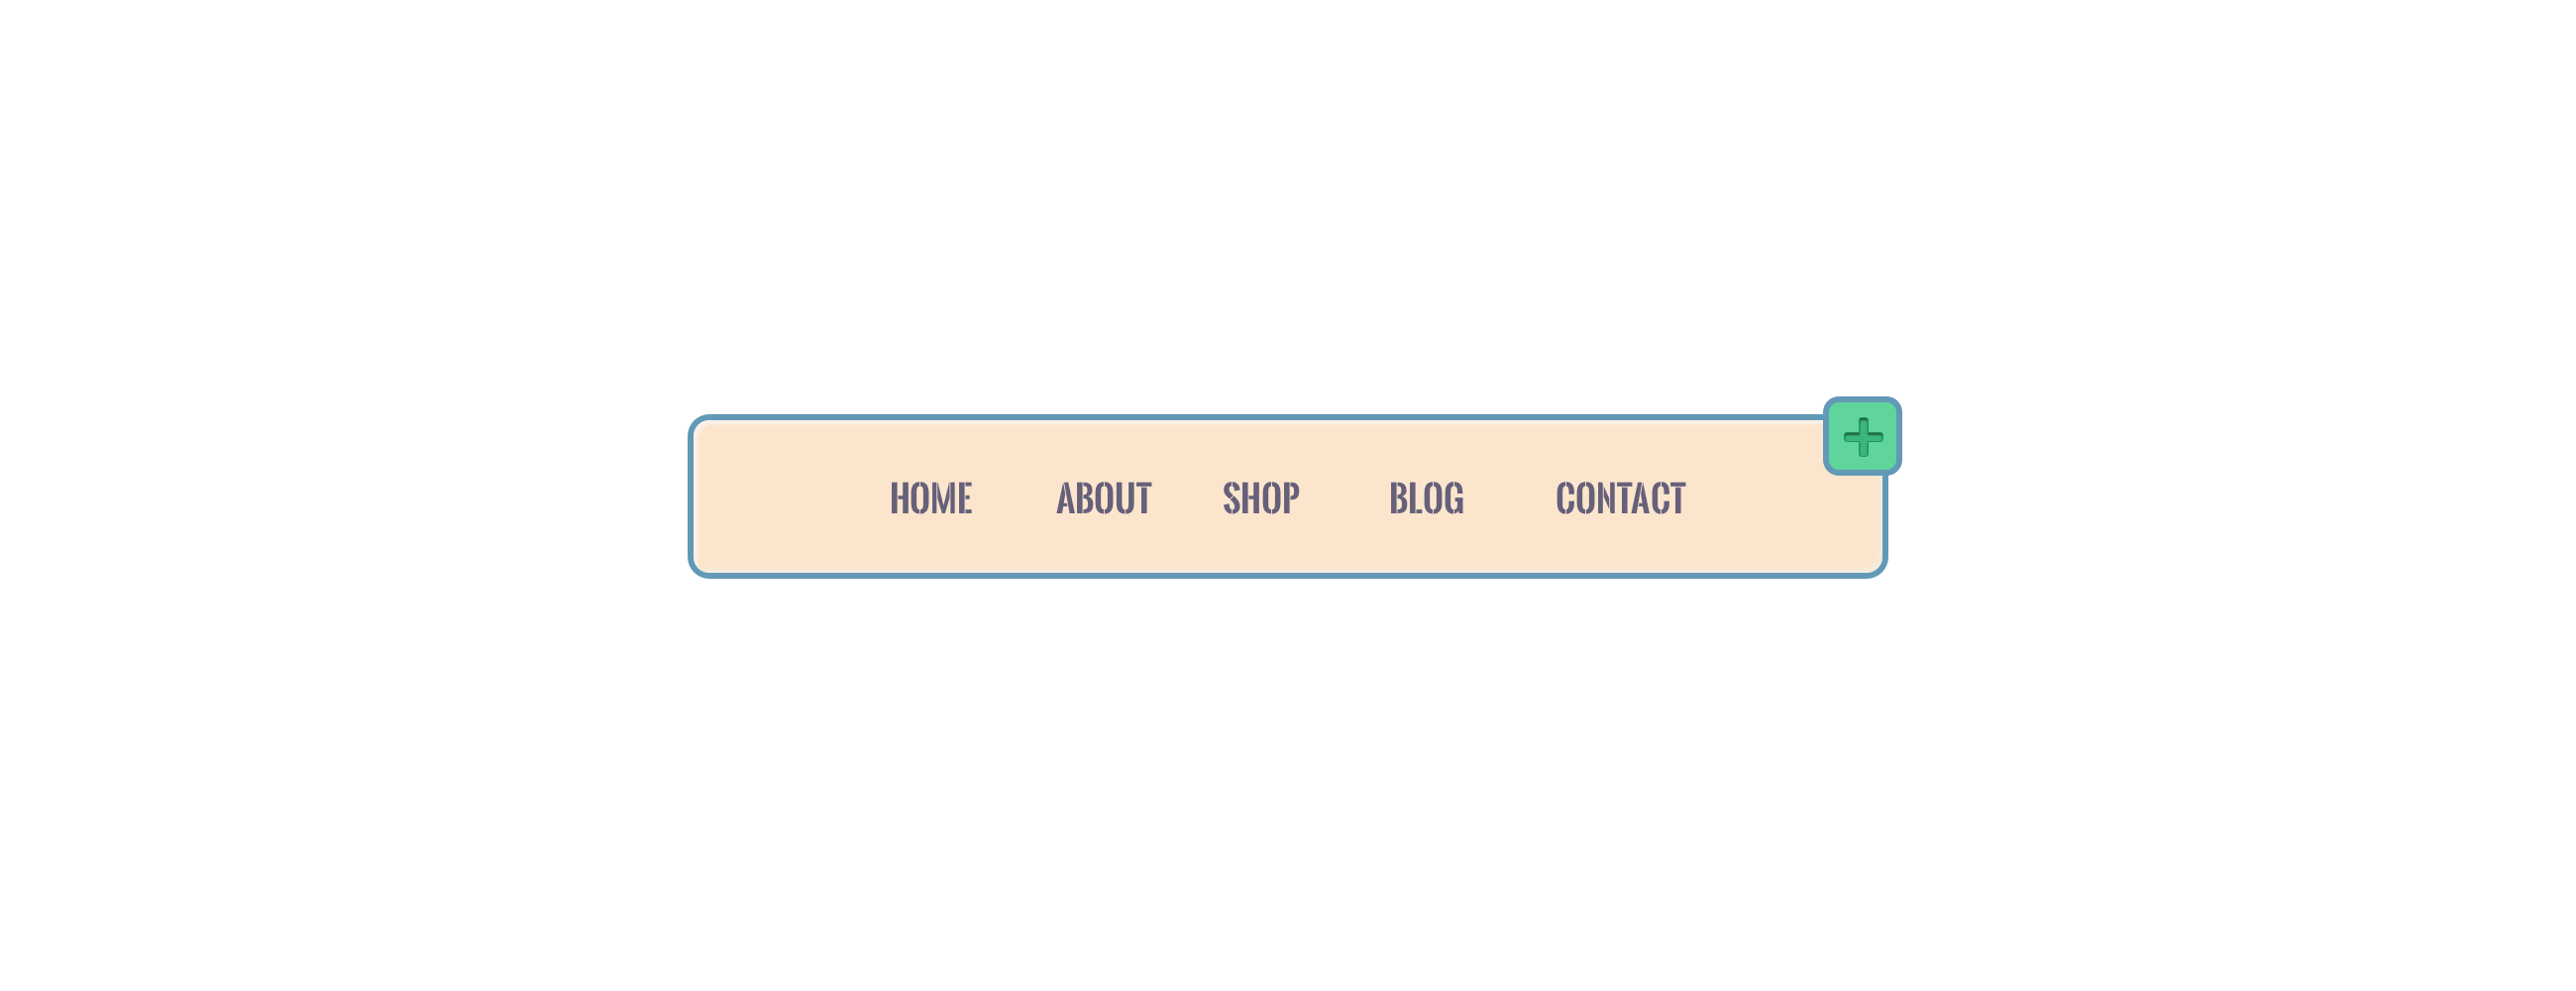
Creating a menu is a bit time consuming in Shopify and although most of the process is drag and drop you need to select the resource needed to link to, add the text and so on.
The new features that duplicate a menu in Shopify at a click of a button can save you a lot of time when creating similar navigation structures across different parts of your store, such as separate menus for desktop and mobile, region-specific menus for international stores or just a clone of the same menu with different links or different text.
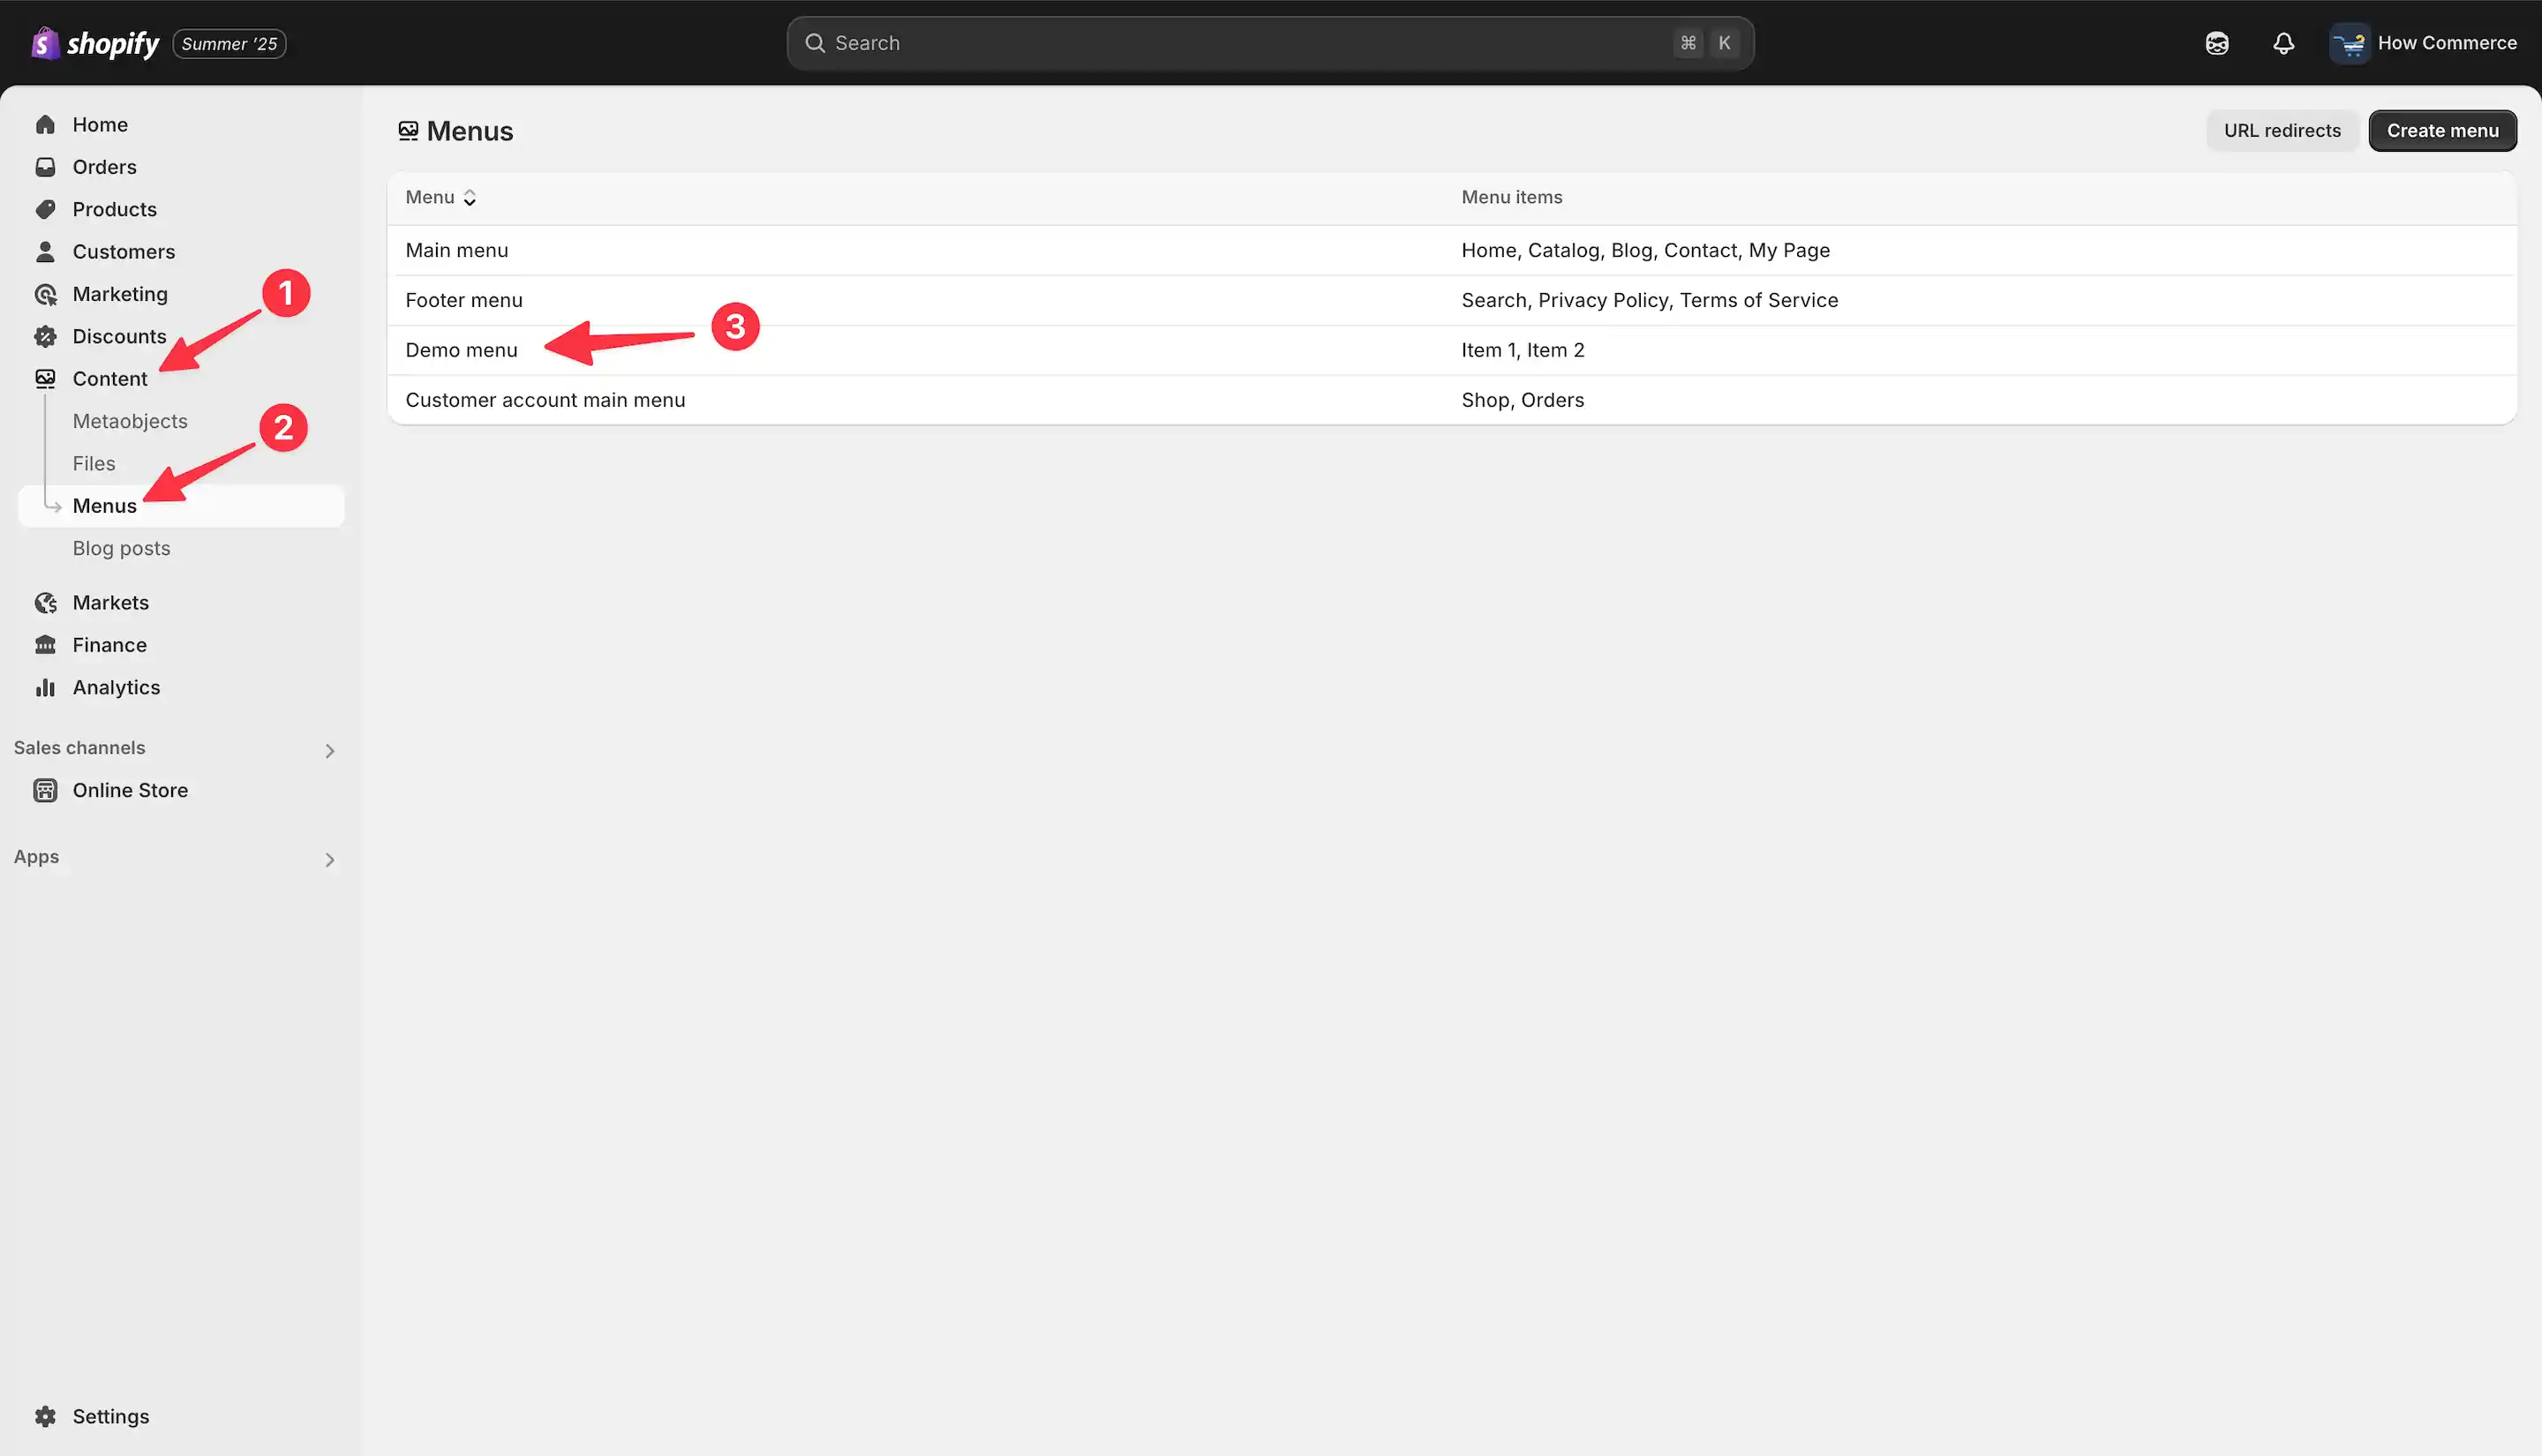
Identify the menu you want to duplicate
Menus (marked with 2 in the image below) are located under “Content” (marked with 1 in the image below).
Click on the menu you want to duplicate. In my example is the “Demo menu” (marked with 3 in the image below).
Duplicate the menu
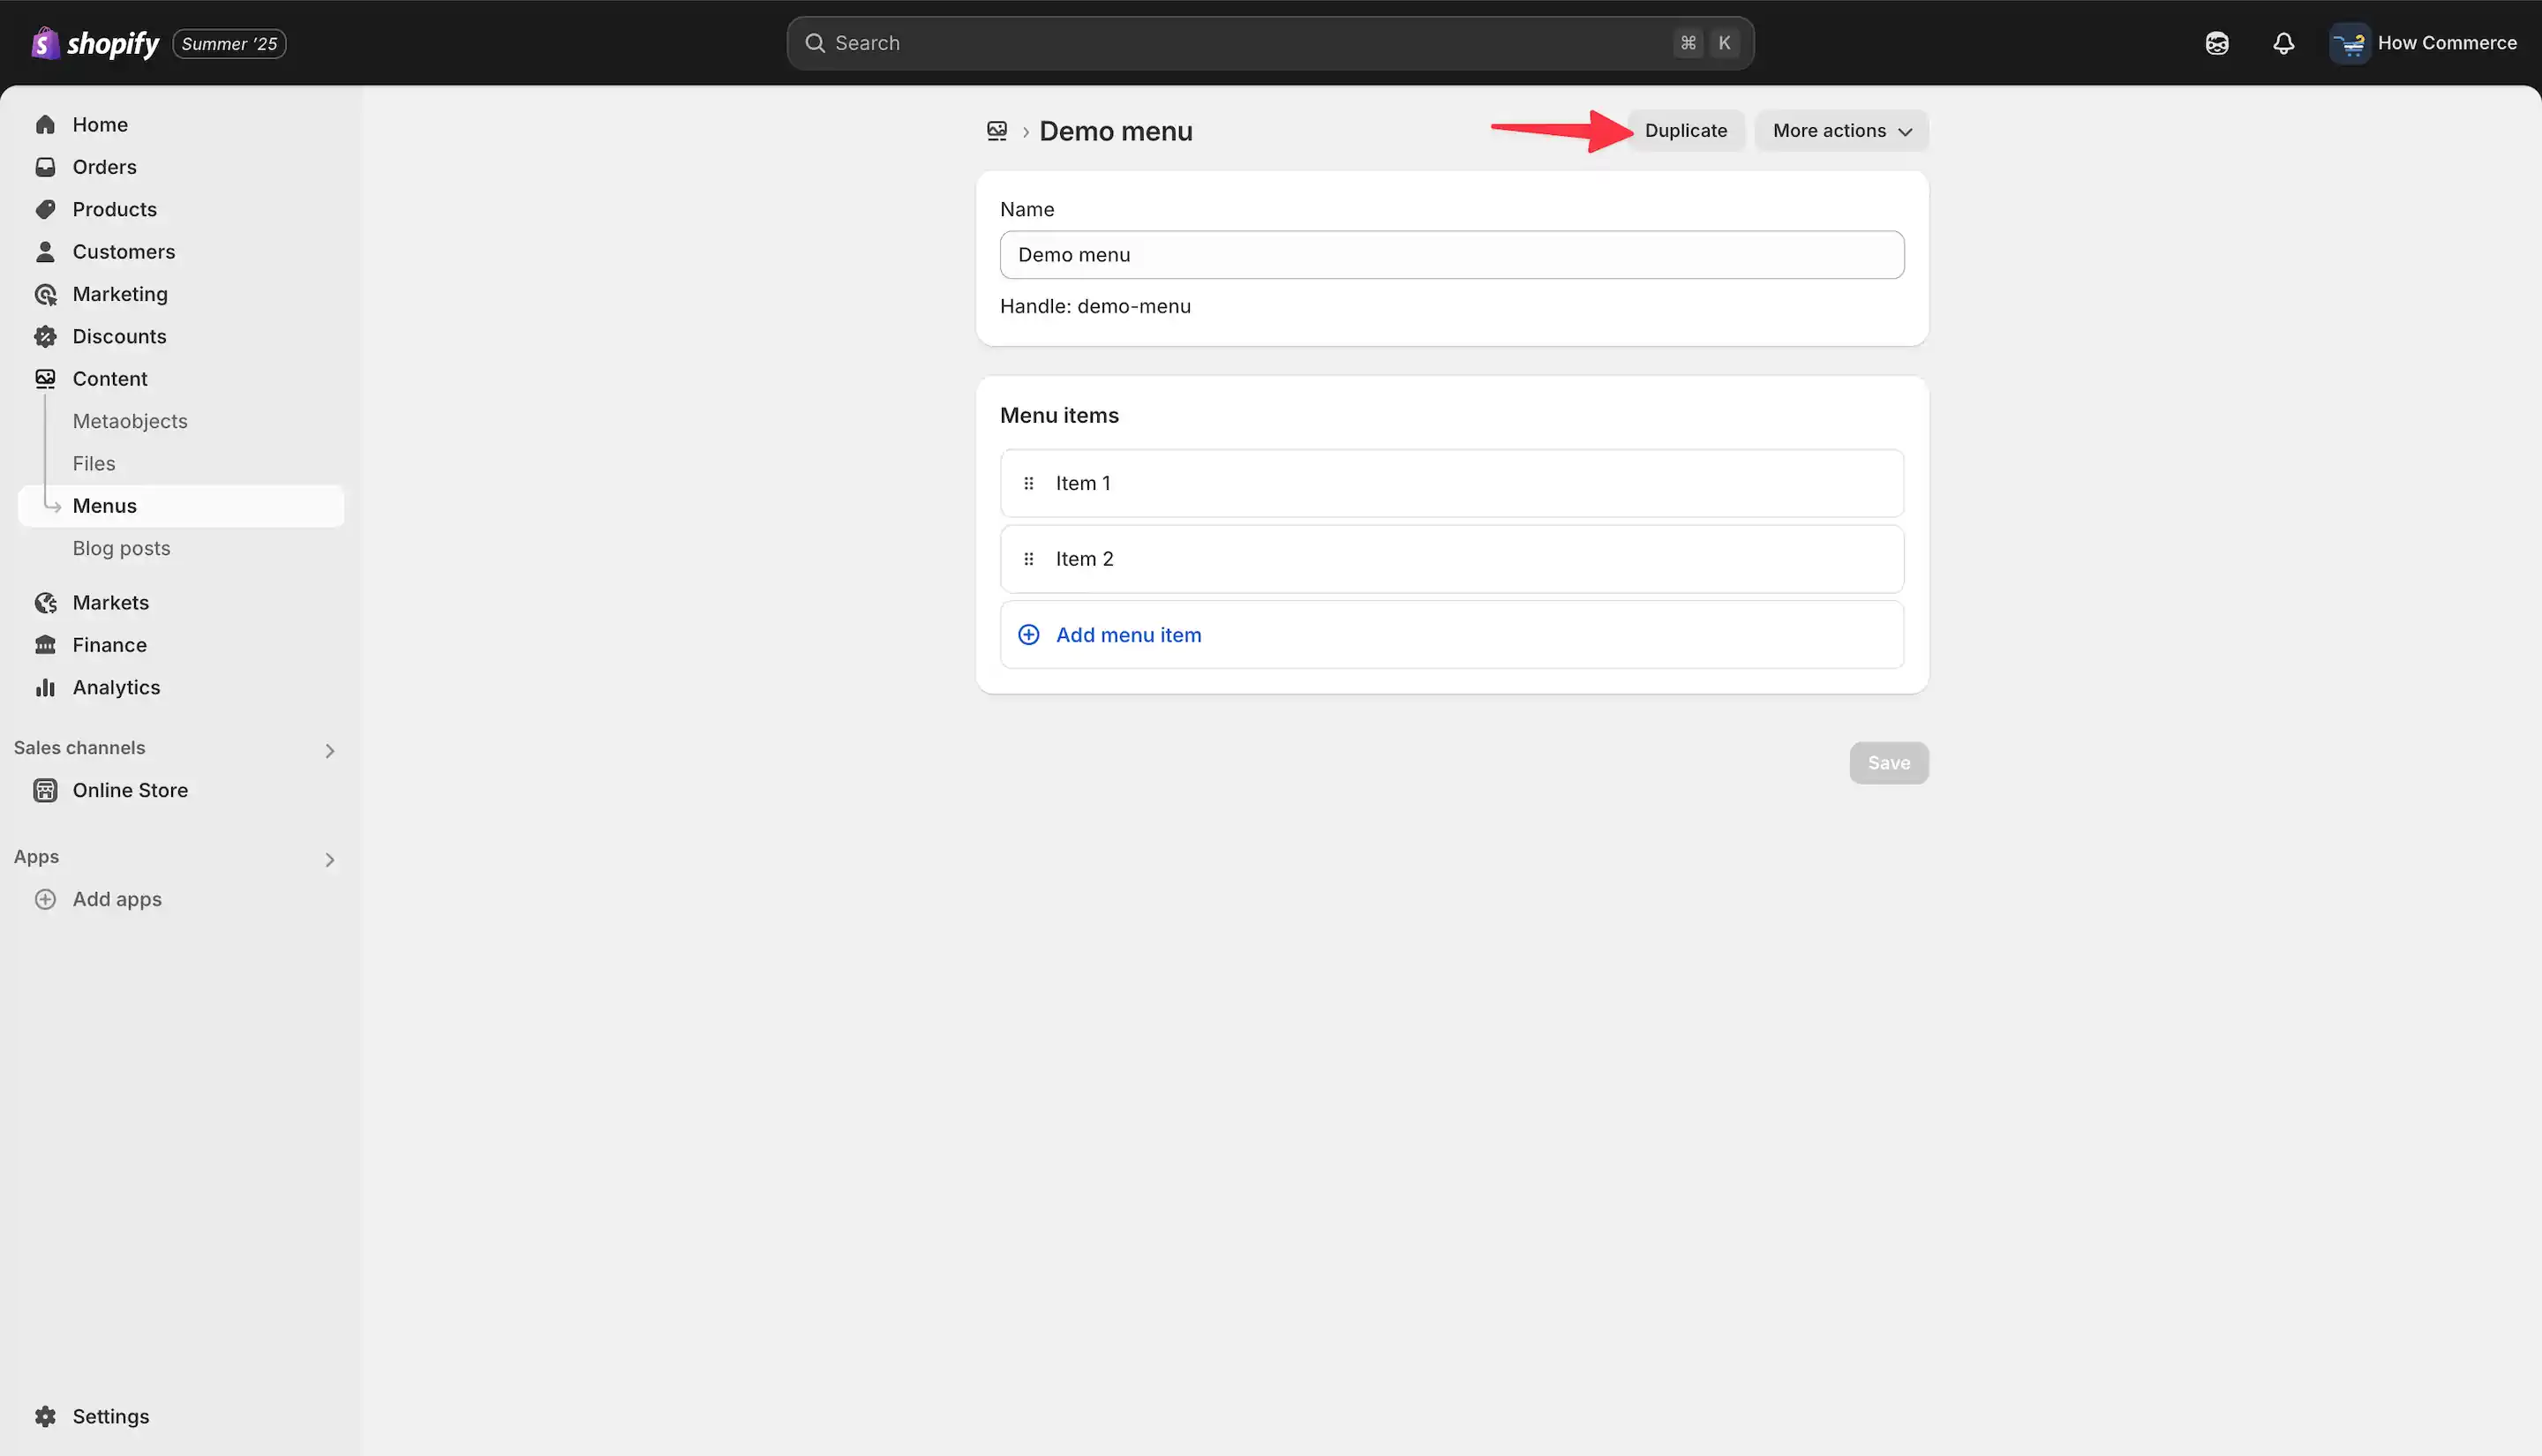
Now you are located on the selected menu page.
On the top right corner you’ll see a “Duplicate“ button like in the image below.
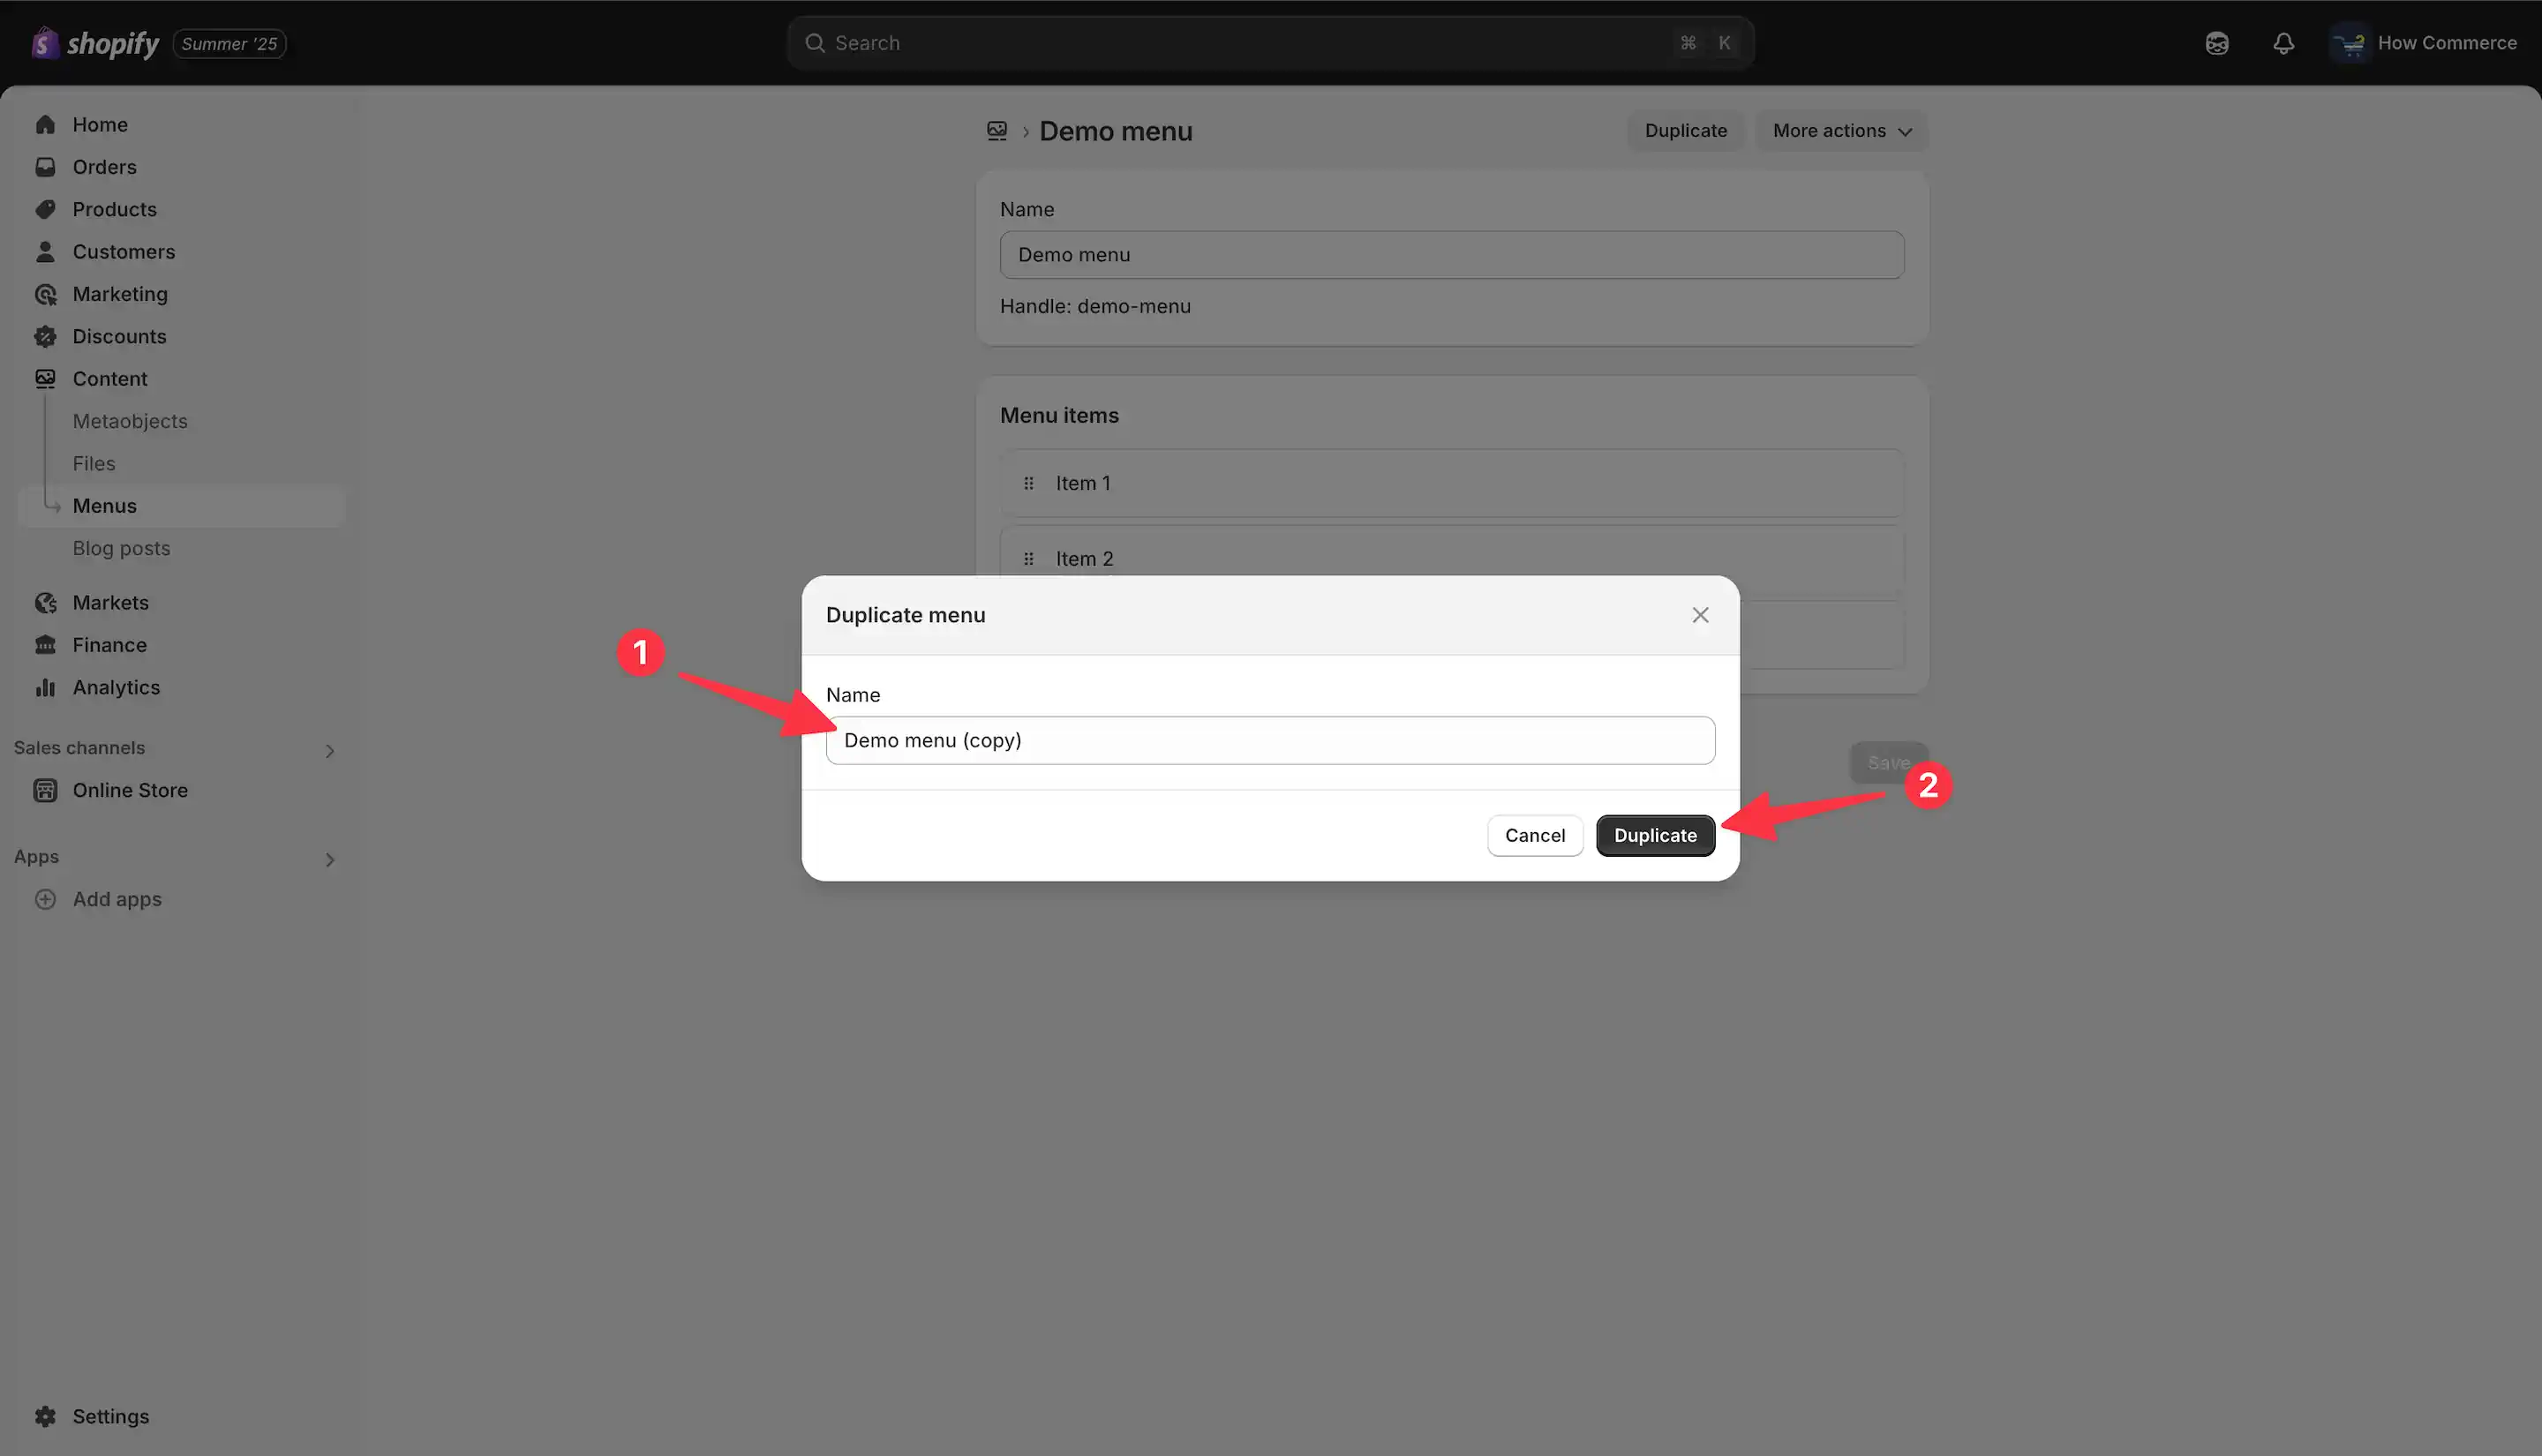
Once you click on the “Duplicate” button a modal will display like in the image below.
Go to “Name” (marked with 1 in the image below) and type in the input box your new menu name.
Once you have that in place click on the “Duplicate” button (marked with 2 in the image below).
Now the menu is duplicated and you have a new menu generated based on the previous one that you decided to duplicate.
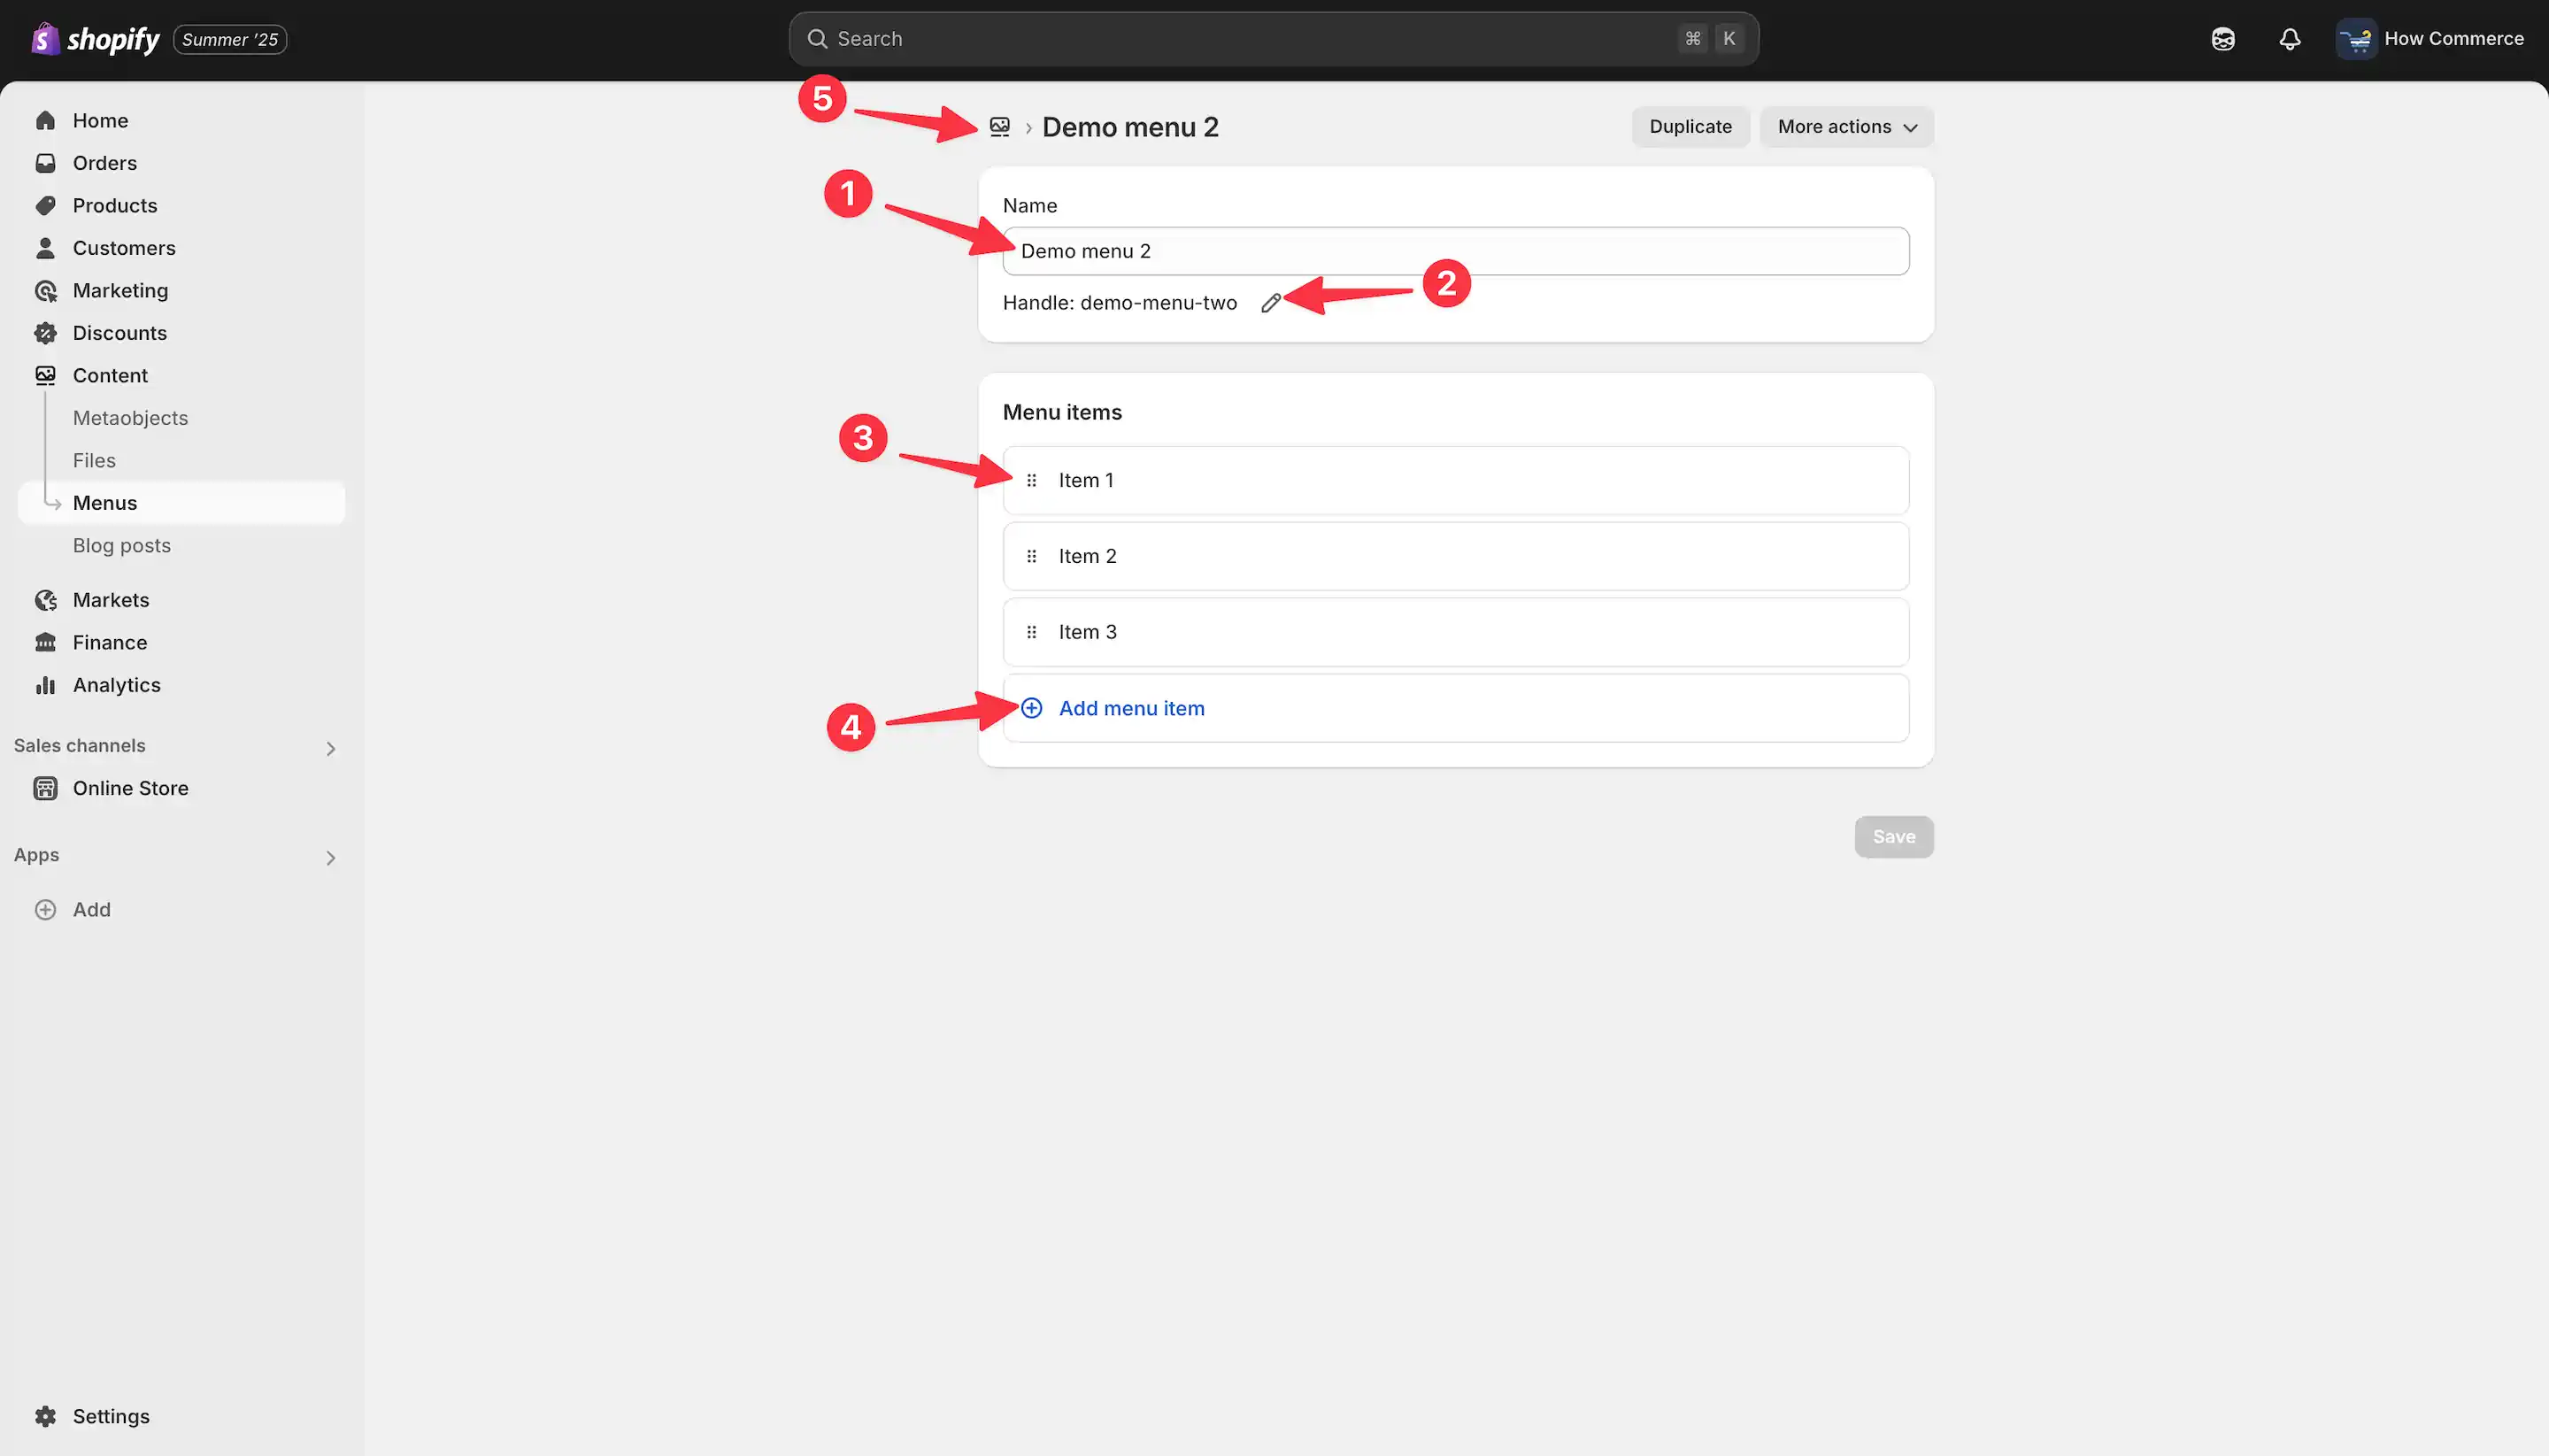
The structure is exactly the same except the menu name (marked with 1 in the image below) and the handle (marked with 2 in the image below).
Now you need to further edit the newly created menu if you need to.
Menu name can be modified in the “Name” input box (marked with 1 in the image below).
Handle can be modified by clicking on the icon (marked with 2 in the image below).
For menu item editing you can select any of the items (marked with 3 in the image below) and edit the link and text for them.
If you need to add new menu items click on the “Add menu item” (marked with 4 in the image below).
After everything is set in place and edits are completed click on the “Save” button to save your changes to the menu.
If you want you can go back to the menus losing page to see your new menu by clicking on the icon (marked with 5 in the image below).
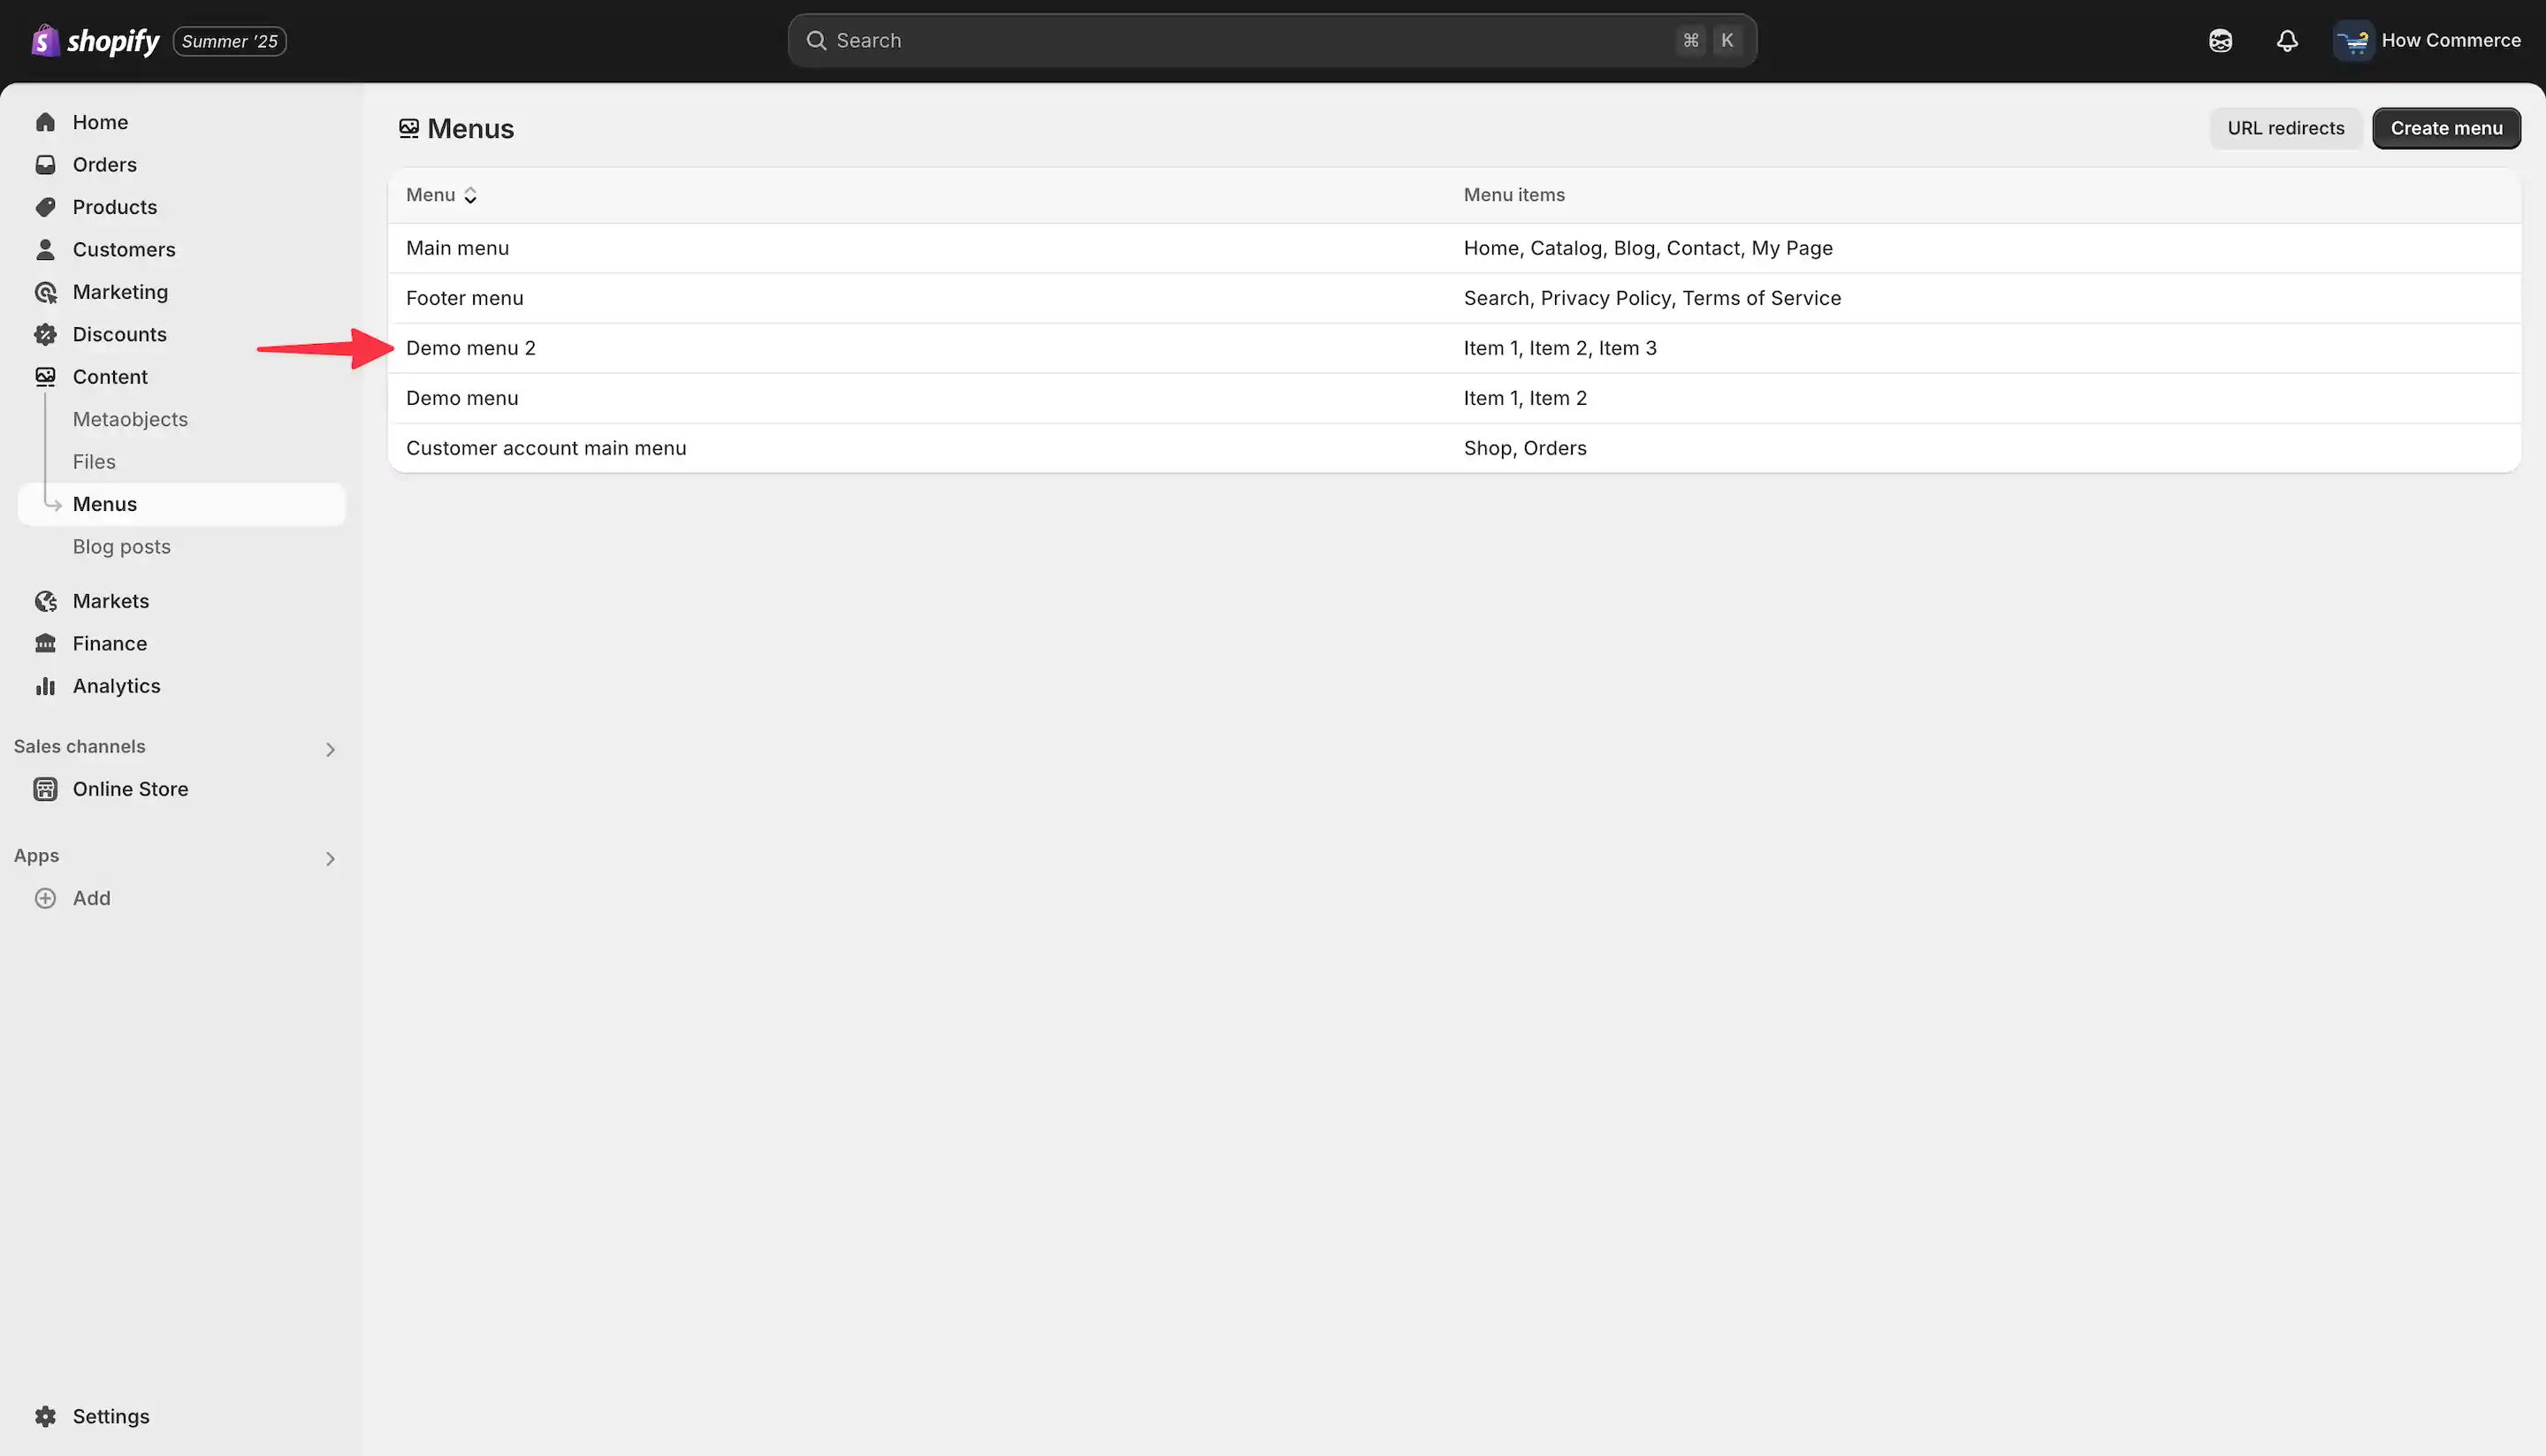
In my example my new duplicated menu is called “Demo menu 2” as seen in the image below:
Assign the new menu to theme
Now that you have the menu setup you need to list it in the storefront so users can use it when they visit your store.
To do that you need to assign it to a theme and especially your published (live) theme.
If you want to test things use an unpublished theme and once you like what you see and everything is tested you can publish the unpublished theme to reflect your changes live. Honestly this is the recommended way to do it, especially if you have a high trafficked store.
In my example I’ll use the published theme.
In order to do that you need to go to the themes listing page of your Shopify store.
Go to “Online store” (marked with 1 in the image below) and to “Themes” (marked with 2 in the image below).
Your published theme, the one that is live on the storefront is the first one you see on the page.
Yours could be different. In my example I use the Horizon theme which is the latest default theme at this time in Shopify new installations.
Click on the “Customize” button (marked with 3 in the image below).
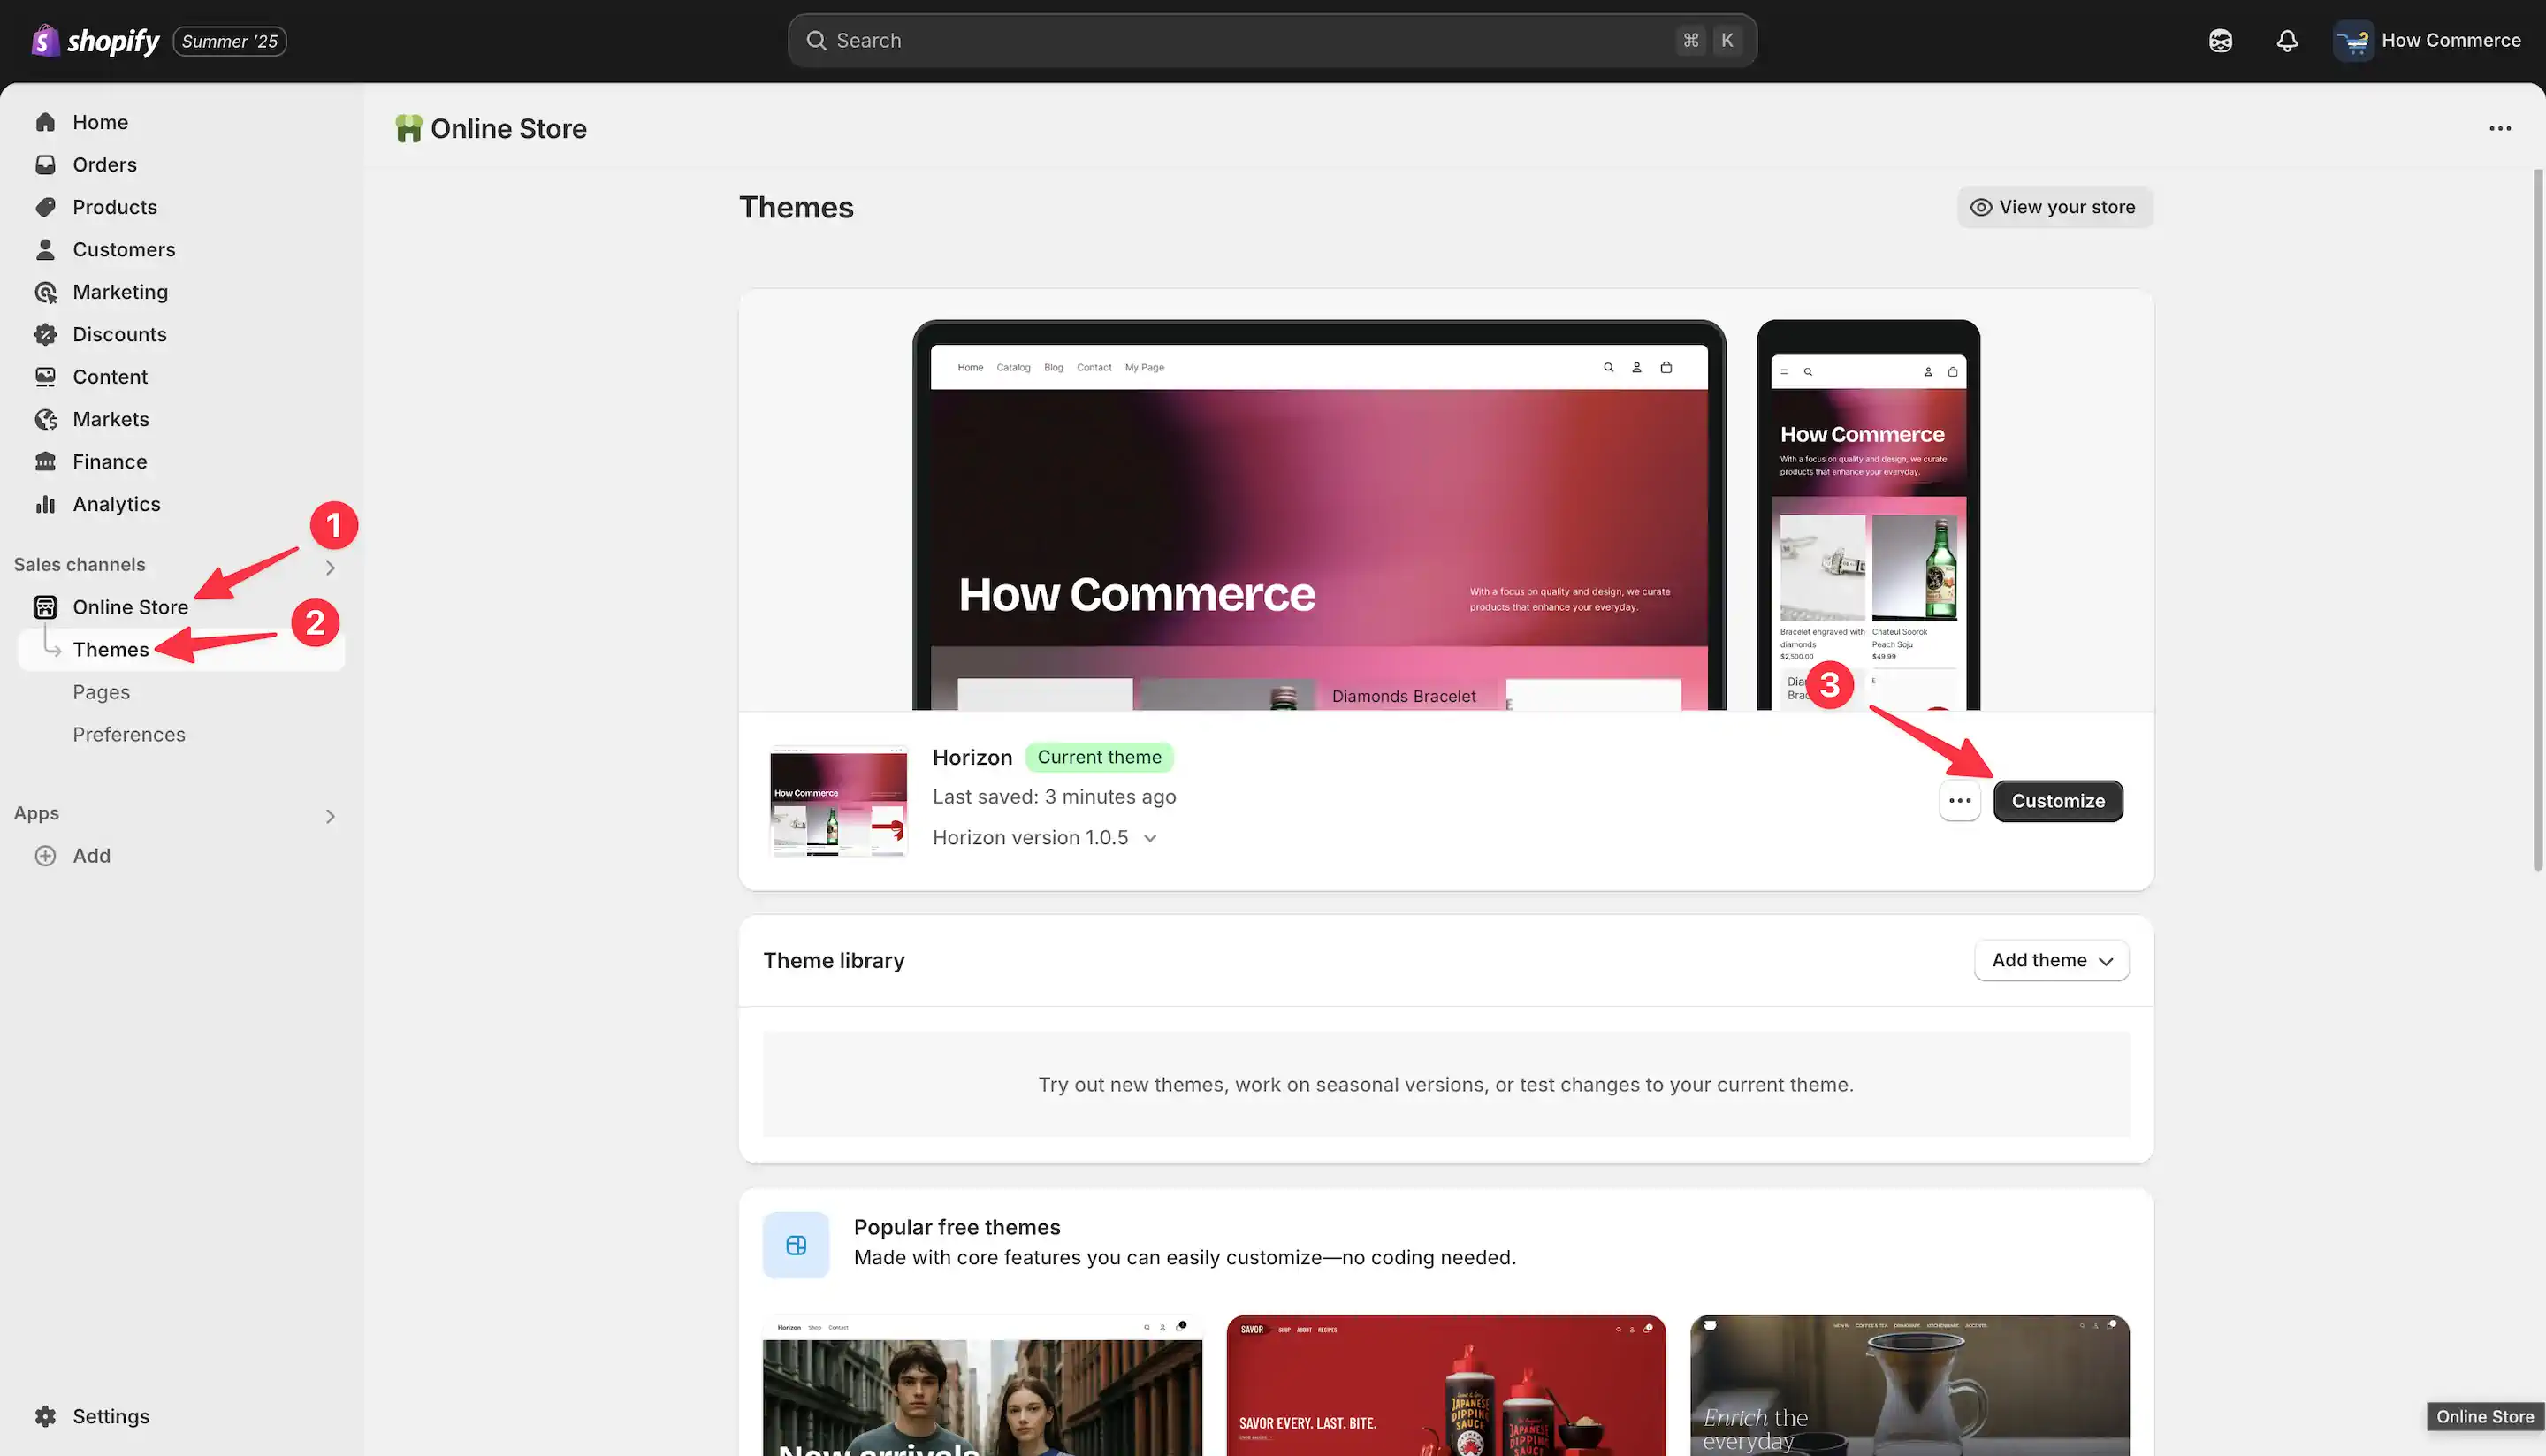
This will open the Shopify theme editor for the published theme.
Any changes you make here will be immediately visible to your customers. Always double-check edits before saving, and consider testing on an unpublished theme if possible.
Select the section and create a block on that section to assign the menu.
If your theme does not have blocks that support menus then you need to create one or find a developer to do it for you.
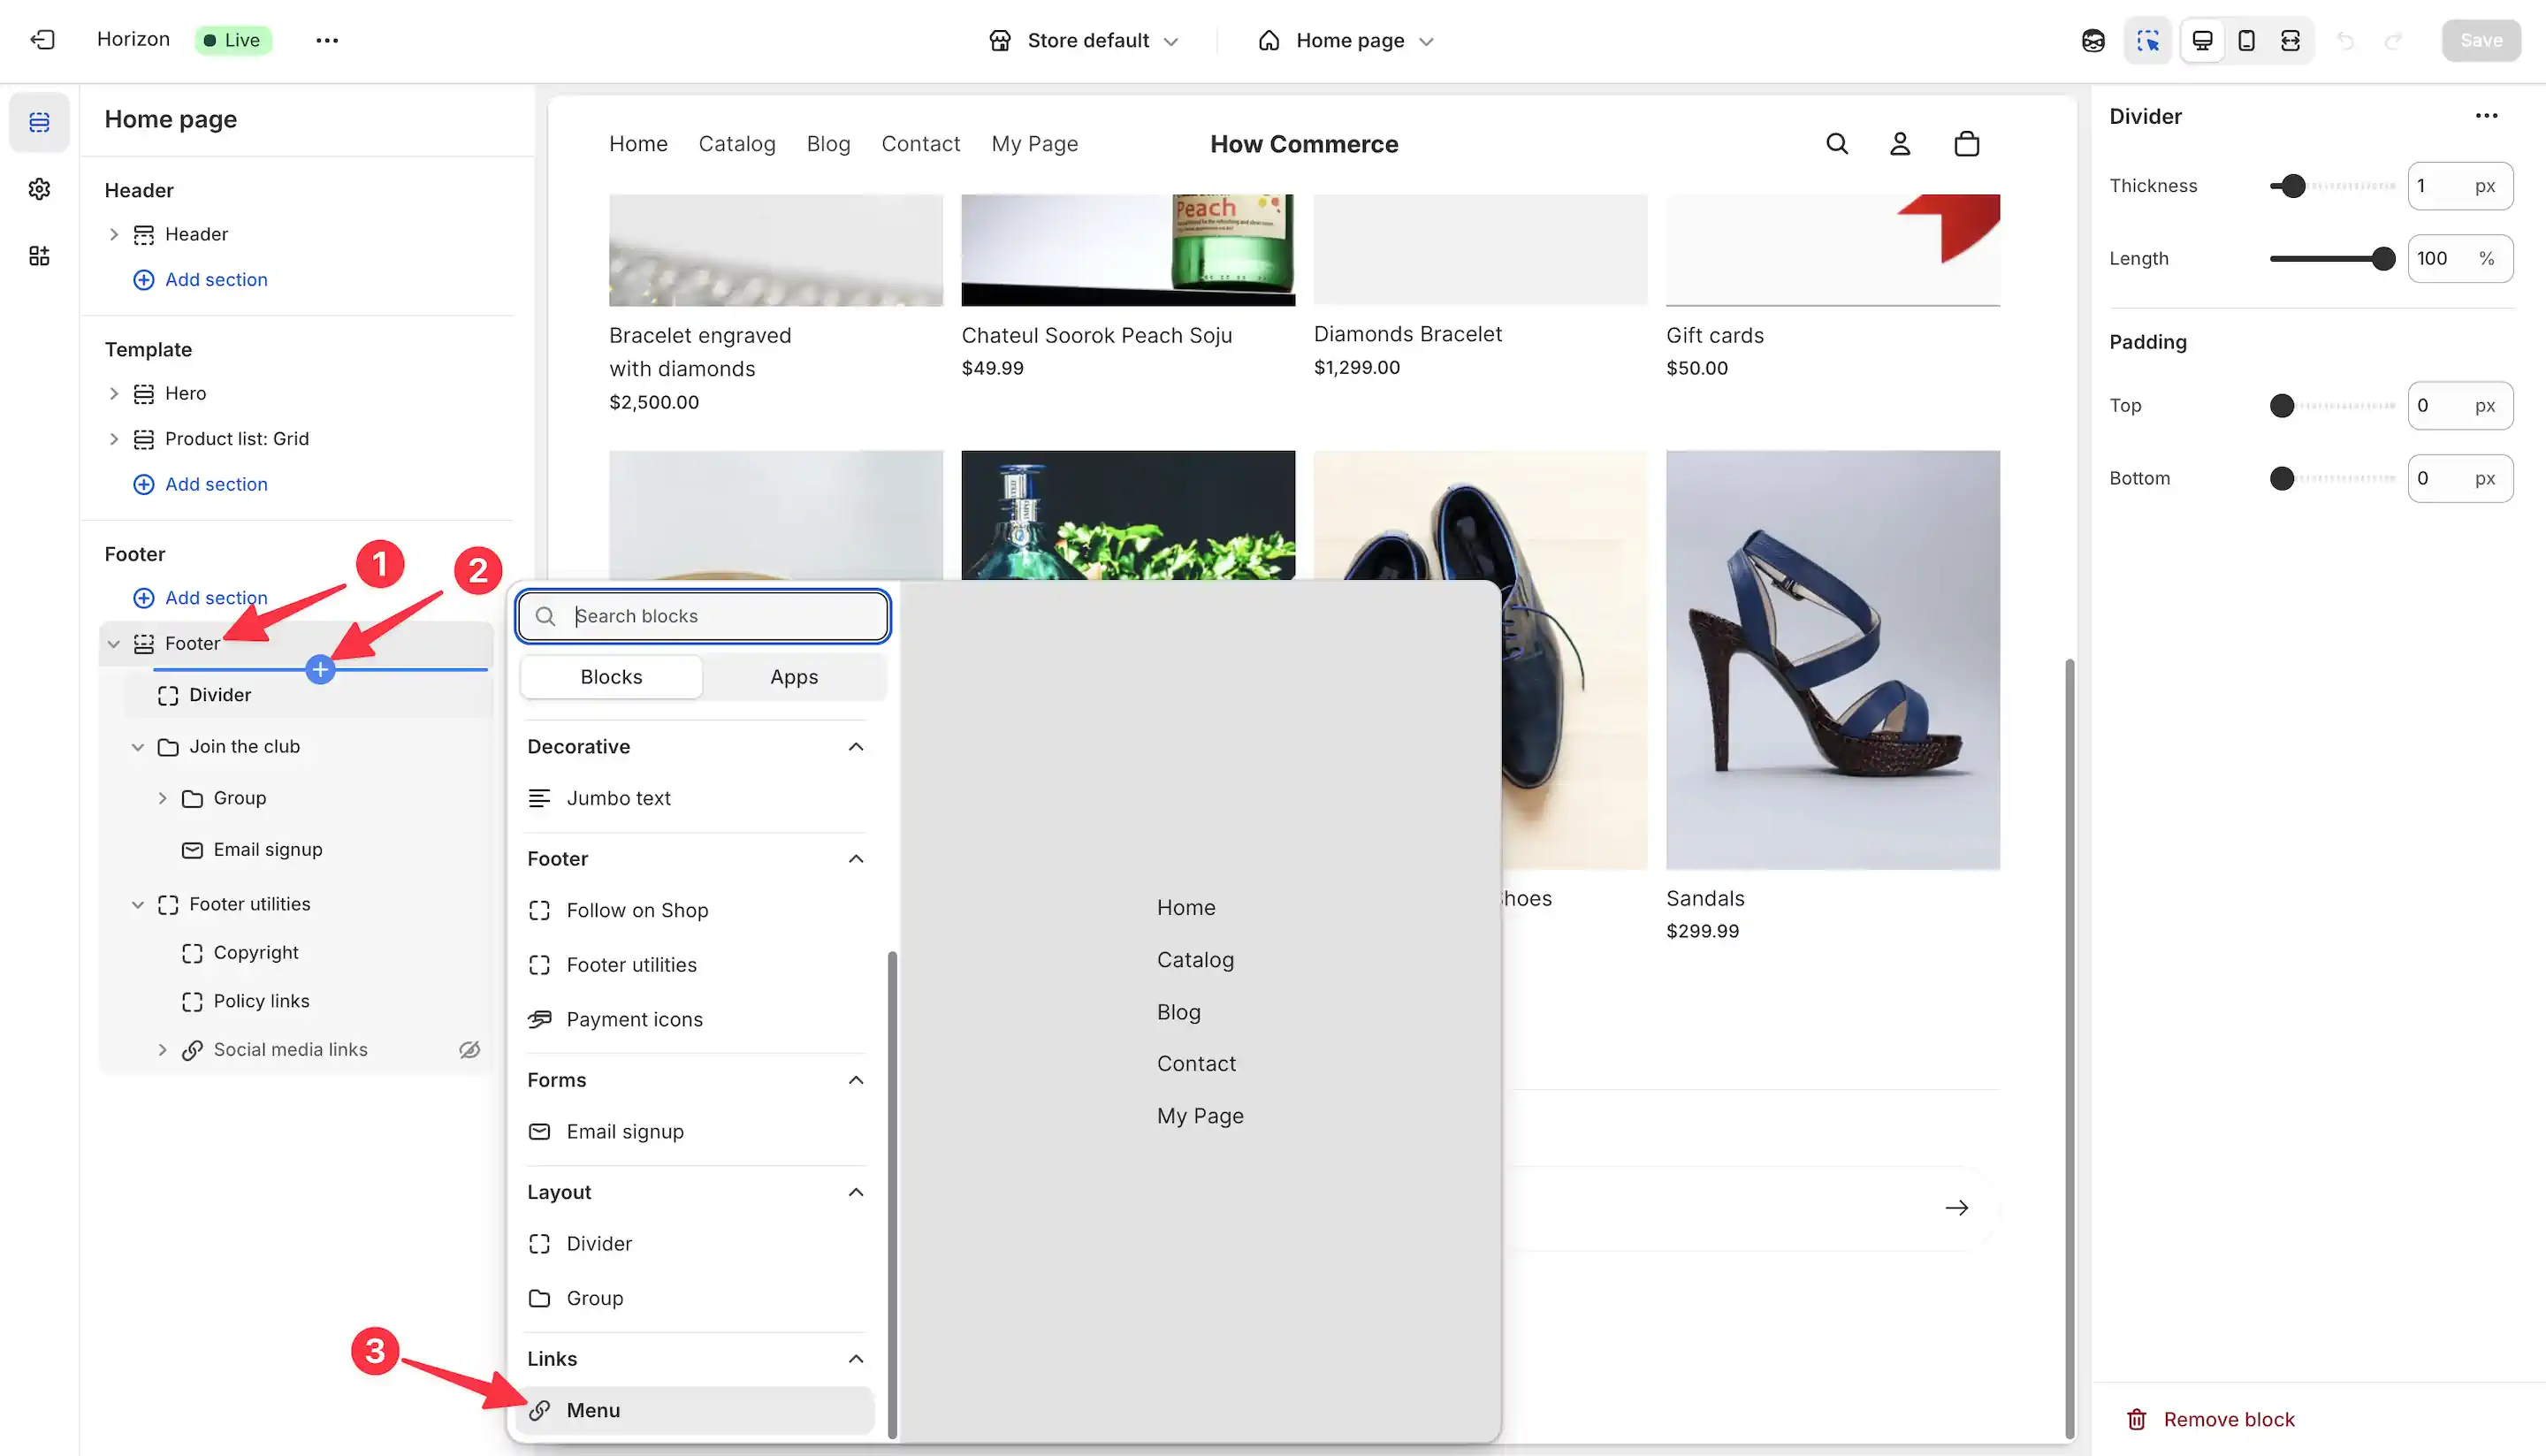
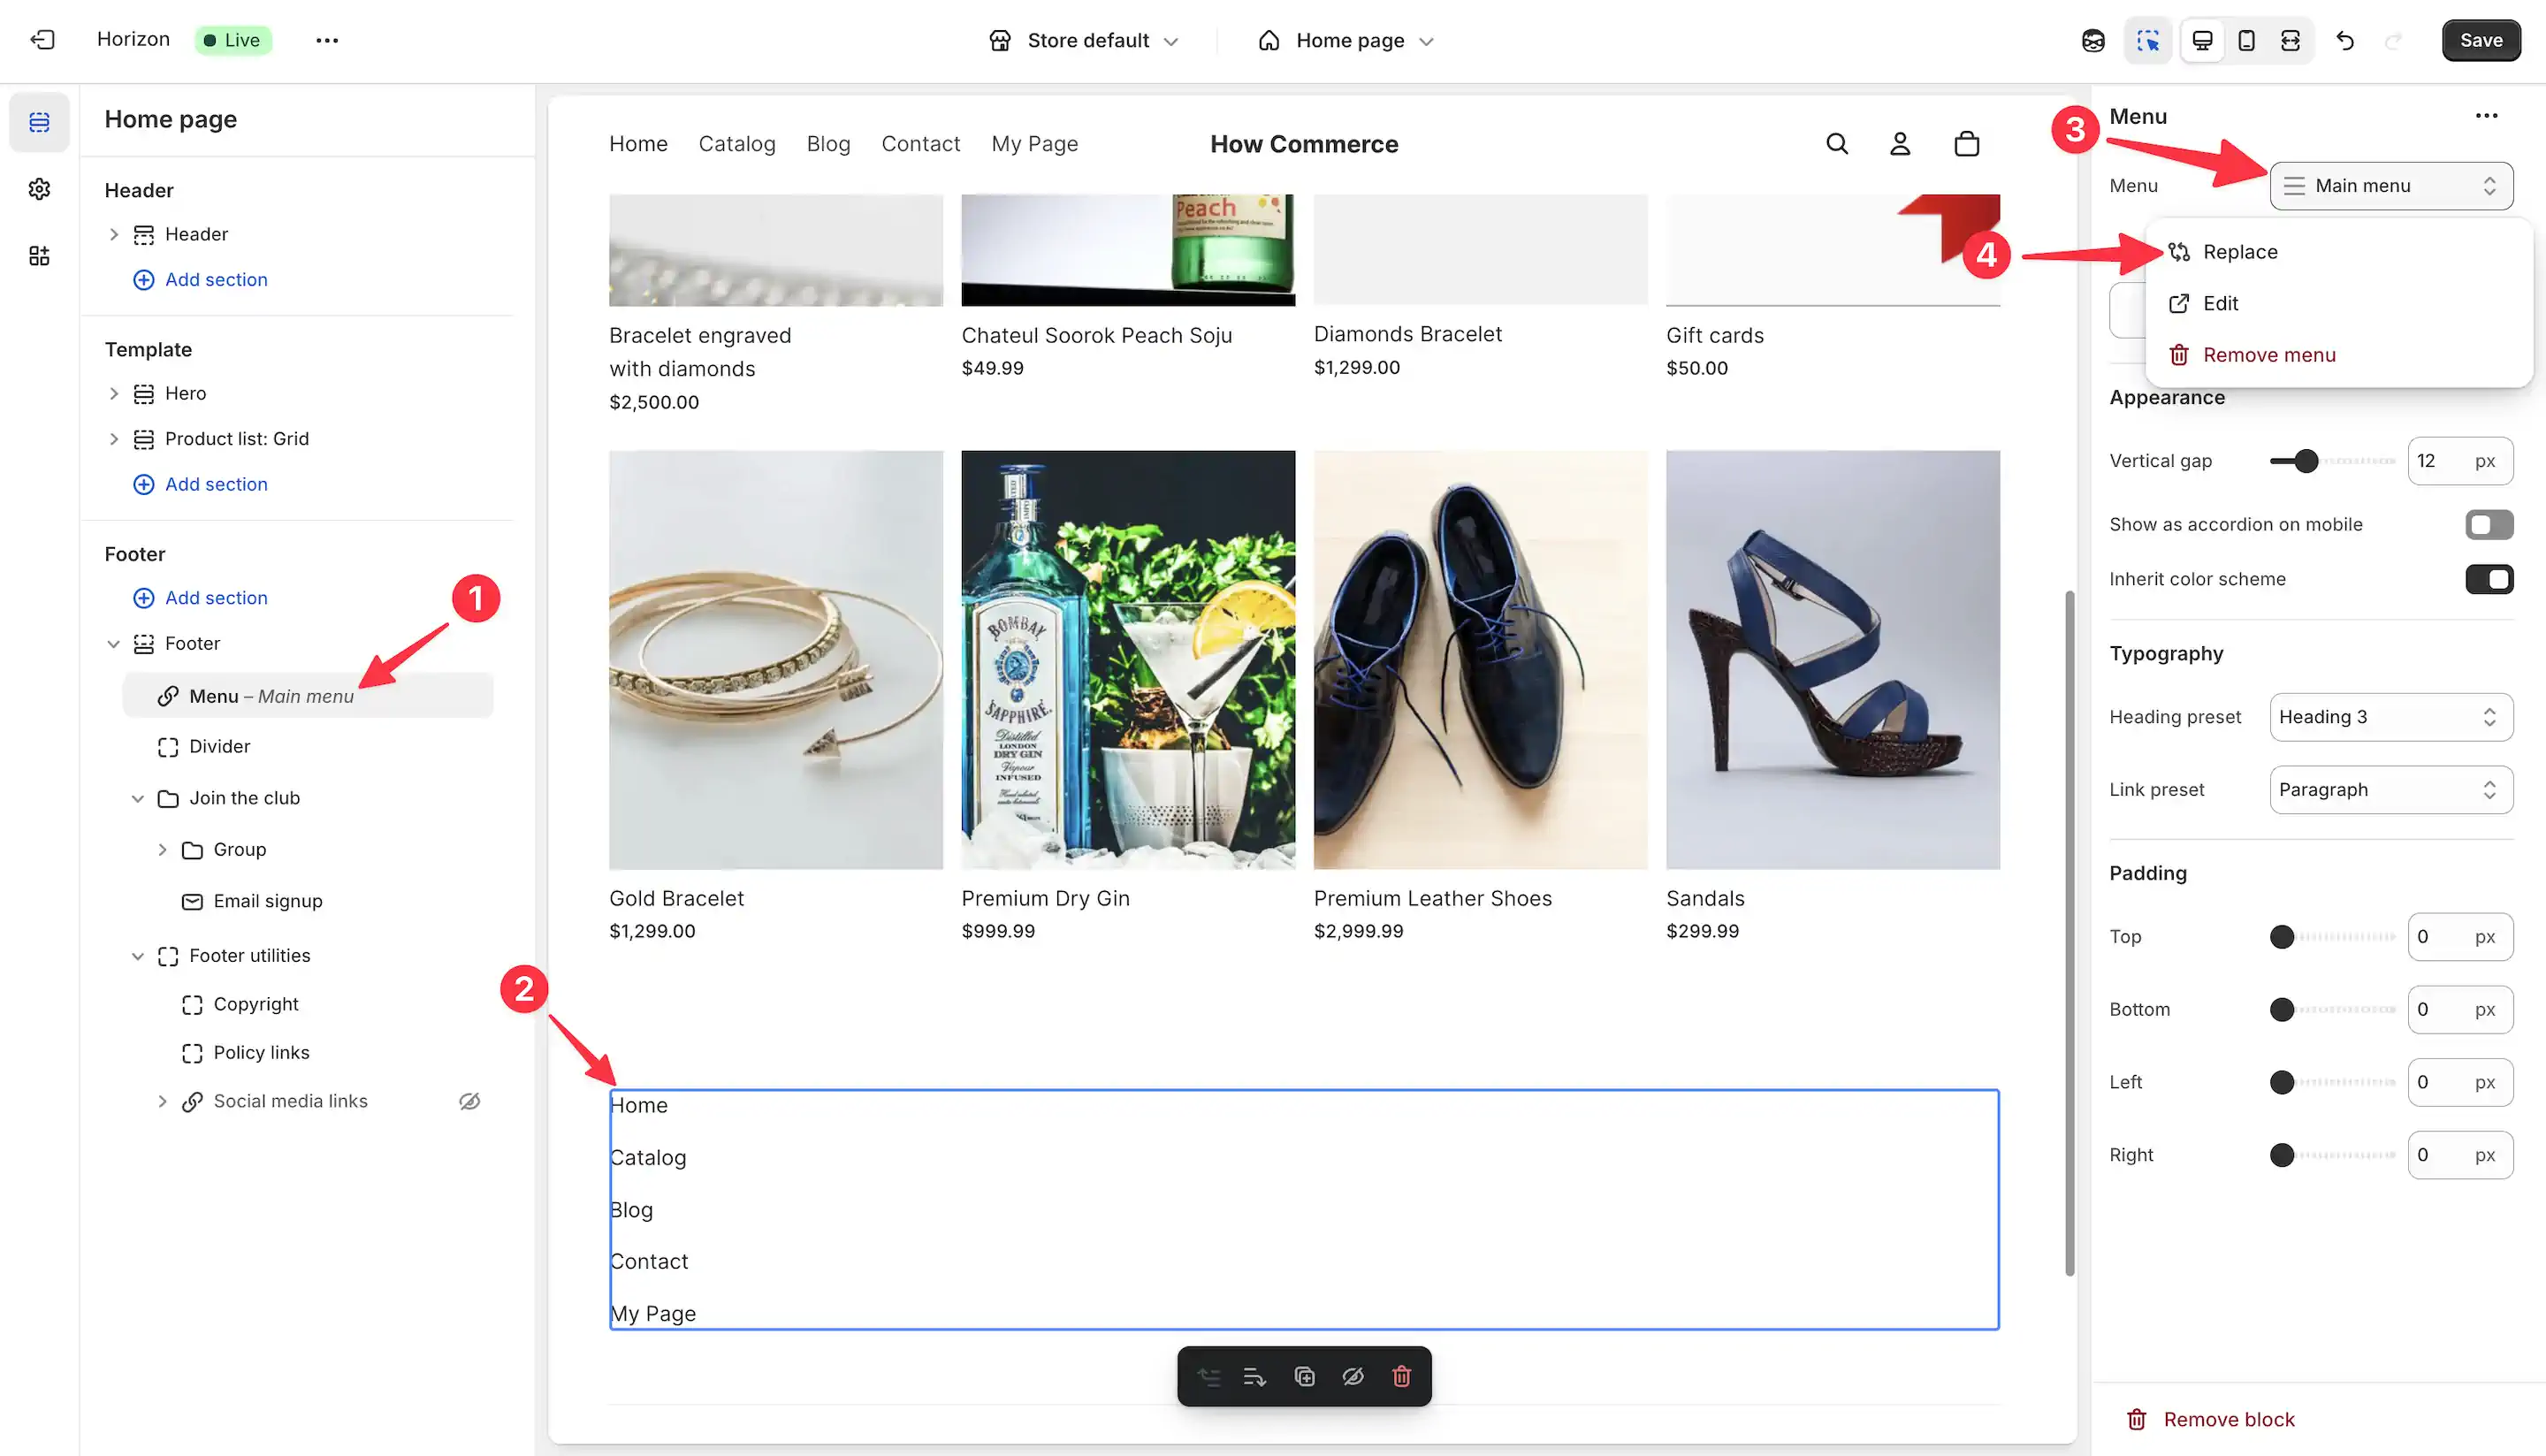
Go to the “Footer” section (marked with 1 in the image below) or to a section that contains a menu block and click on the icon (marked with 2 in the image below) to assign a new menu block to this section.
Search for the menu block (marked with 3 in the image below) and add it to the section.
You should see now under the section the menu block (marked with 1 in the image below) and in the editor view you should see the new menu clock displayed.
By default the block will list the main menu as seen in the image (marked with 3 in the image below). From here you can select your newly created menu.
Click on “Replace” (marked with 4 in the image below) to choose your newly duplicated menu.
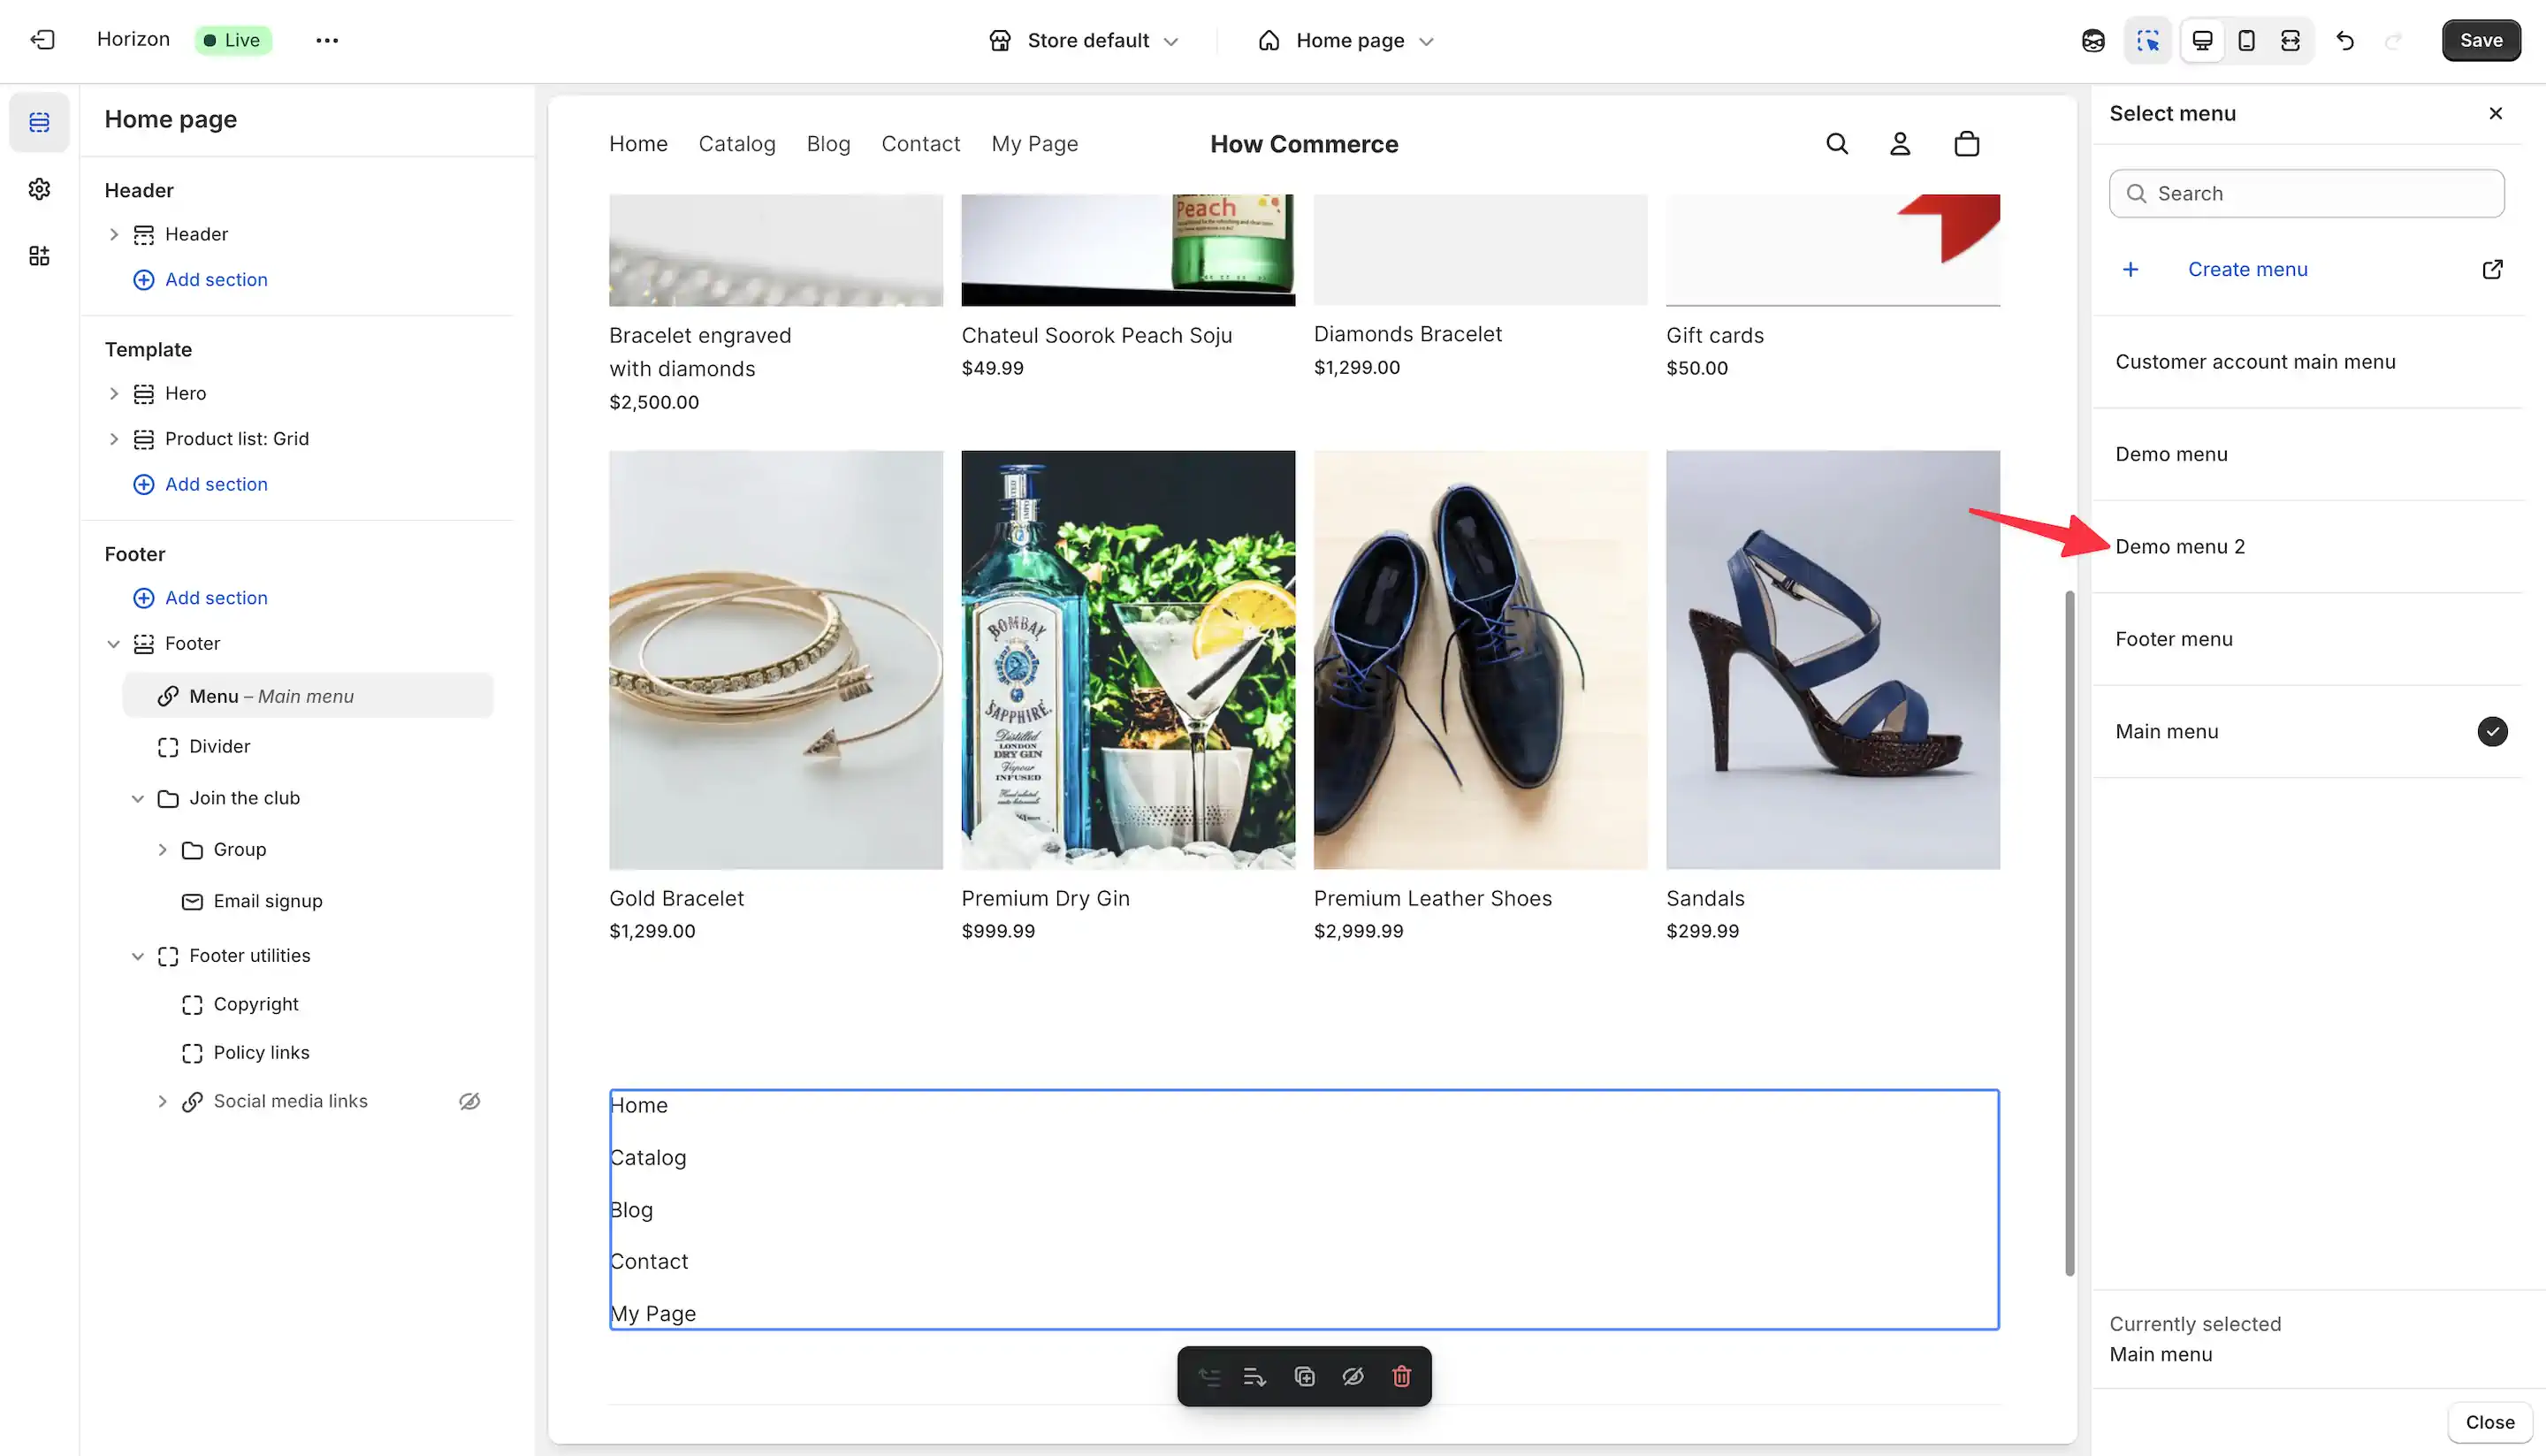
You’ll now see all the menus in the store. Select the one you created, in my example “Demo menu 2” like in the image below:
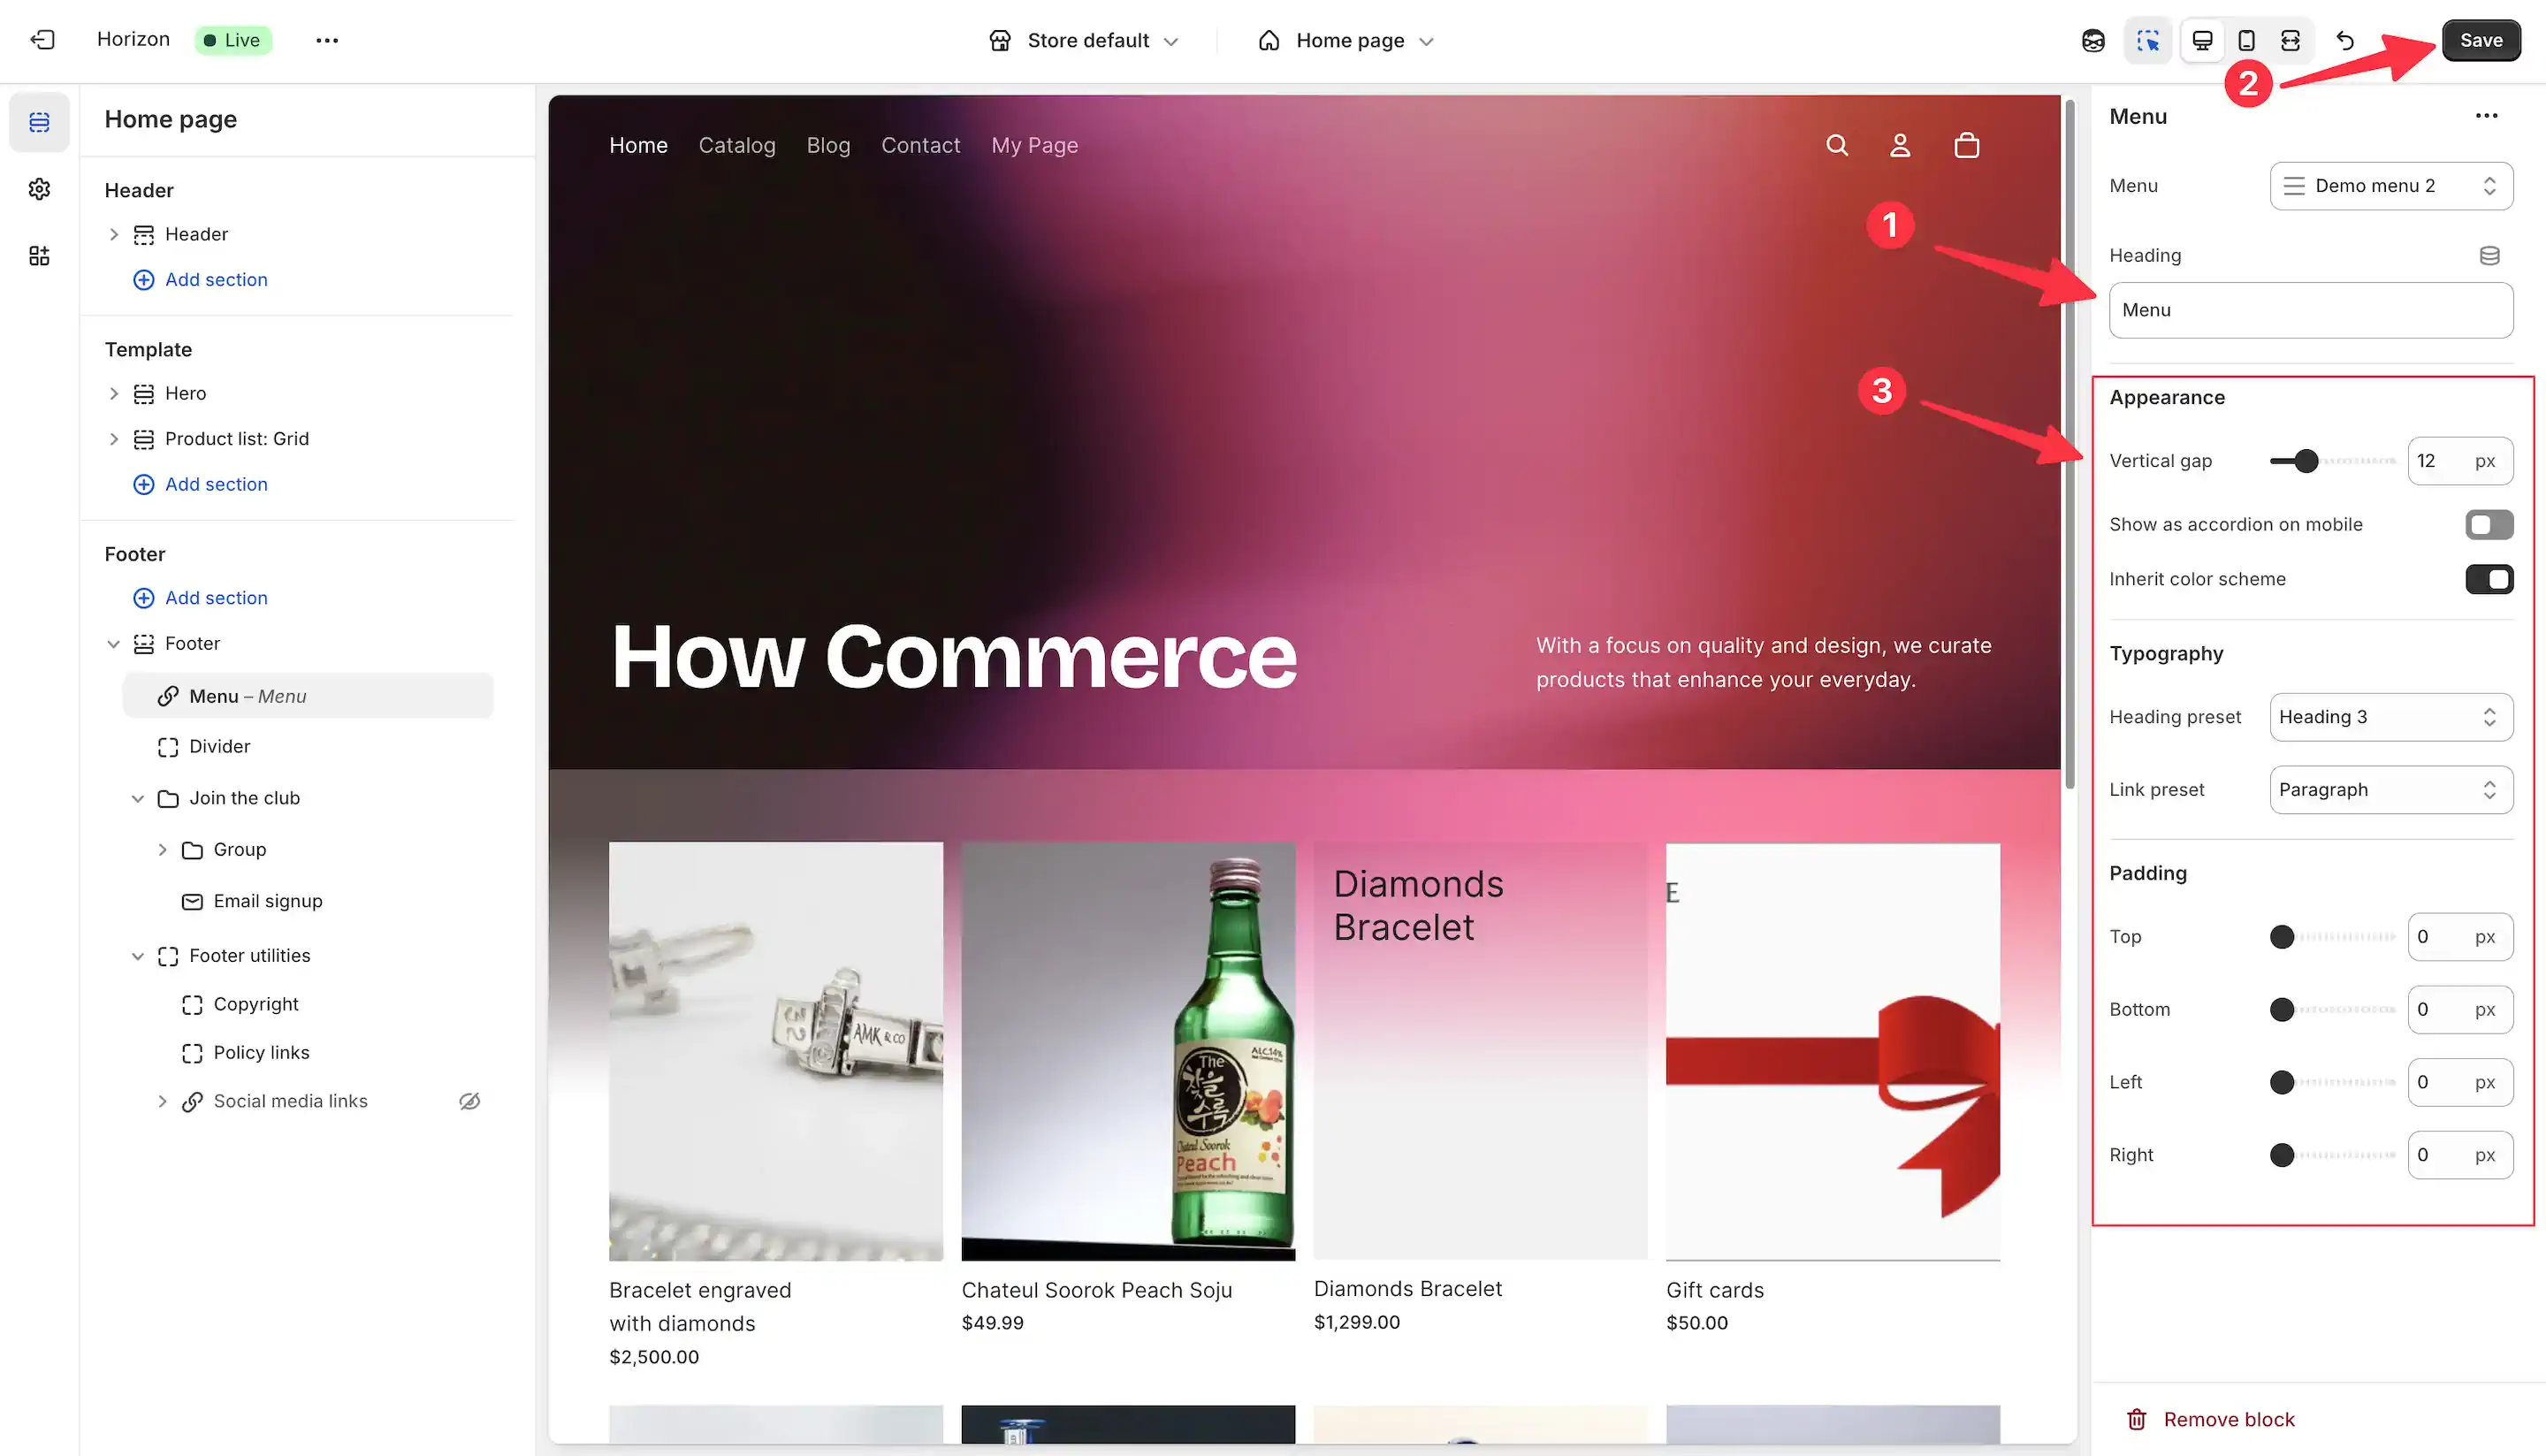
If you want to add a heading to the menu and if your theme supports that - in my case Horizon does that - click on the input box (marked with 1 in the image below) and type it.
You may also have other settings to the menu block like in my example (marked with 3 in the image below). If that is the case and your block is customizable in details like the one in the Shopify default theme then do all the adjustments here.
Once everything is complete click on the “Save” button (marked with 2 in the image below) to save your changes.
Check the new duplicate menu in storefront
Now your new duplicated menu is assigned to a block and listed in the Shopify storefront.
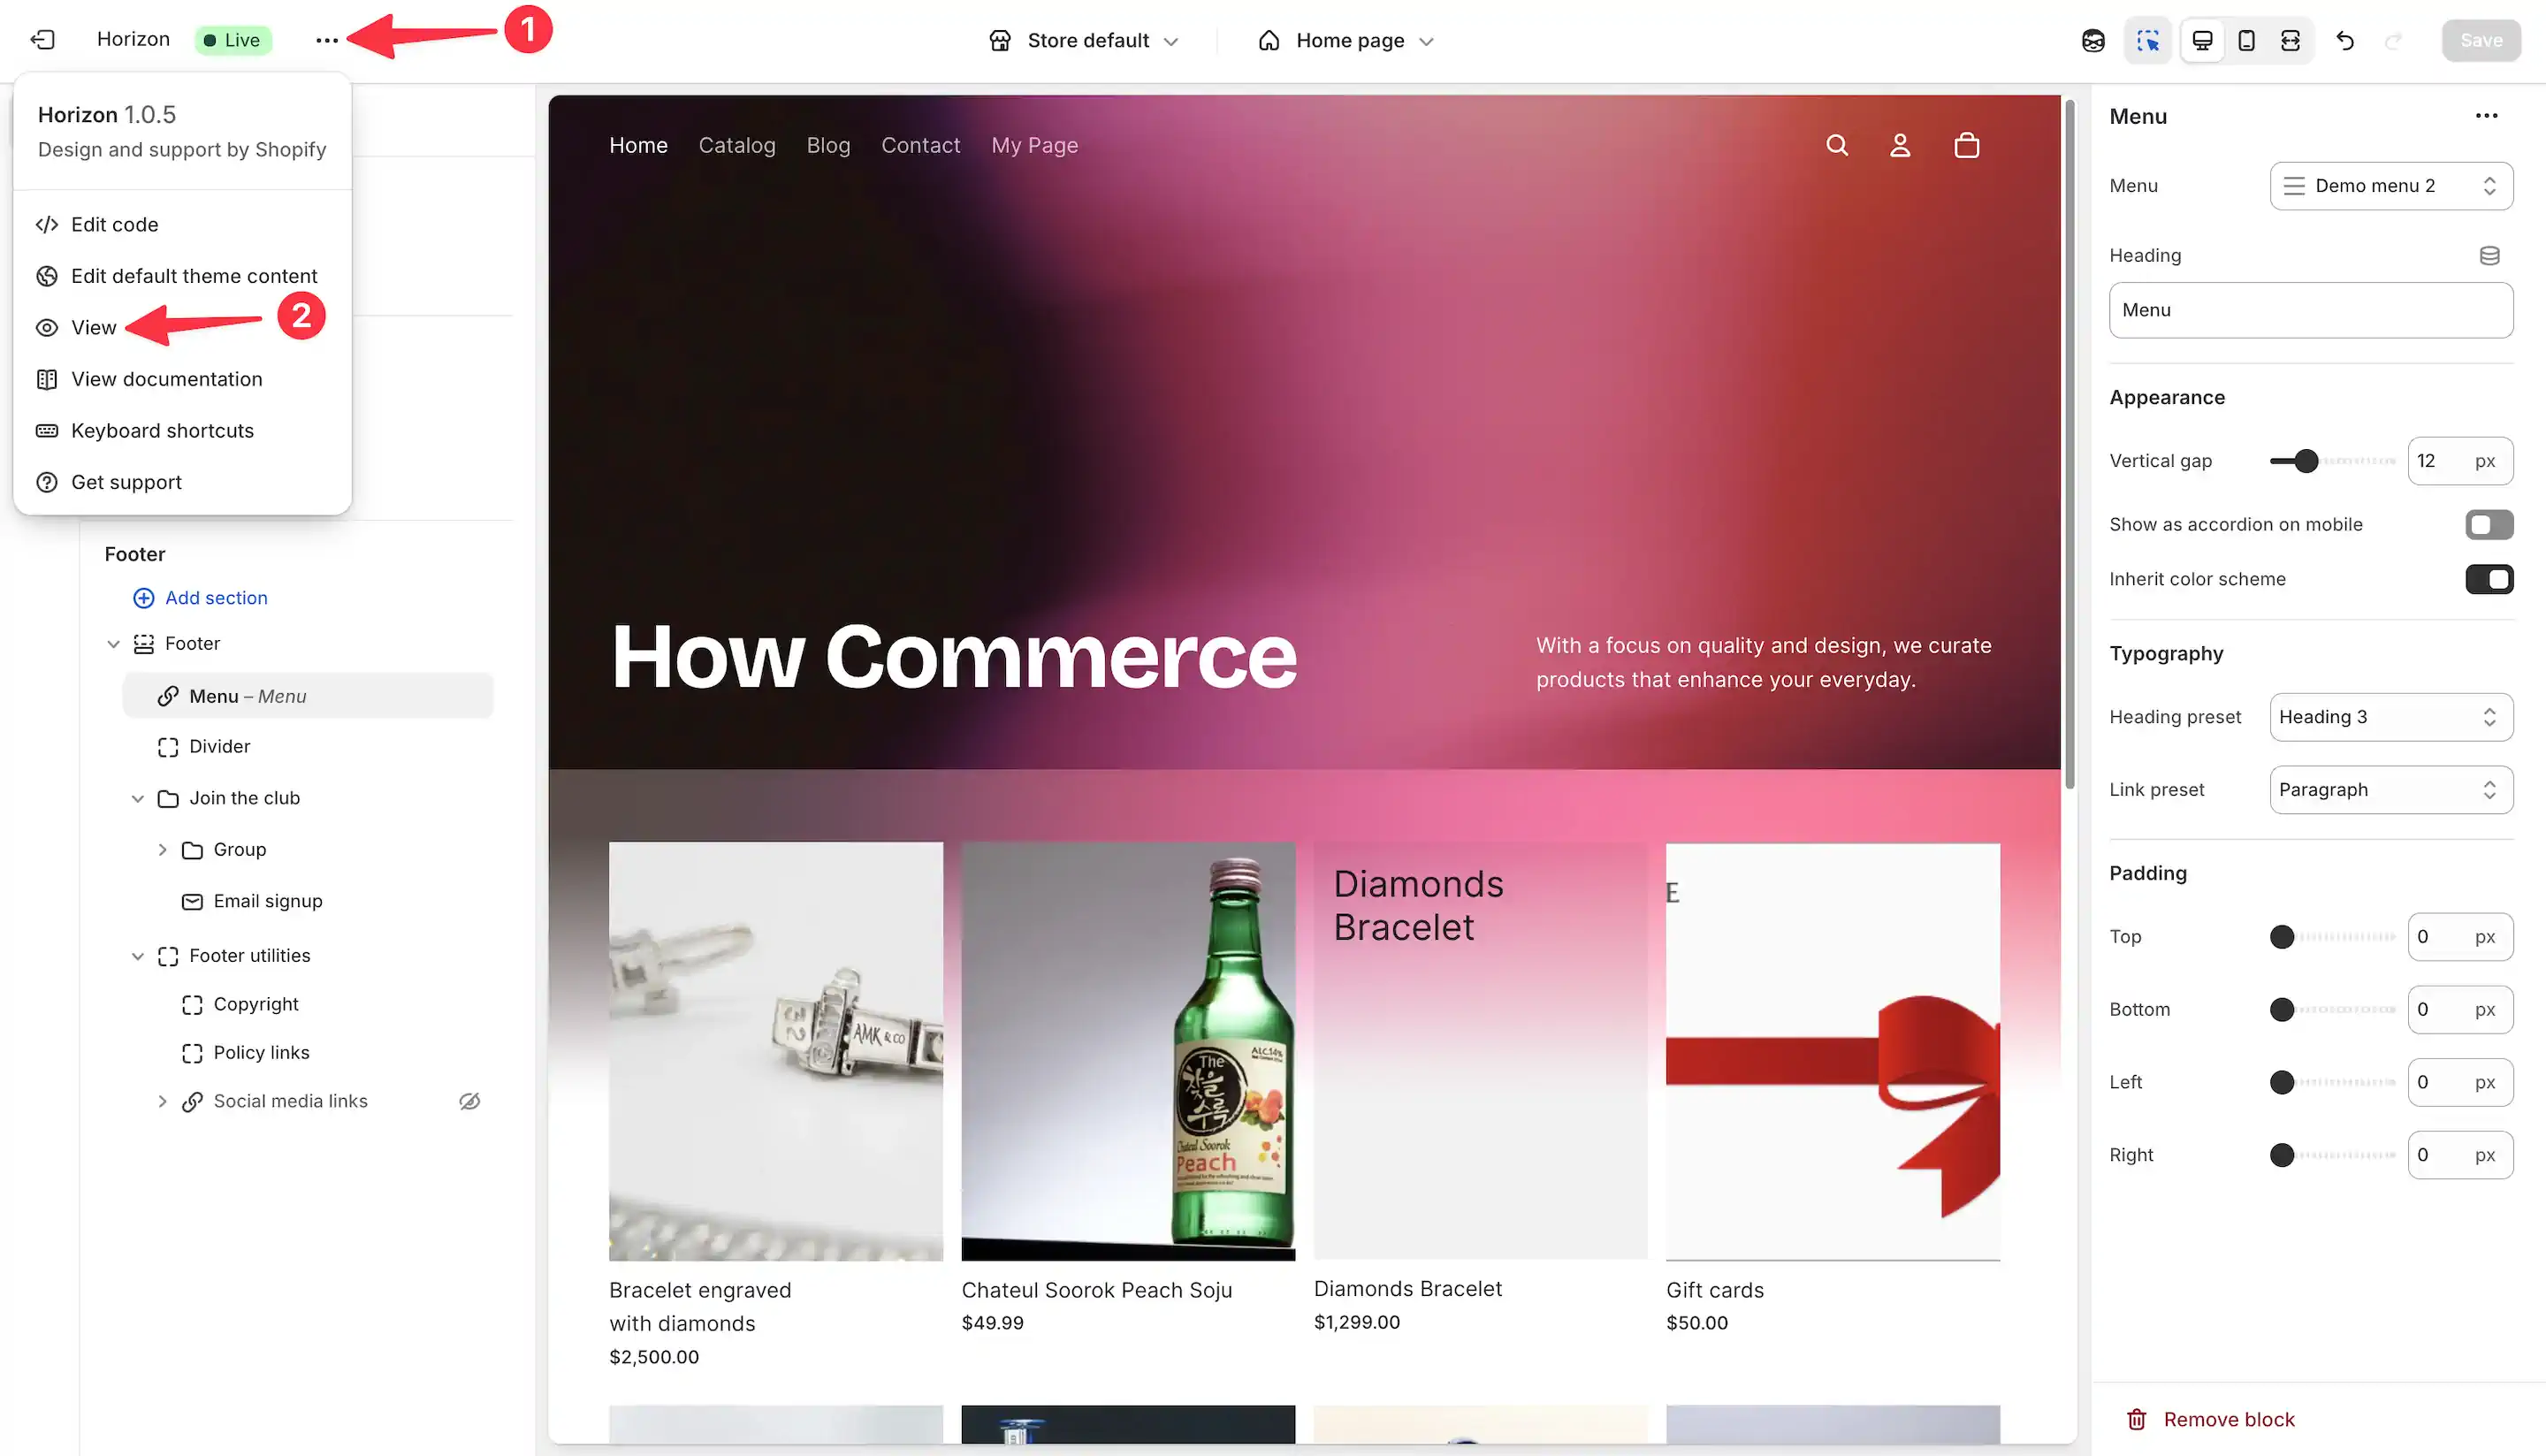
To view it click on the “…” (marked with 1 in the image below) and after on “View” (marked with 2 in the image below).
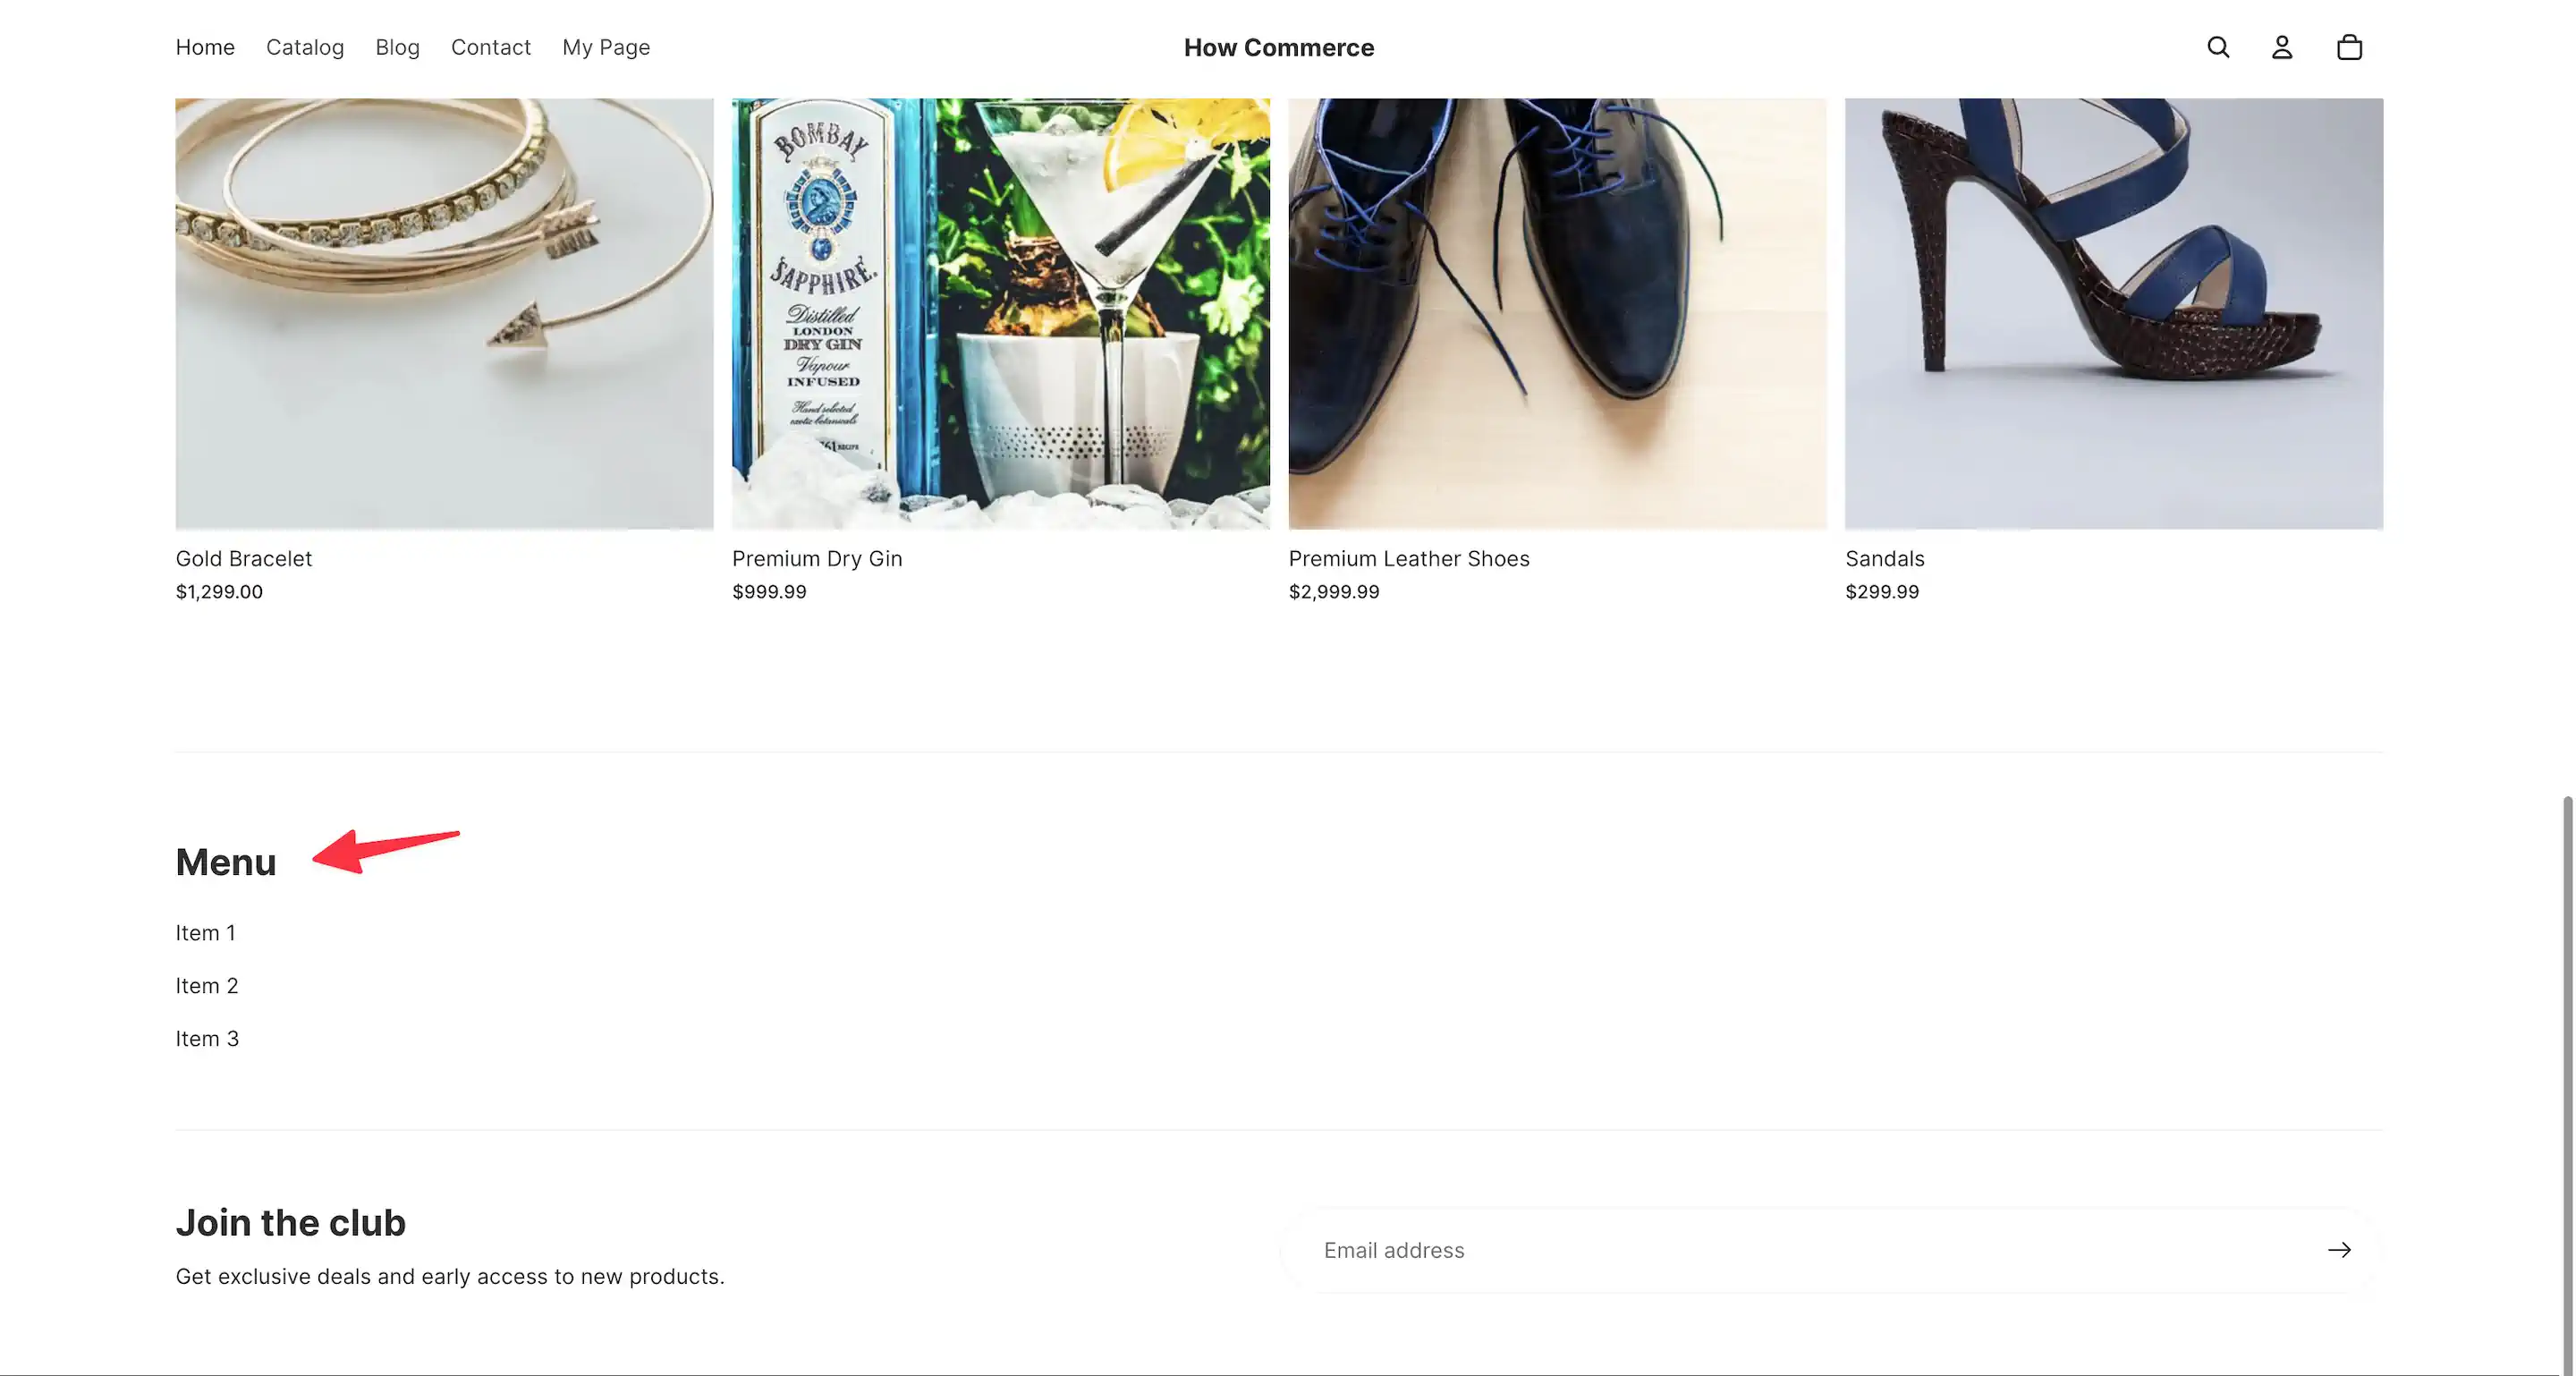
It should look like the one listed in my image below, depending on what theme you use.
On the Shopify’s Horizon theme it’s looking like this:
Conclusion
For many store owners and developers alike this tiny feature will save a ton of time.
There are stores that have menus with hundreds of items and recreating those could take hours upon hours of your time.
Hopefully this tutorial will help many of you understand easily how this process works.