

What is the assets folder?
The assets folder is a directory inside your Shopify theme where you can store various files, such as images, CSS stylesheets, JavaScript files, font files, and other resources that are essential for your store's design and functionality.
For example if you want to store the font files yourself, this is the folder where you can upload the fonts to use them in your theme.
If you want to use a third-party JS or CSS library and you do not want to use the CDN version and host the file yourself this is the place where you need to upload the files.
For those coming from a WordPress background is mostly the same thing as the “Assets” folder on a WordPress theme.
The assets folder acts as a centralized repository for all the files that are necessary to customize and enhance your Shopify theme.
Is the only place on a Shopify theme where you can upload files to use inside your theme.
If you try to upload the files anywhere else when you do the deployment via the Shopify CLI, Shopify will ignore all files that are not recognized by the system except the files located in the assets folder.
Of course even in this folder there are files that are accepted and files that are not accepted. This is all for improved security purposes.
Do not confuse the files that you use inside Shopify content (uploaded via the Shopify Content section) with the files in the assets folder. These are two different things.
Files that you use inside content are uploaded via Shopify admin directly to Shopify CDN, whereas files in the assets folder are uploaded via the theme code editor or your local code editor and then to Shopify CDN.
You can use files uploaded via the content section in the theme as well by calling some special Liquid filters, but that is another topic.
Another thing to keep in mind is that you cannot create folders inside the assets folder, at least not at this time.
How to upload an image or a file to the assets folder
First, to render the image inside our Shopify theme we need to upload it to the assets folder.
I’ll use my local code editor for this example since I prefer it over the Shopify theme code editor.
First make sure you have the Shopify CLI installed on your computer so you can sync your local files to the Shopify server where your cloud store is located.
Inside your code editor add files that you want to use in your theme to the assets folder:
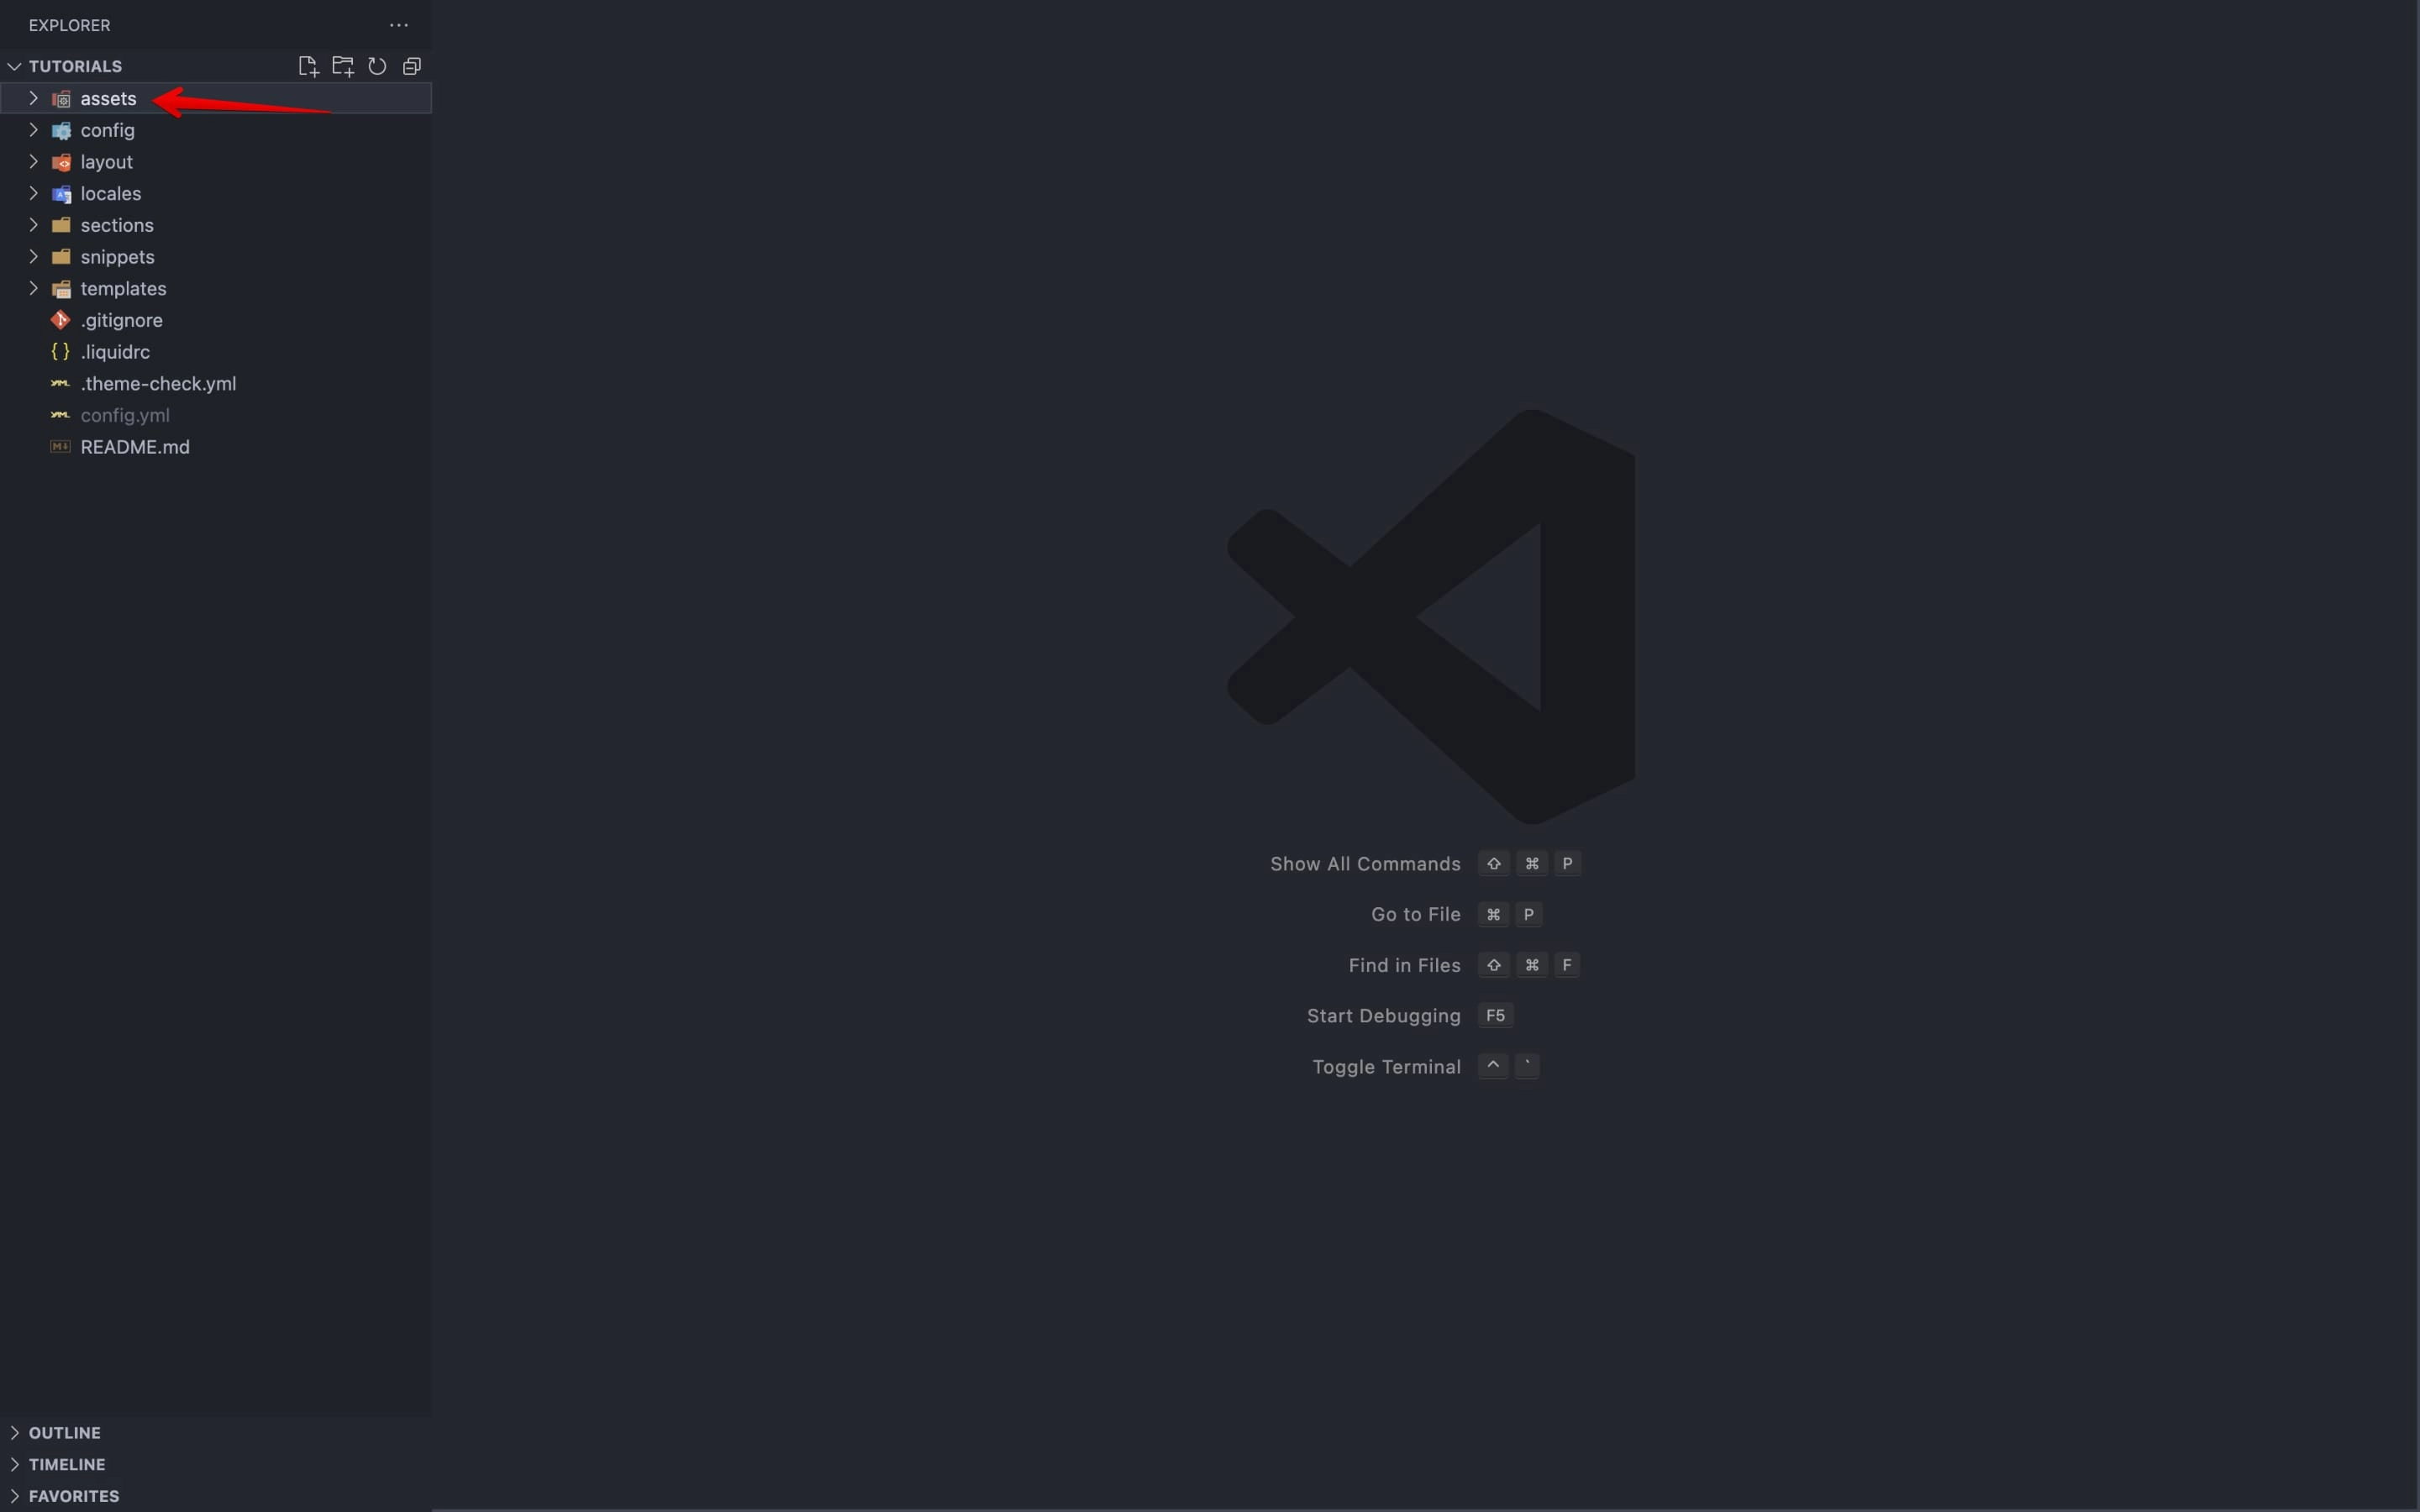
For this example I'll upload an image called "image.jpg":
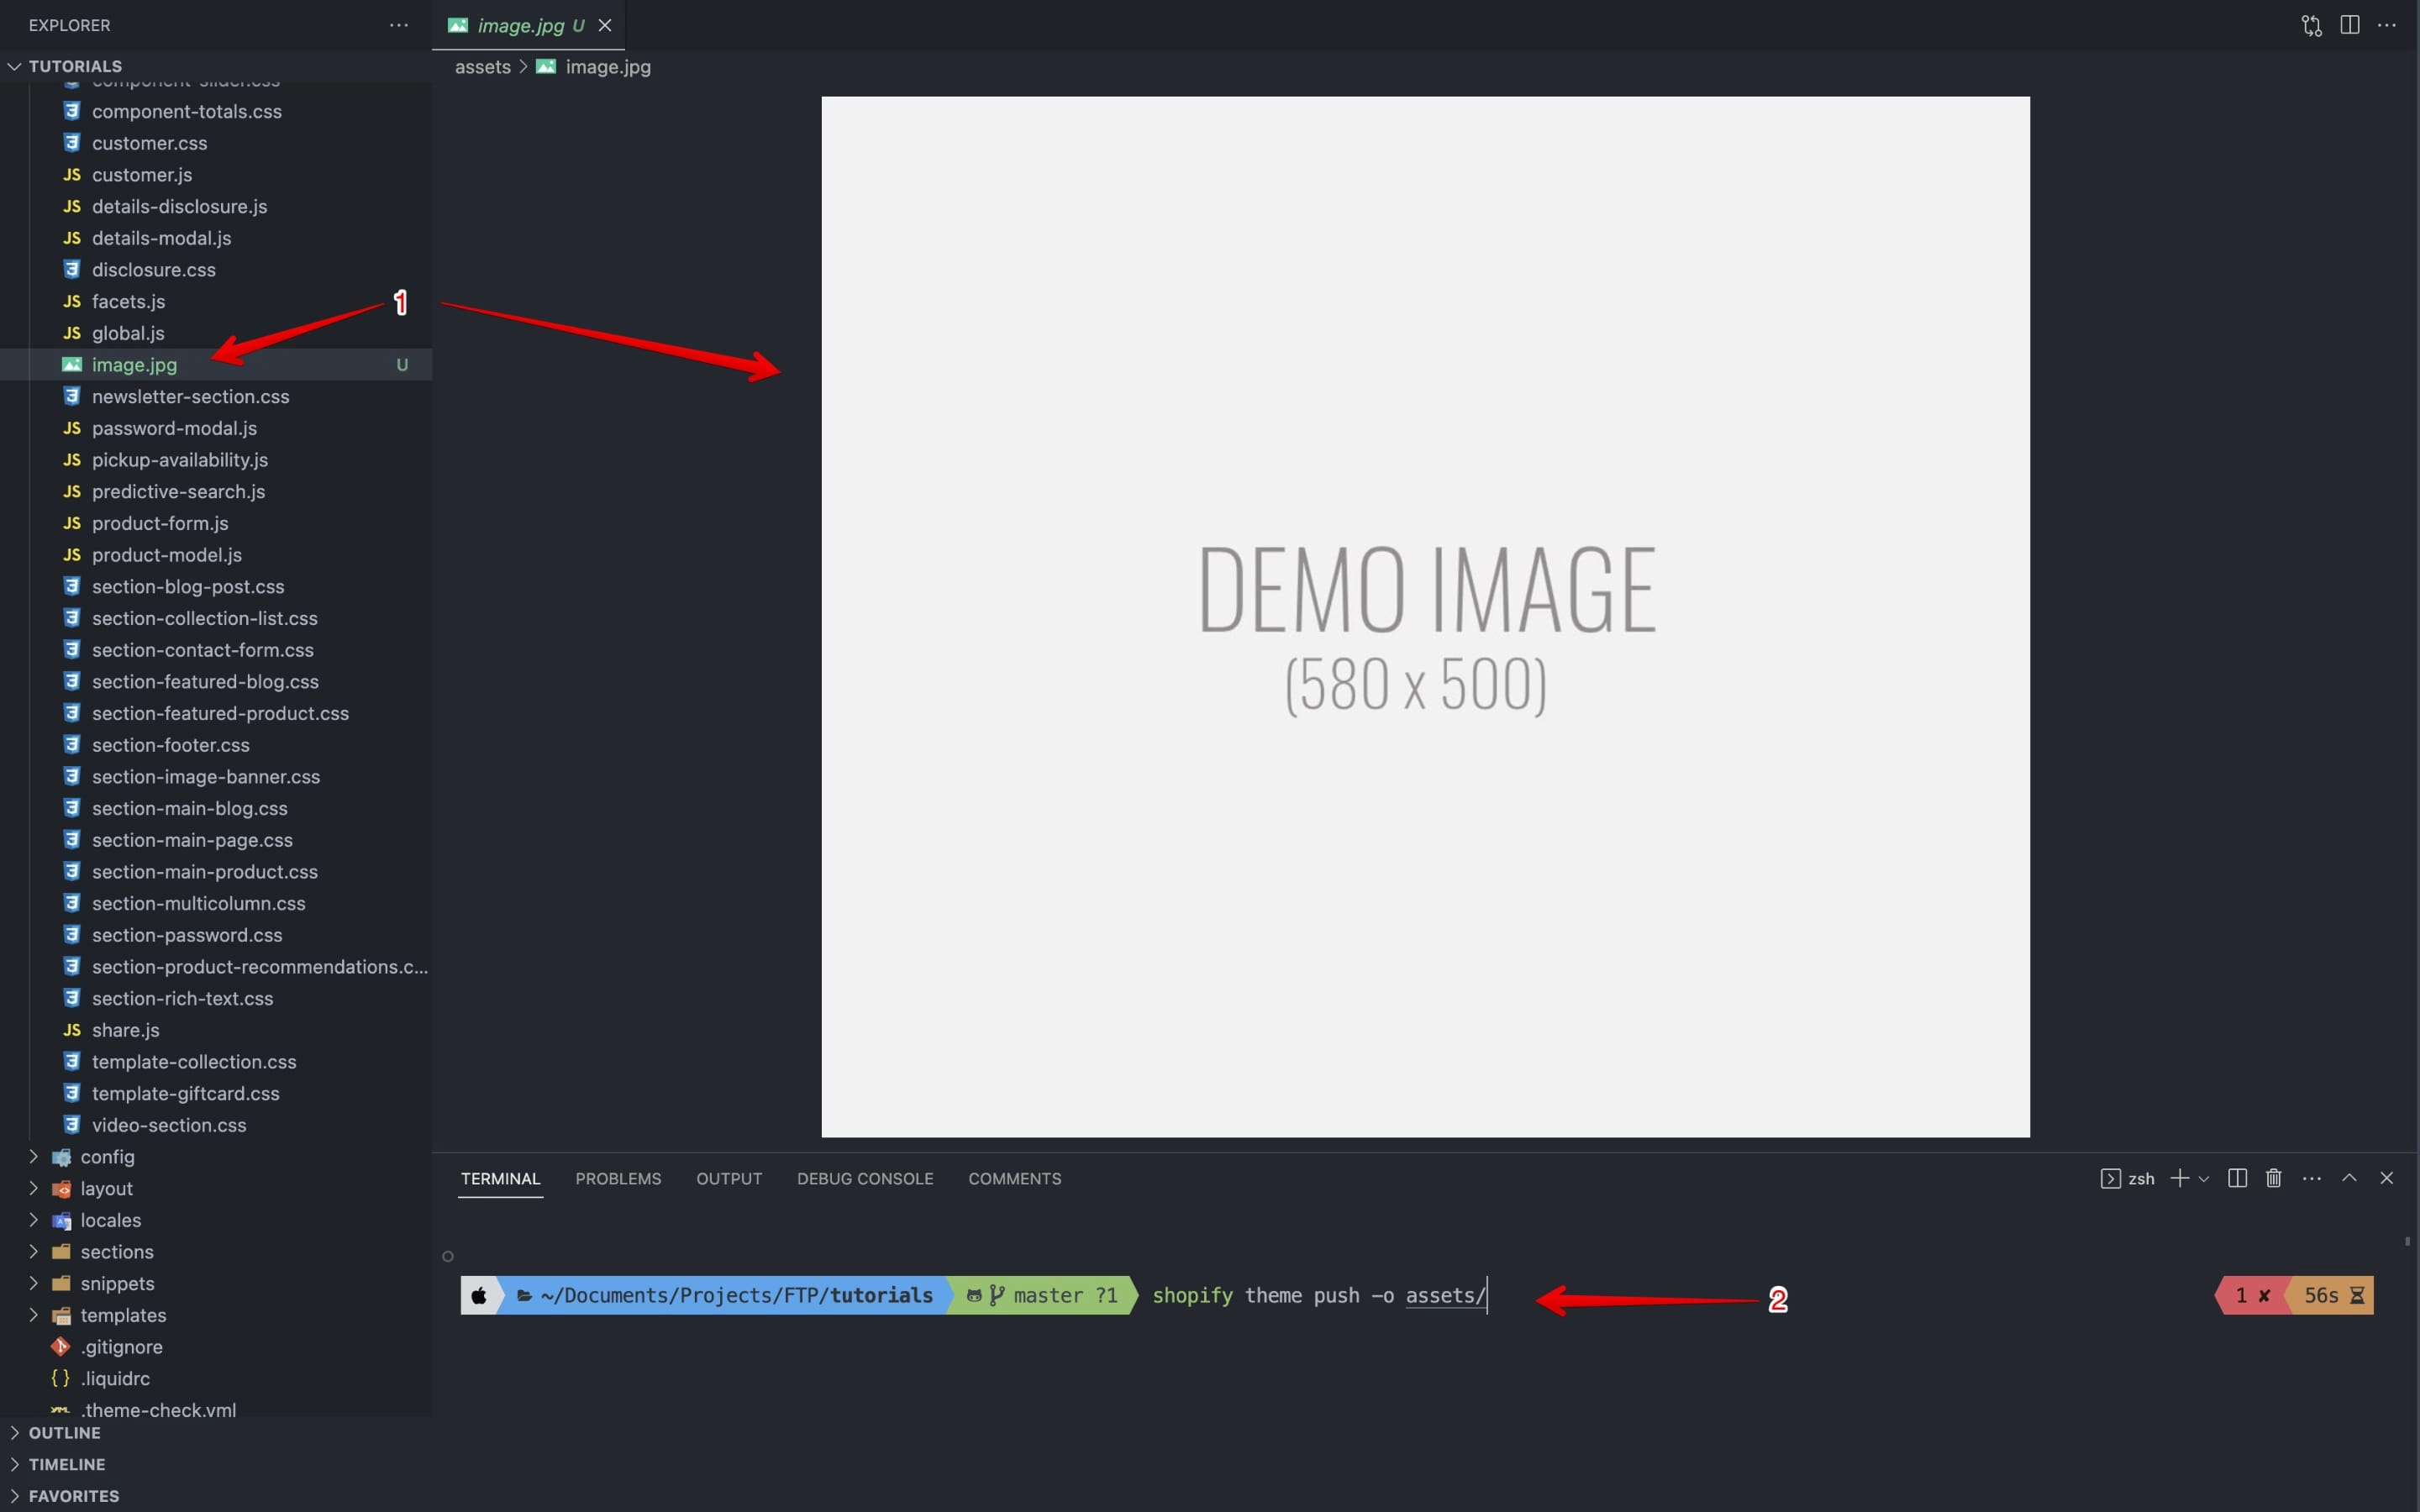
Now to upload the file you need to open the terminal and type the command. But before running the command make sure you are logged into the correct store. You do not want to upload images to the wrong store and the wrong theme.
shopify theme push -o assets/image.jpgThis command will upload the file to your store assets folder located in the cloud.
If you are not sure which store you are in then type this command:
shopify theme push -o assets/image.jpg --store mystore.myshopify.comNow you’ll see a list with all the themes in your store like this:
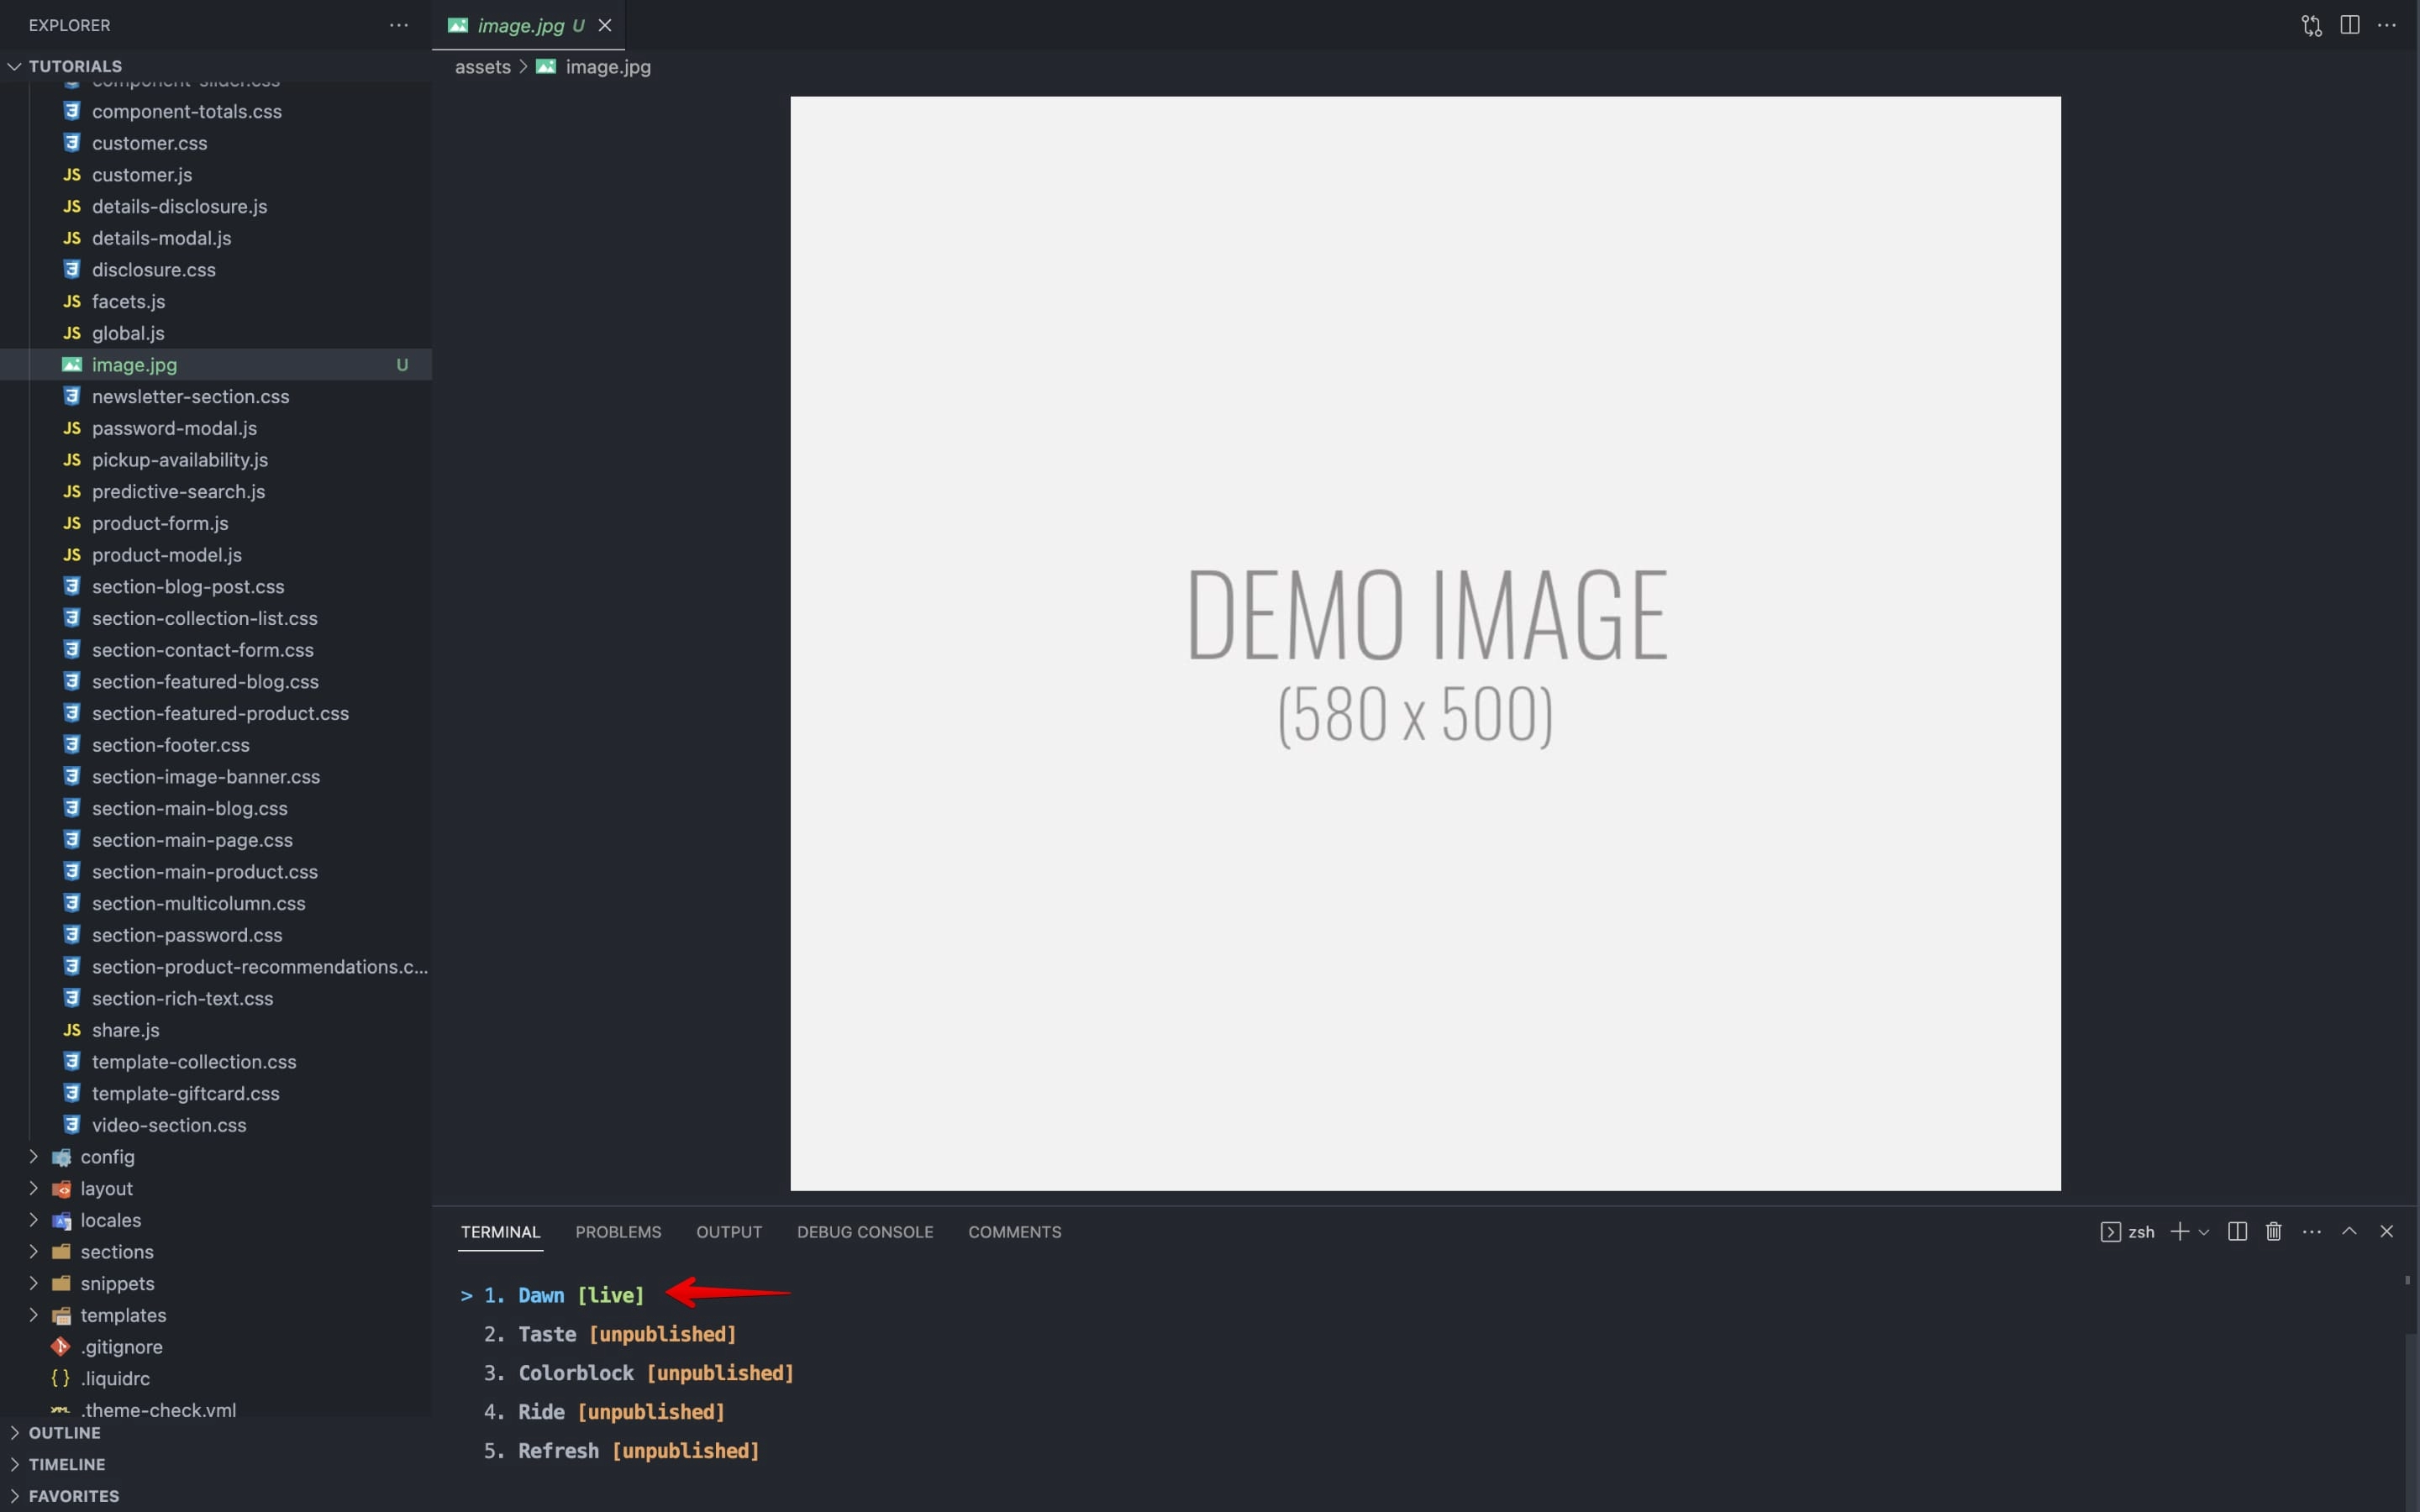
Select the theme that you want to upload the image to.
In my example I'll select the "Dawn" theme which is the "Live" one on this store. You may have a staging theme which will be a duplicate of the live one.
After you decide which theme you want to upload, select it by pressing the keyboard number (in my case it is 1) and click "Enter":
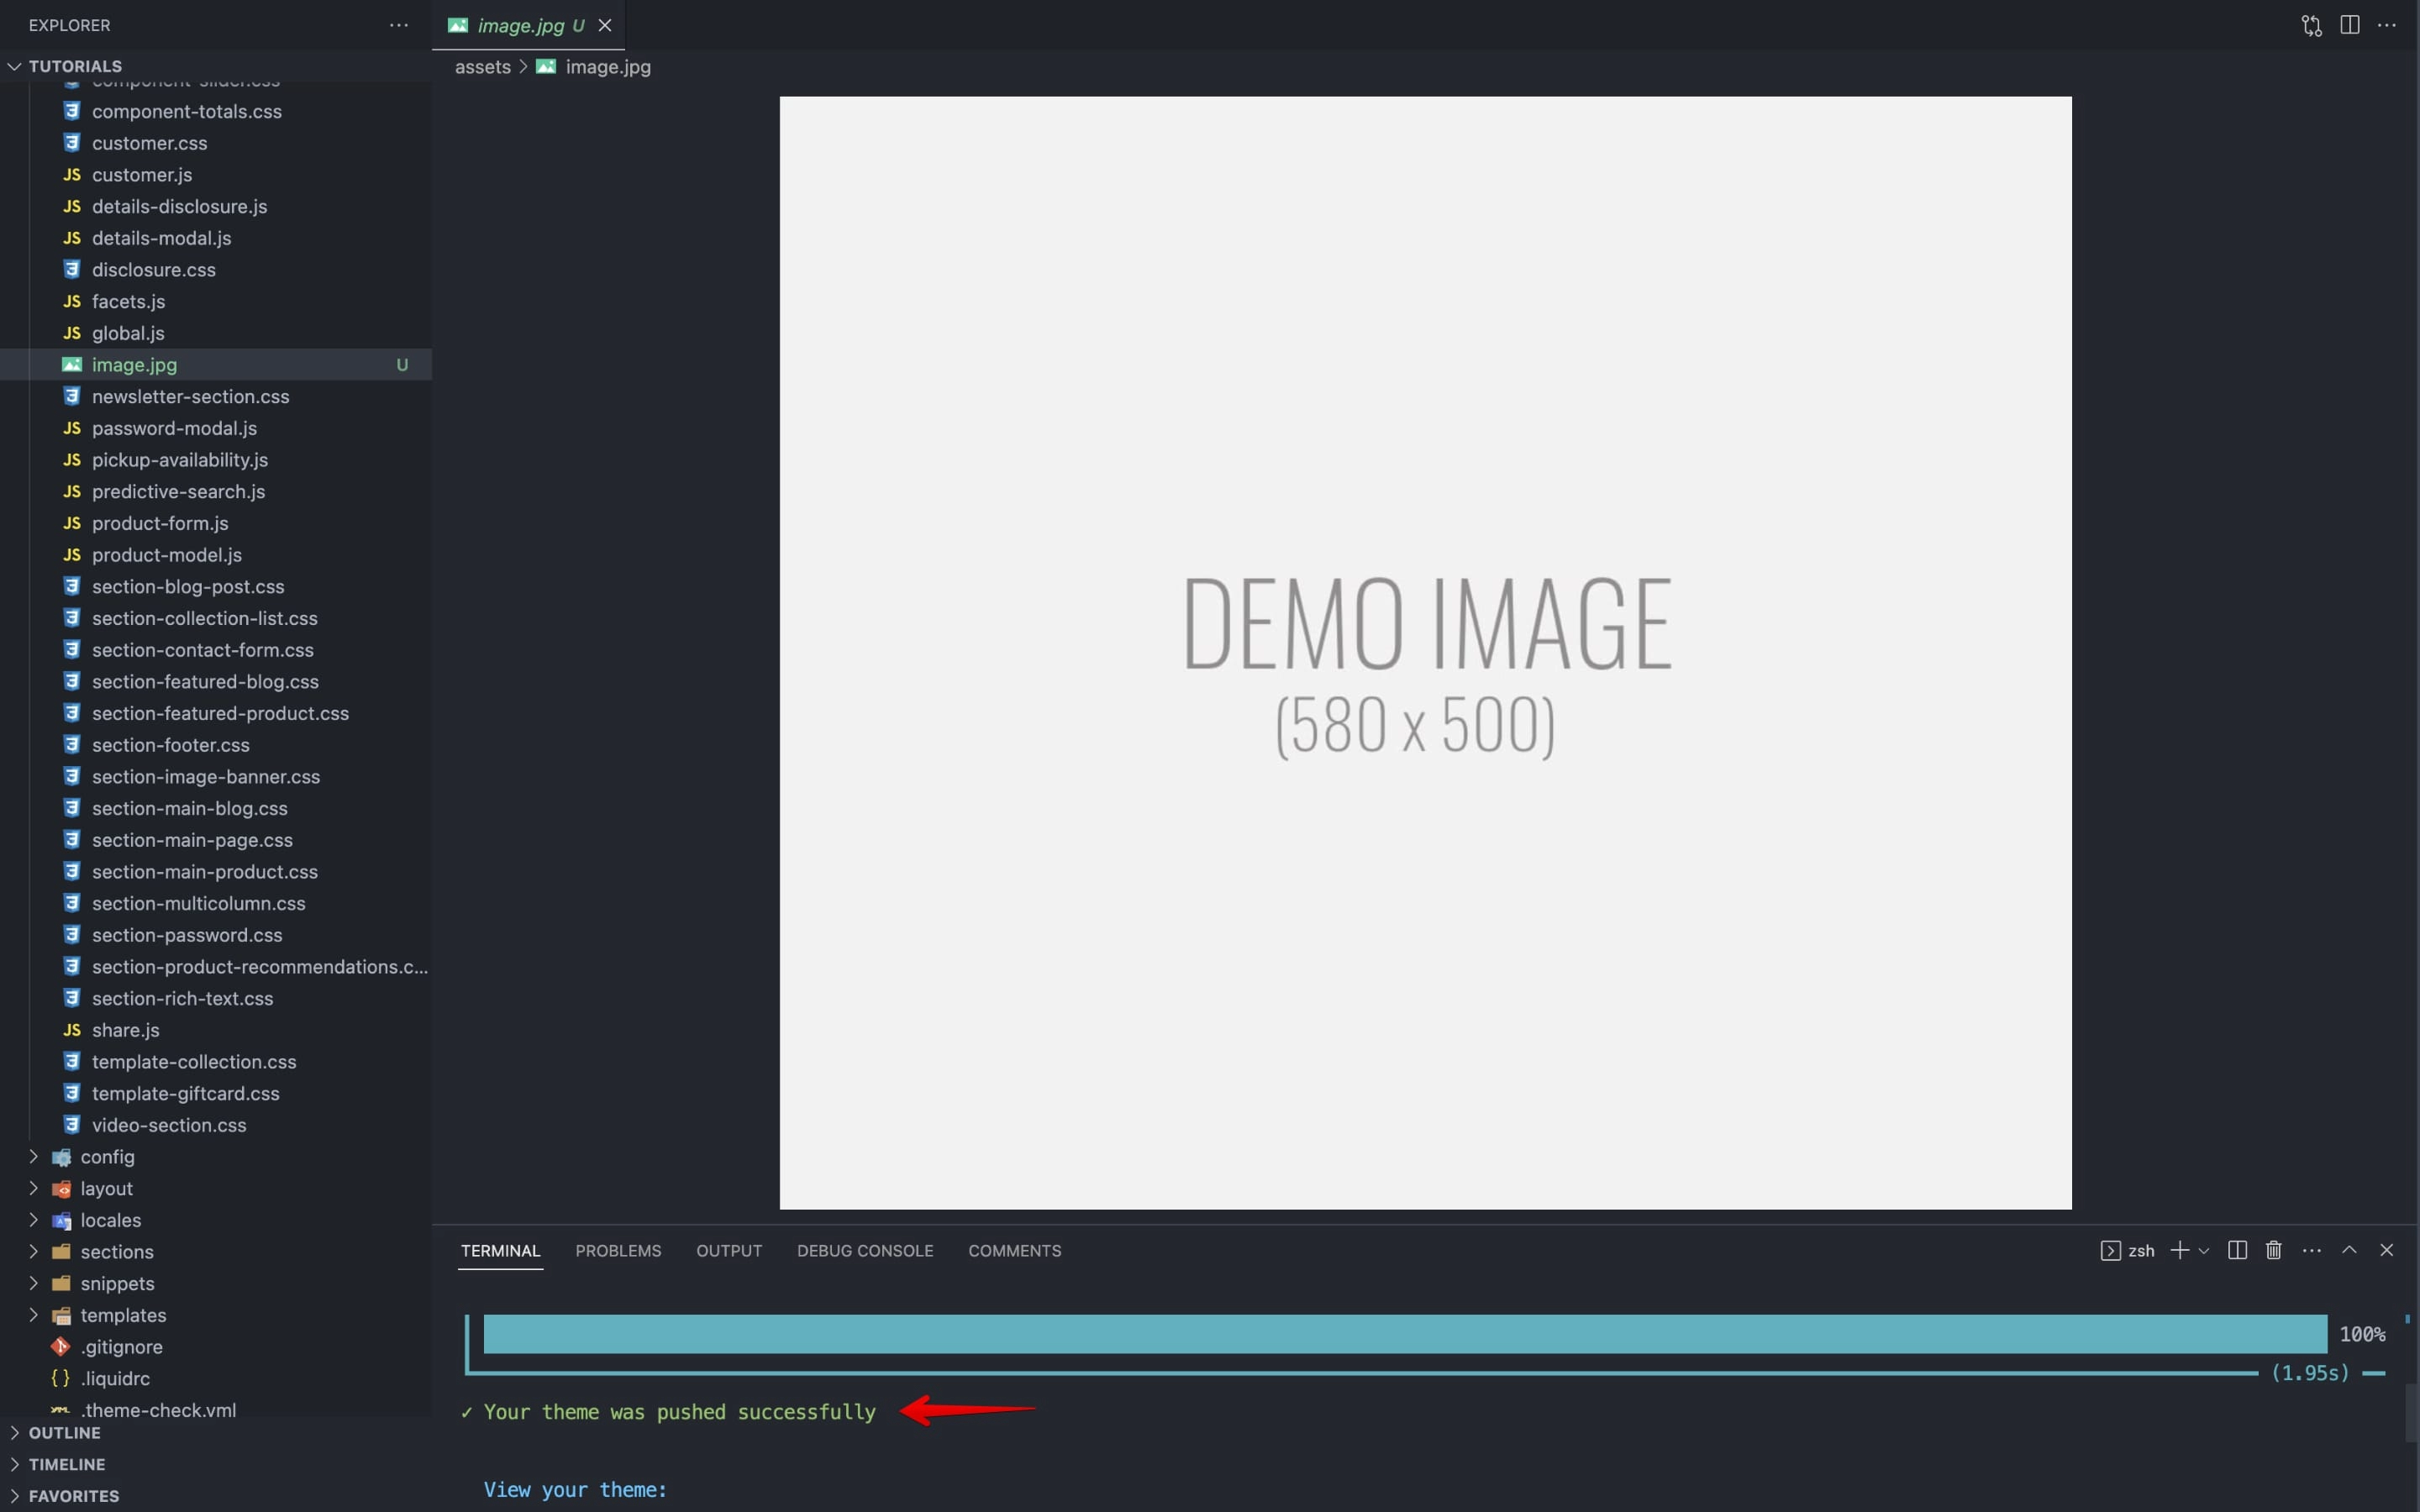
If the upload was successful you'll see a success message in the terminal.
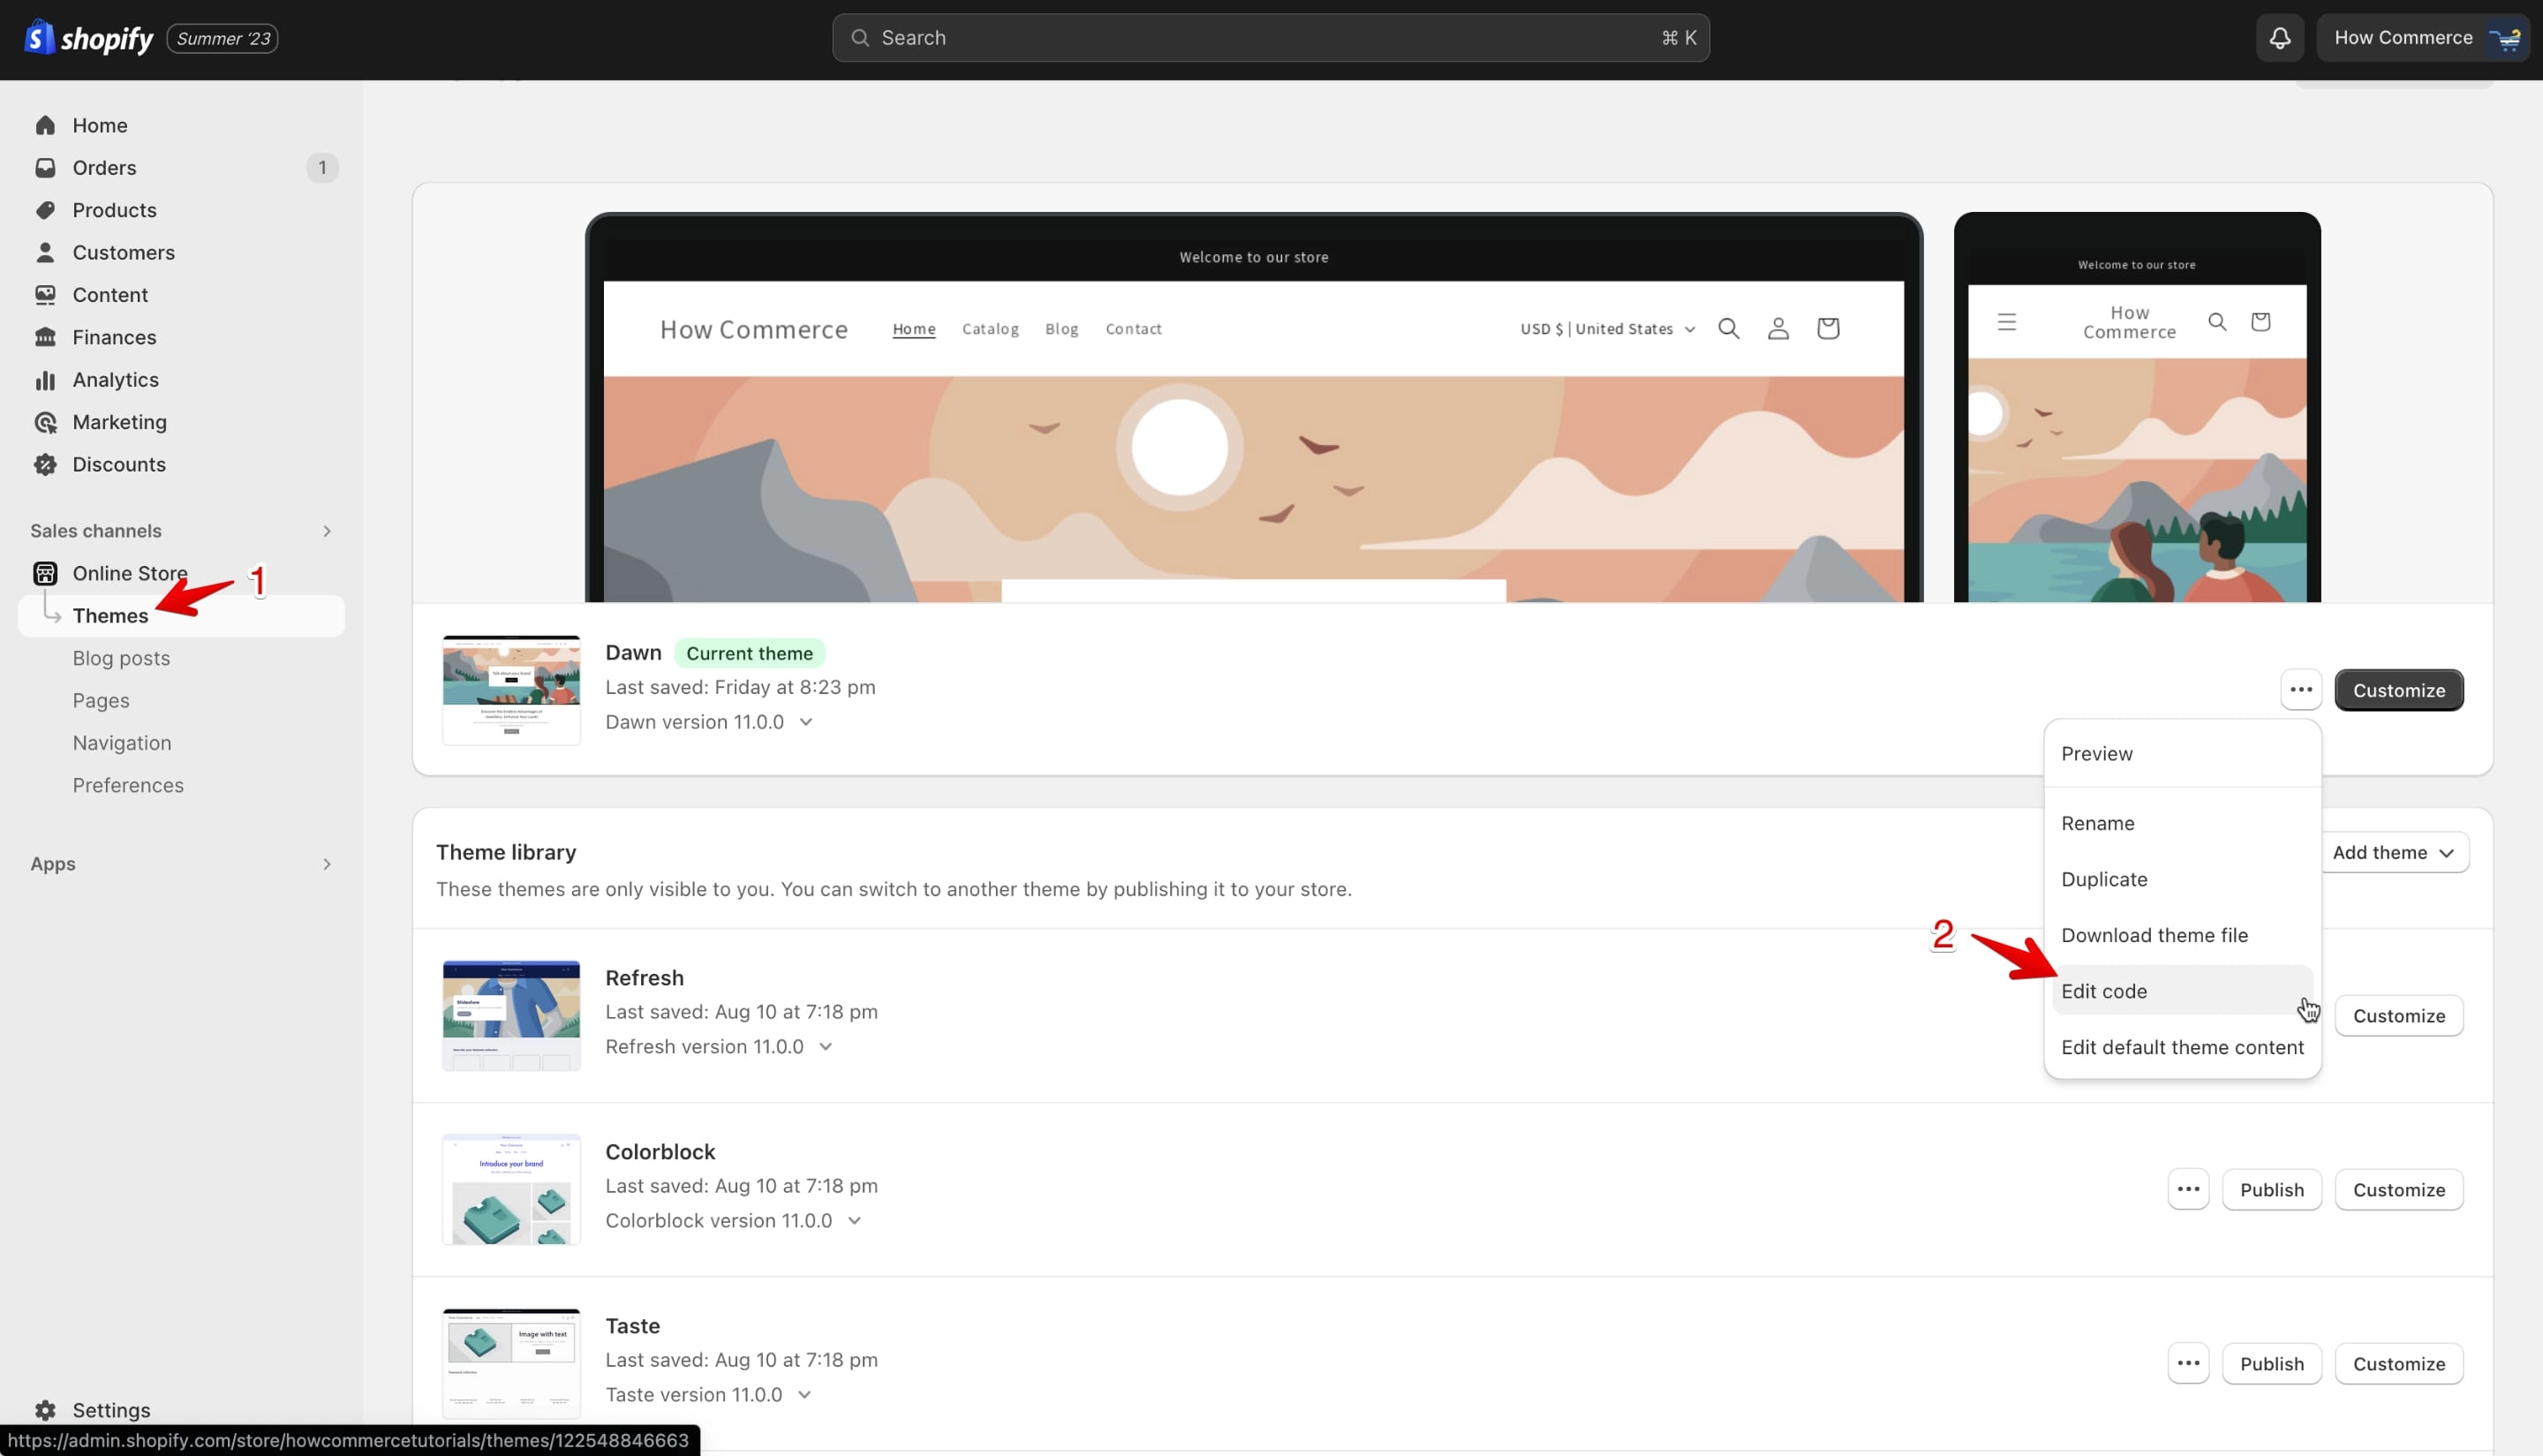
If you want to check if the file is uploaded you can go to the Shopify cloud code editor and check for the file. Go to the "Themes" section and then to the "Edit code" option:
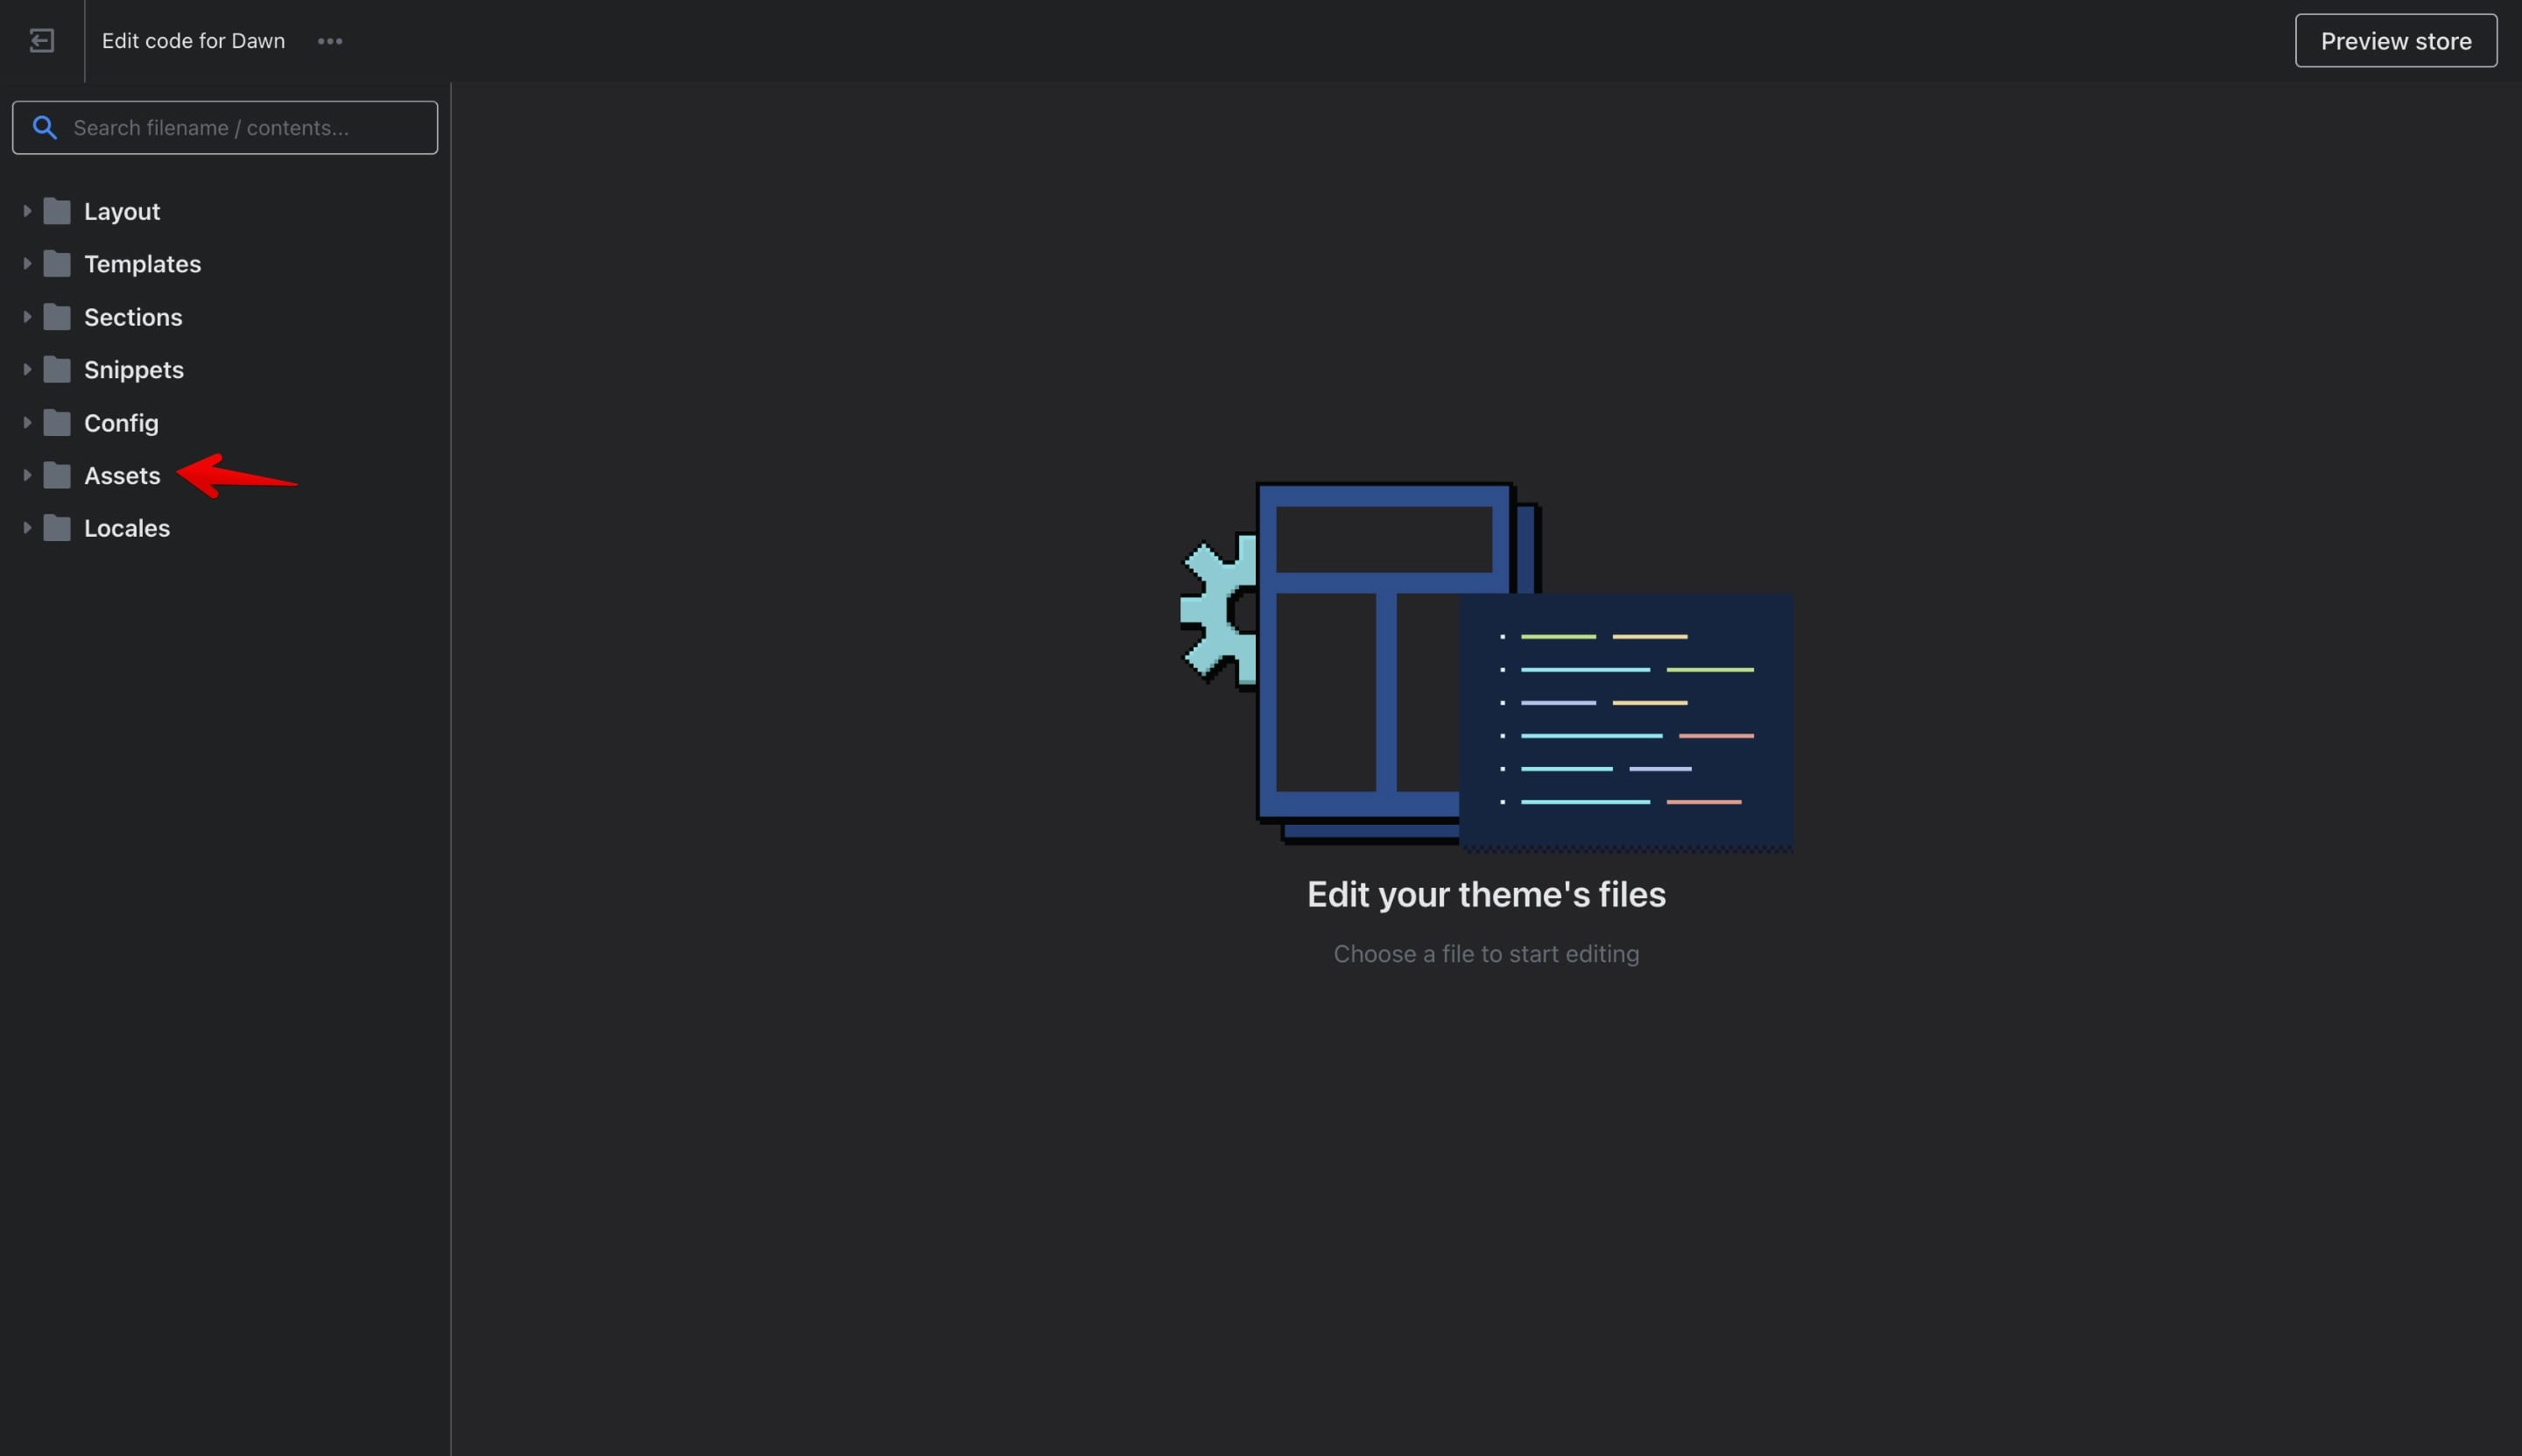
Inside the theme code editor look for the assets folder:
Now look for the file you uploaded. In my case it's "image.jpg":
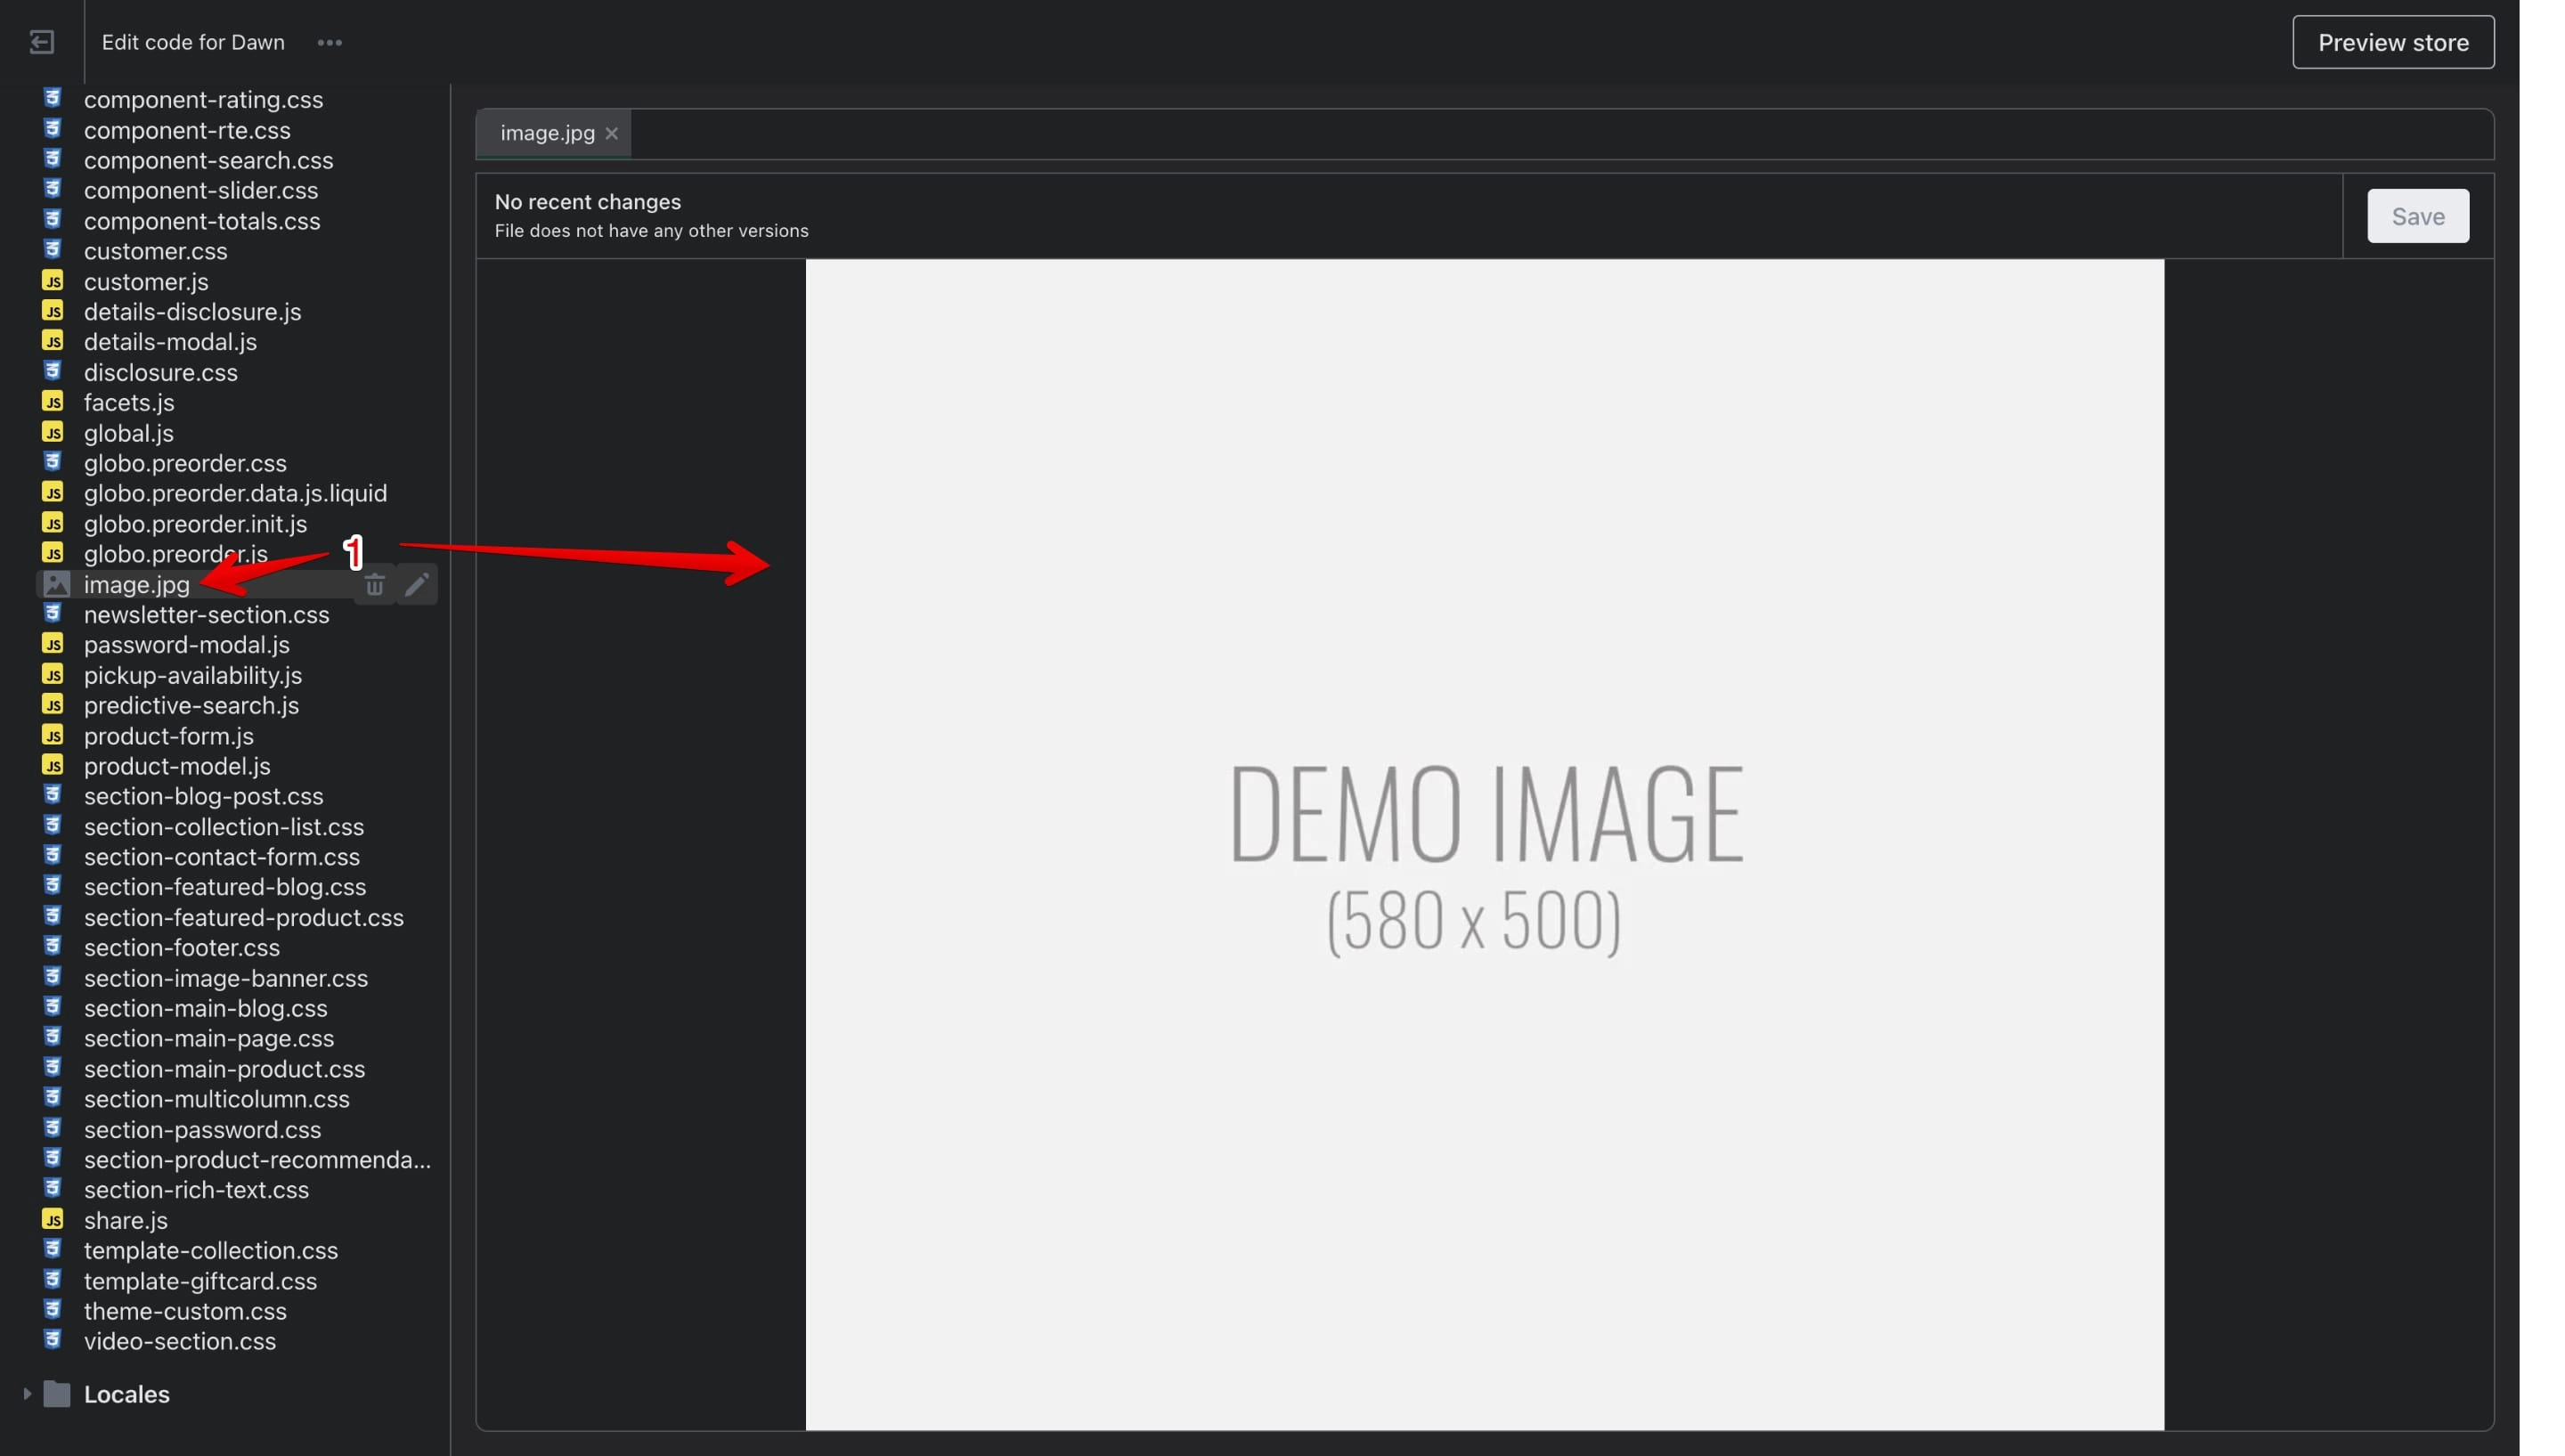
If you see the file in the assets folder then all is good. The file is on the Shopify servers and can be served from Shopify CDN inside your theme.
How to call images and files from the assets folder
In order to call images and files from the assets folder inside the Shopify theme we need to use two Liquid filters which are part of the "Hosted file filters".
“Hosted file filters” is a group of filters that return URLs for assets hosted on the Shopify CDN, including files uploaded in the Shopify admin.
For images Shopify provides the asset_img_url filter and for files we have the asset_url filter. Both filters return a string type.
How to call an image with Liquid to the assets folder
To call the “image.jpg” in our theme, we write this code:
{{ 'image.jpg' | asset_img_url }}Returns a string type similar to this:
//store-name.myshopify.com/cdn/shop/t/4/assets/image.jpg?315
For the asset_img_url filter you can pass a size parameter to request from the Shopify CDN to serve the intended image size:
- Pico (16x16 px)
- Icon (32x32 px)
- Thumb (50x50 px)
- Small (100x100 px)
- Compact (160x160 px)
- Medium (240x240 px)
- Large (480x480 px)
- Grande (600x600 px)
- Original (1024x1024 px)
- Master (the size of your image without any resizing)
How to call a file with Liquid to the assets folder
To call the “style.css” in our theme, we write this code:
{{ 'style.css' | asset_url }}Returns a string type similar to this:
//store-name.myshopify.com/cdn/shop/t/4/assets/style.css?v=29998243648213344773925698752
You do the same for any other type of file like a JS file, a font file, and so on.
From where are the assets resources pulled
When you reference an asset in your Shopify theme, the resources are pulled from Shopify's content delivery network (CDN).
A CDN is a network of servers distributed across different geographic locations that deliver content to users with high availability and performance.
Shopify's CDN ensures that your assets are served quickly and efficiently to visitors of your online store, regardless of their location.
Can you render the assets URL with JavaScript
No. Since both filters need Liquid to be rendered and since Liquid is processed server-side and JavaScript on client-side, you need to use the asset_img_url or asset_url filter in Liquid files and pass the rendered value to JavaScript.
Store the rendered value inside a JS variable and from there you can use it in your JS script as you please.
Conclusion
Working with the assets URL in Shopify is an essential aspect of customizing and enhancing your online store.
By understanding how to upload files, generate links to assets using Liquid, and leveraging Shopify's CDN, you can effectively manage and deliver resources to your customers.
Whether you are adding images, CSS stylesheets, or JavaScript files, the assets folder provides a central location to store and organize these files, enabling you to create a visually appealing and functional storefront for your Shopify store.