

Why archive products
As a store owner, you may find that you need to remove products from your store temporarily or permanently for a variety of reasons.
This is where the product archiving feature comes in handy.
Archiving a product in Shopify means that it is hidden from your store but not deleted entirely.
This is useful when you have seasonal products or discontinued products that you may want to bring back later.
In this article, we will go through the steps on how to archive a single product and how to archive products in bulk.
Archive a product
Archiving a product in Shopify is a simple process that can be done in just a few steps.
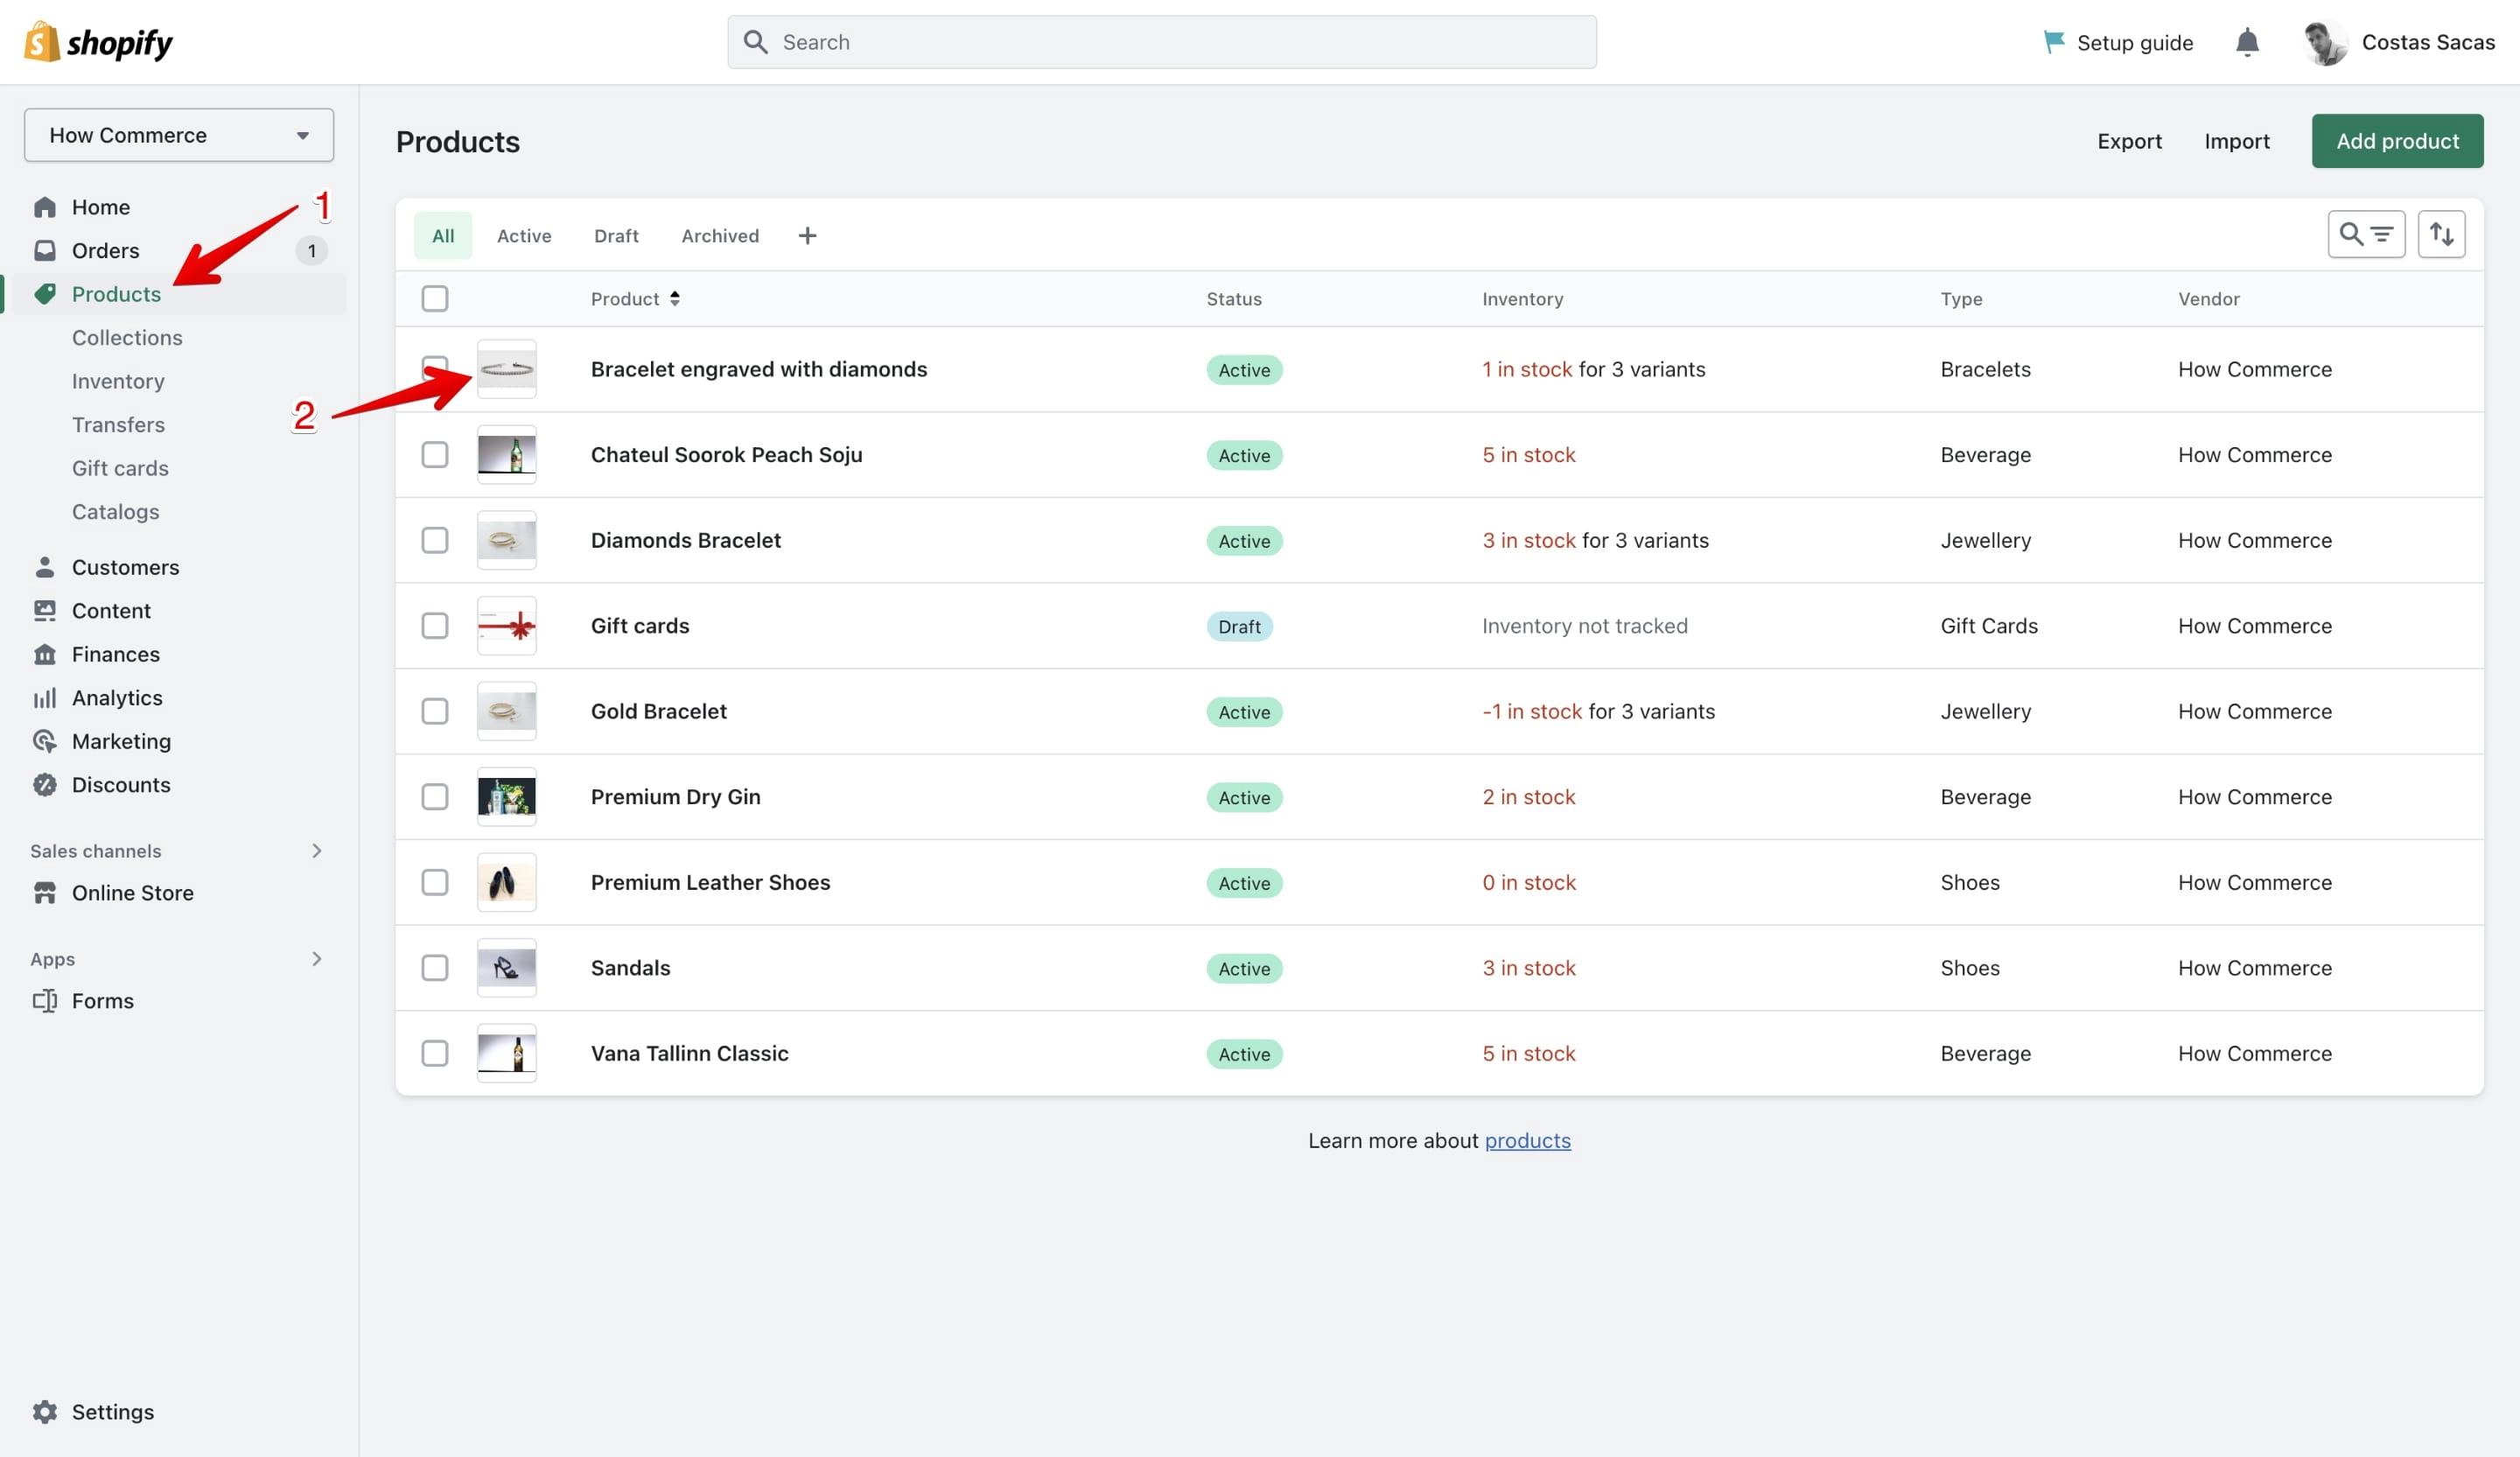
First log into your Shopify account and navigate to your Products page. Select the product that you want to archive and click on its title to enter the editing page:
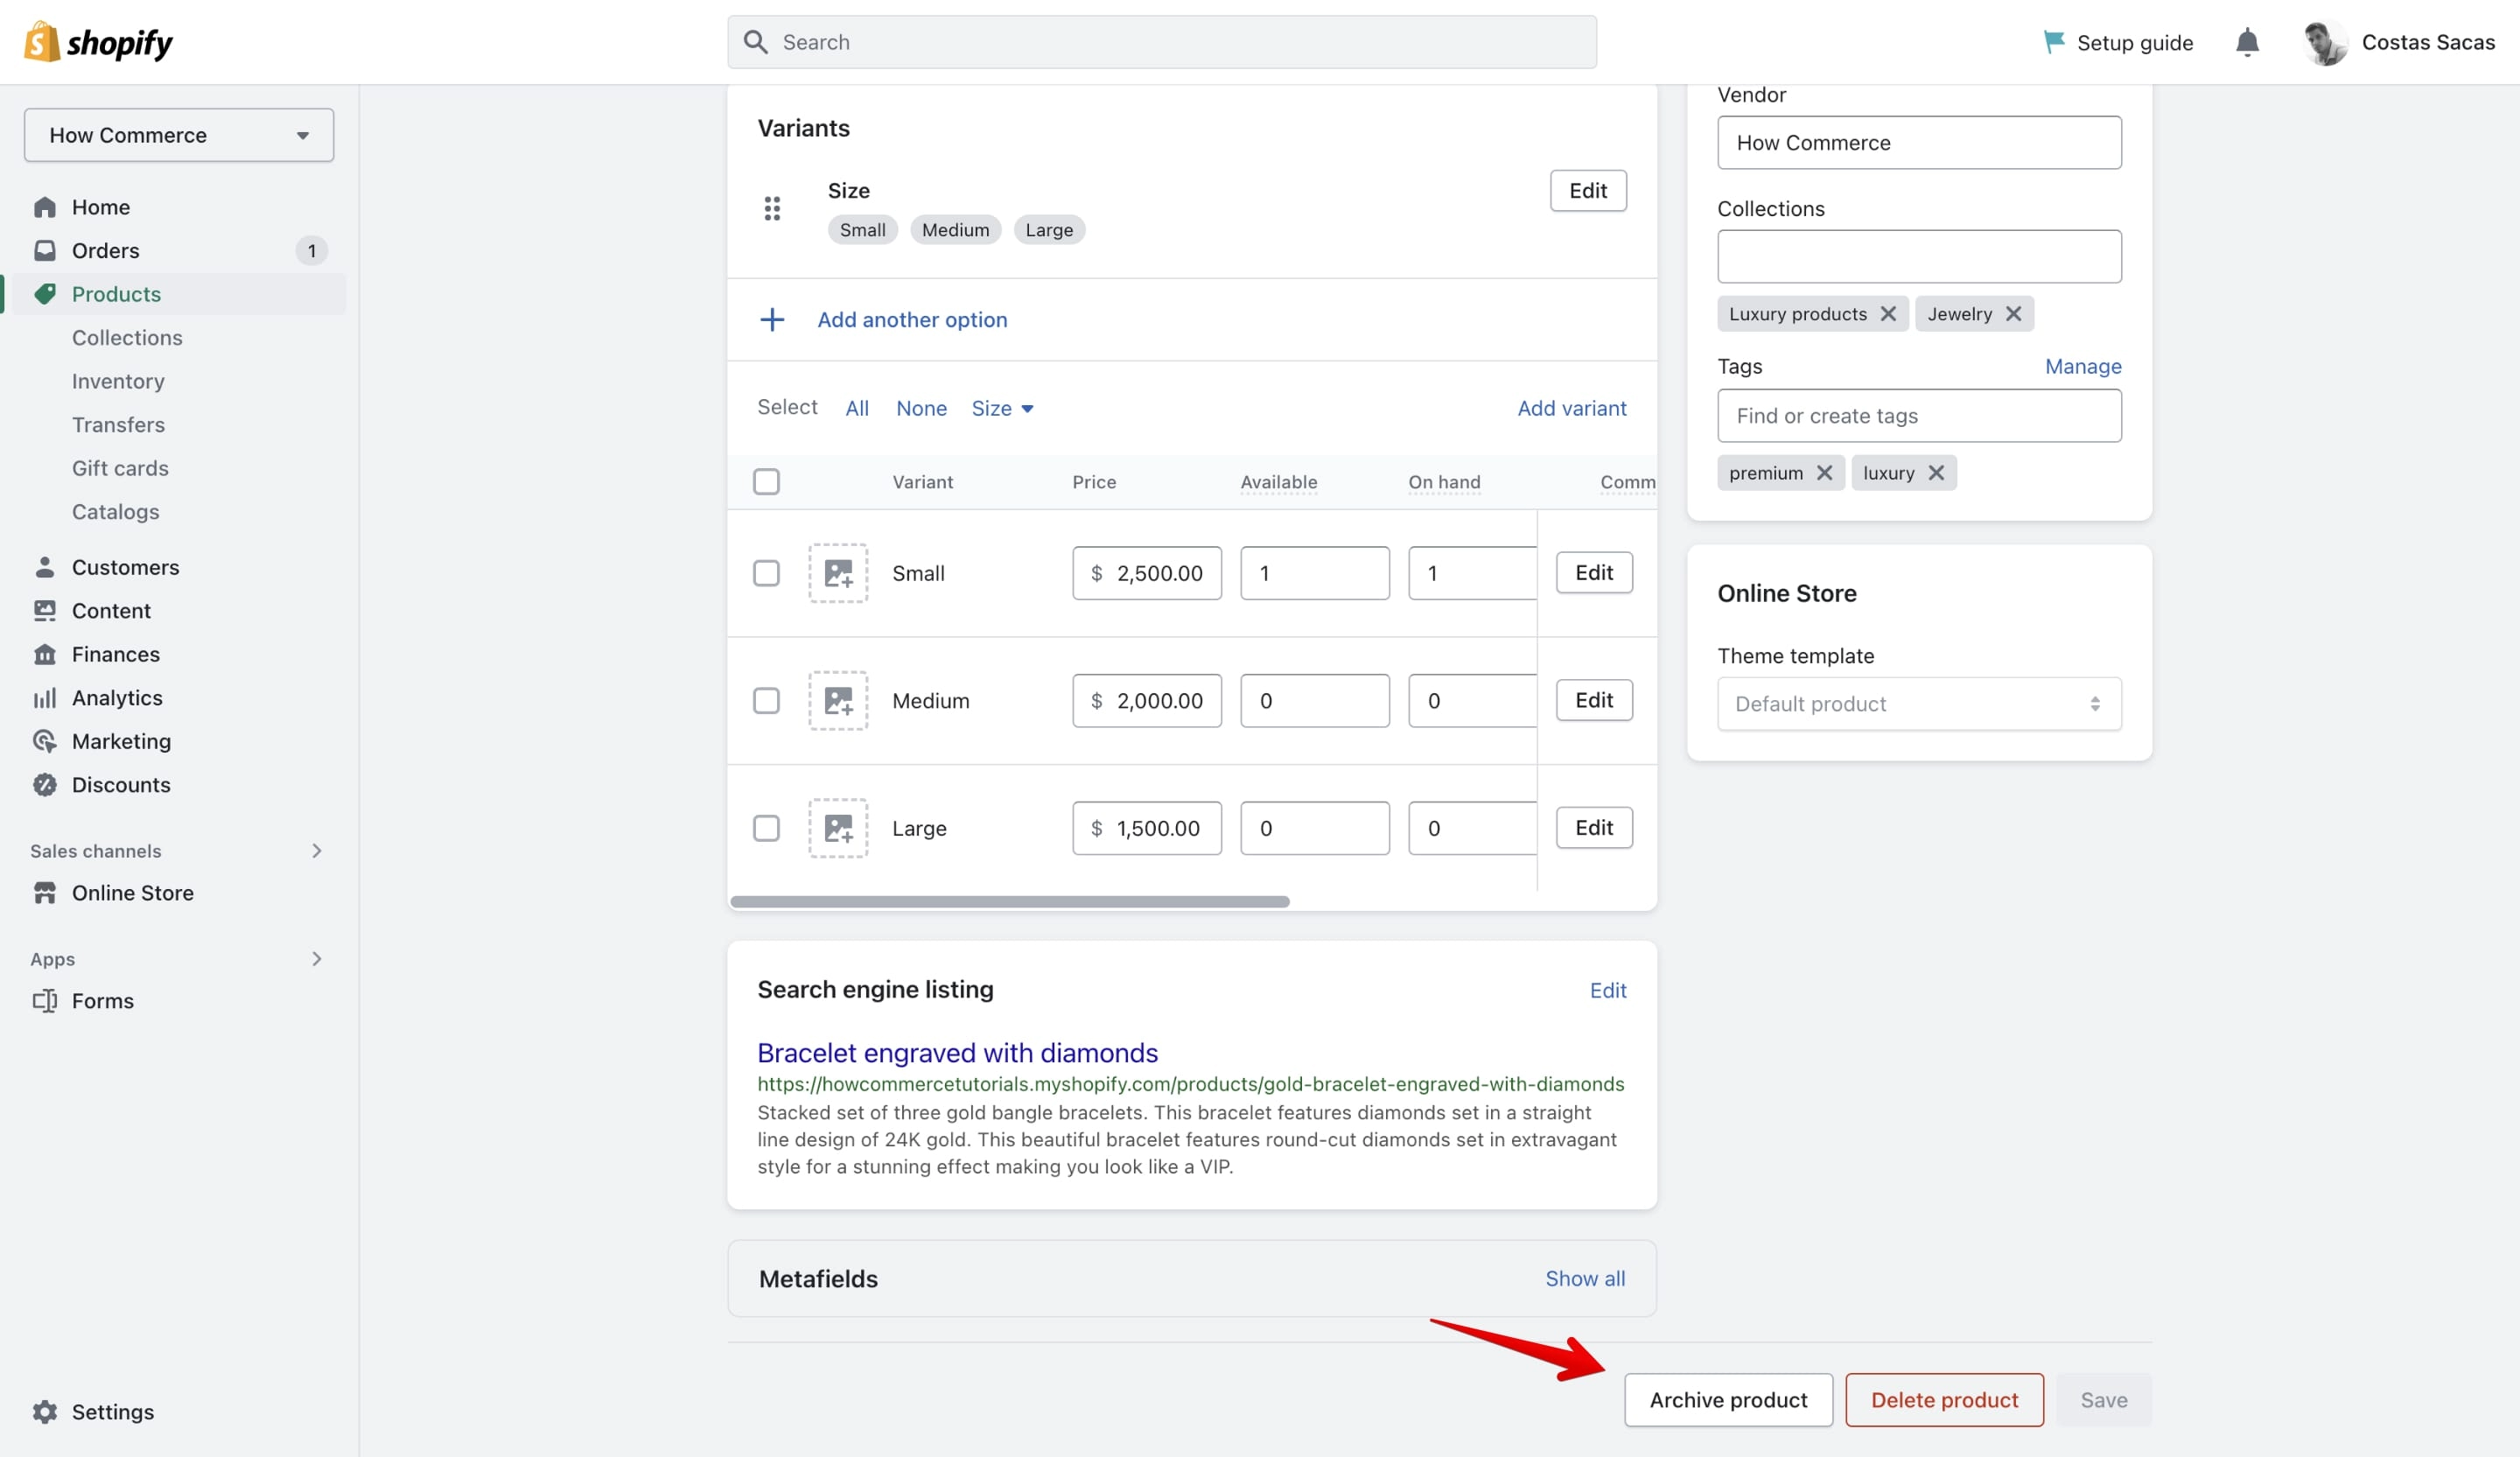
Scroll down to the bottom of the product page and click on the Archive button located on the right side of the page:
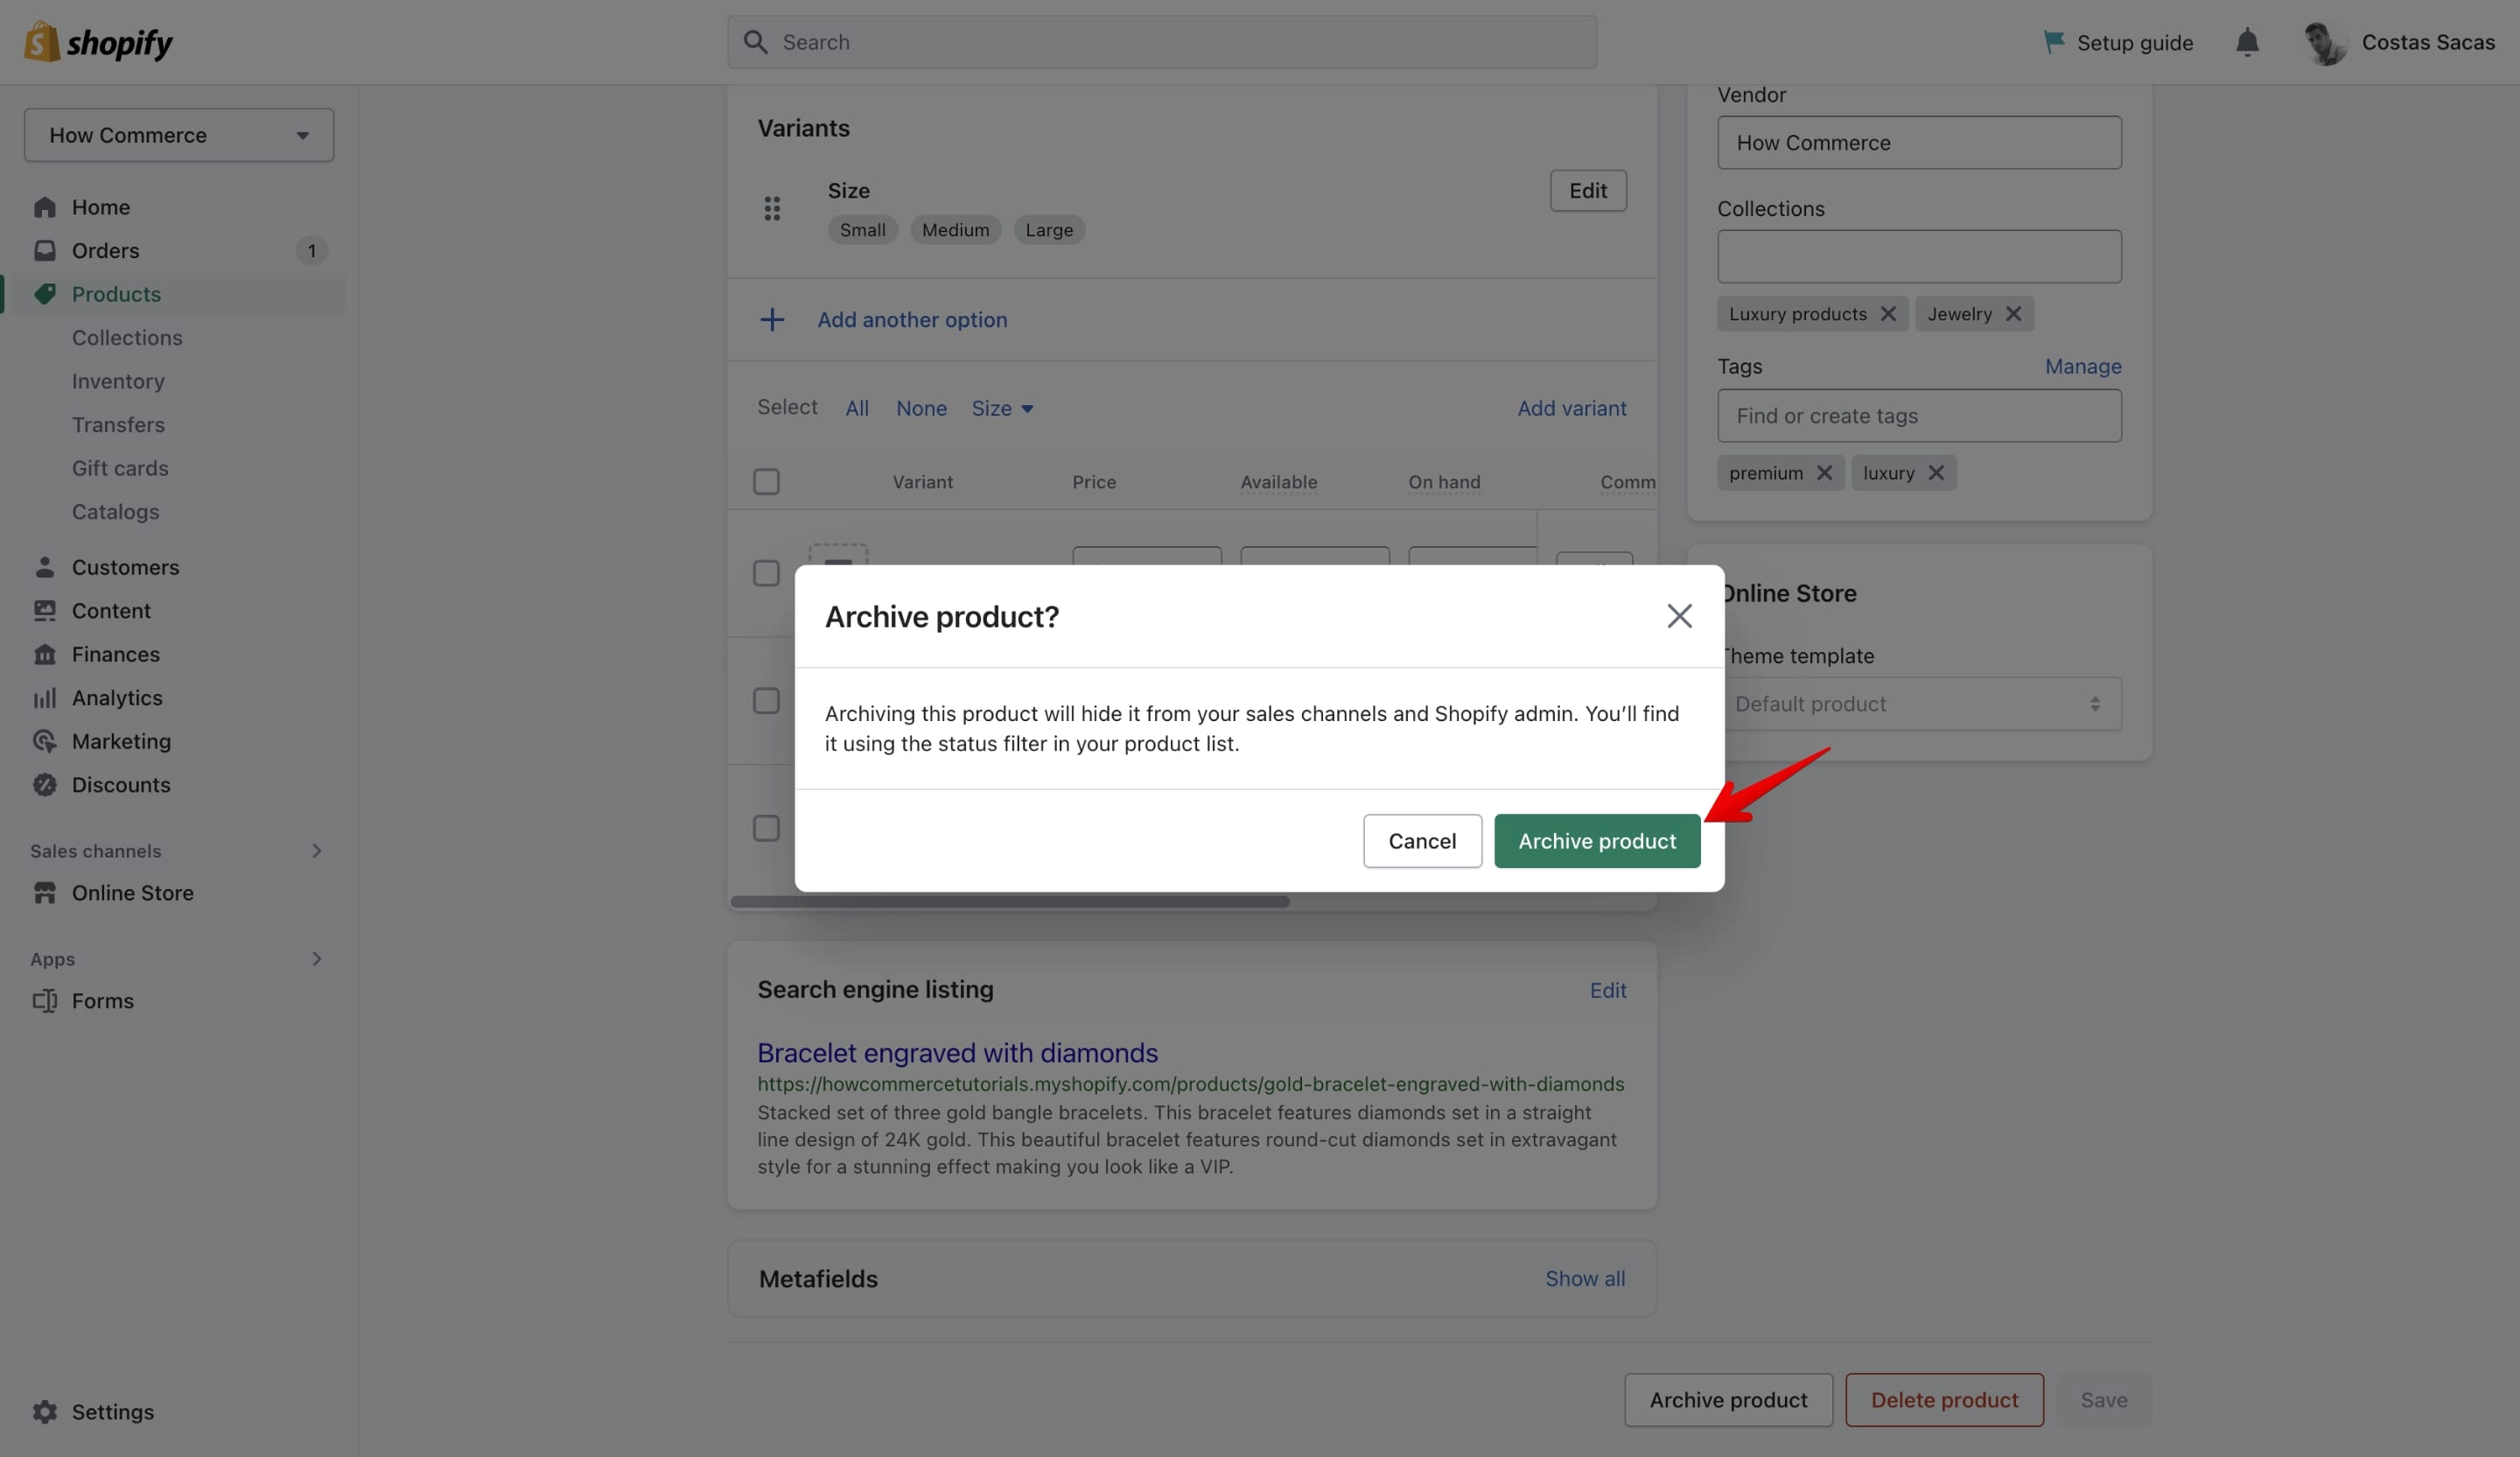
A popup window will appear asking you to confirm that you want to archive the product. Click Archive to confirm:
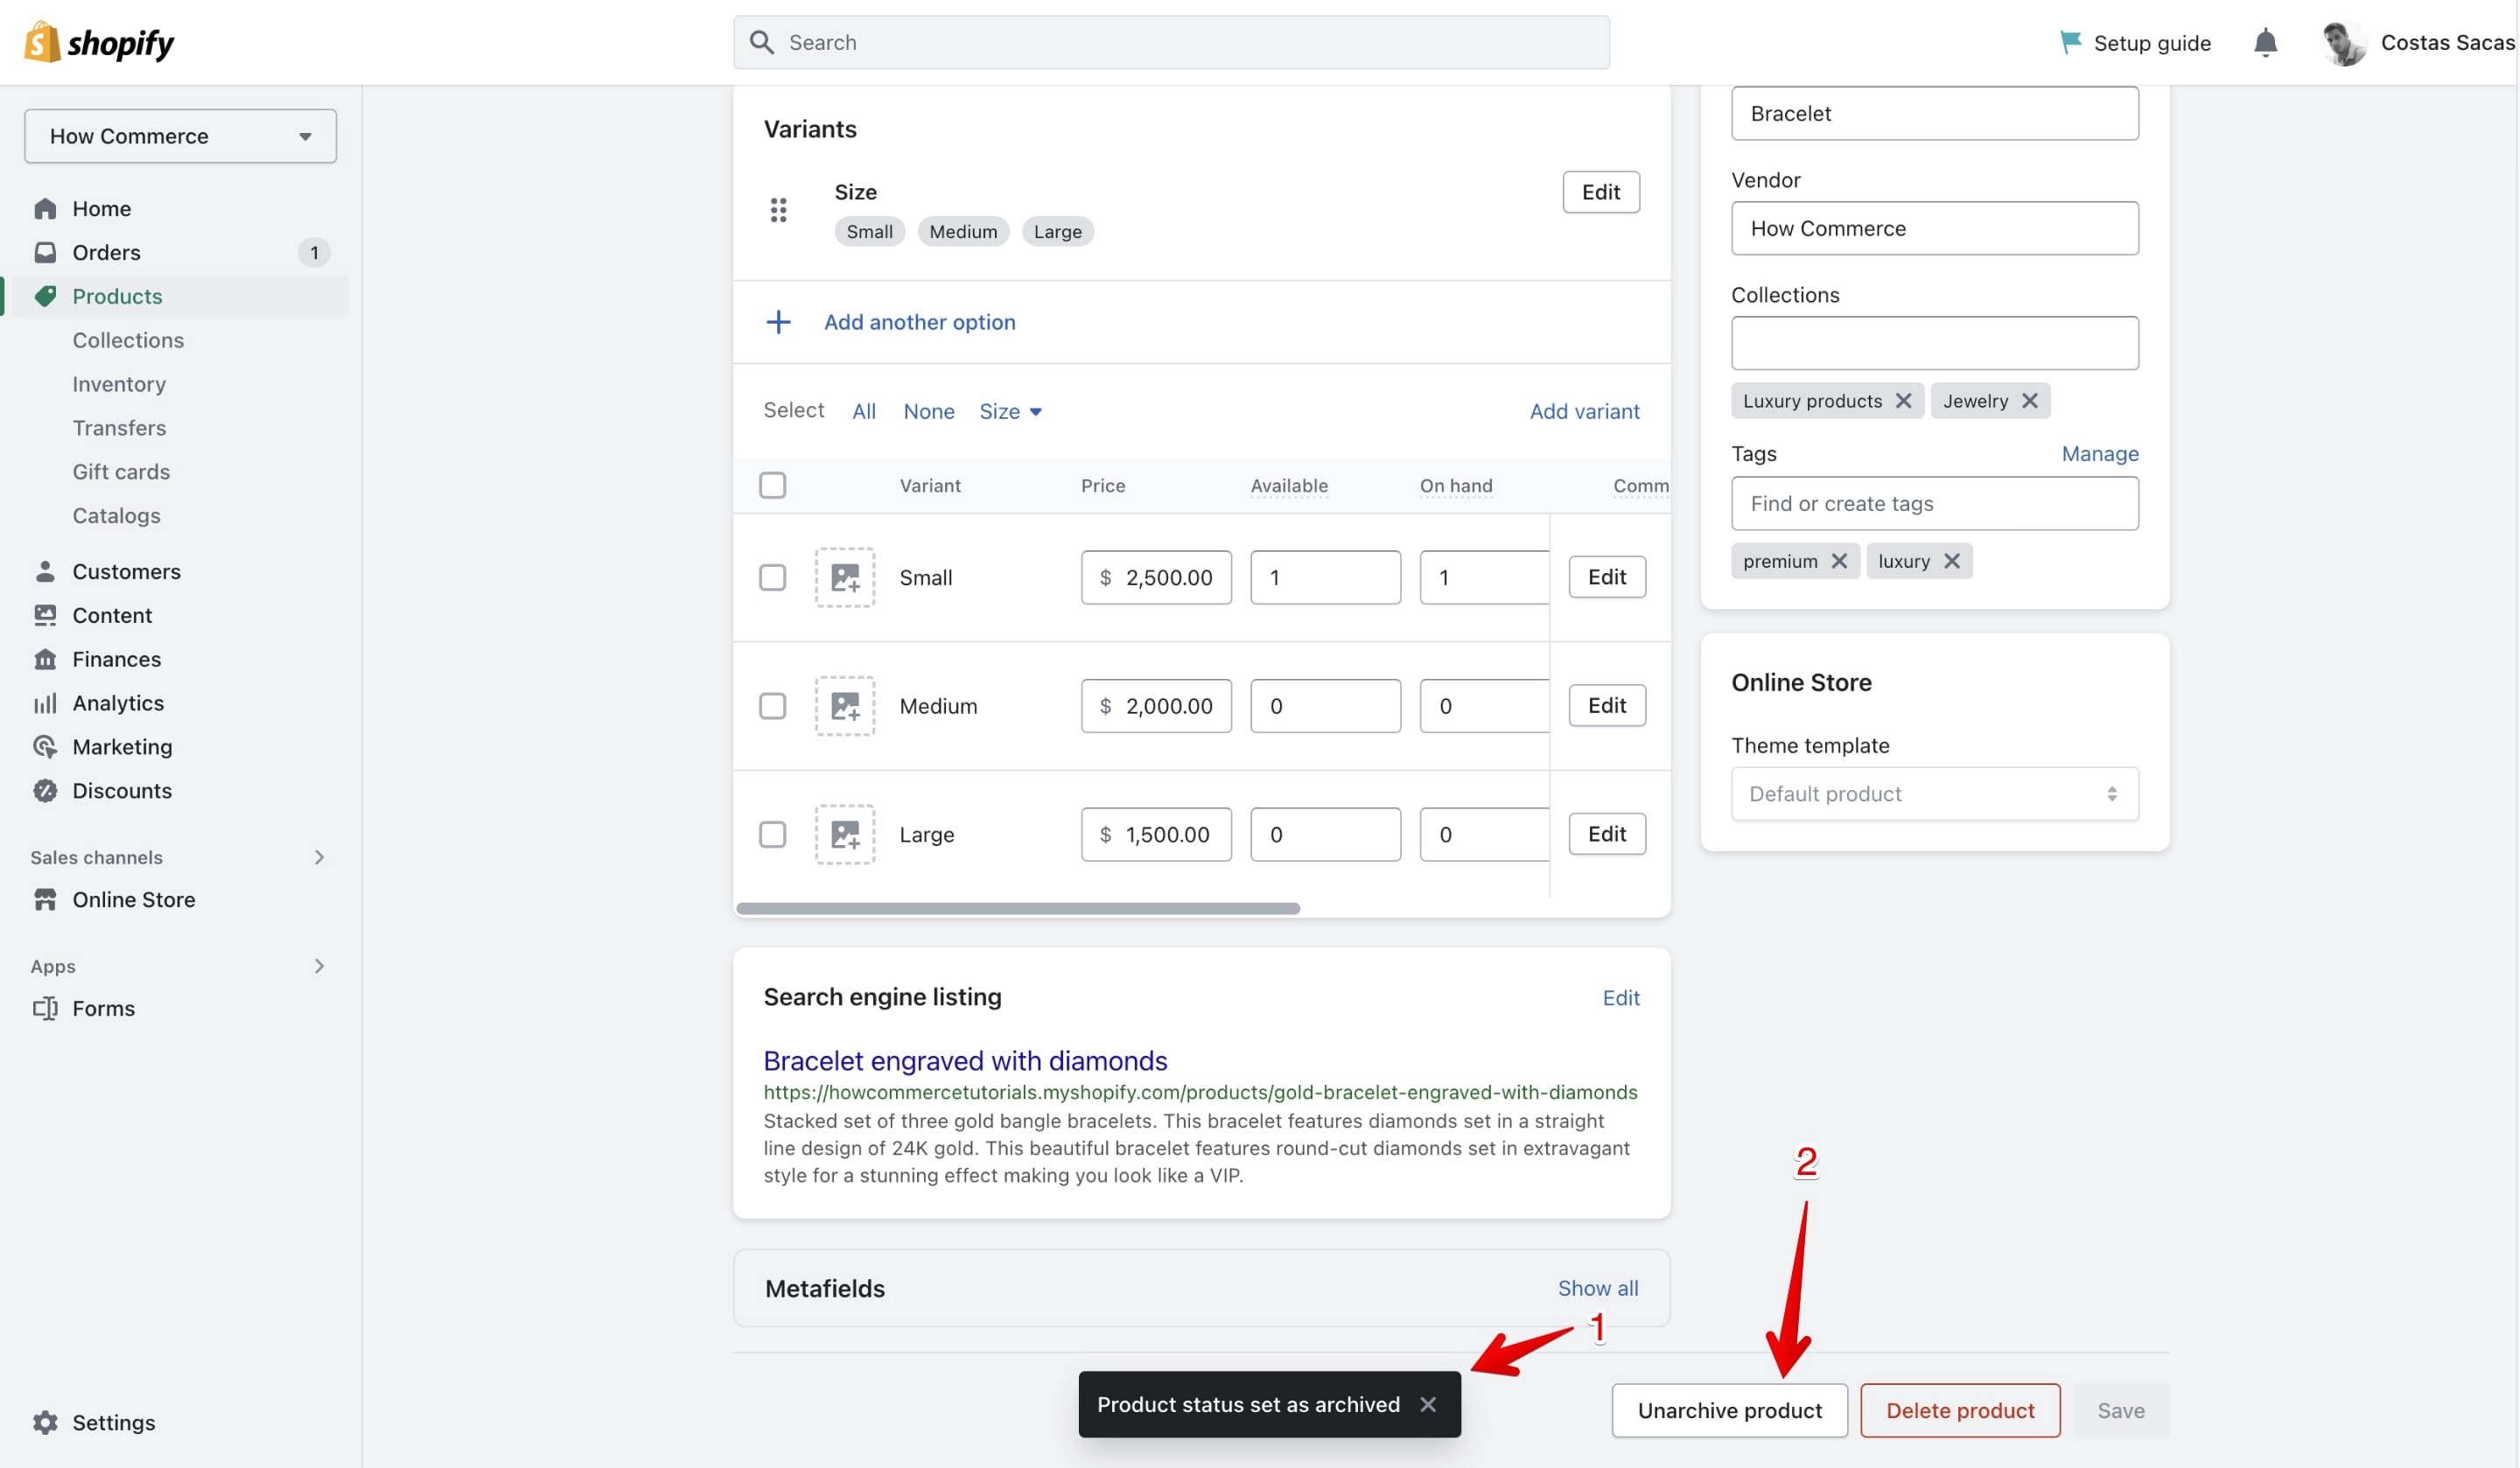
The product will now be archived, and it will no longer be visible on your store's front end.
Upon success you'll see a success message and the Unarchive product button:
Archive products in bulk
If you have multiple products that you want to archive at once, you can use the bulk actions feature in Shopify.
Here's how to do it.
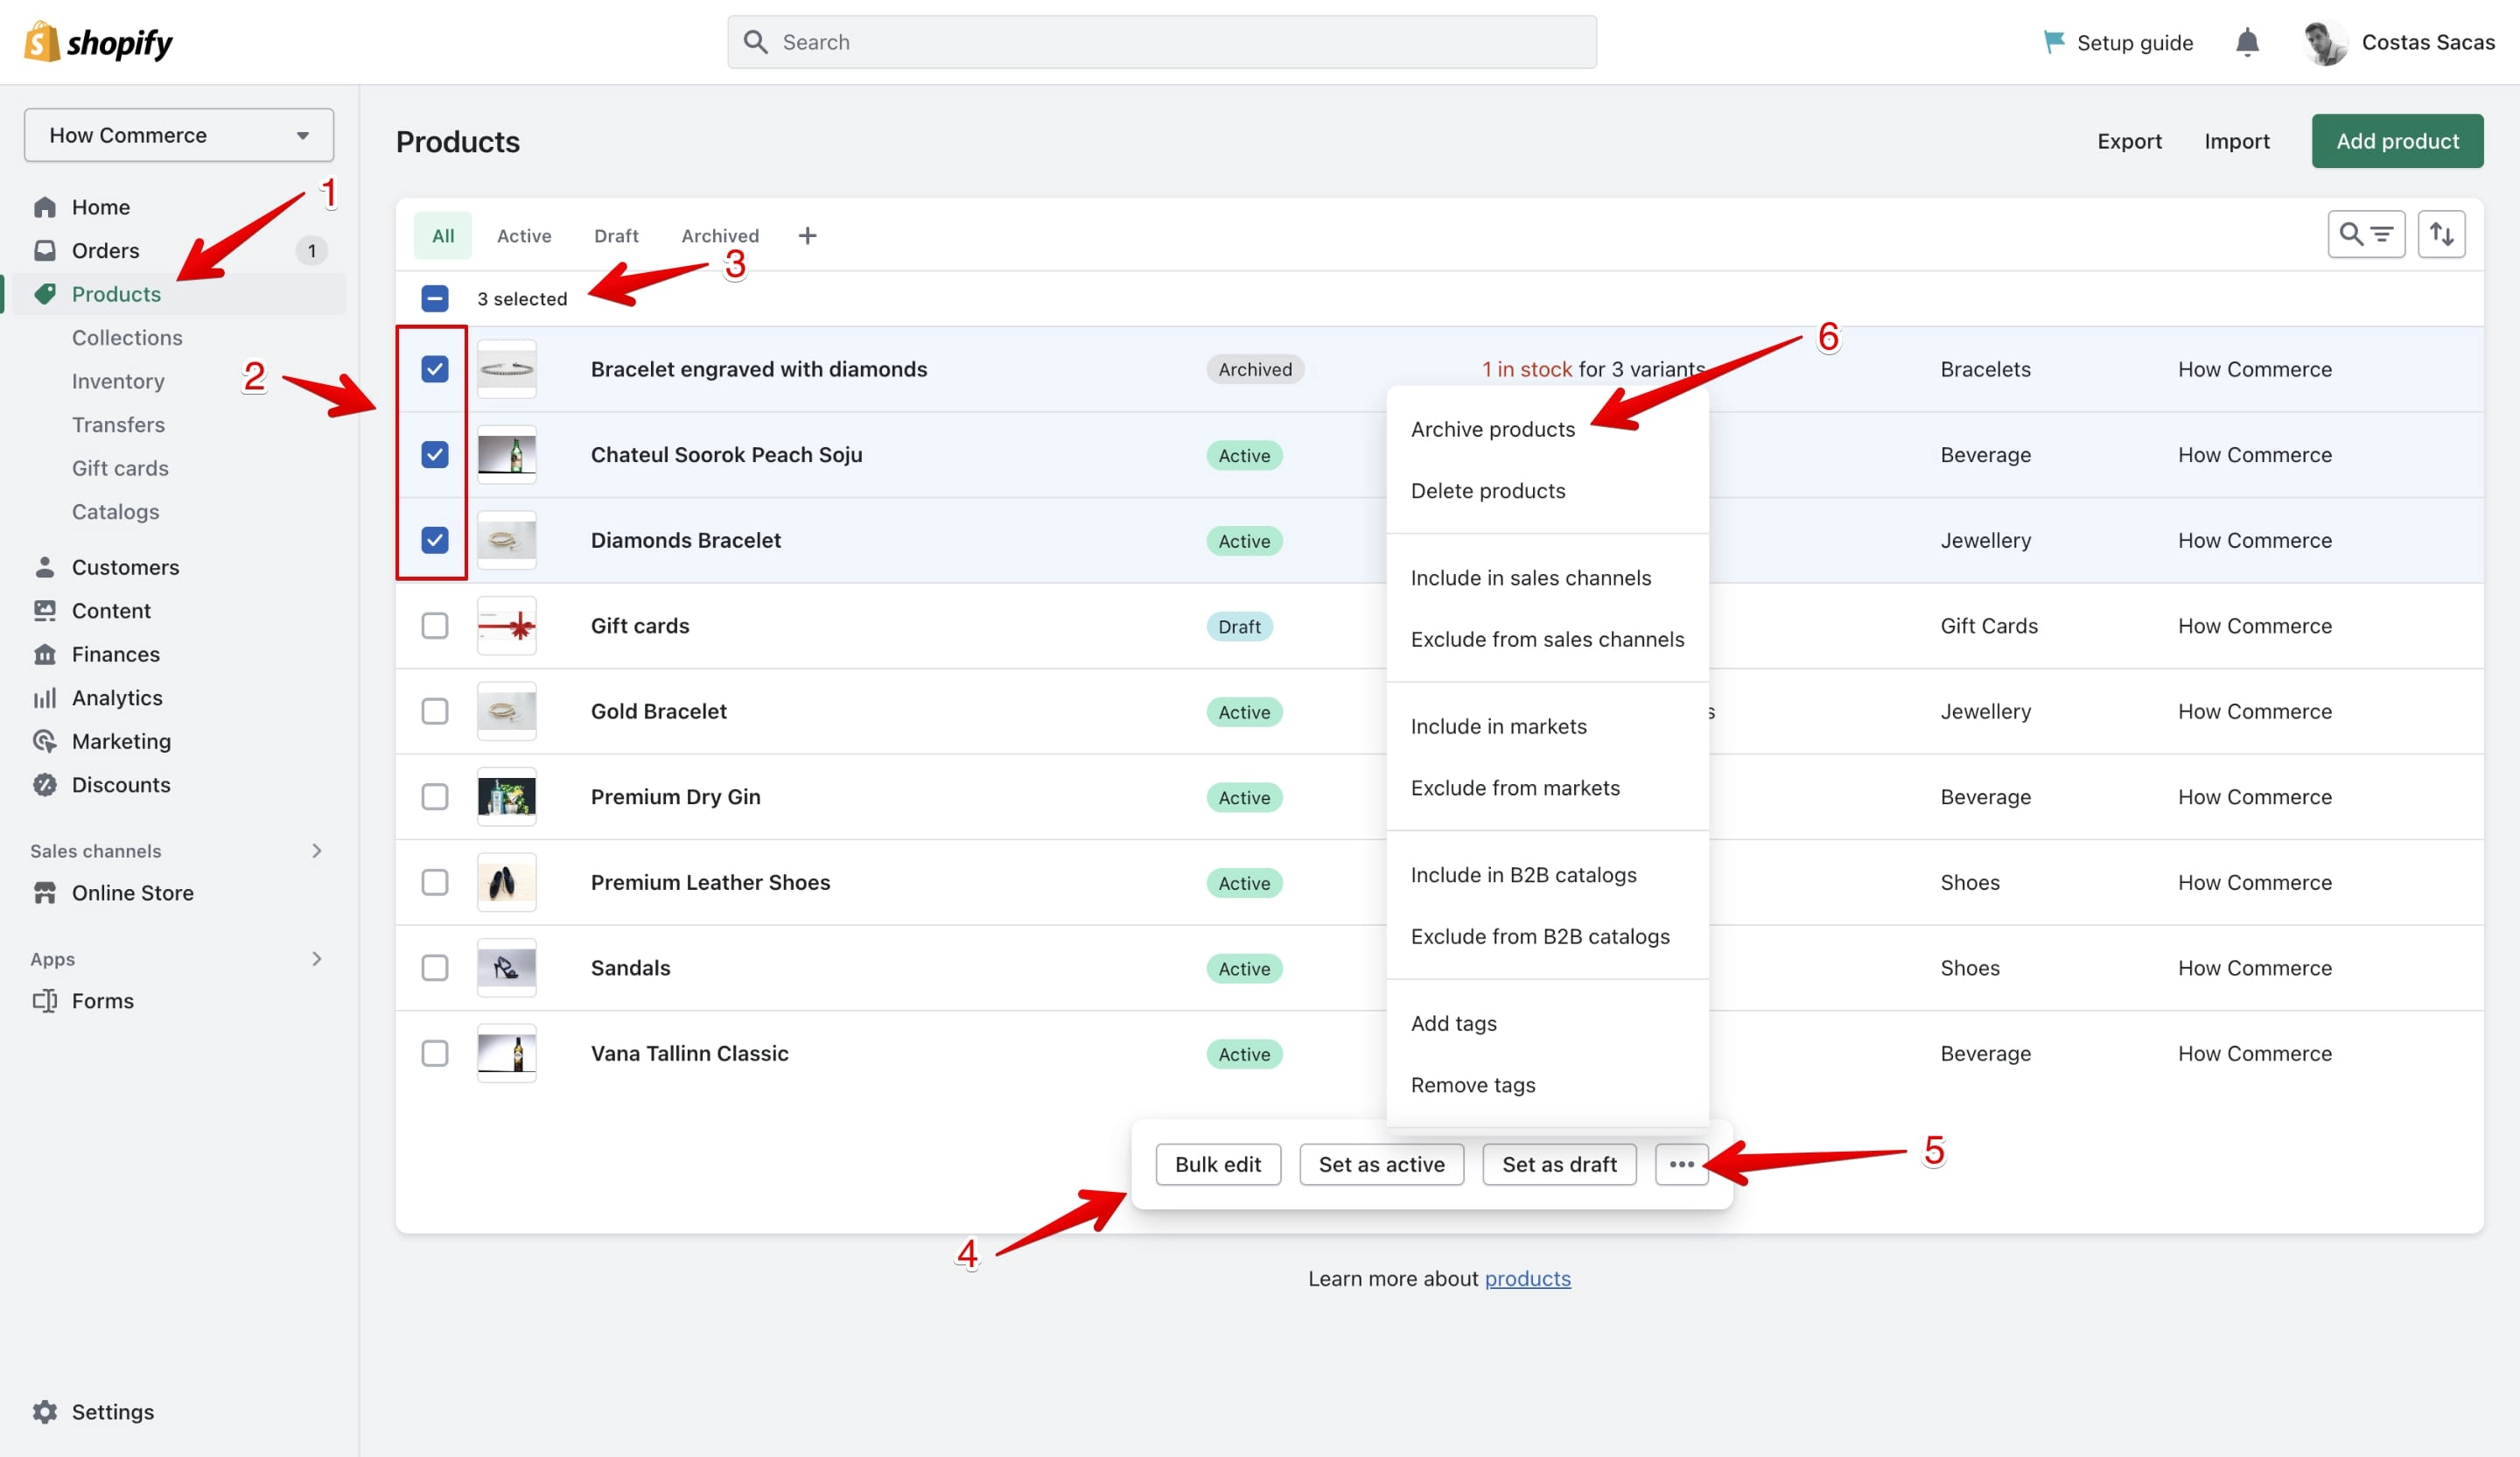
Go back to the product listing page by clicking on the Products menu item. Select the products you want to archive by clicking on the checkbox beside each product's title.
In this example I've selected 3 products.
If you want to select all products check the checkbox at the top.
A popup will display with options.
Click on the three-dot menu button and select Archive products from the dropdown:
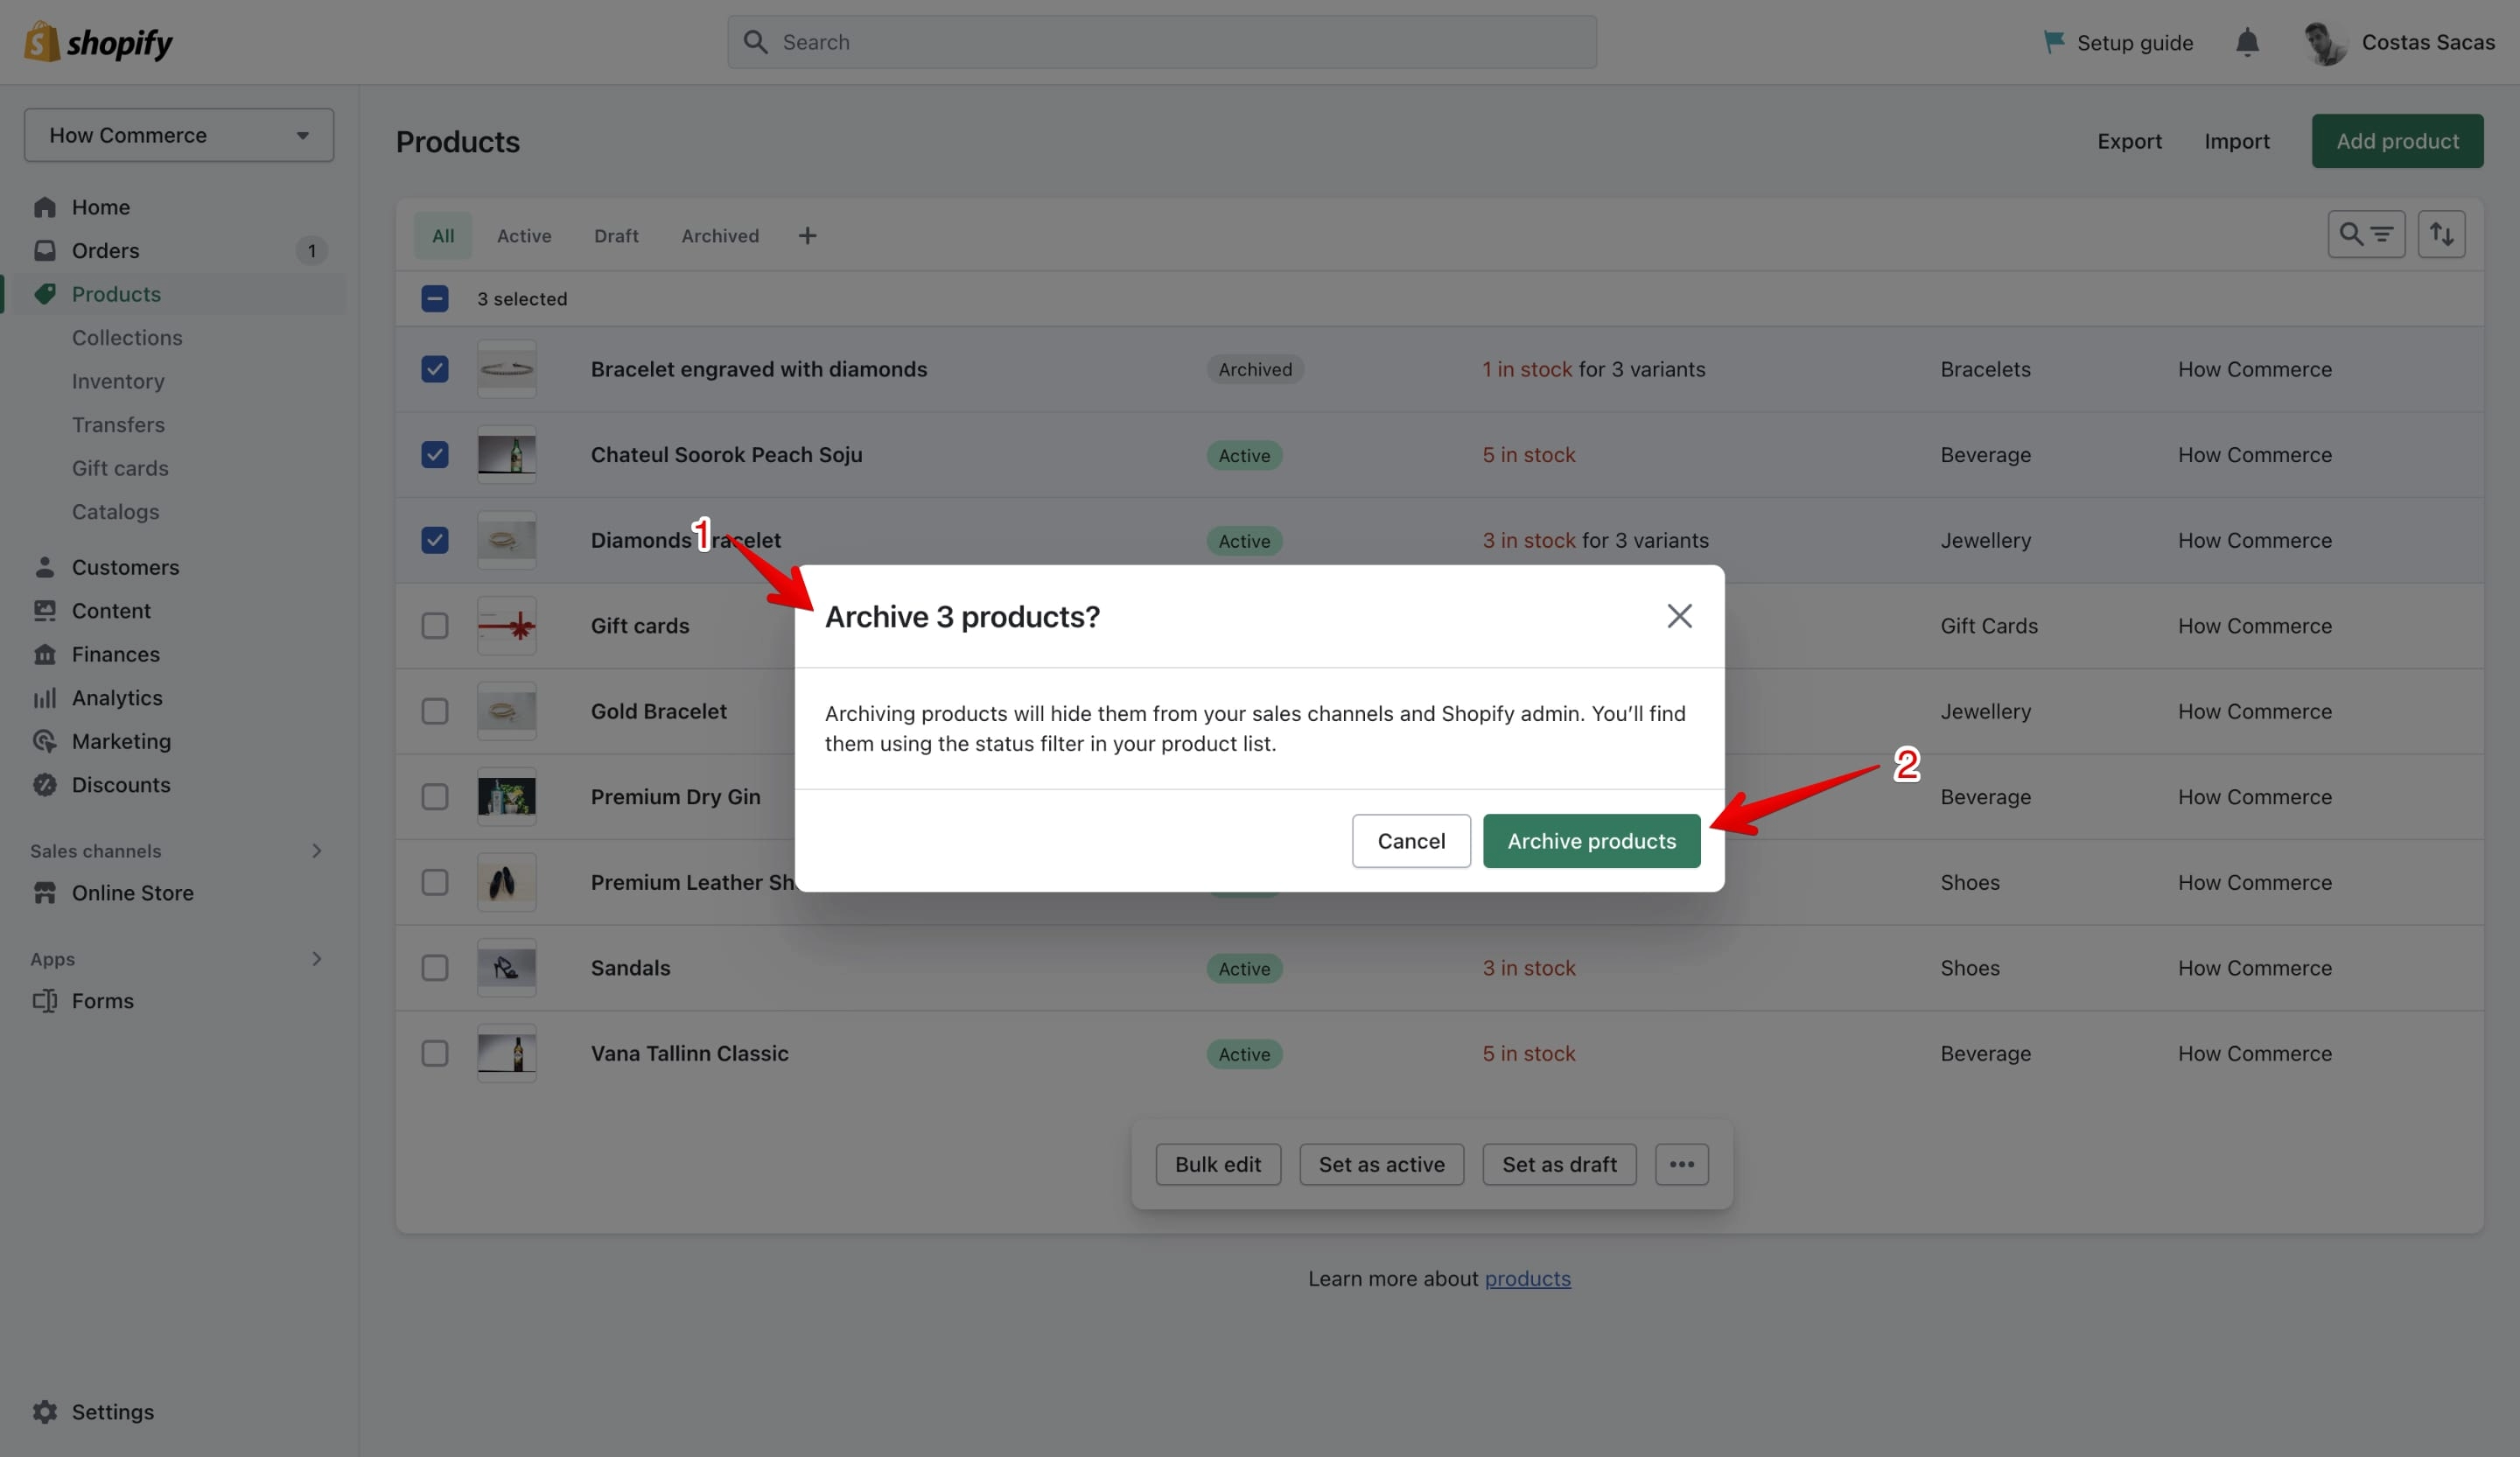
Now you should see a popup that will ask you if you want to archive the products.
Click on the Archive products button to confirm:
If the archiving process was successful you'll receive a success message:
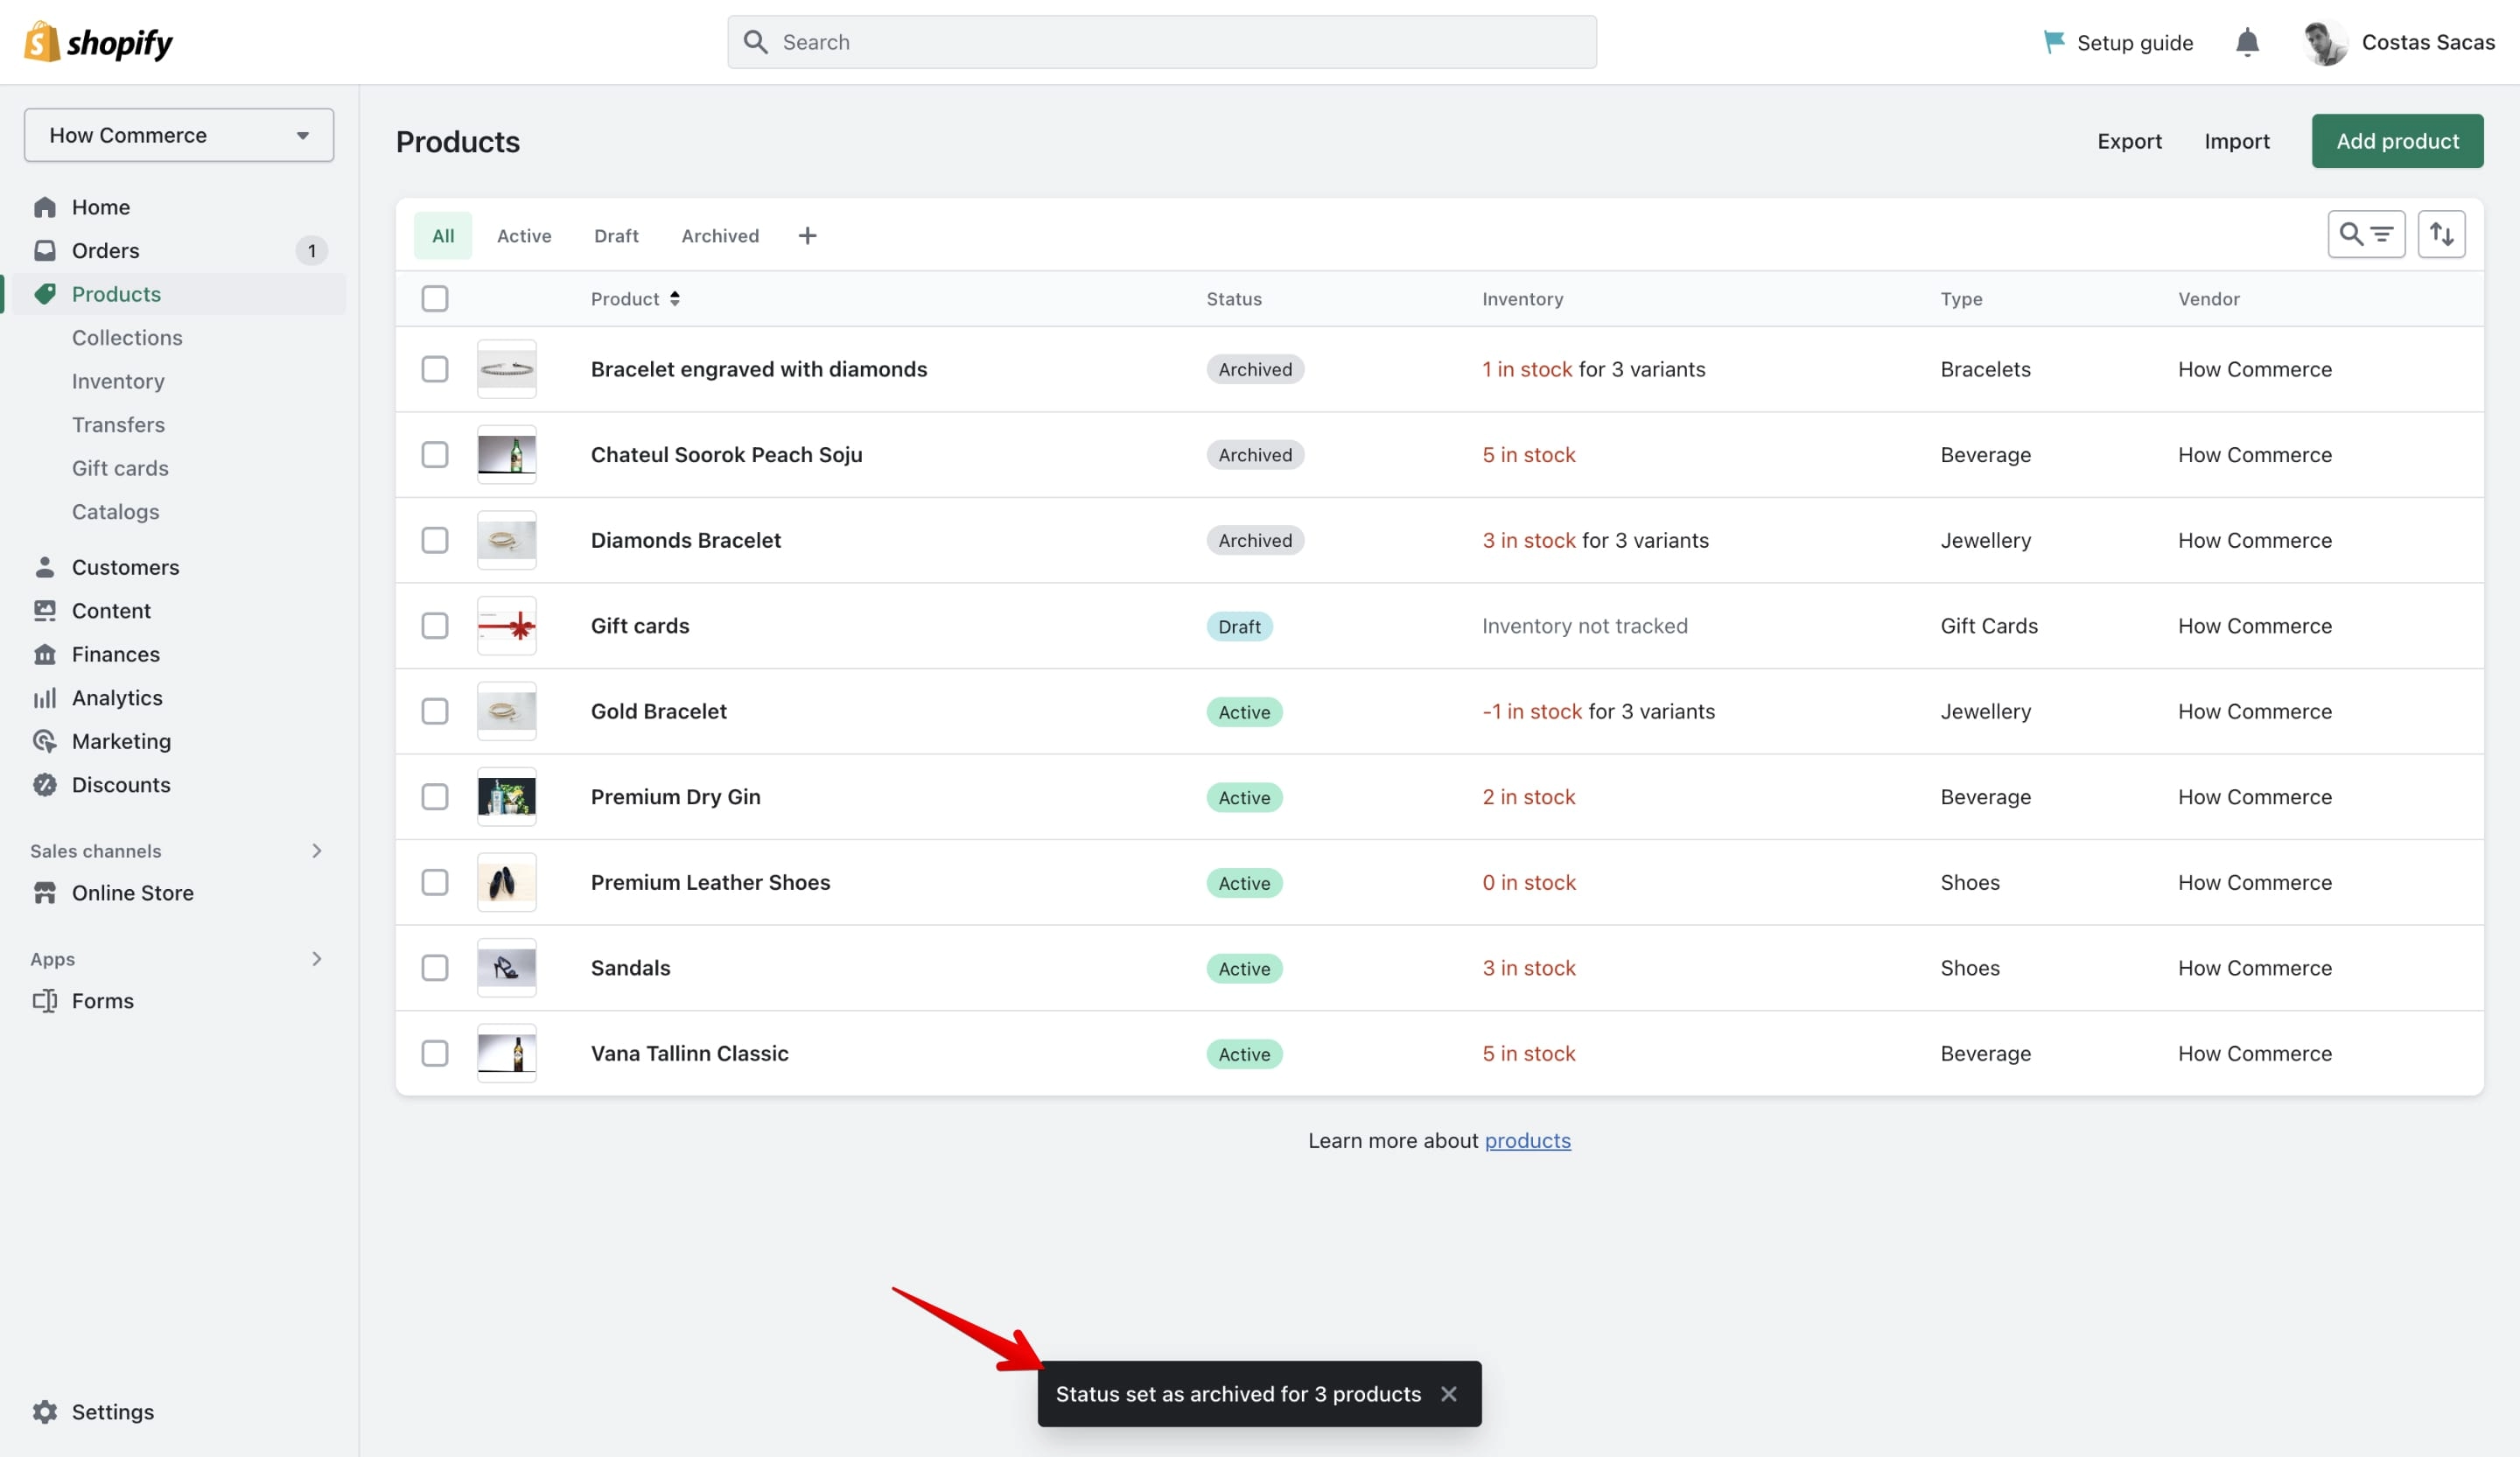
All the selected products will now be archived, and they will no longer be visible on your store's front end.
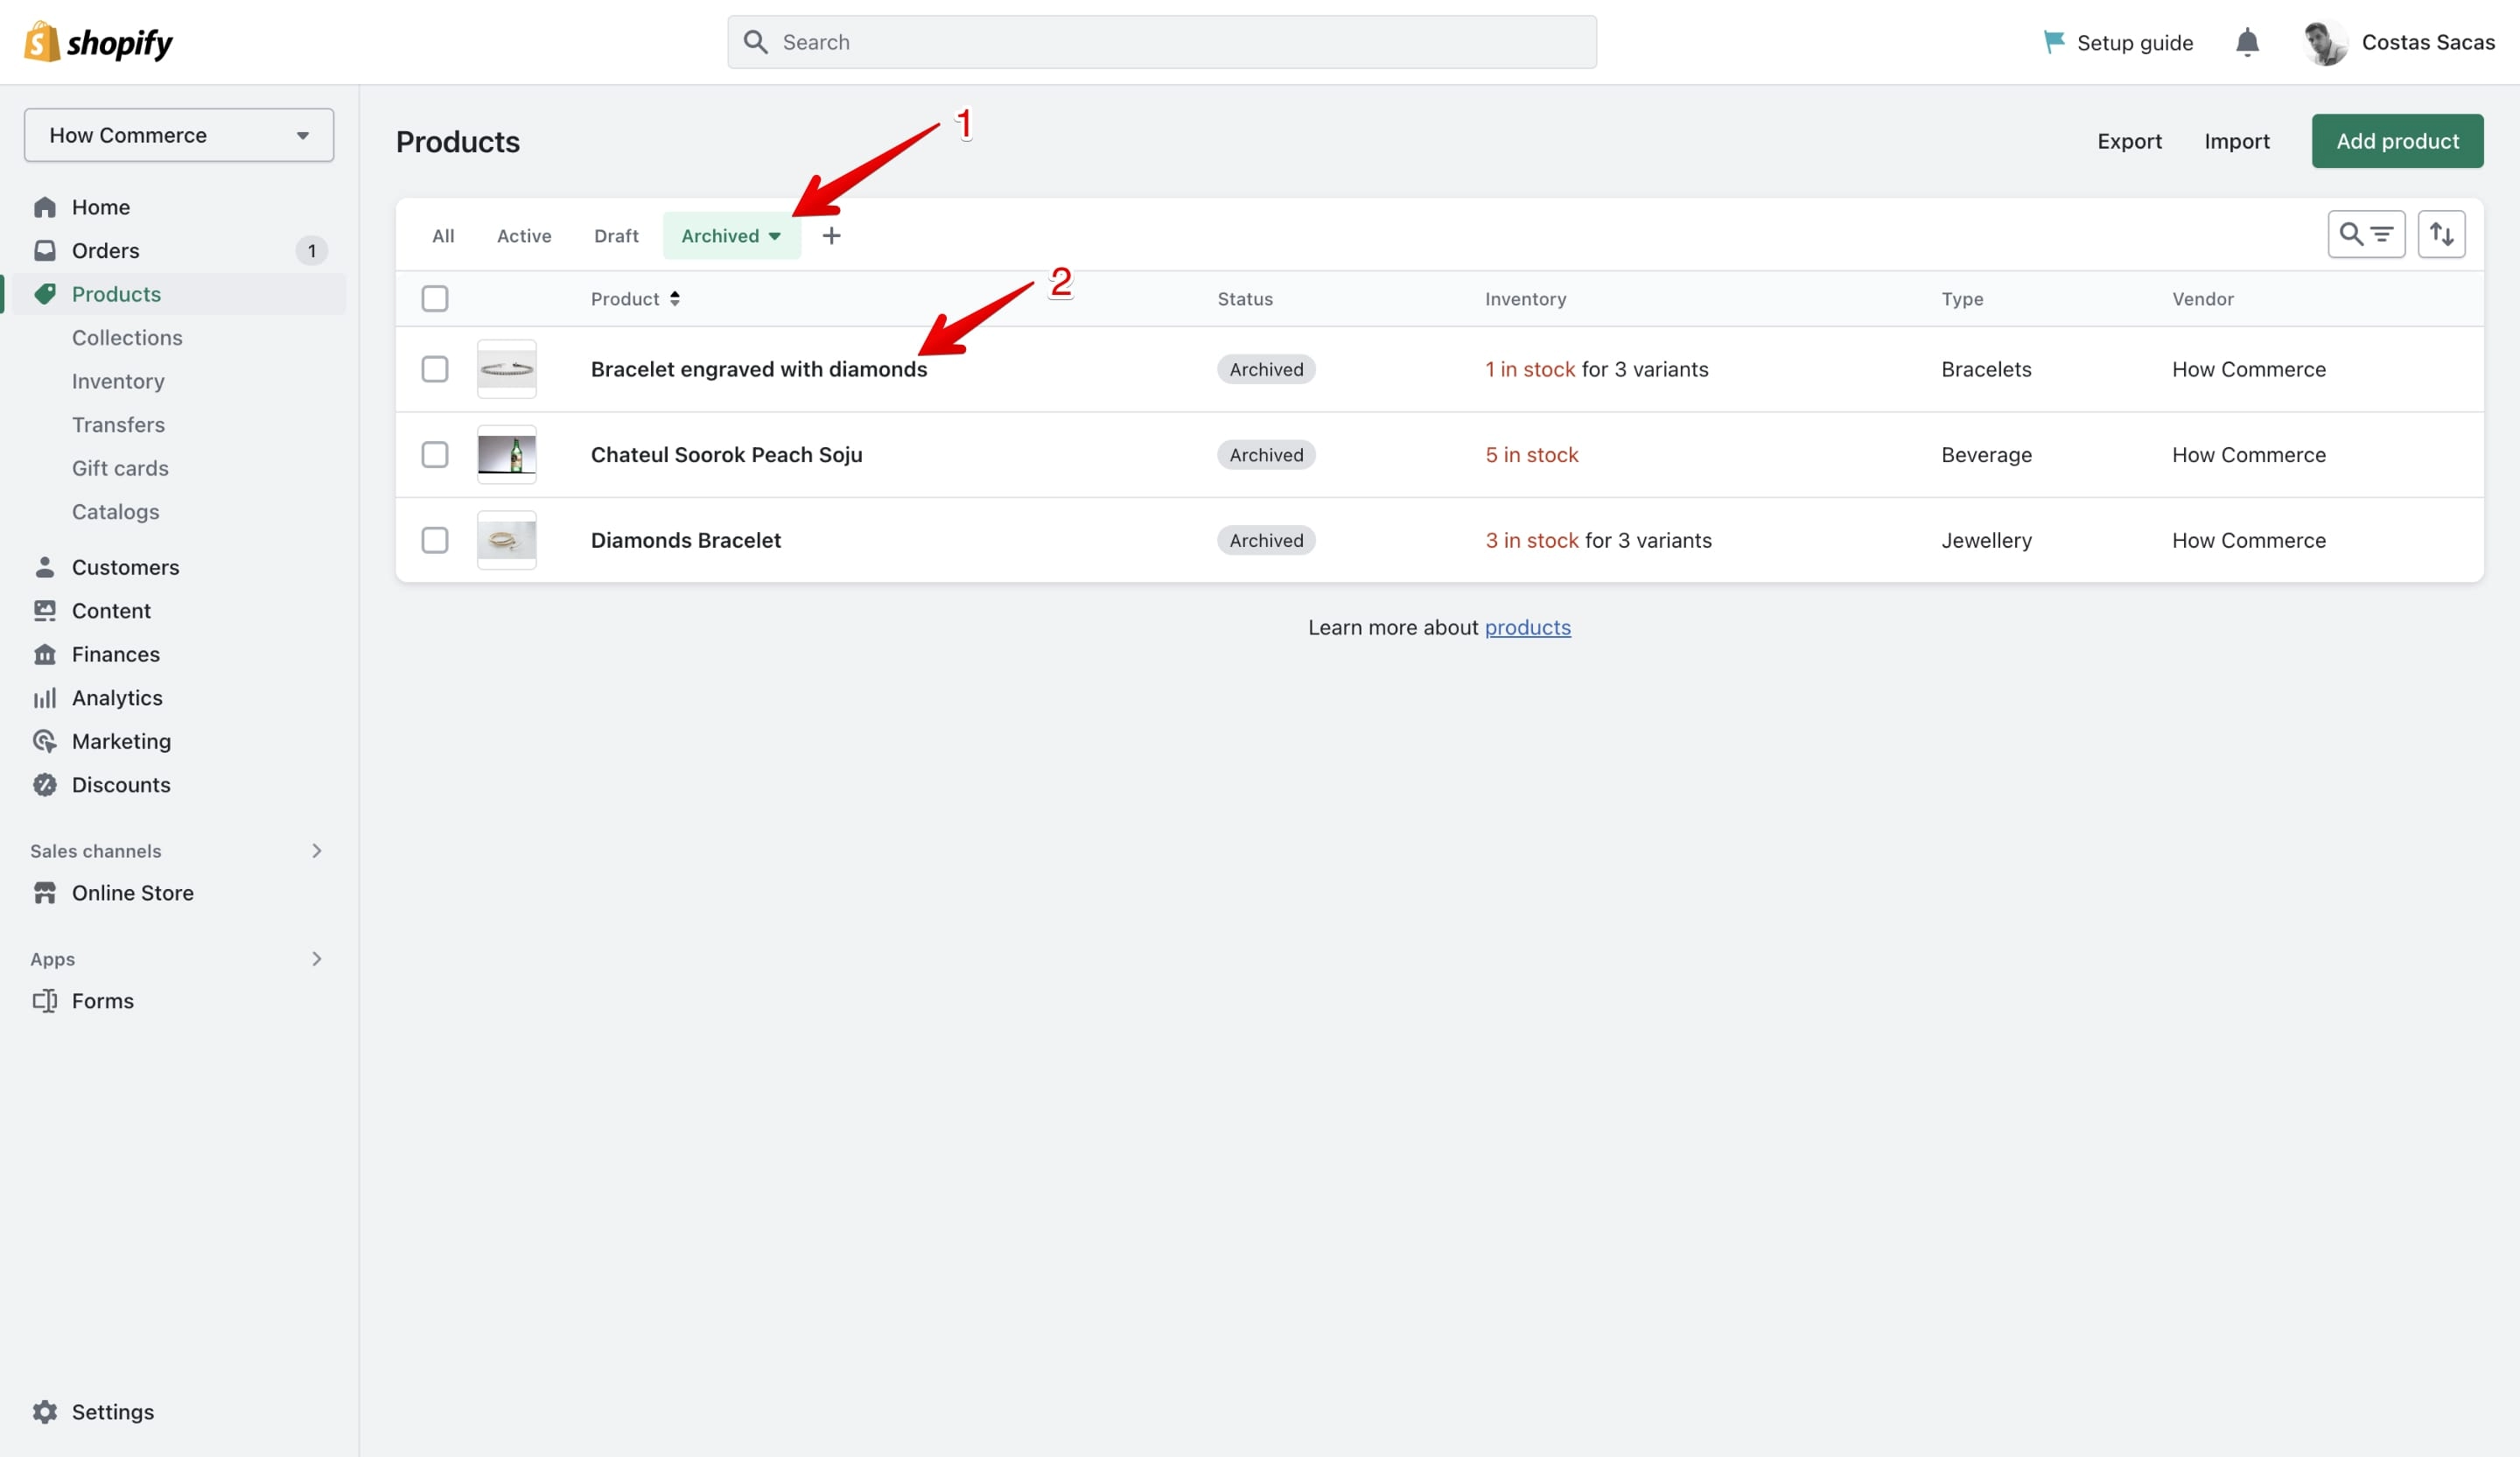
How to check your archived products
At the top of the product page you have an Archived tab. Once you click on it Shopify will list all archived products. This is the same area where you go to unarchive your products.
Unarchive a product
Click on the Archived tab located on the top of the Products page. This will display a list of all the products that have been archived.
Find the product that you want to unarchive and click on its title to open its product page:
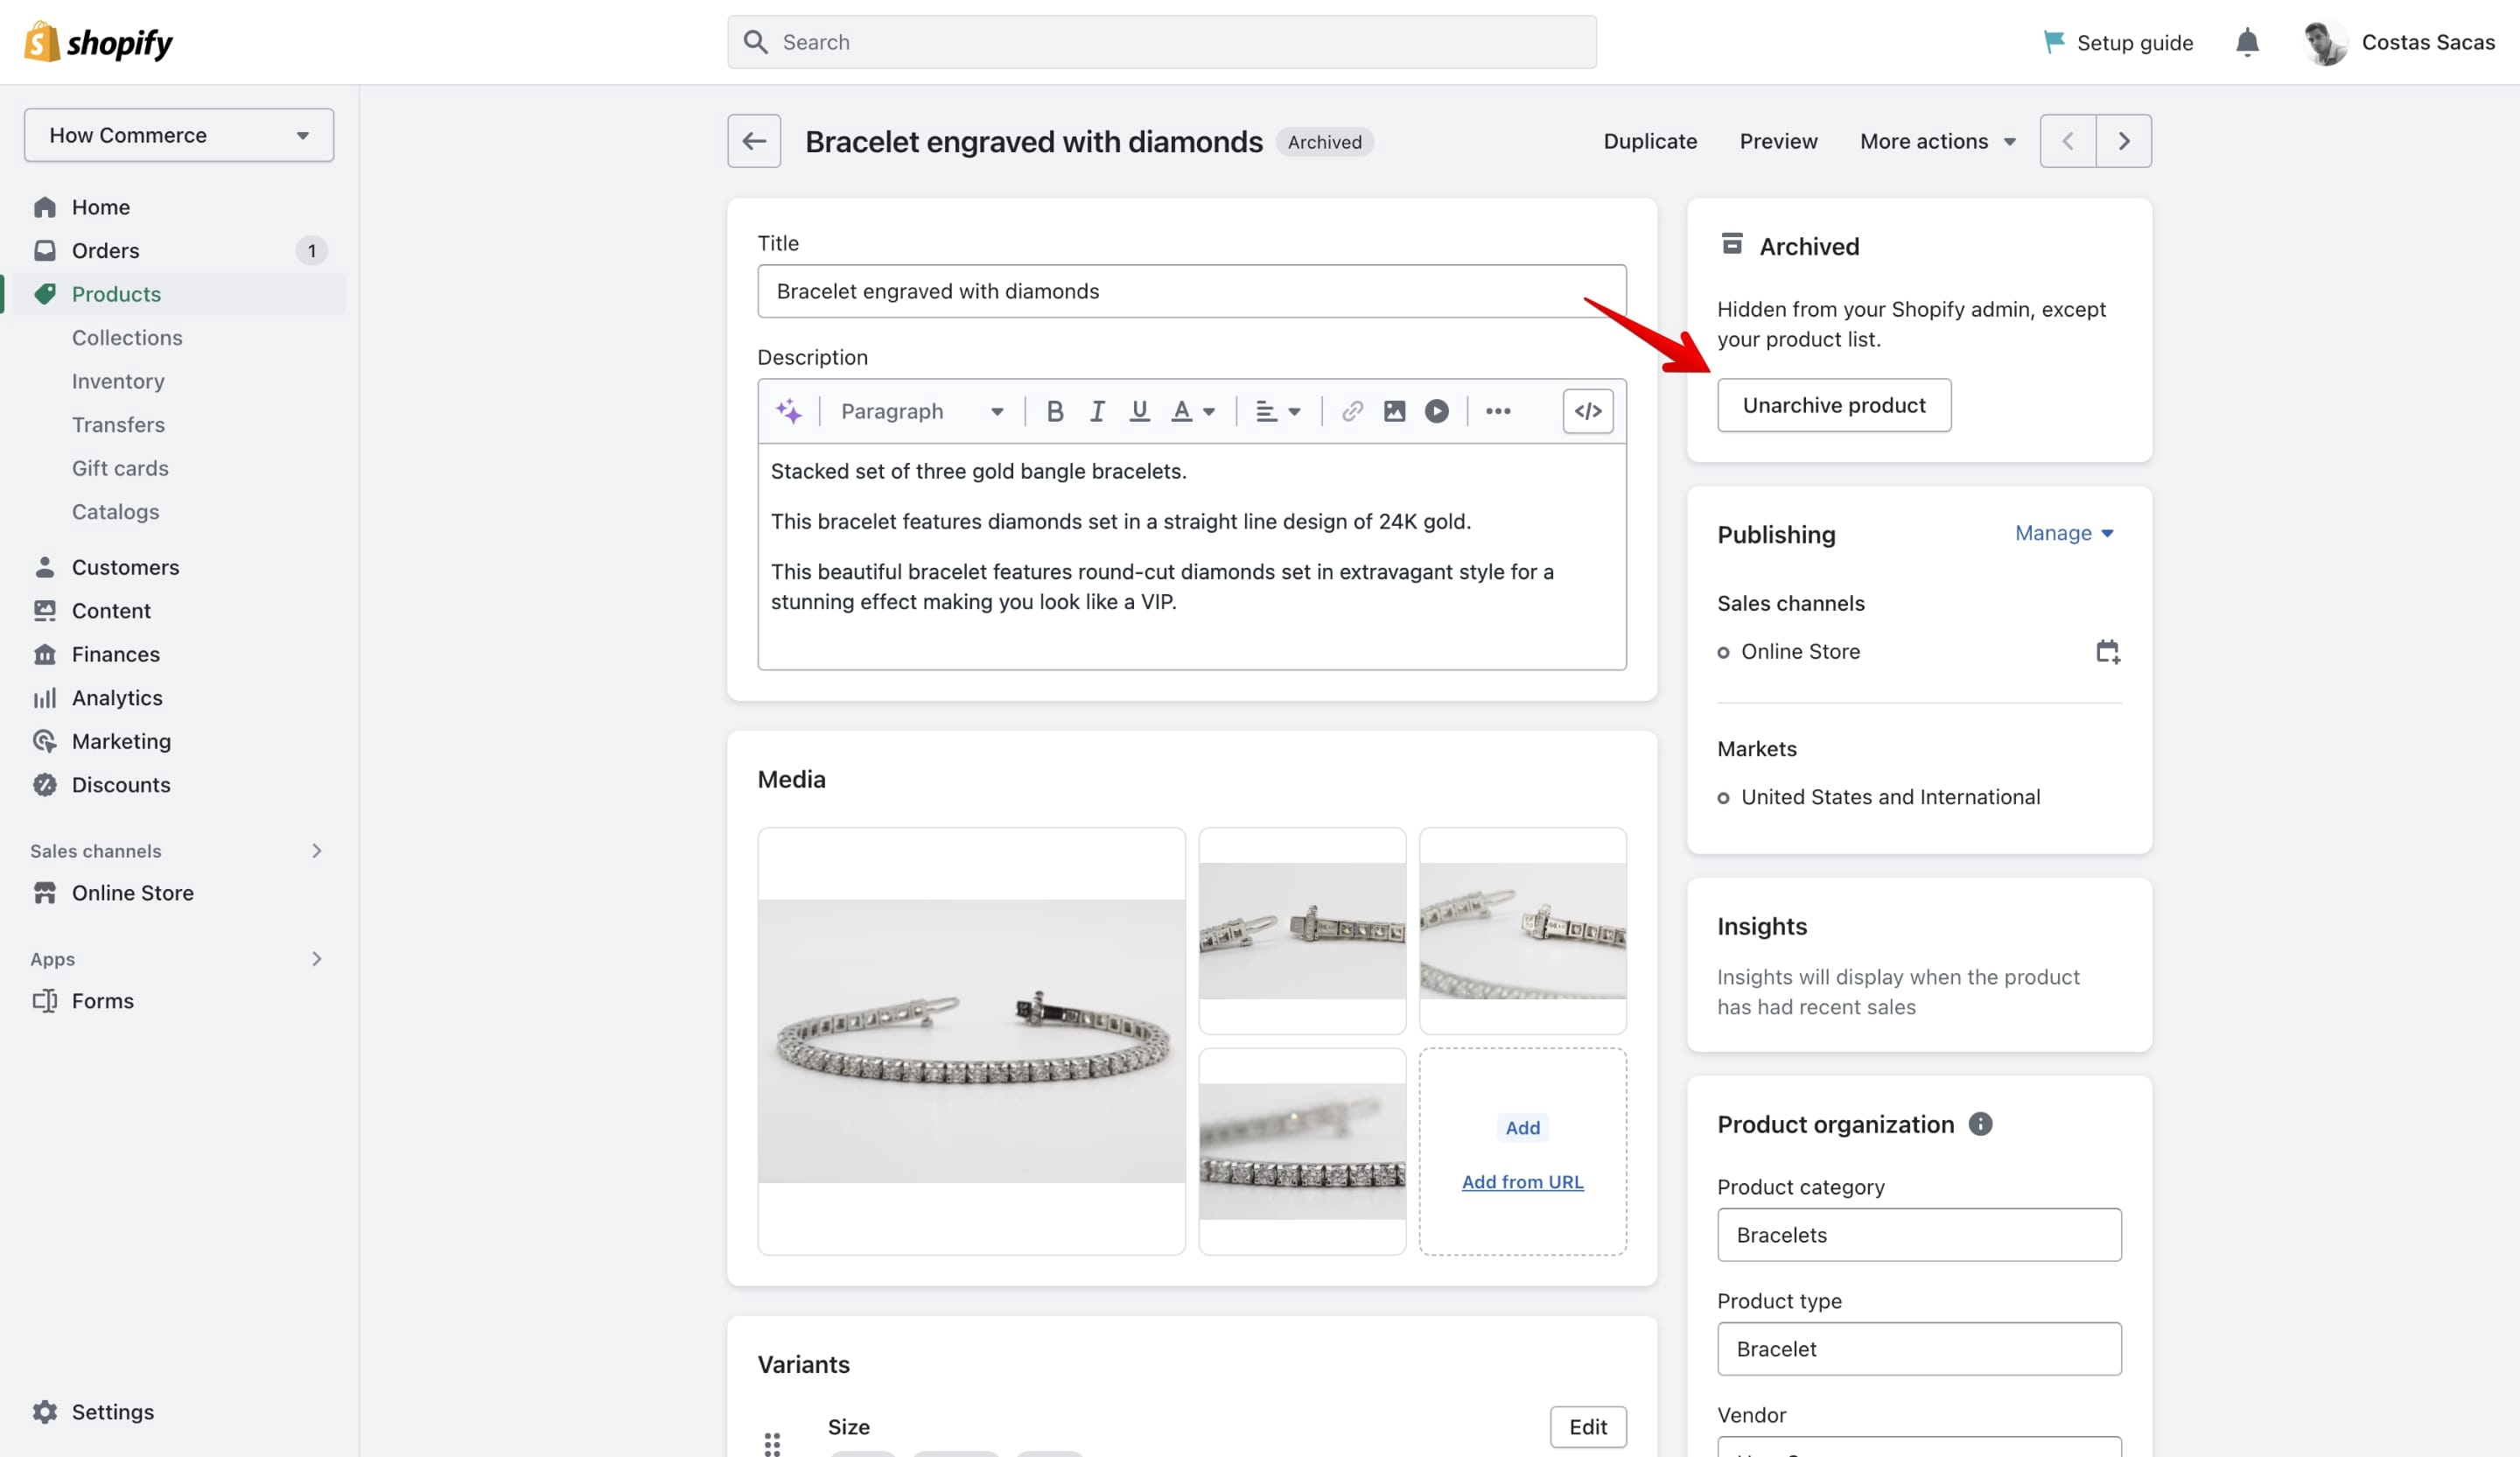
Once you have opened the product page, click on the Unarchive button located on the right side of the page:
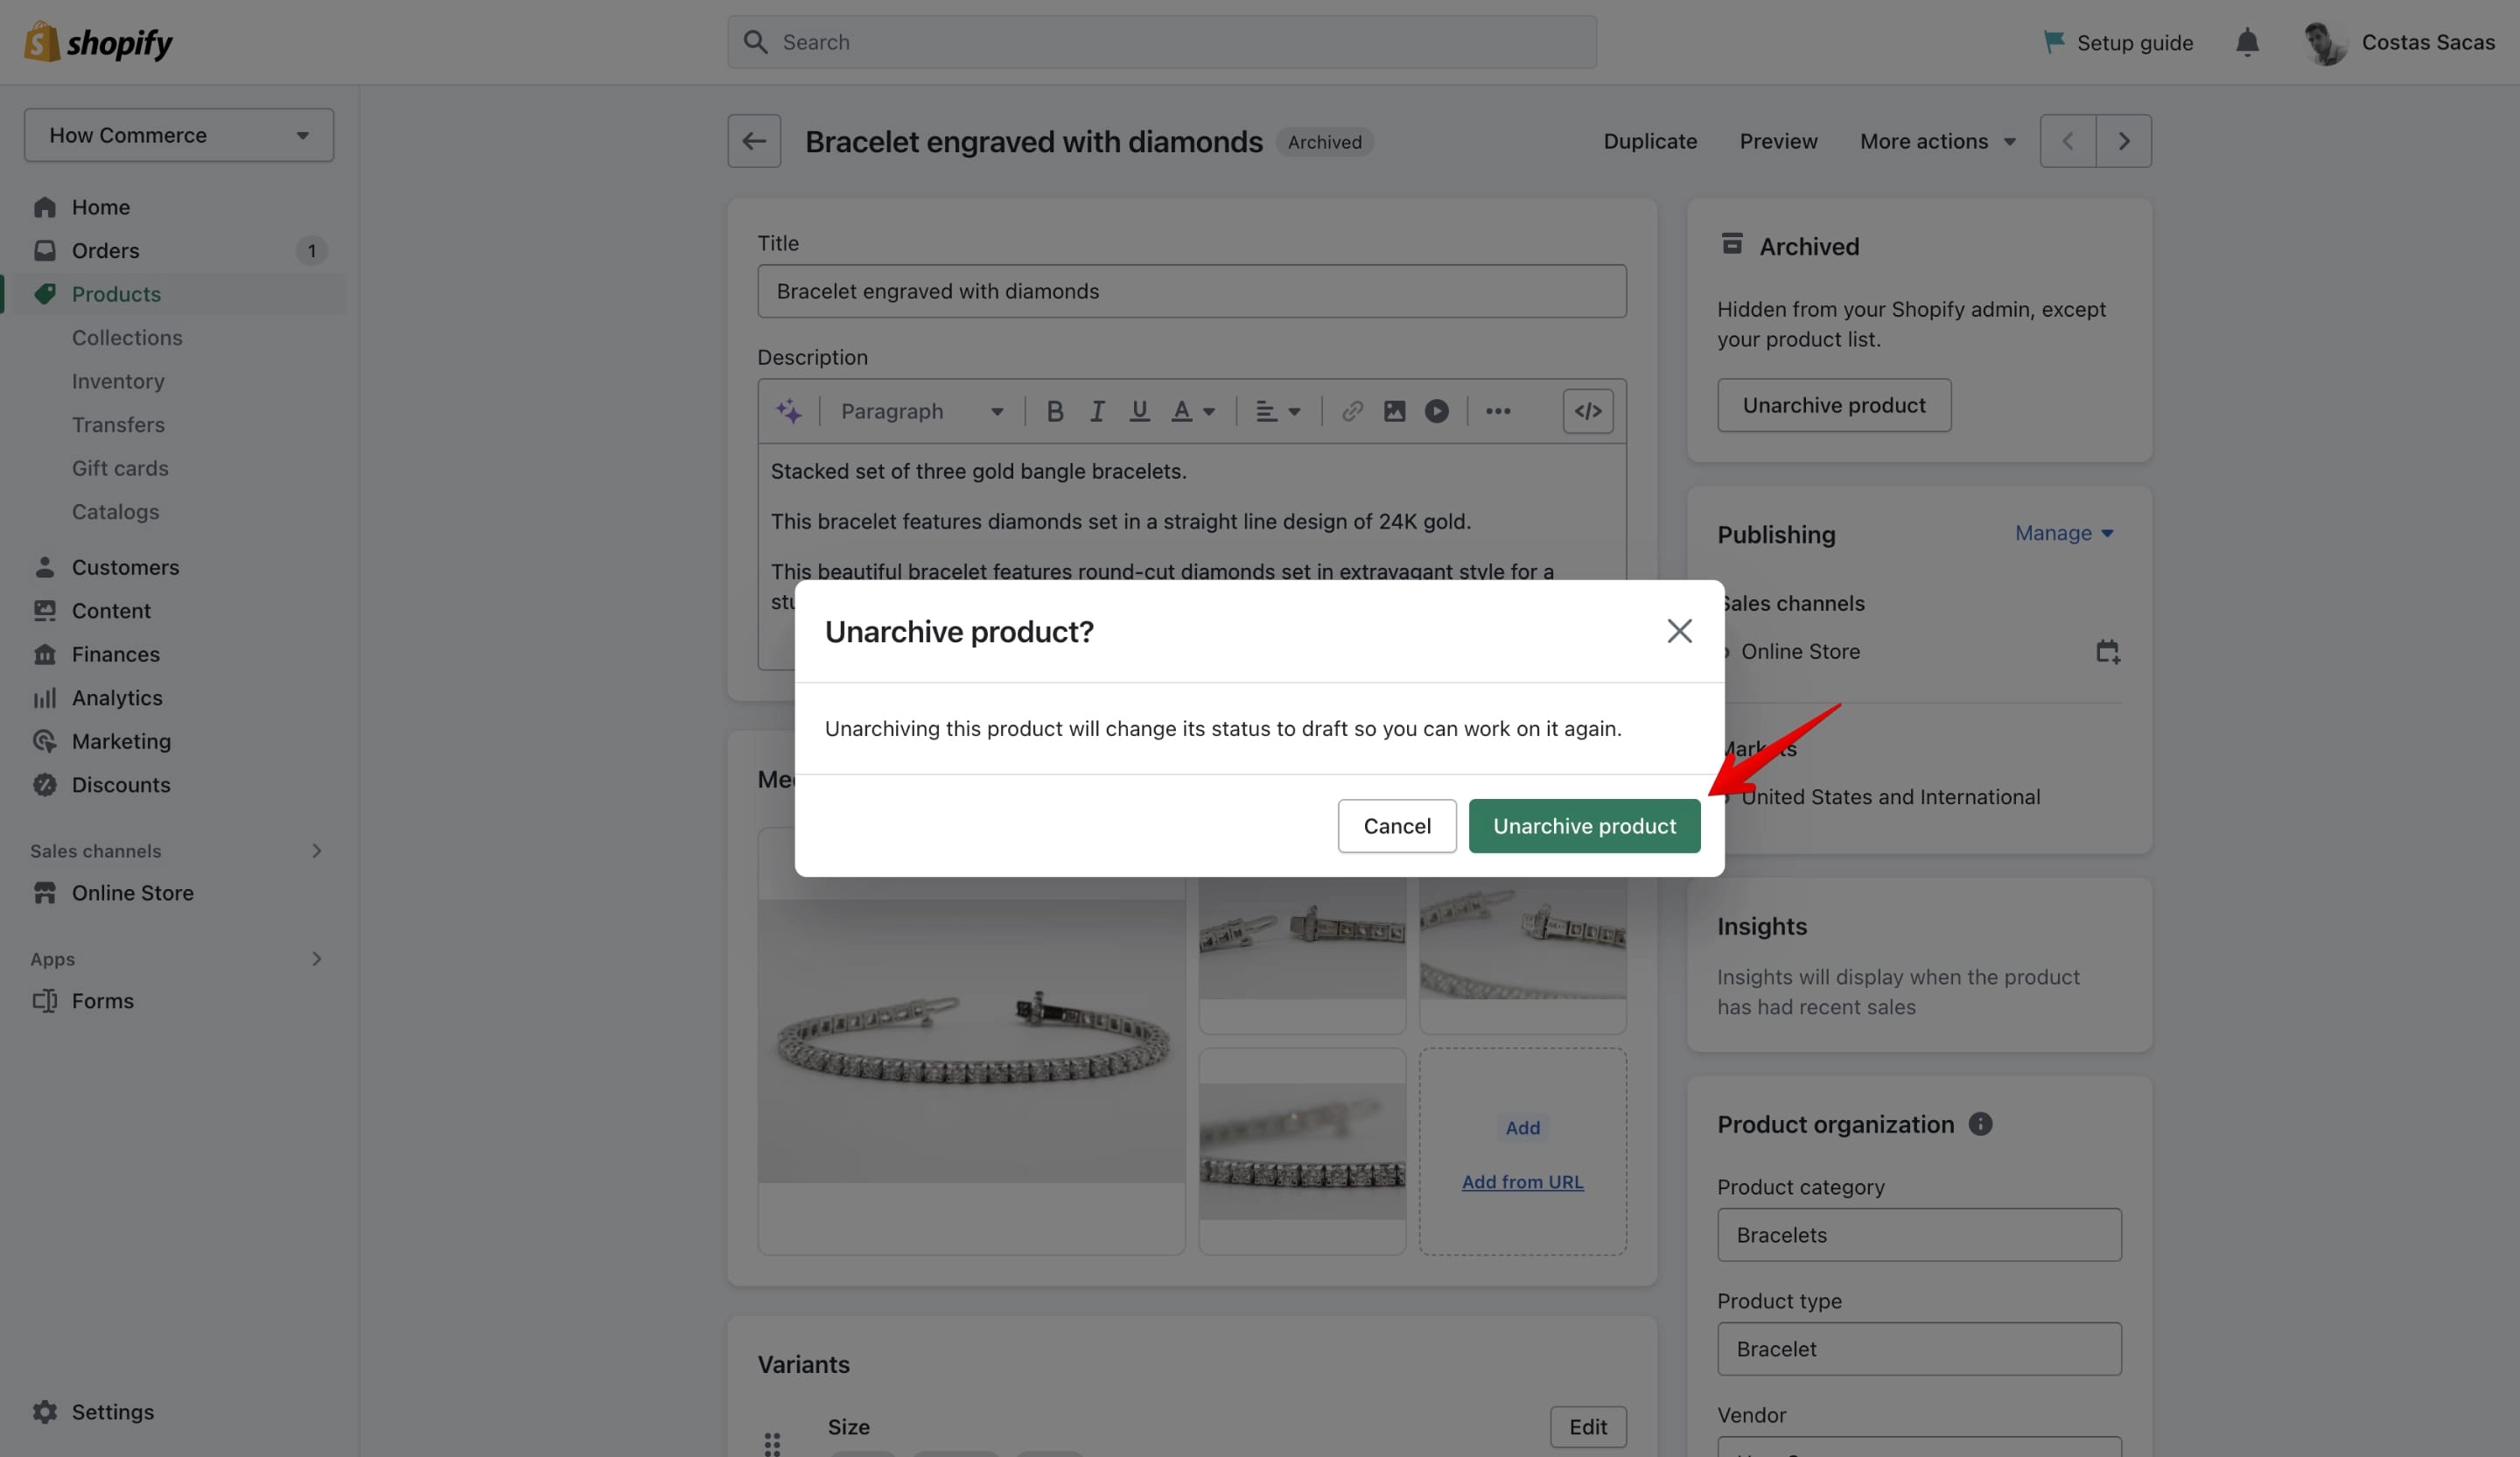
A popup window will appear asking you to confirm that you want to unarchive the product. Click the Unarchive button to confirm:
If the process was successful you'll see a success message:
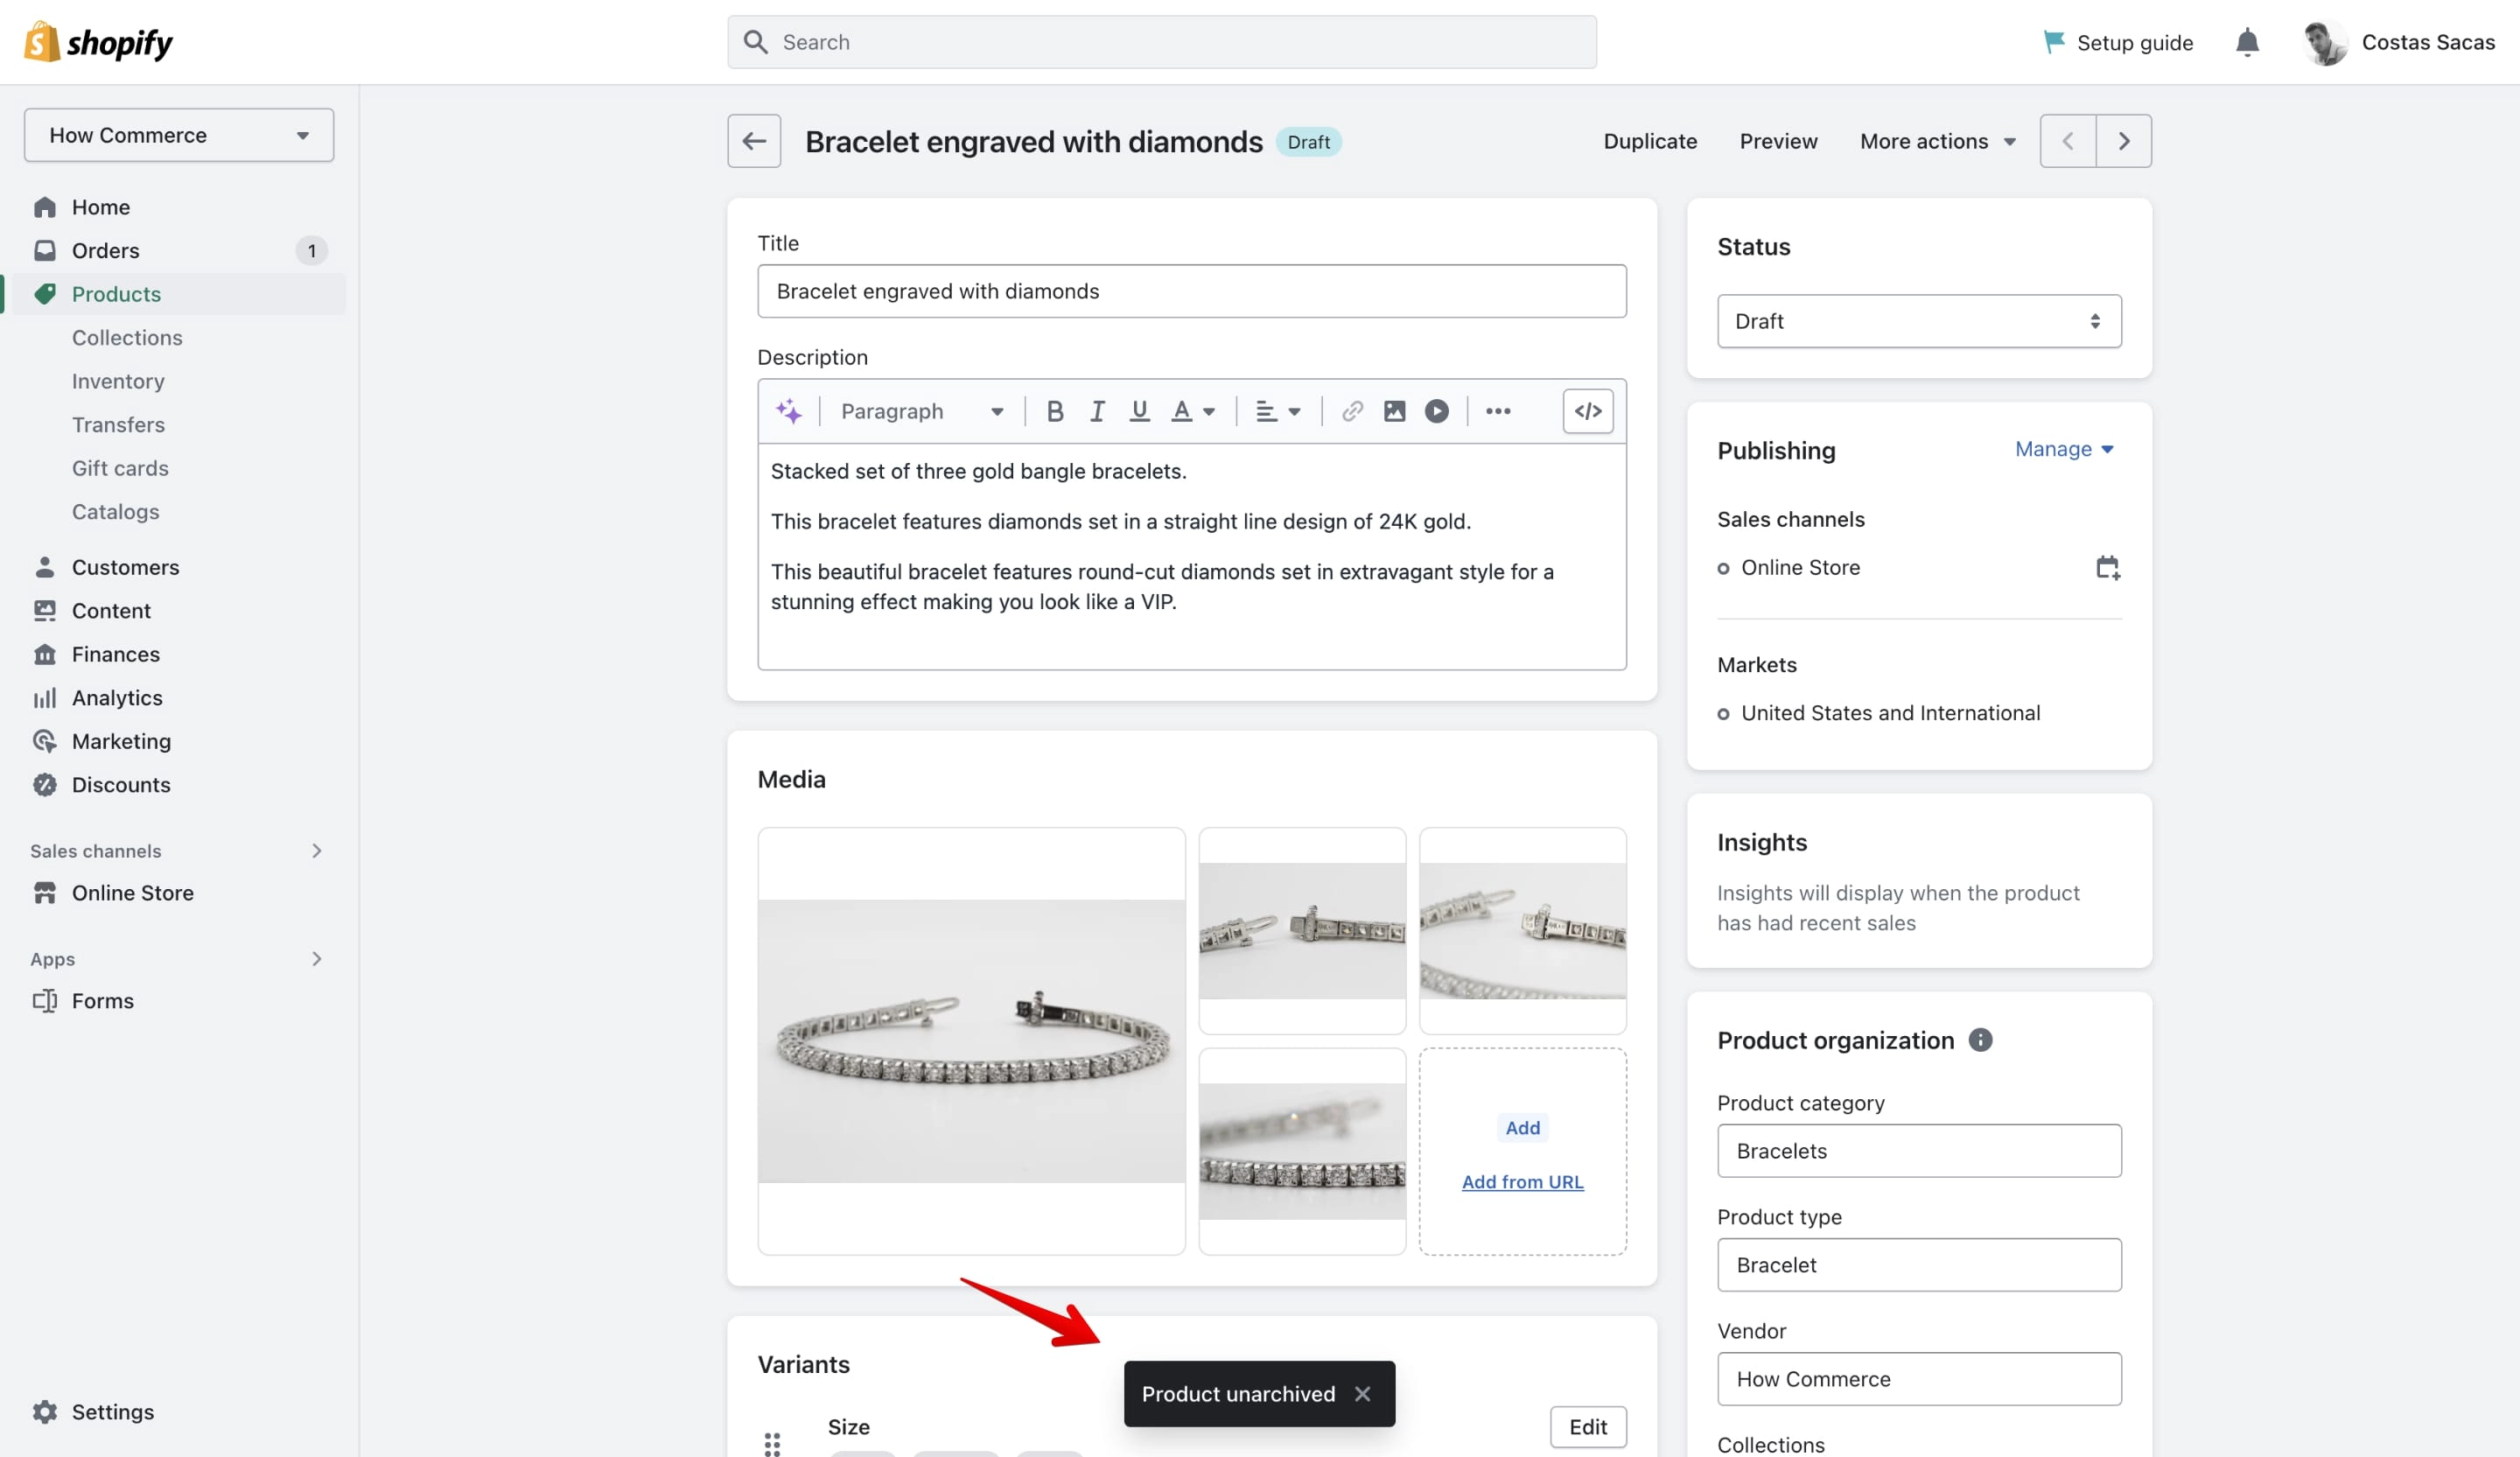
The product will now be unarchived and will be visible on your store's front end once again.
It is important to note that unarchiving a product does not automatically make it available for purchase.
By default Shopify unarchives the product as "Draft".
You will need to make sure that the product's availability settings are set to "Published" to reflect its new status.
You can do this by editing the product's inventory settings and making any necessary adjustments like sales channels.
Unarchive products in bulk
Unfortunately at this time a bulk option to unarchive products doesn't exist, so you have to unarchive products one by one.
Soon as I find out that things have changed I'll update this section.
Conclusion
Archiving products in Shopify is a useful feature that can help you manage your store's products more effectively.
By following the simple steps outlined in this article, you can easily archive individual products or multiple products in bulk.
Remember that archiving a product does not delete it entirely, so you can always unarchive it in the future if you decide to bring it back to your store.