

Overview
As long as your theme supports it you can add a 3D model to Shopify like any other product assets: images, video, files, etc.
Is it possible that you have an old custom theme or one based on the OS 1.0 theme engine and because of that the 3D models will not work.
Just find a developer to help you upgrade the theme or use one of the Shopify OS 2.0 themes.
Login into the admin dashboard. If you do not know how to follow this tutorial: How to login into your Shopify store
Shopify 3D supported files
3D models supported by Shopify at this time are USDZ and GLB. If your model comes in any other file format you need to convert it to one of these formats in order to use it on your Shopify store.
USDZ files
Platform: Primarily supported by Apple for use with ARKit.
Compression: Single-file, zip-compressed.
Features: Optimized for augmented reality, it can include 3D models, textures, and animations.
Compatibility: Native support on iOS and macOS.
Software: Created and edited using software like Reality Composer, Xcode, or third-party tools.
GLB files
Platform: Universal, but commonly used with WebGL and platforms like Three.js.
Compression: Binary format that includes images, textures, and shaders.
Features: Suited for both AR and VR, more flexible in terms of what can be included.
Compatibility: Supported by various platforms and software.
Software: Created and edited using Blender, 3ds Max, or other 3D modeling software.
To decide what files you should use, my recommendation is to check your store analytics, Google Analytics or the analytics software you are using to understand your store visitors.
There you can see exactly from what platforms your users are coming from and based on that you can decide what file you should use.
Add the 3D model
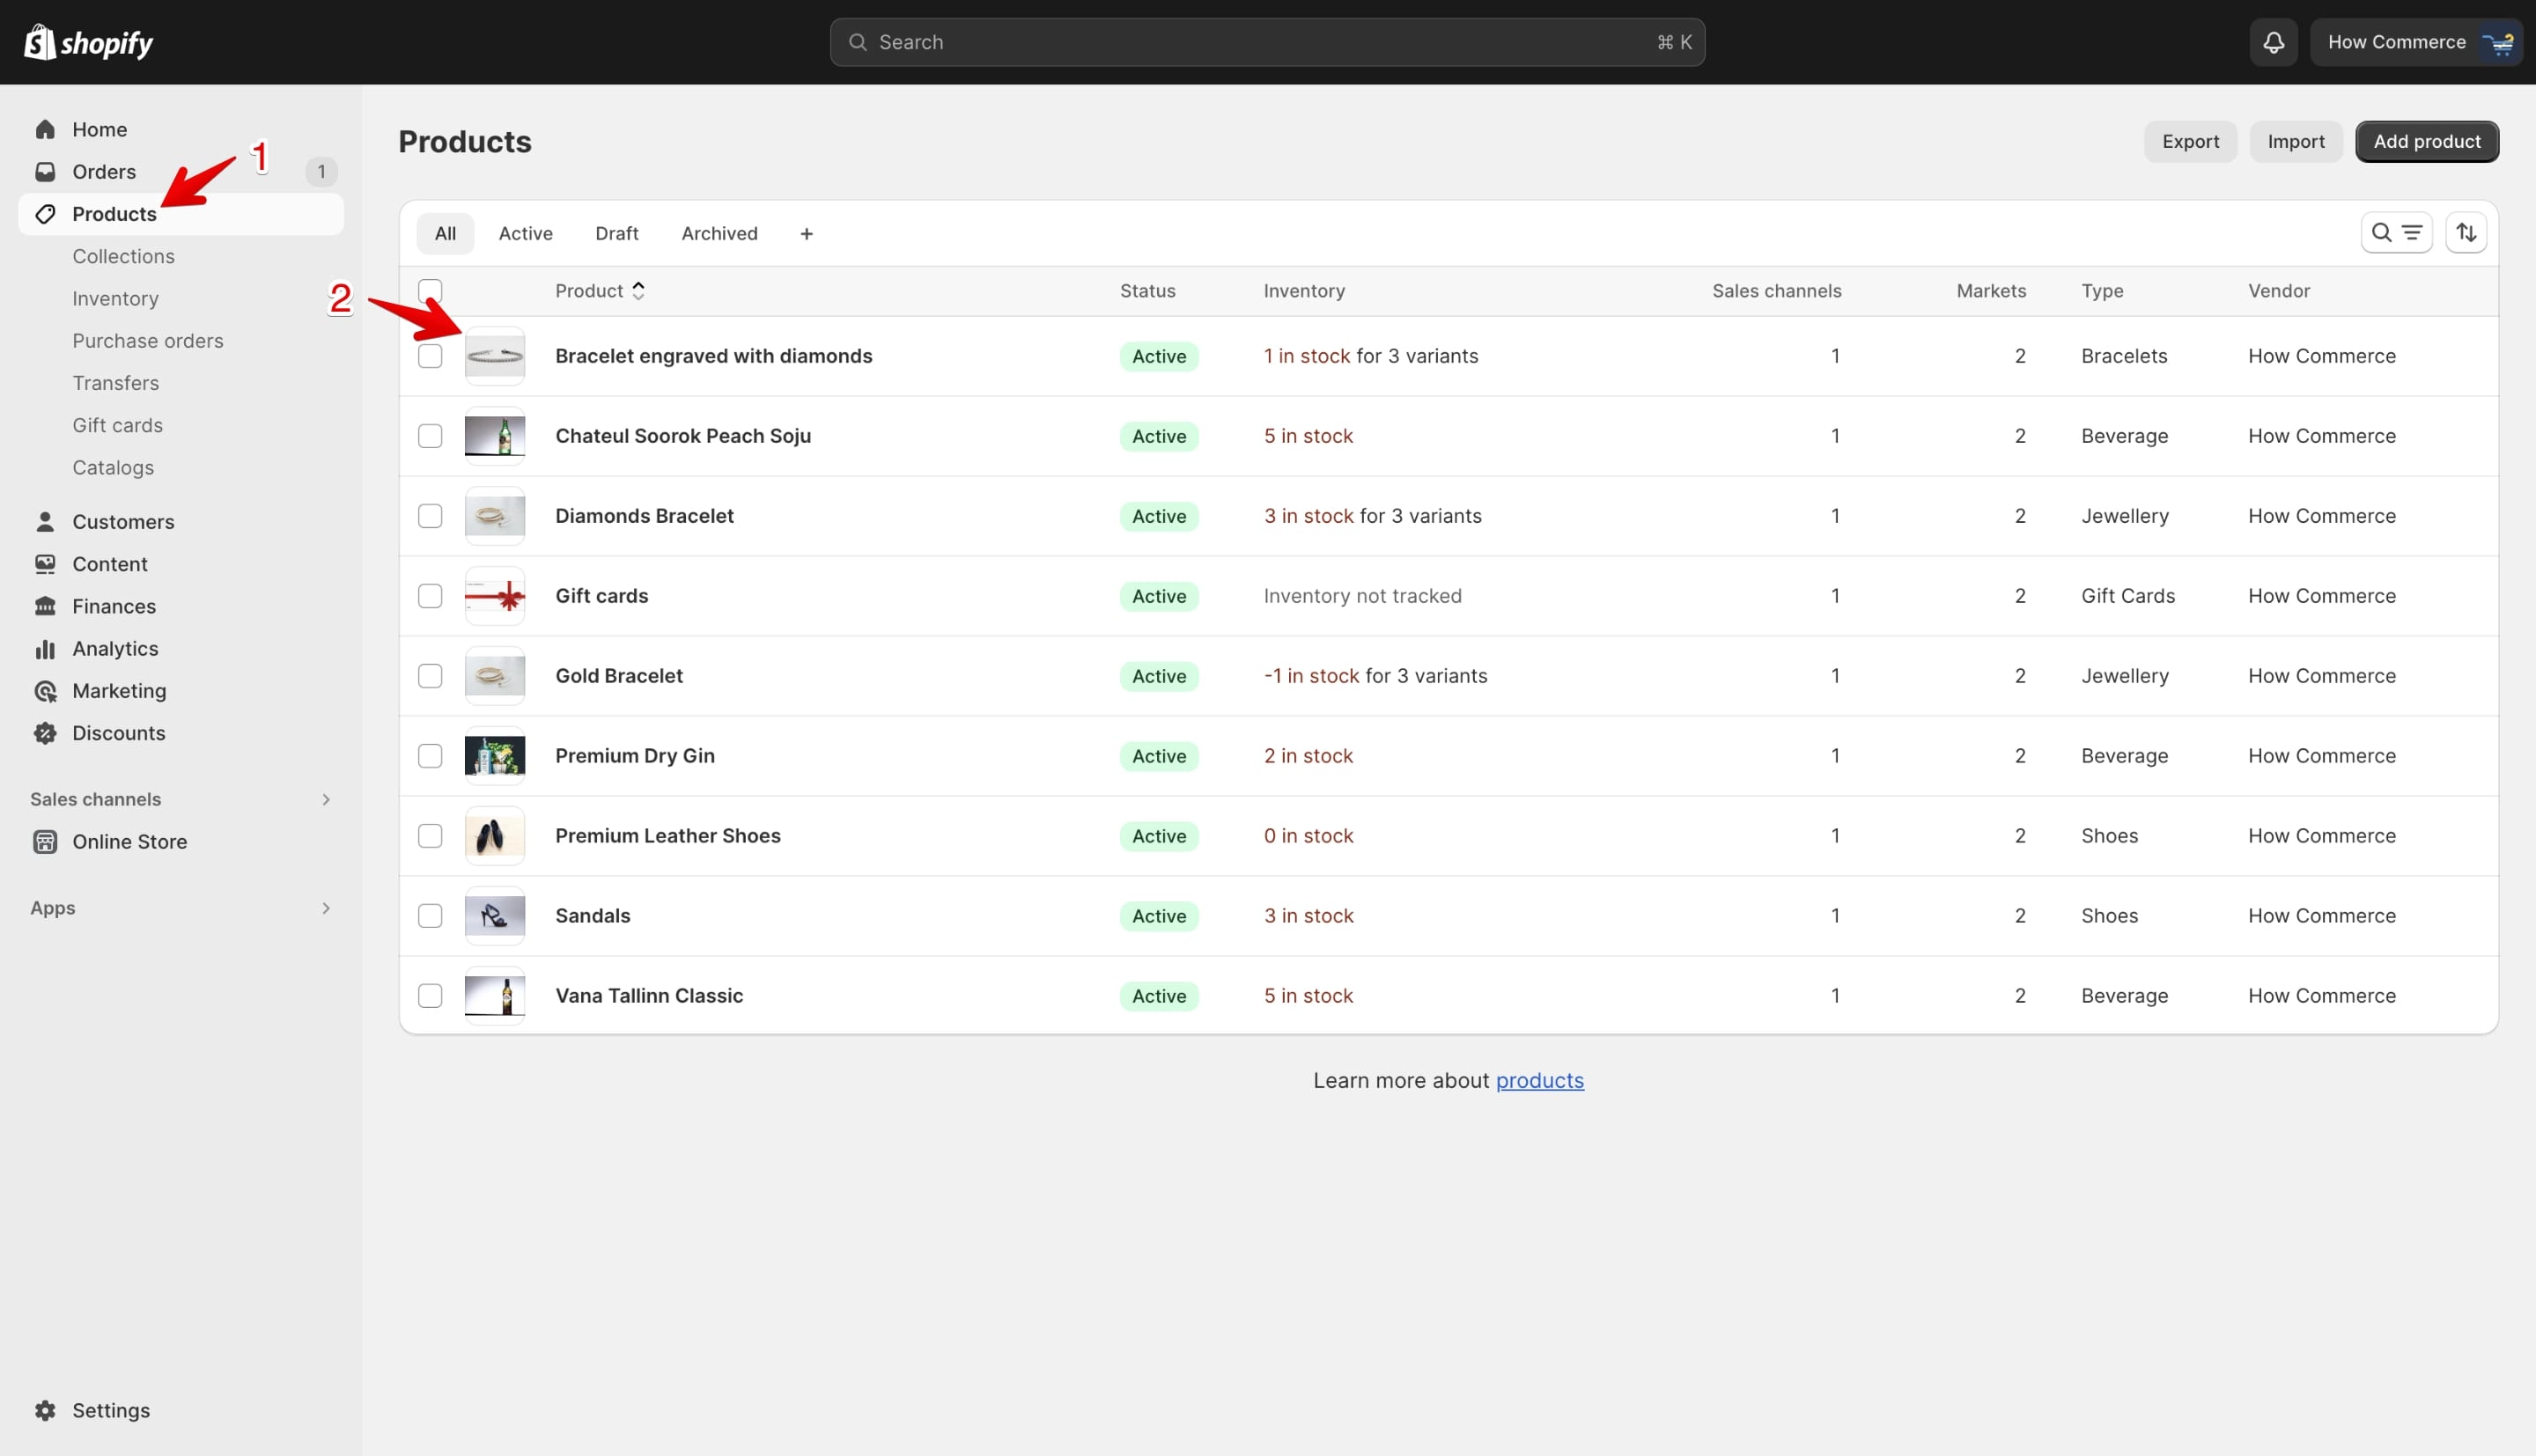
Go to the product listing page (marked with 1 in the image below) and select a product (marked with 2 in the image below) to which you want to add the 3D model:
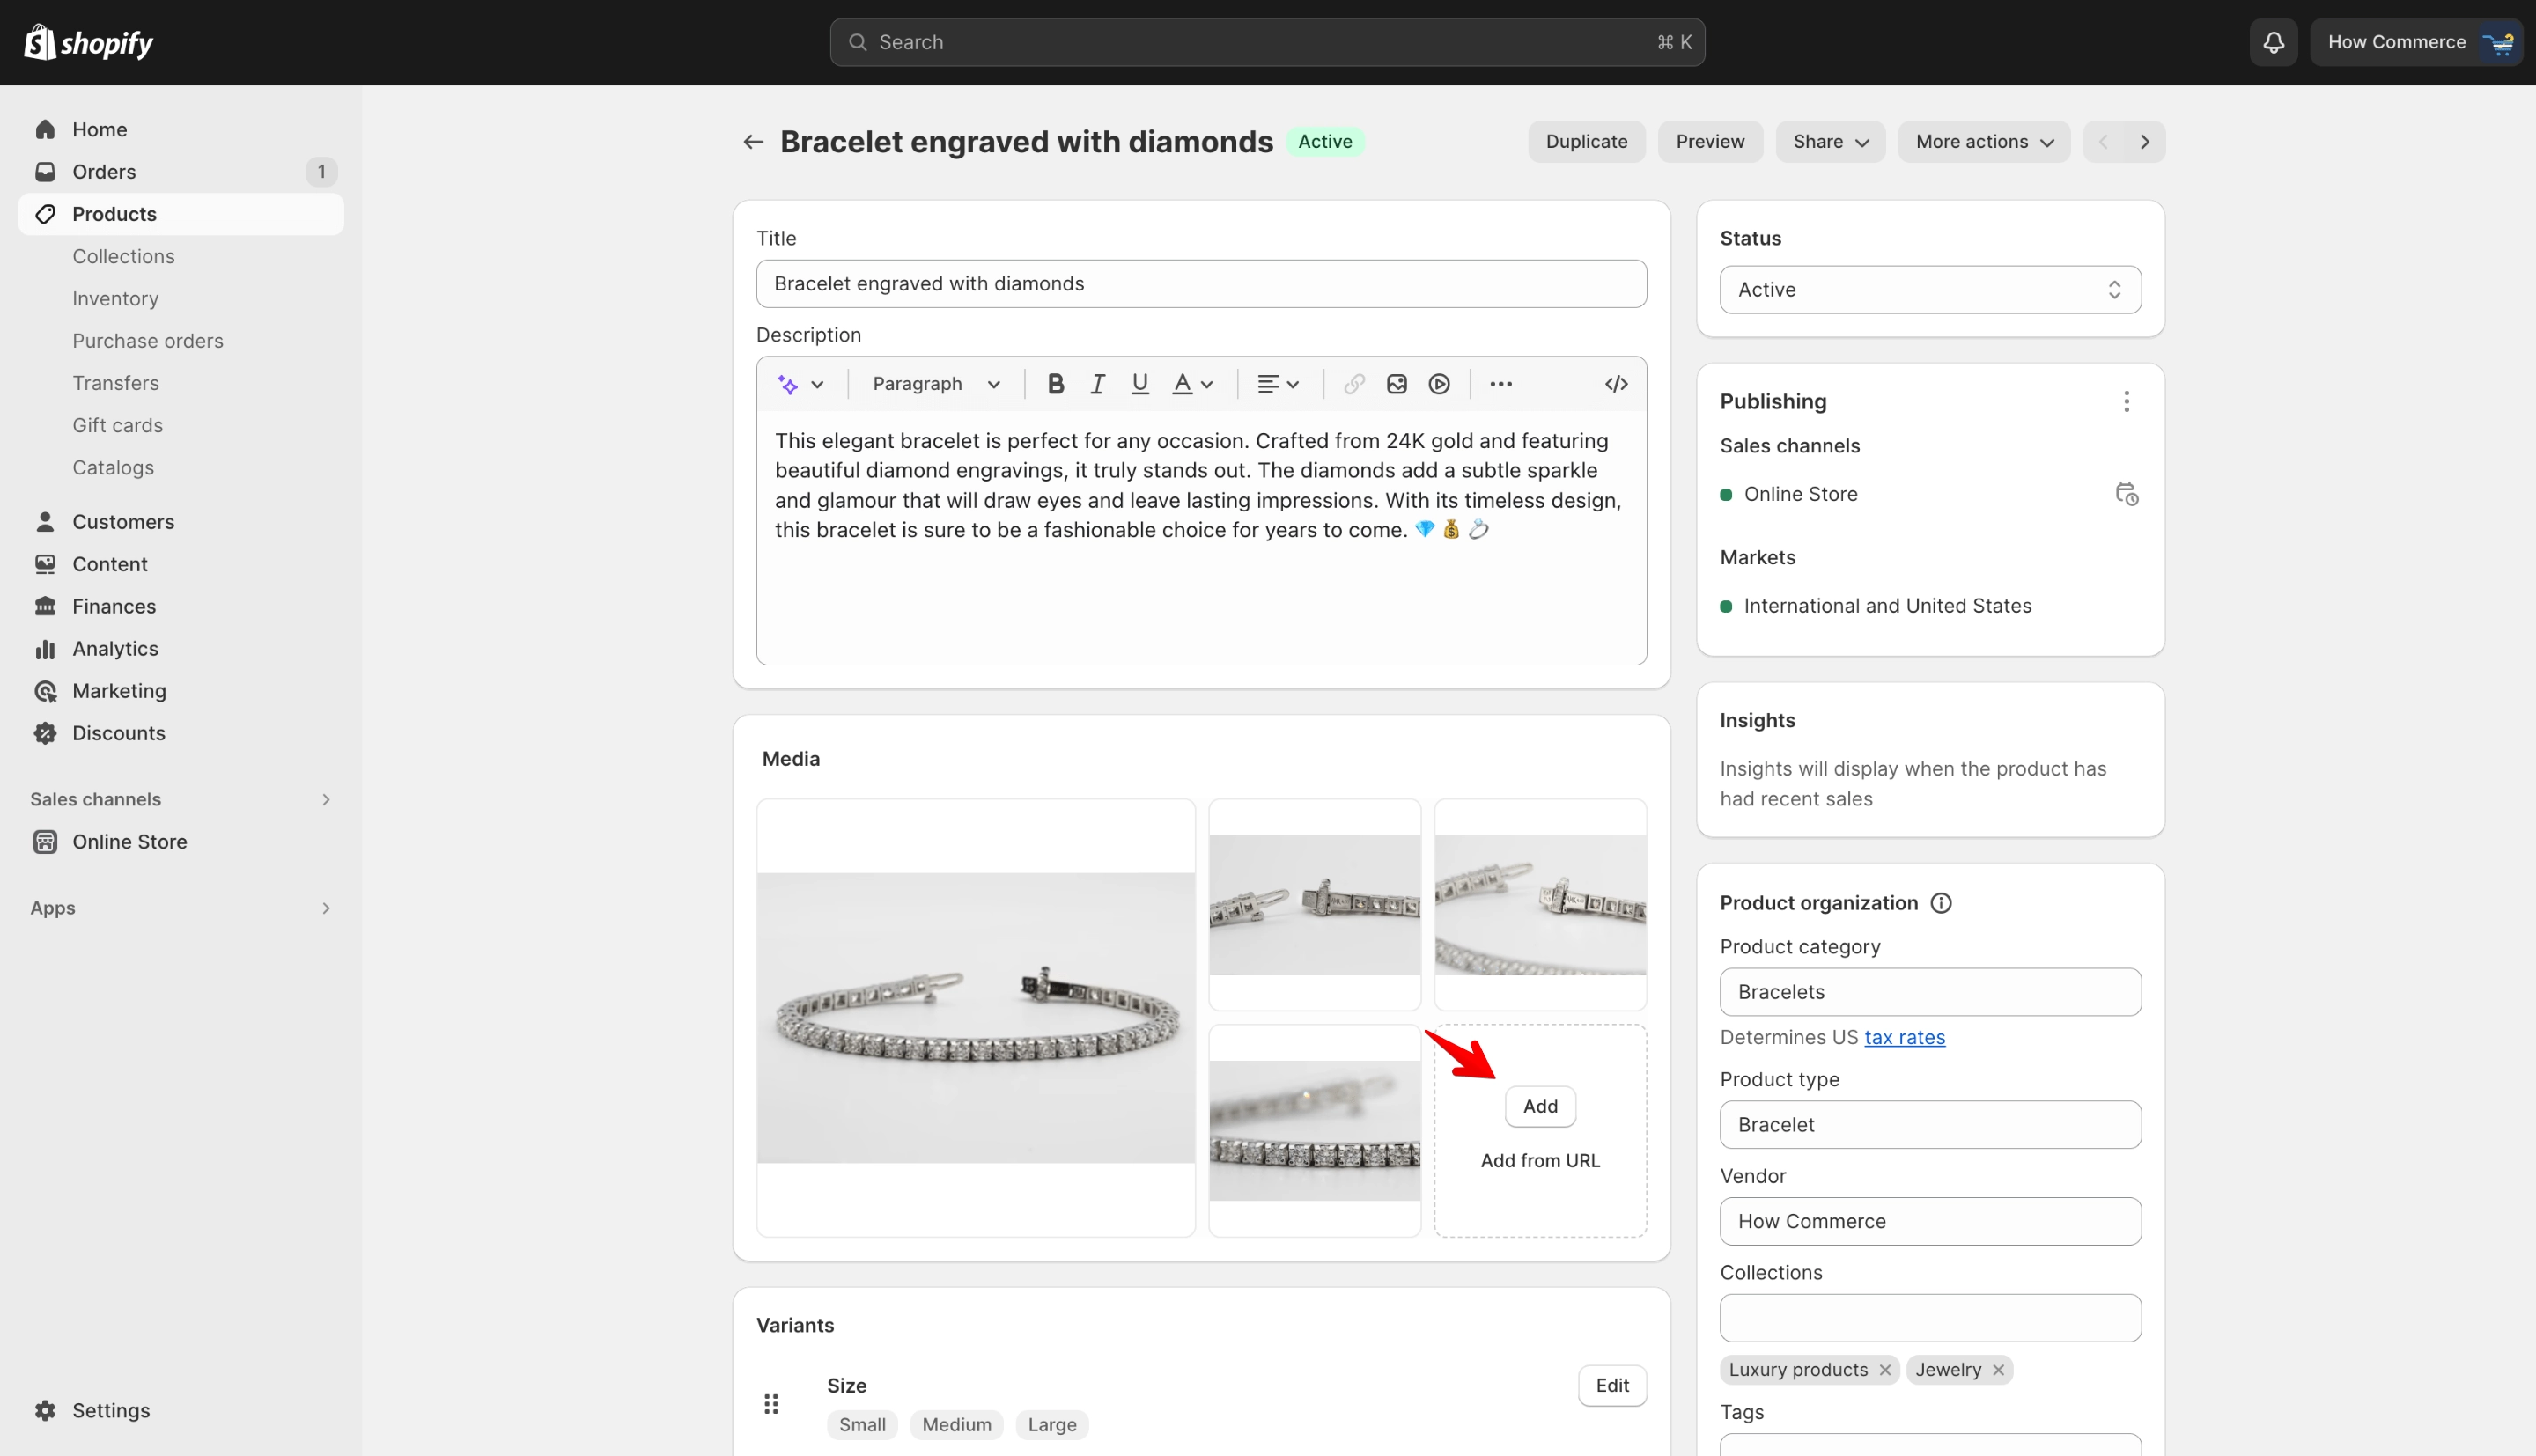
Go to the "Media" section and click on the "Add" button:
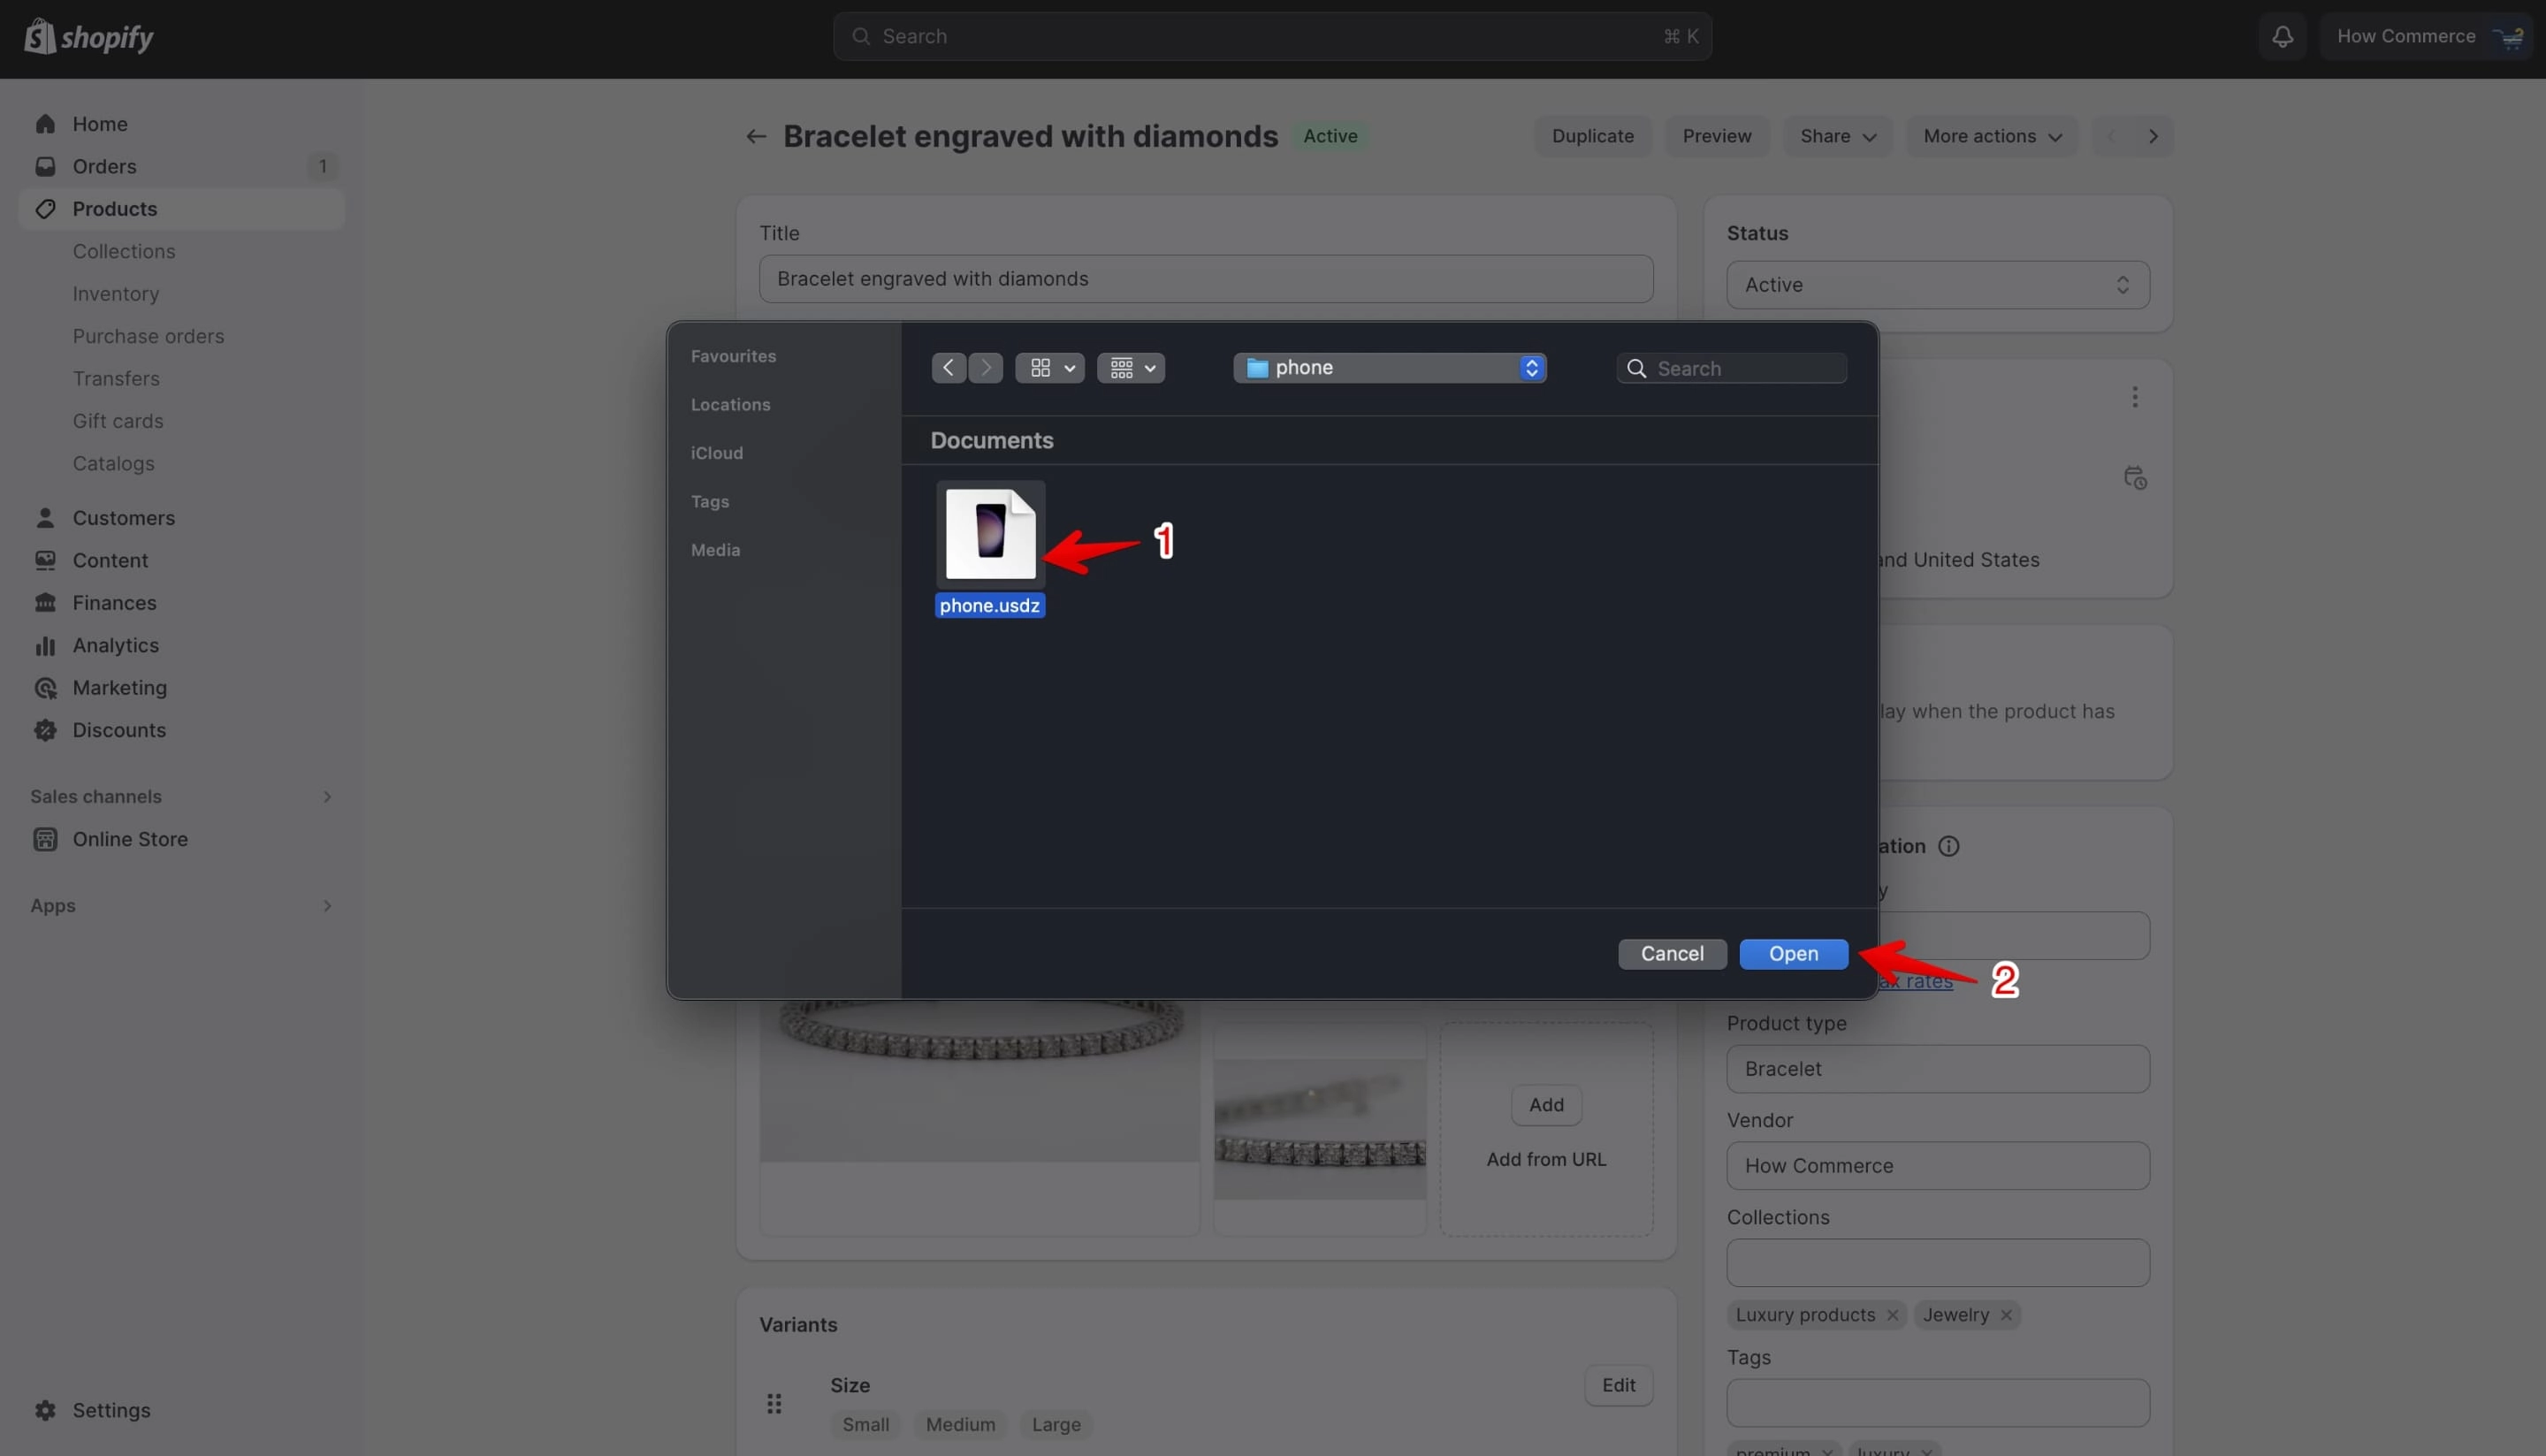
Select the 3D model file (marked with 1 in the image below) and click "Open" (marked with 2 in the image below) to upload the file to Shopify:
Unfortunately free 3D models on the internet are rare since they are expensive to produce and because of that I couldn't find a 3D bracelet in USDZ format to match my product.
I've used a mobile phone file, but the process is the same. If somebody can donate a free bracelet model to use in this article I'm grateful.
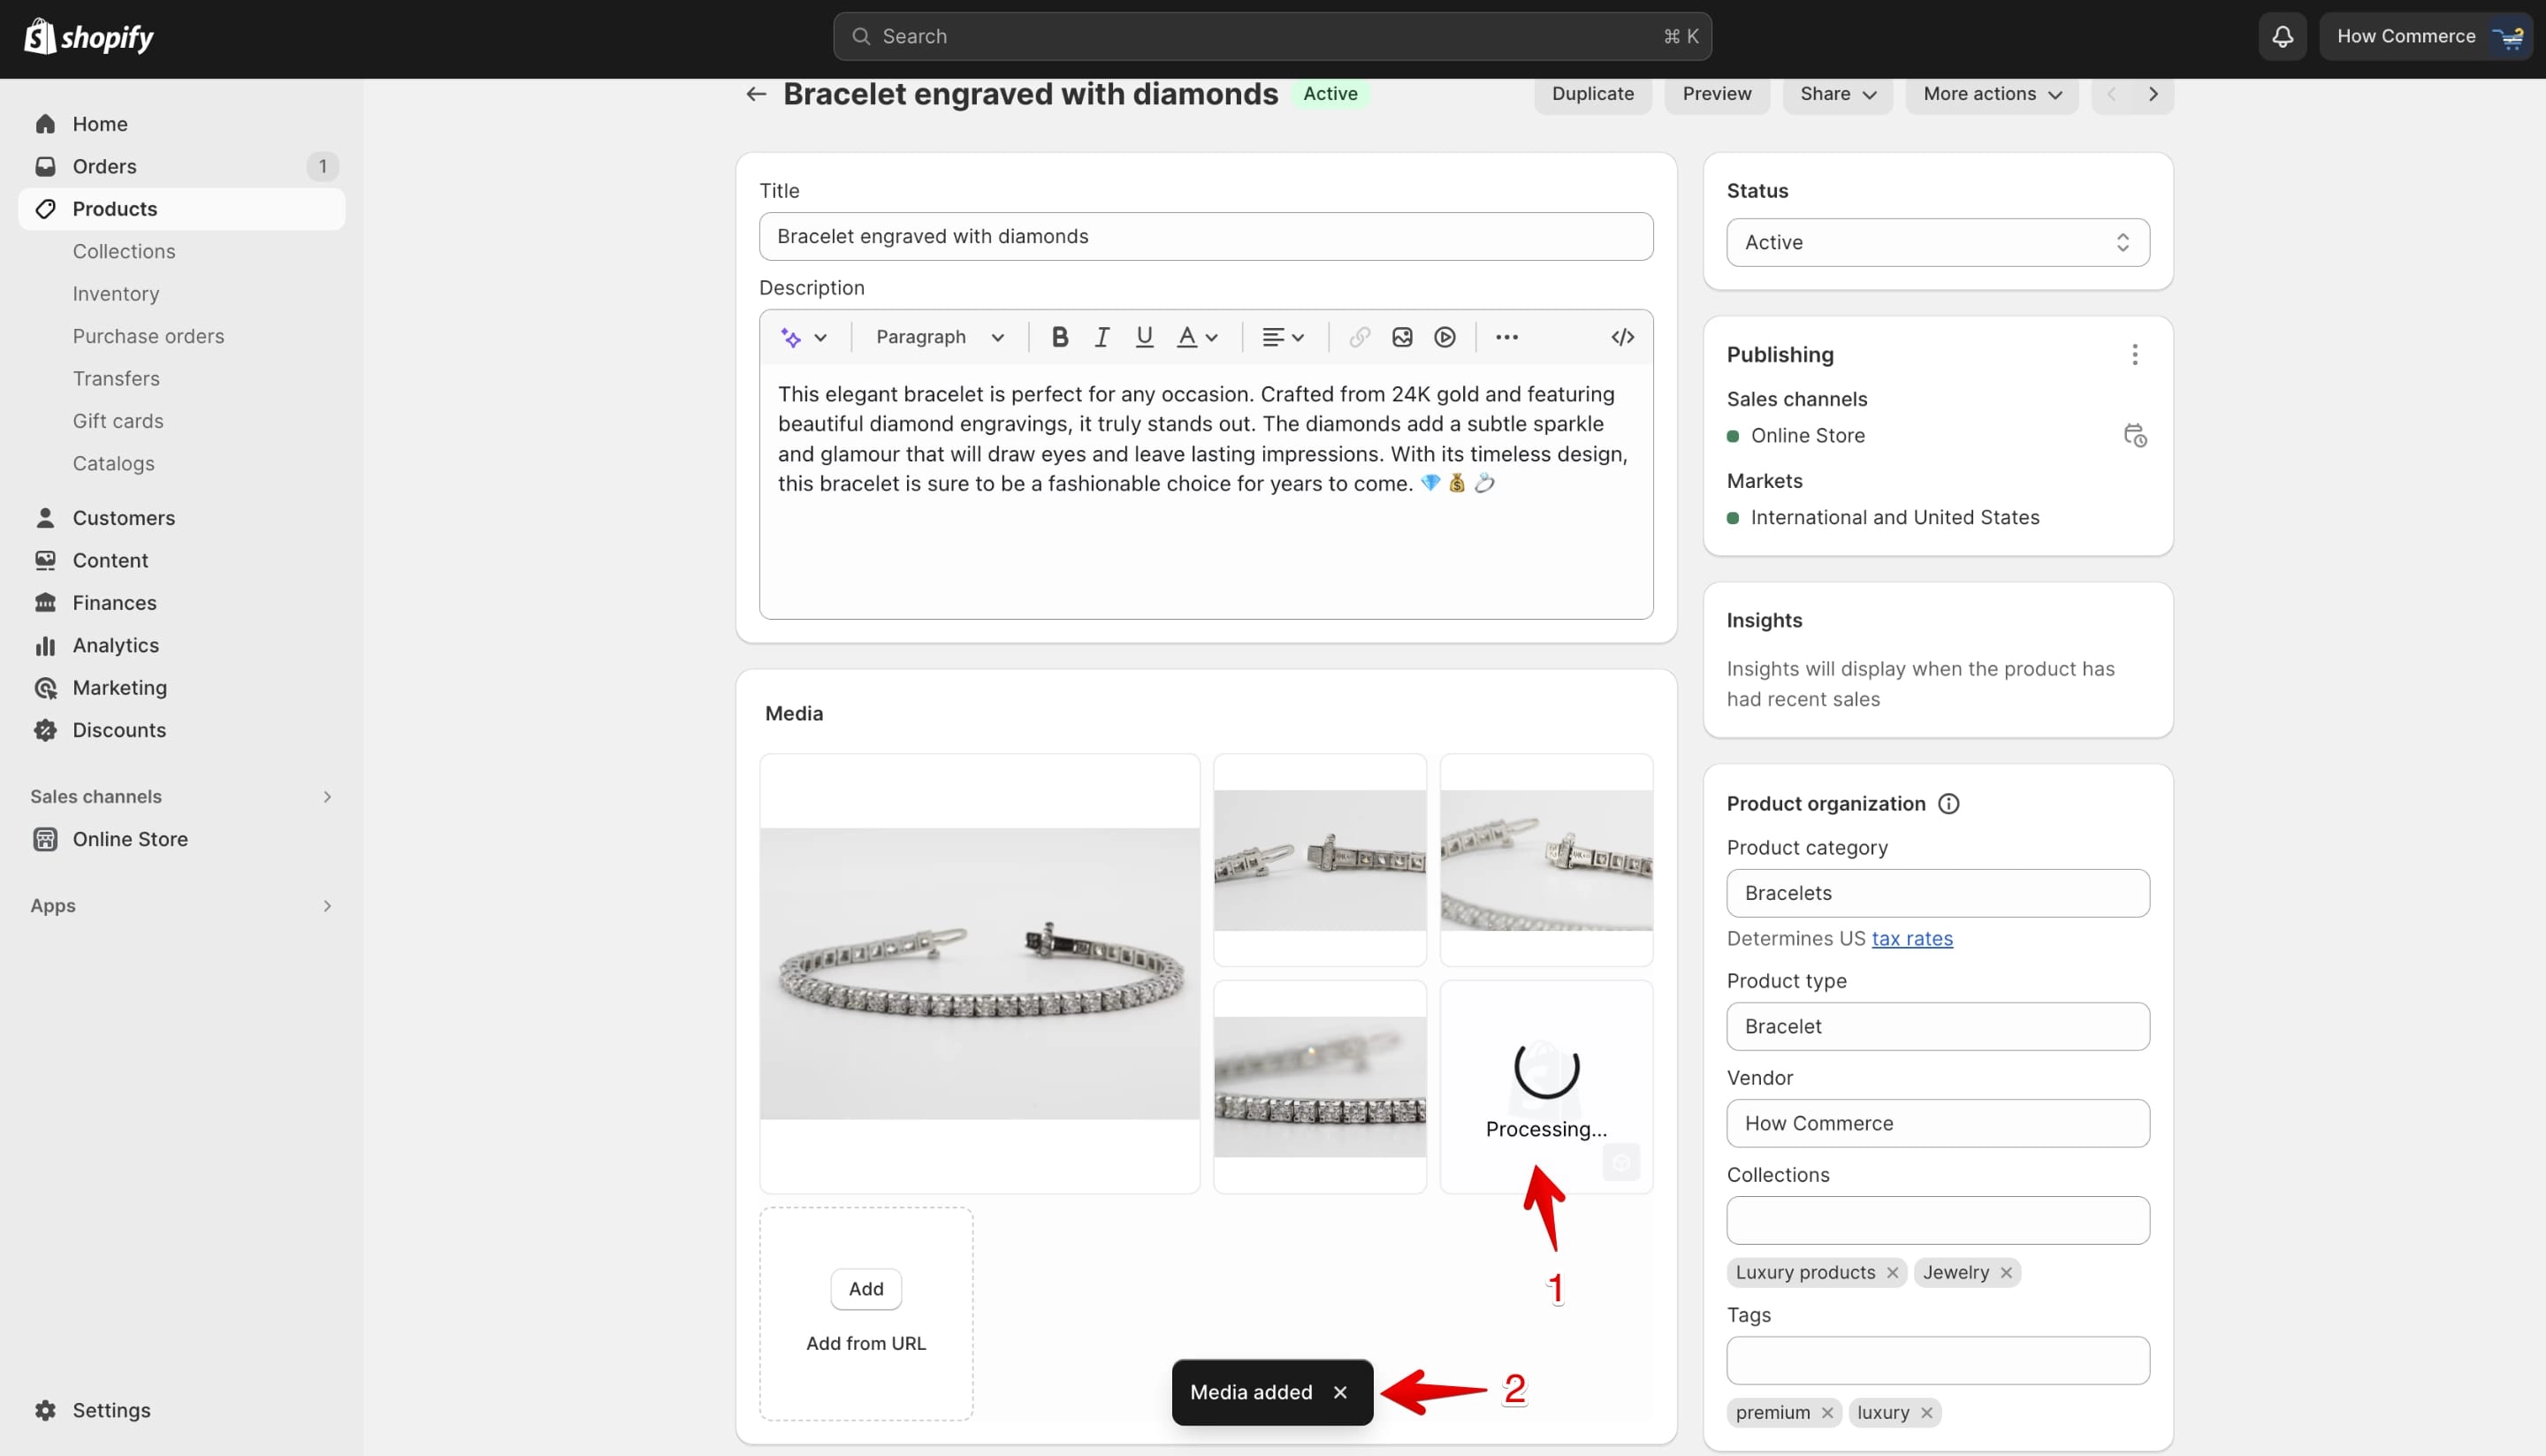
When the file will start uploading you'll see the "Processing" message on the 3D model thumbnail (marked with 1 in the image below) and the message "Media added" (marked with 3 in the image below):
When the 3D model is uploaded to Shopify you'll see the model inside the thumbnail (marked with 1 in the image below).
To make a difference between the images and the 3D model you'll also see a little icon with a small cube (marked with 2 in the image below).
This small cube is a universal representation of the 3D model file types.
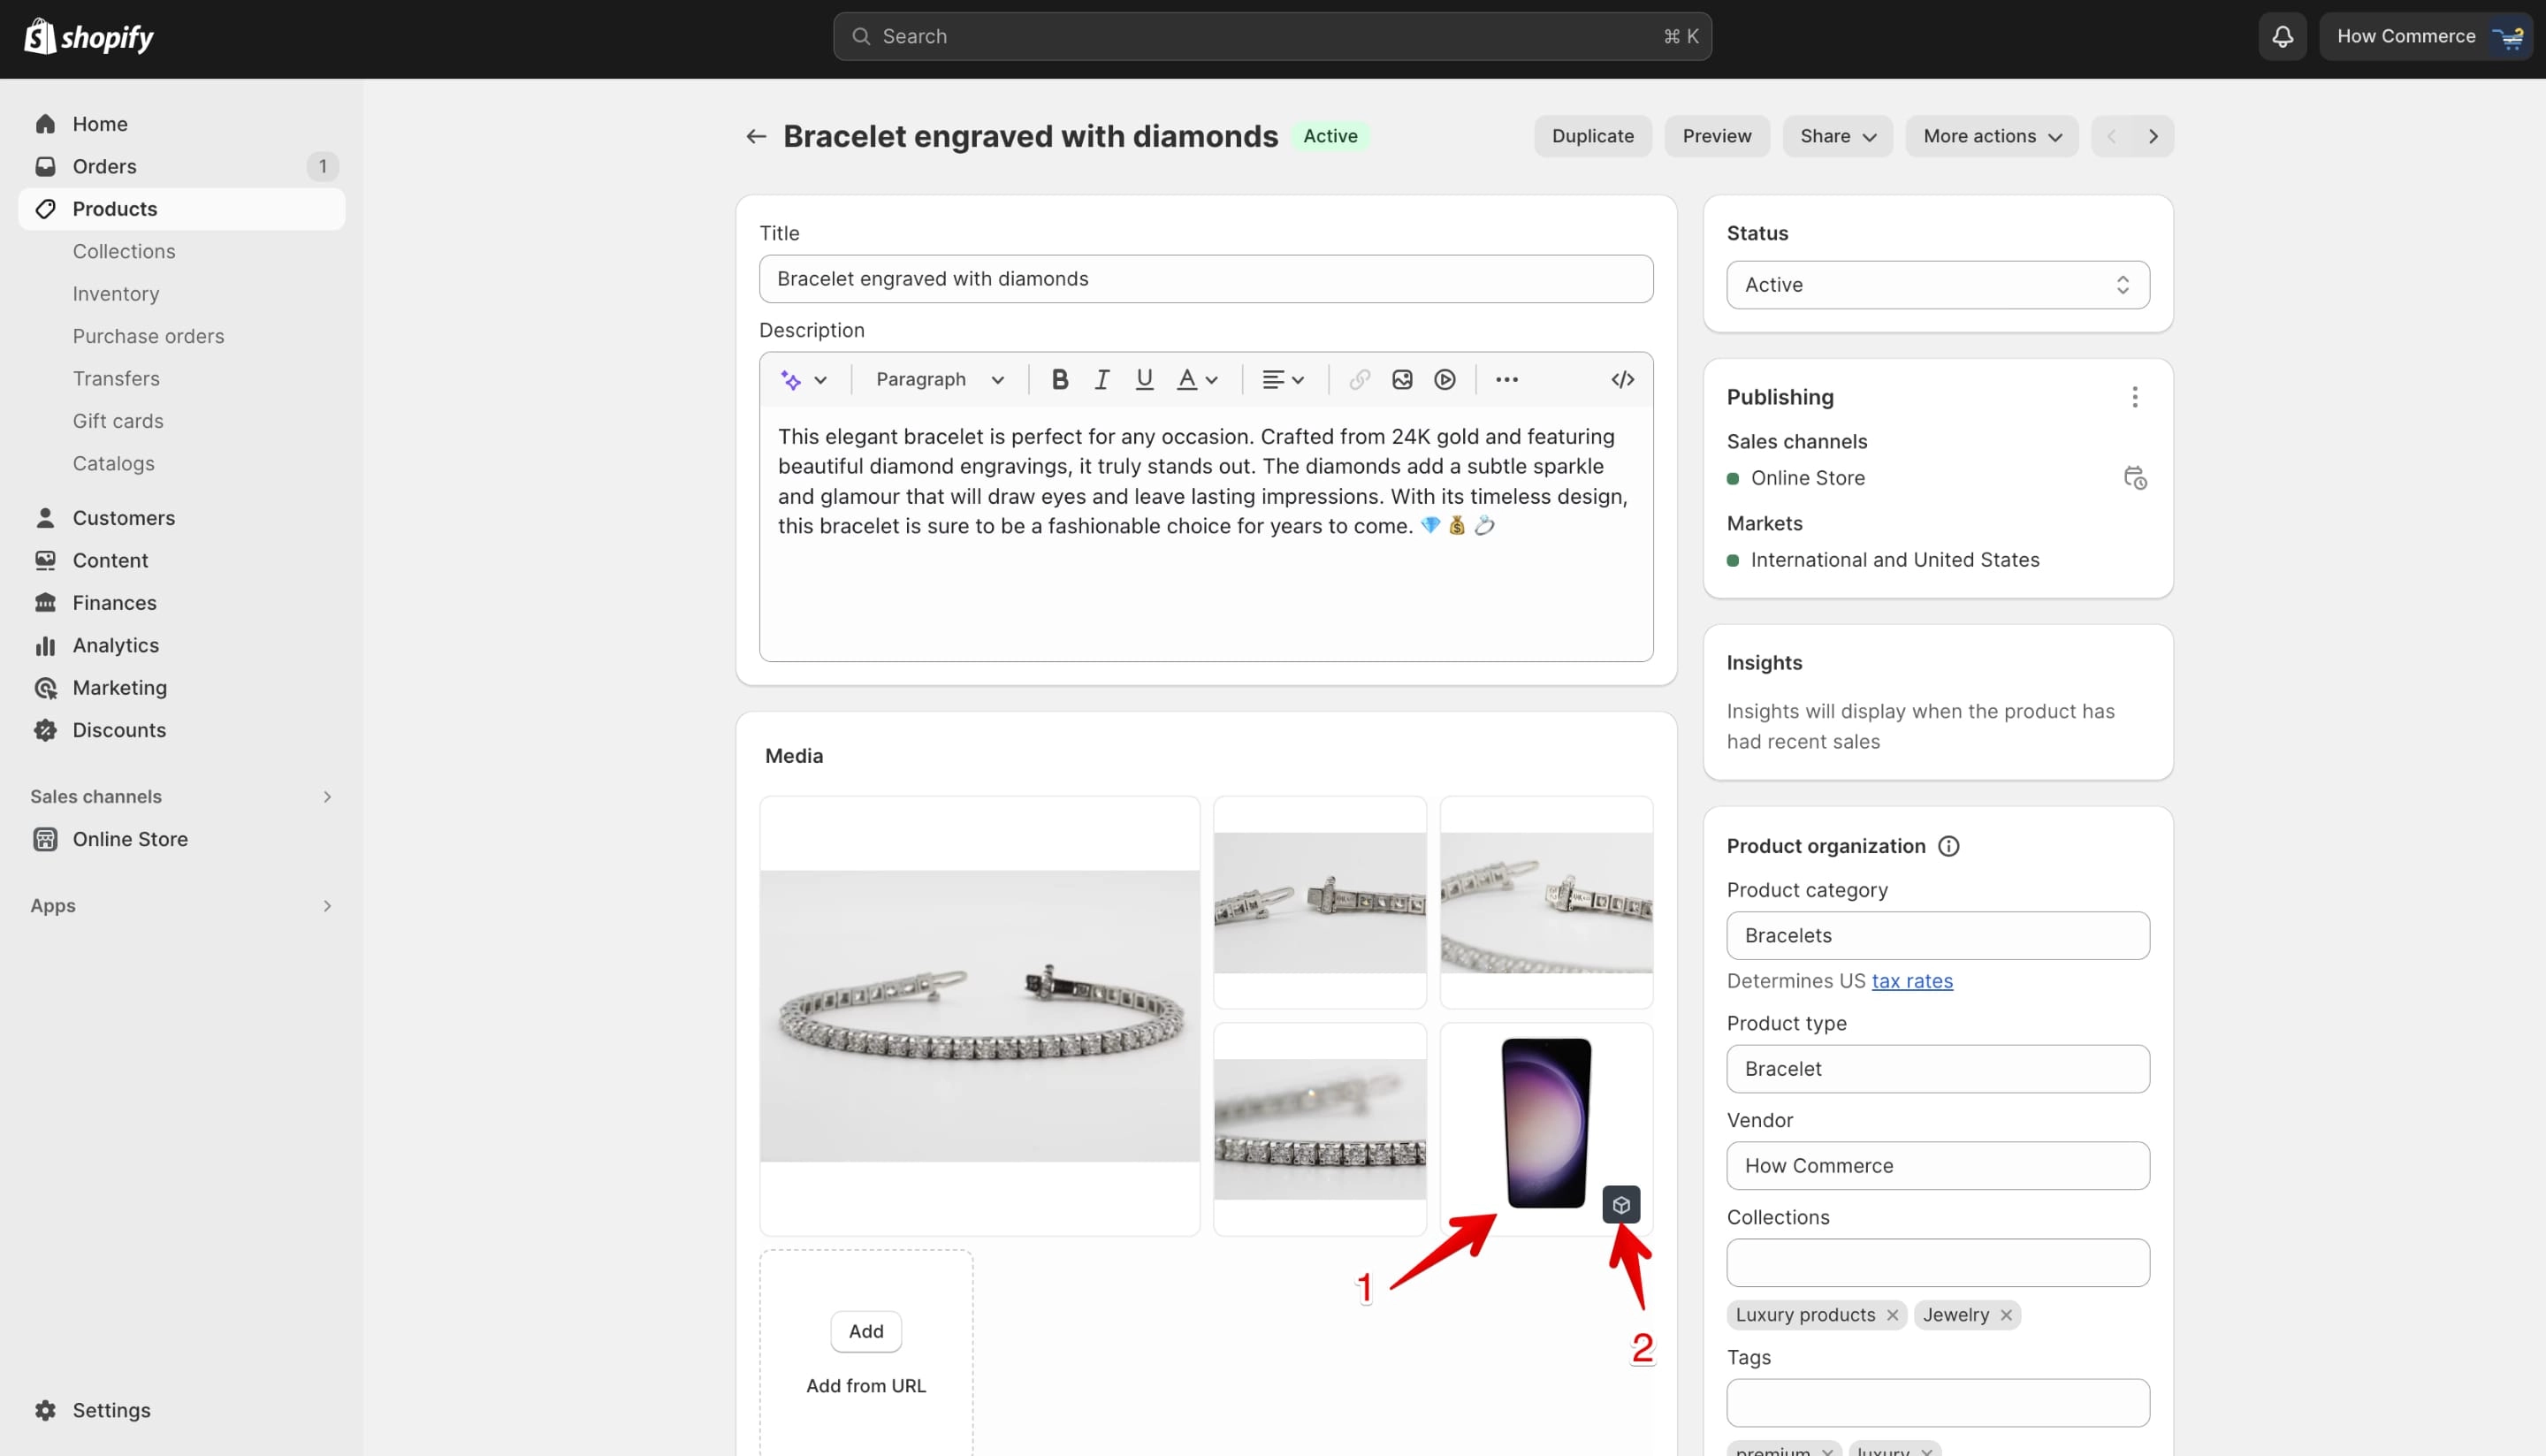
3D models settings
Shopify offers a couple of options to manipulate the 3D model.
Is not something super advanced but for simple manipulation and for end users who are not developers this is helpful.
Developers have a multitude of options via Liquid to manipulate the model inside code.
To see the options you need do the same thing like on images, click on the thumbnails and a pop-up will open listing all the editing tools:
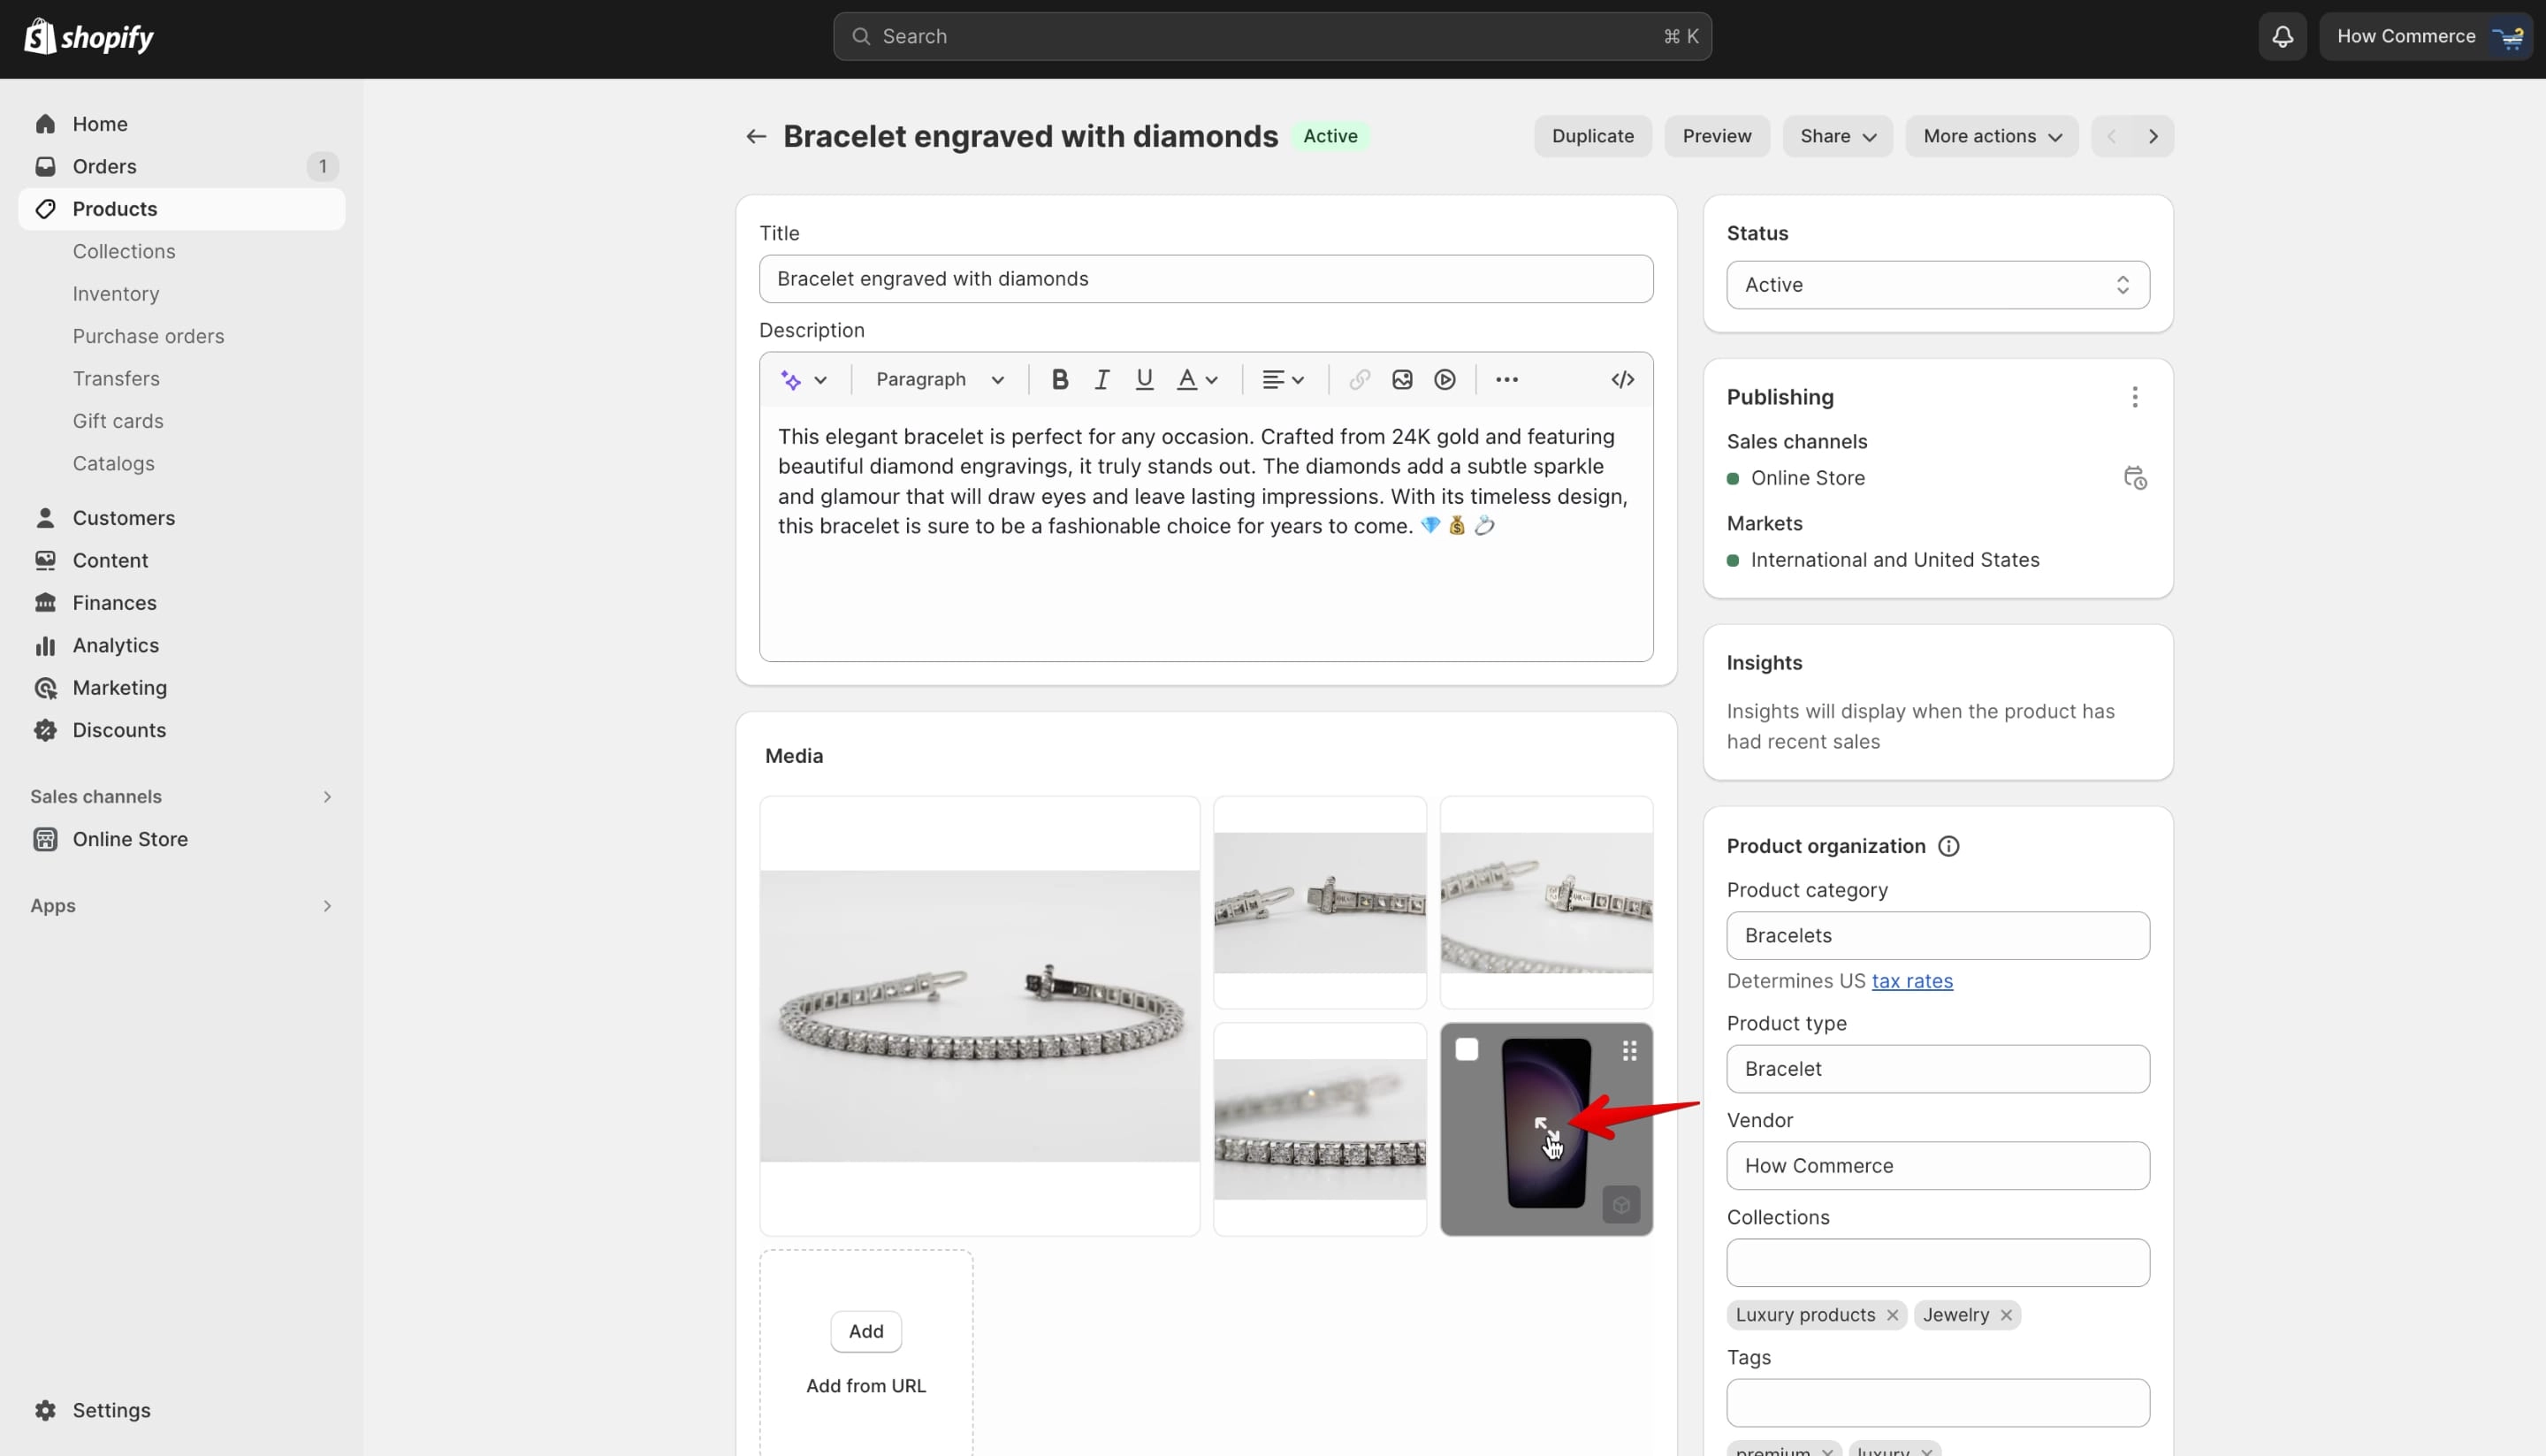
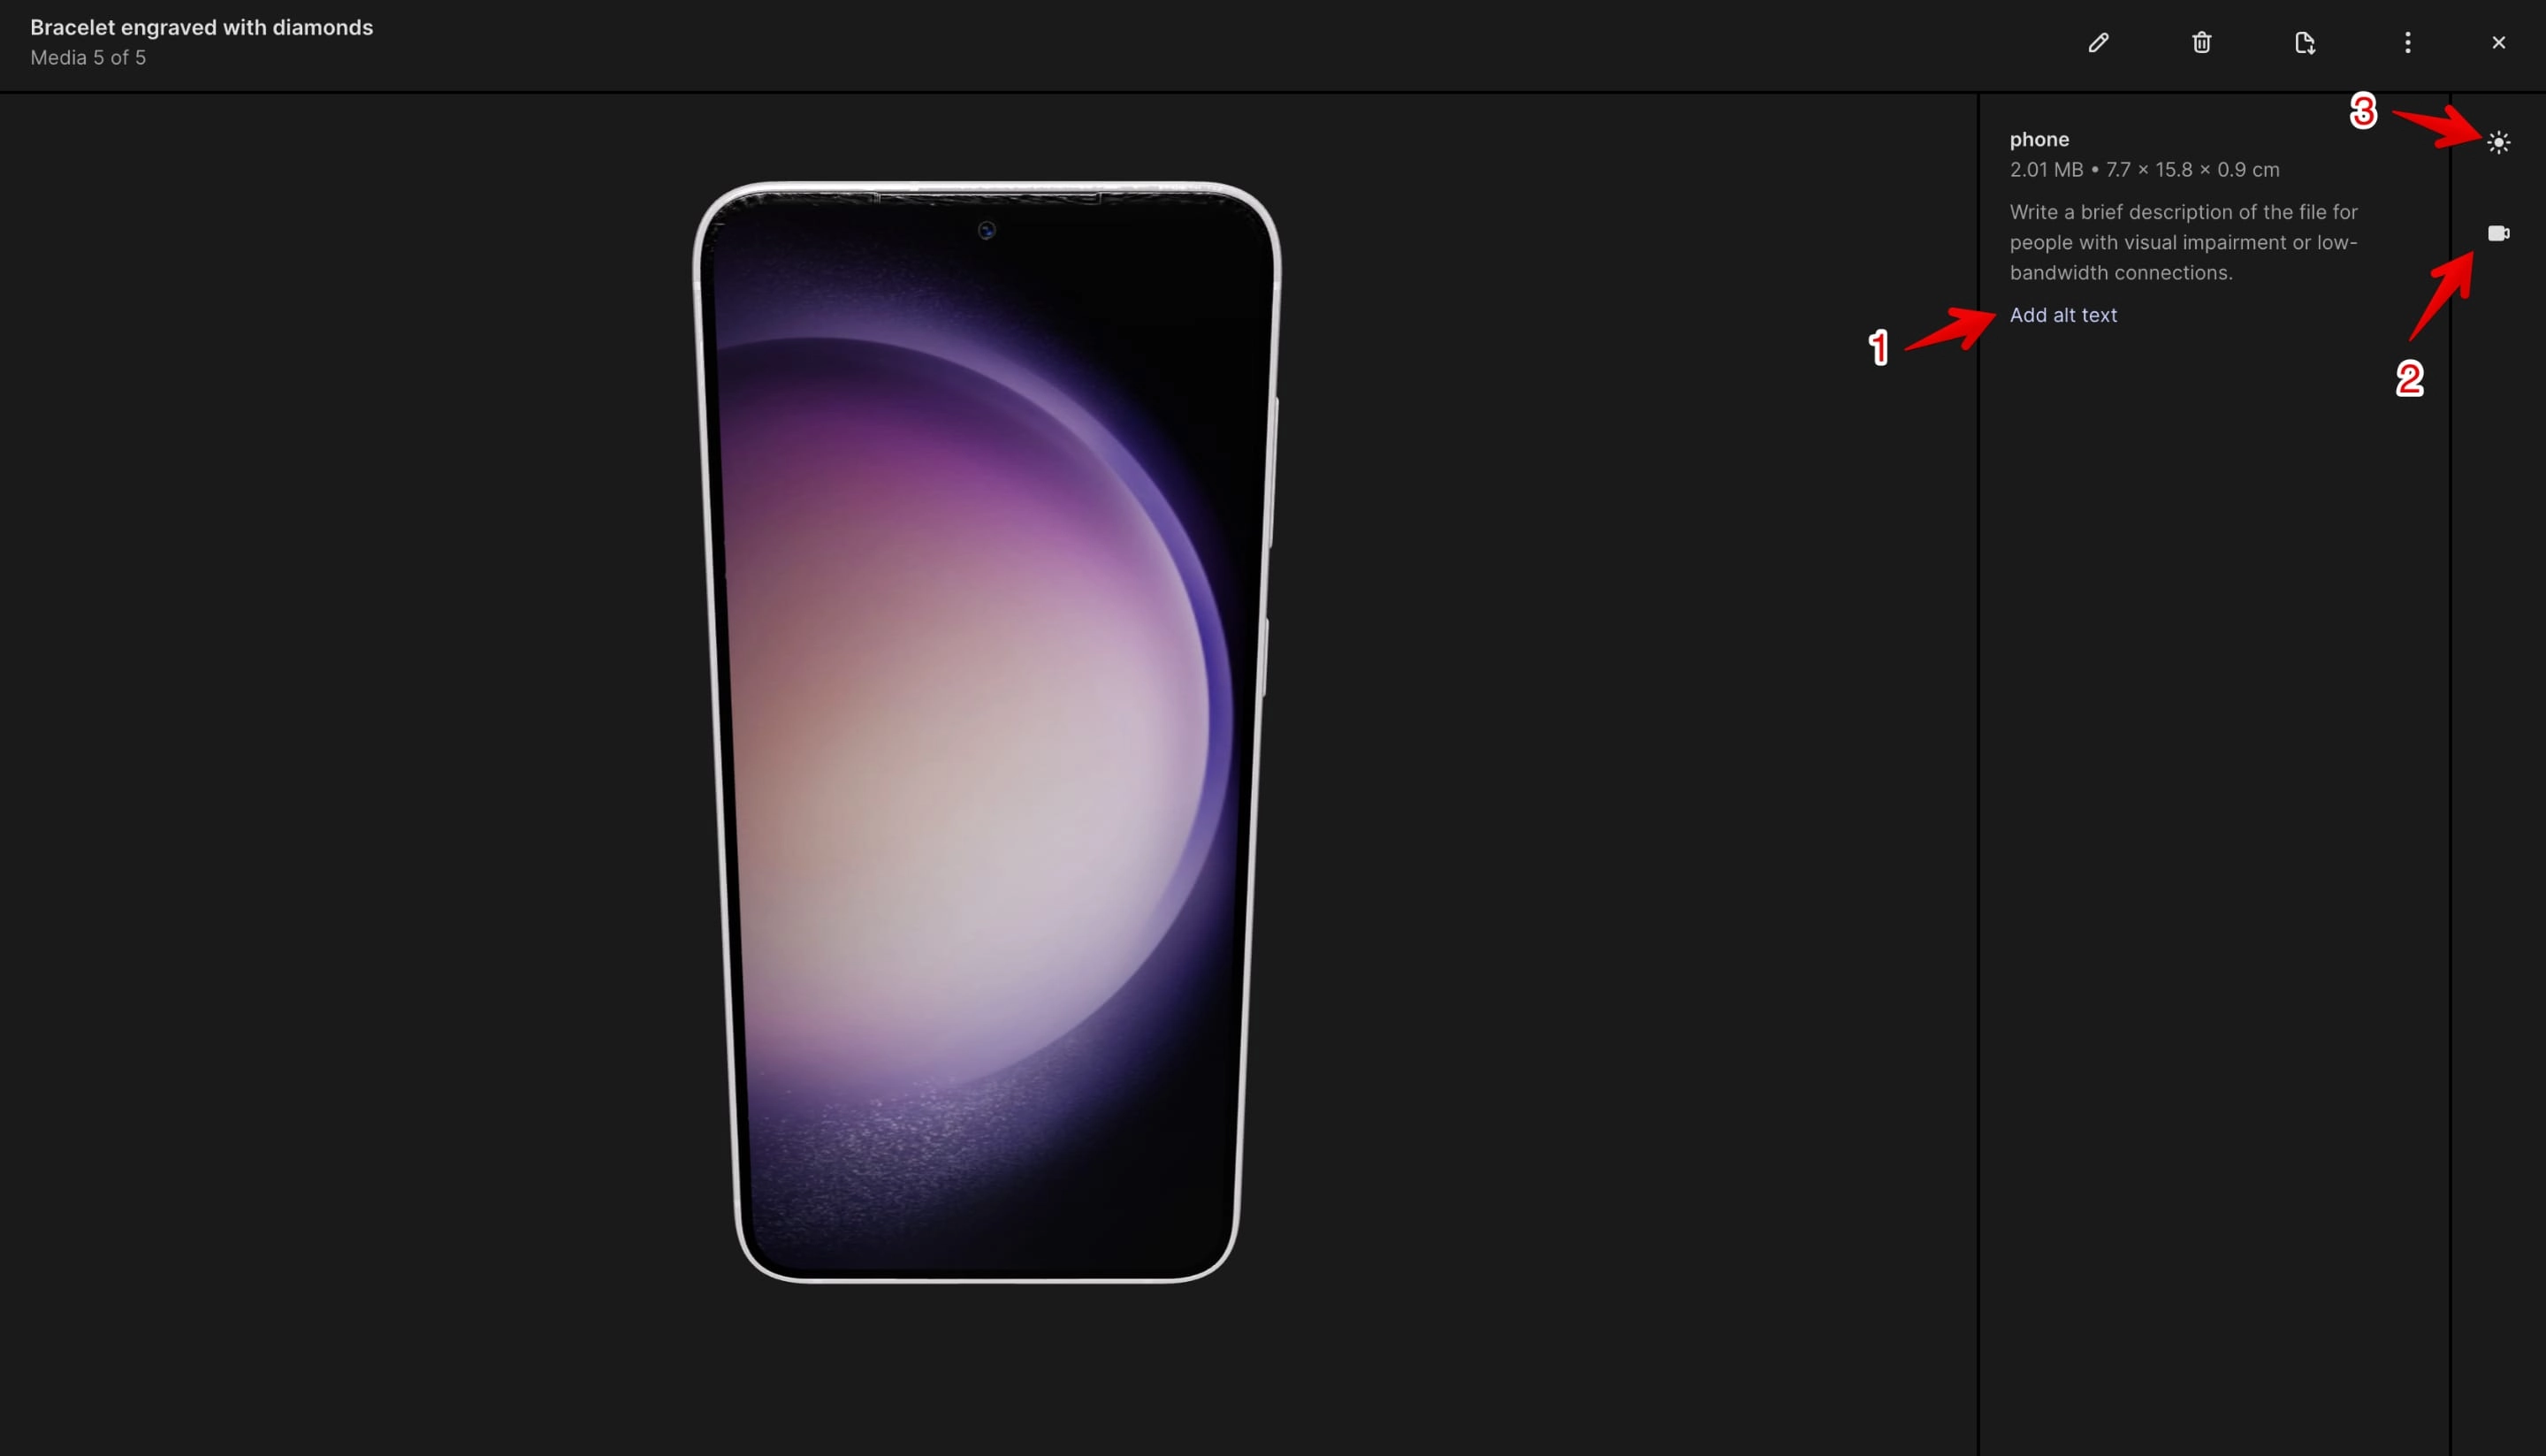
Once the pop-up opens you can see the 3D model and you can preview it, rotate it on X axis, Y axis and Z axis.
You can add an ALT text (marked with 1 in the image below) to the 3D model to be indexed by search engines like Google.
Be very explicit here and describe the model correctly so search engines can understand what the file is about.
Other options are the "Camera" (marked with 2 in the image below) and the "Lightning" (marked with 3 in the image below):
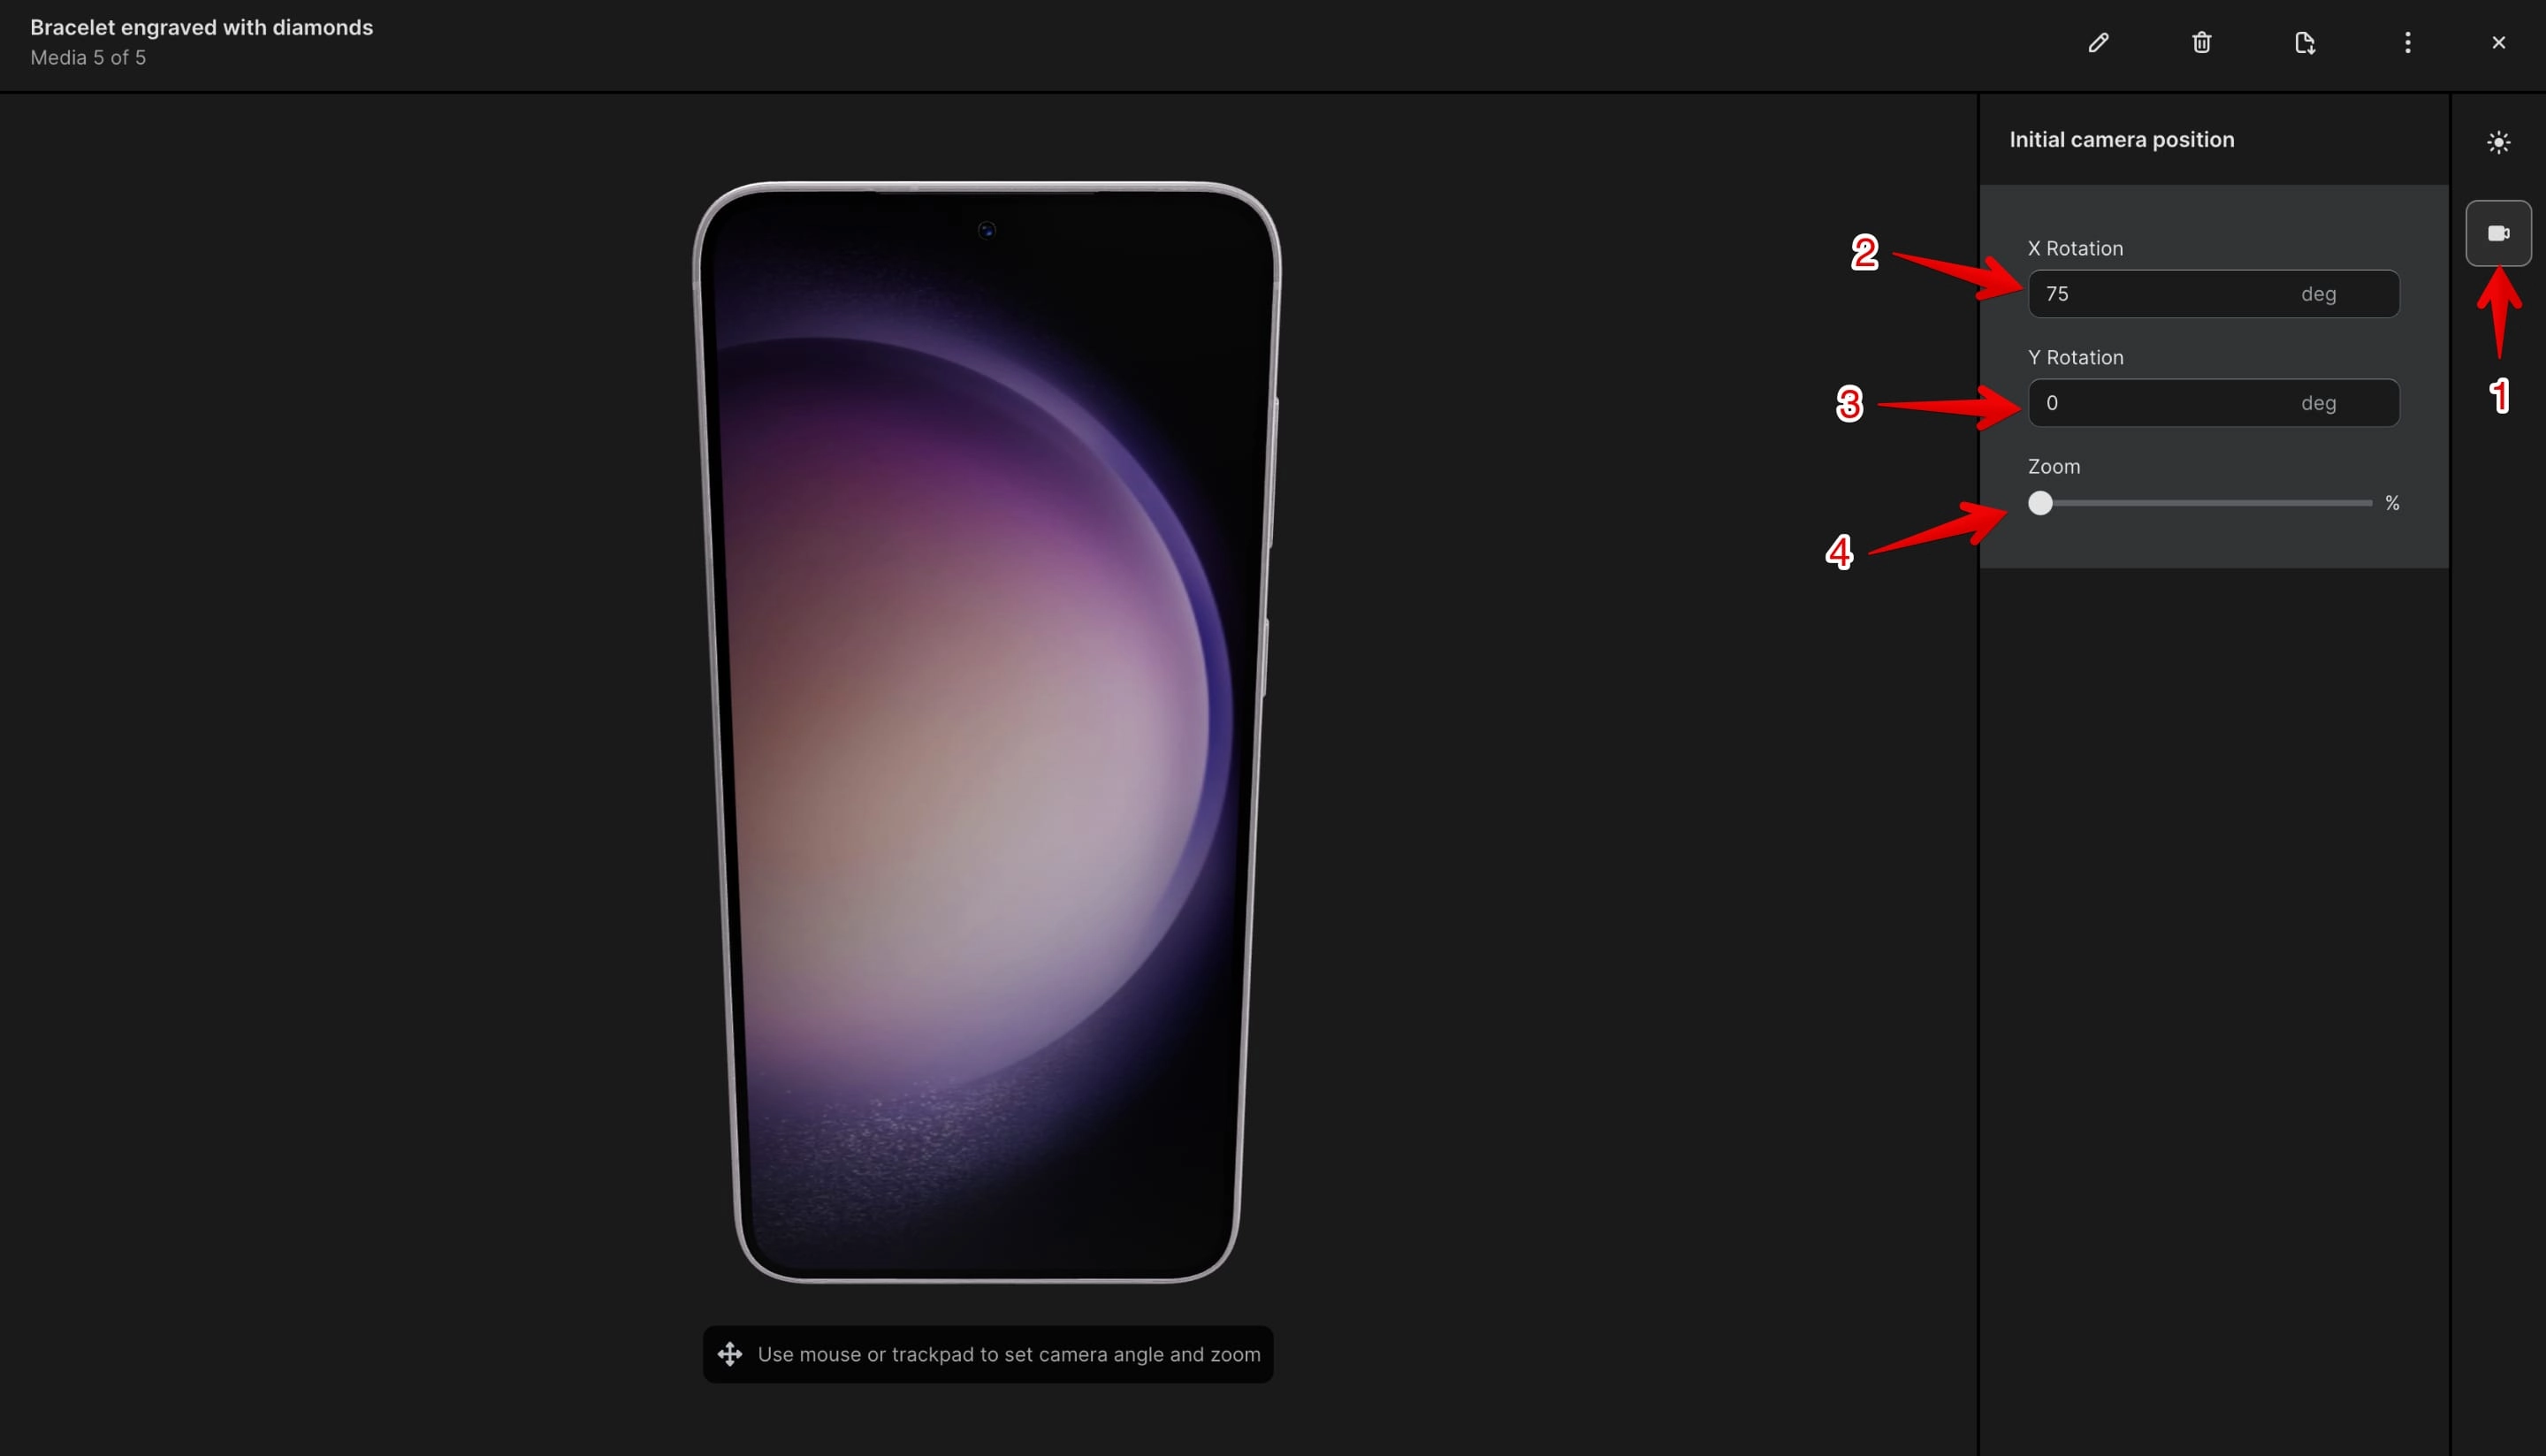
The "Camera" settings (marked with 1 in the image below) allows you to set a:
- X rotation angle (marked with 2 in the image below)
- Y rotation angle (marked with 3 in the image below)
- And the Zoom (marked with 4 in the image below)
Play with the settings until you are satisfied with how the model will look in the store front.
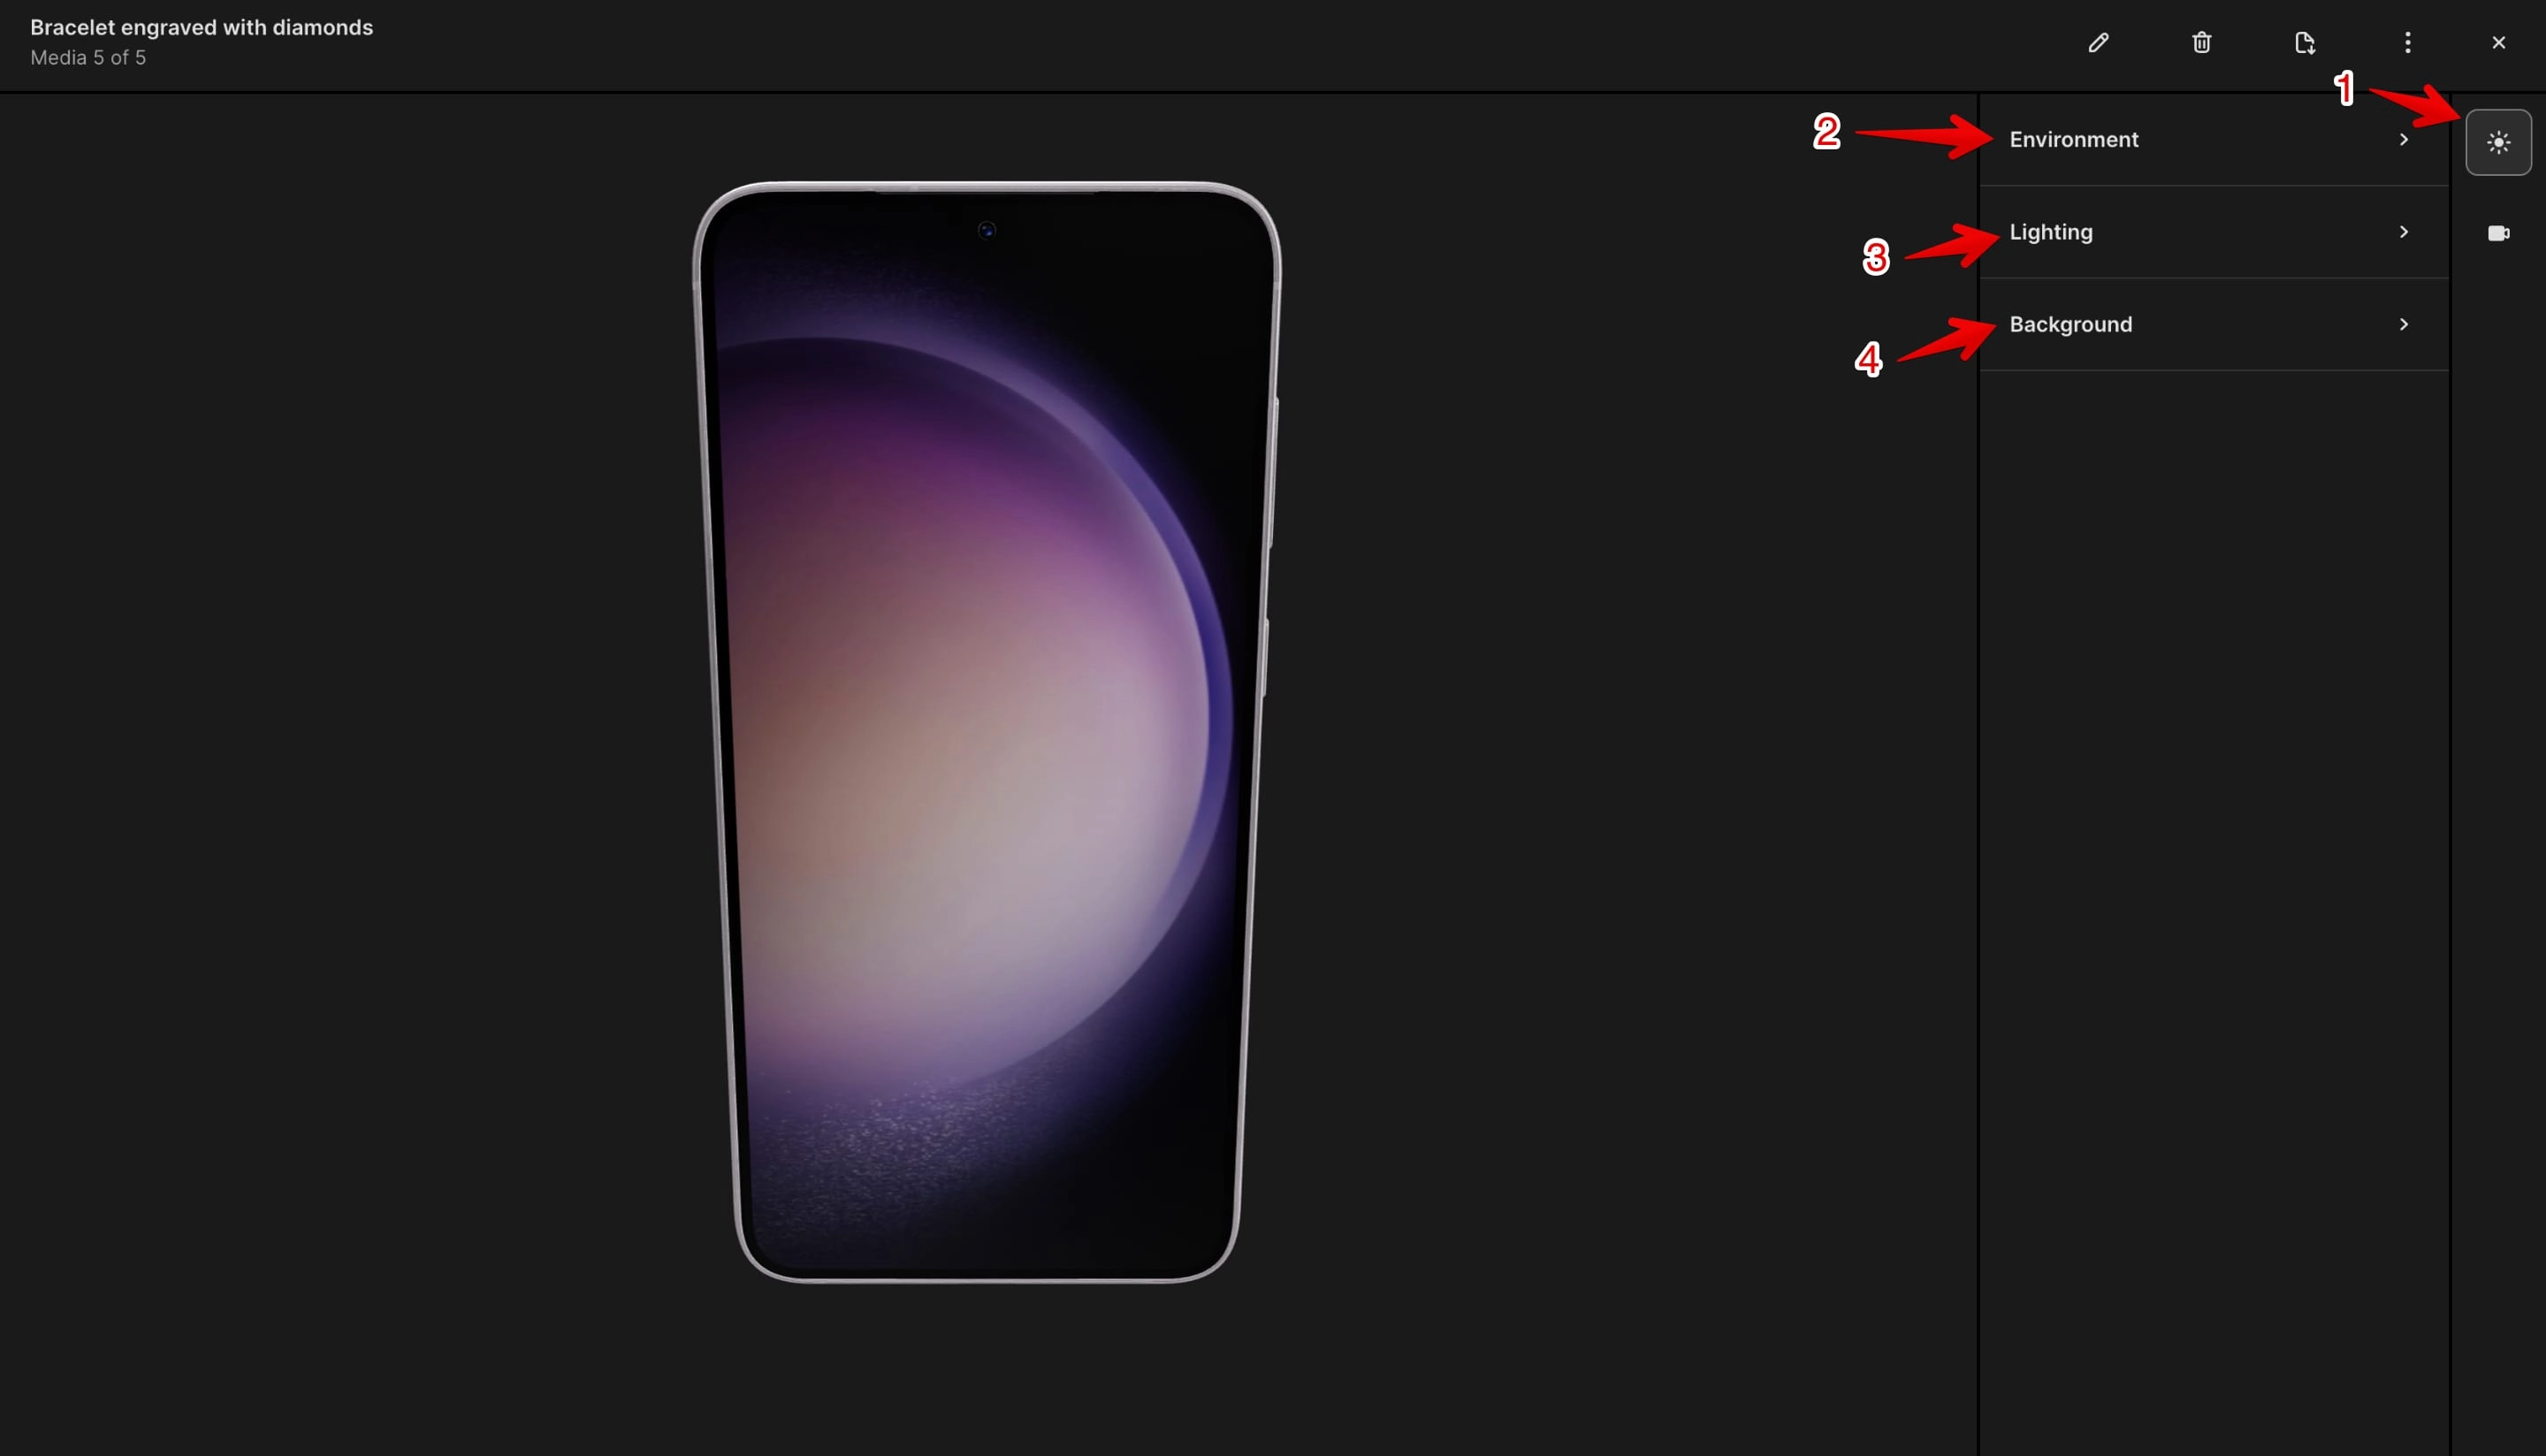
The "Lightning" settings (marked with 1 in the image below) allows you to set a:
- Environment (marked with 2 in the image below)
- Lighting (marked with 3 in the image below)
- Background (marked with 4 in the image below)
Environment
Allows you to add a filter on top of the model to reflect the environment selected. You have at this time 8 environments to choose from.
Lighting
Allows you to set the 3D model exposure to light. You can adjust the intensity of light on the 3D model.
Background
Allows you to select the "Background" color that will list behind the model in the store front.
Play with the settings until you are satisfied with how the model will look in the store front.
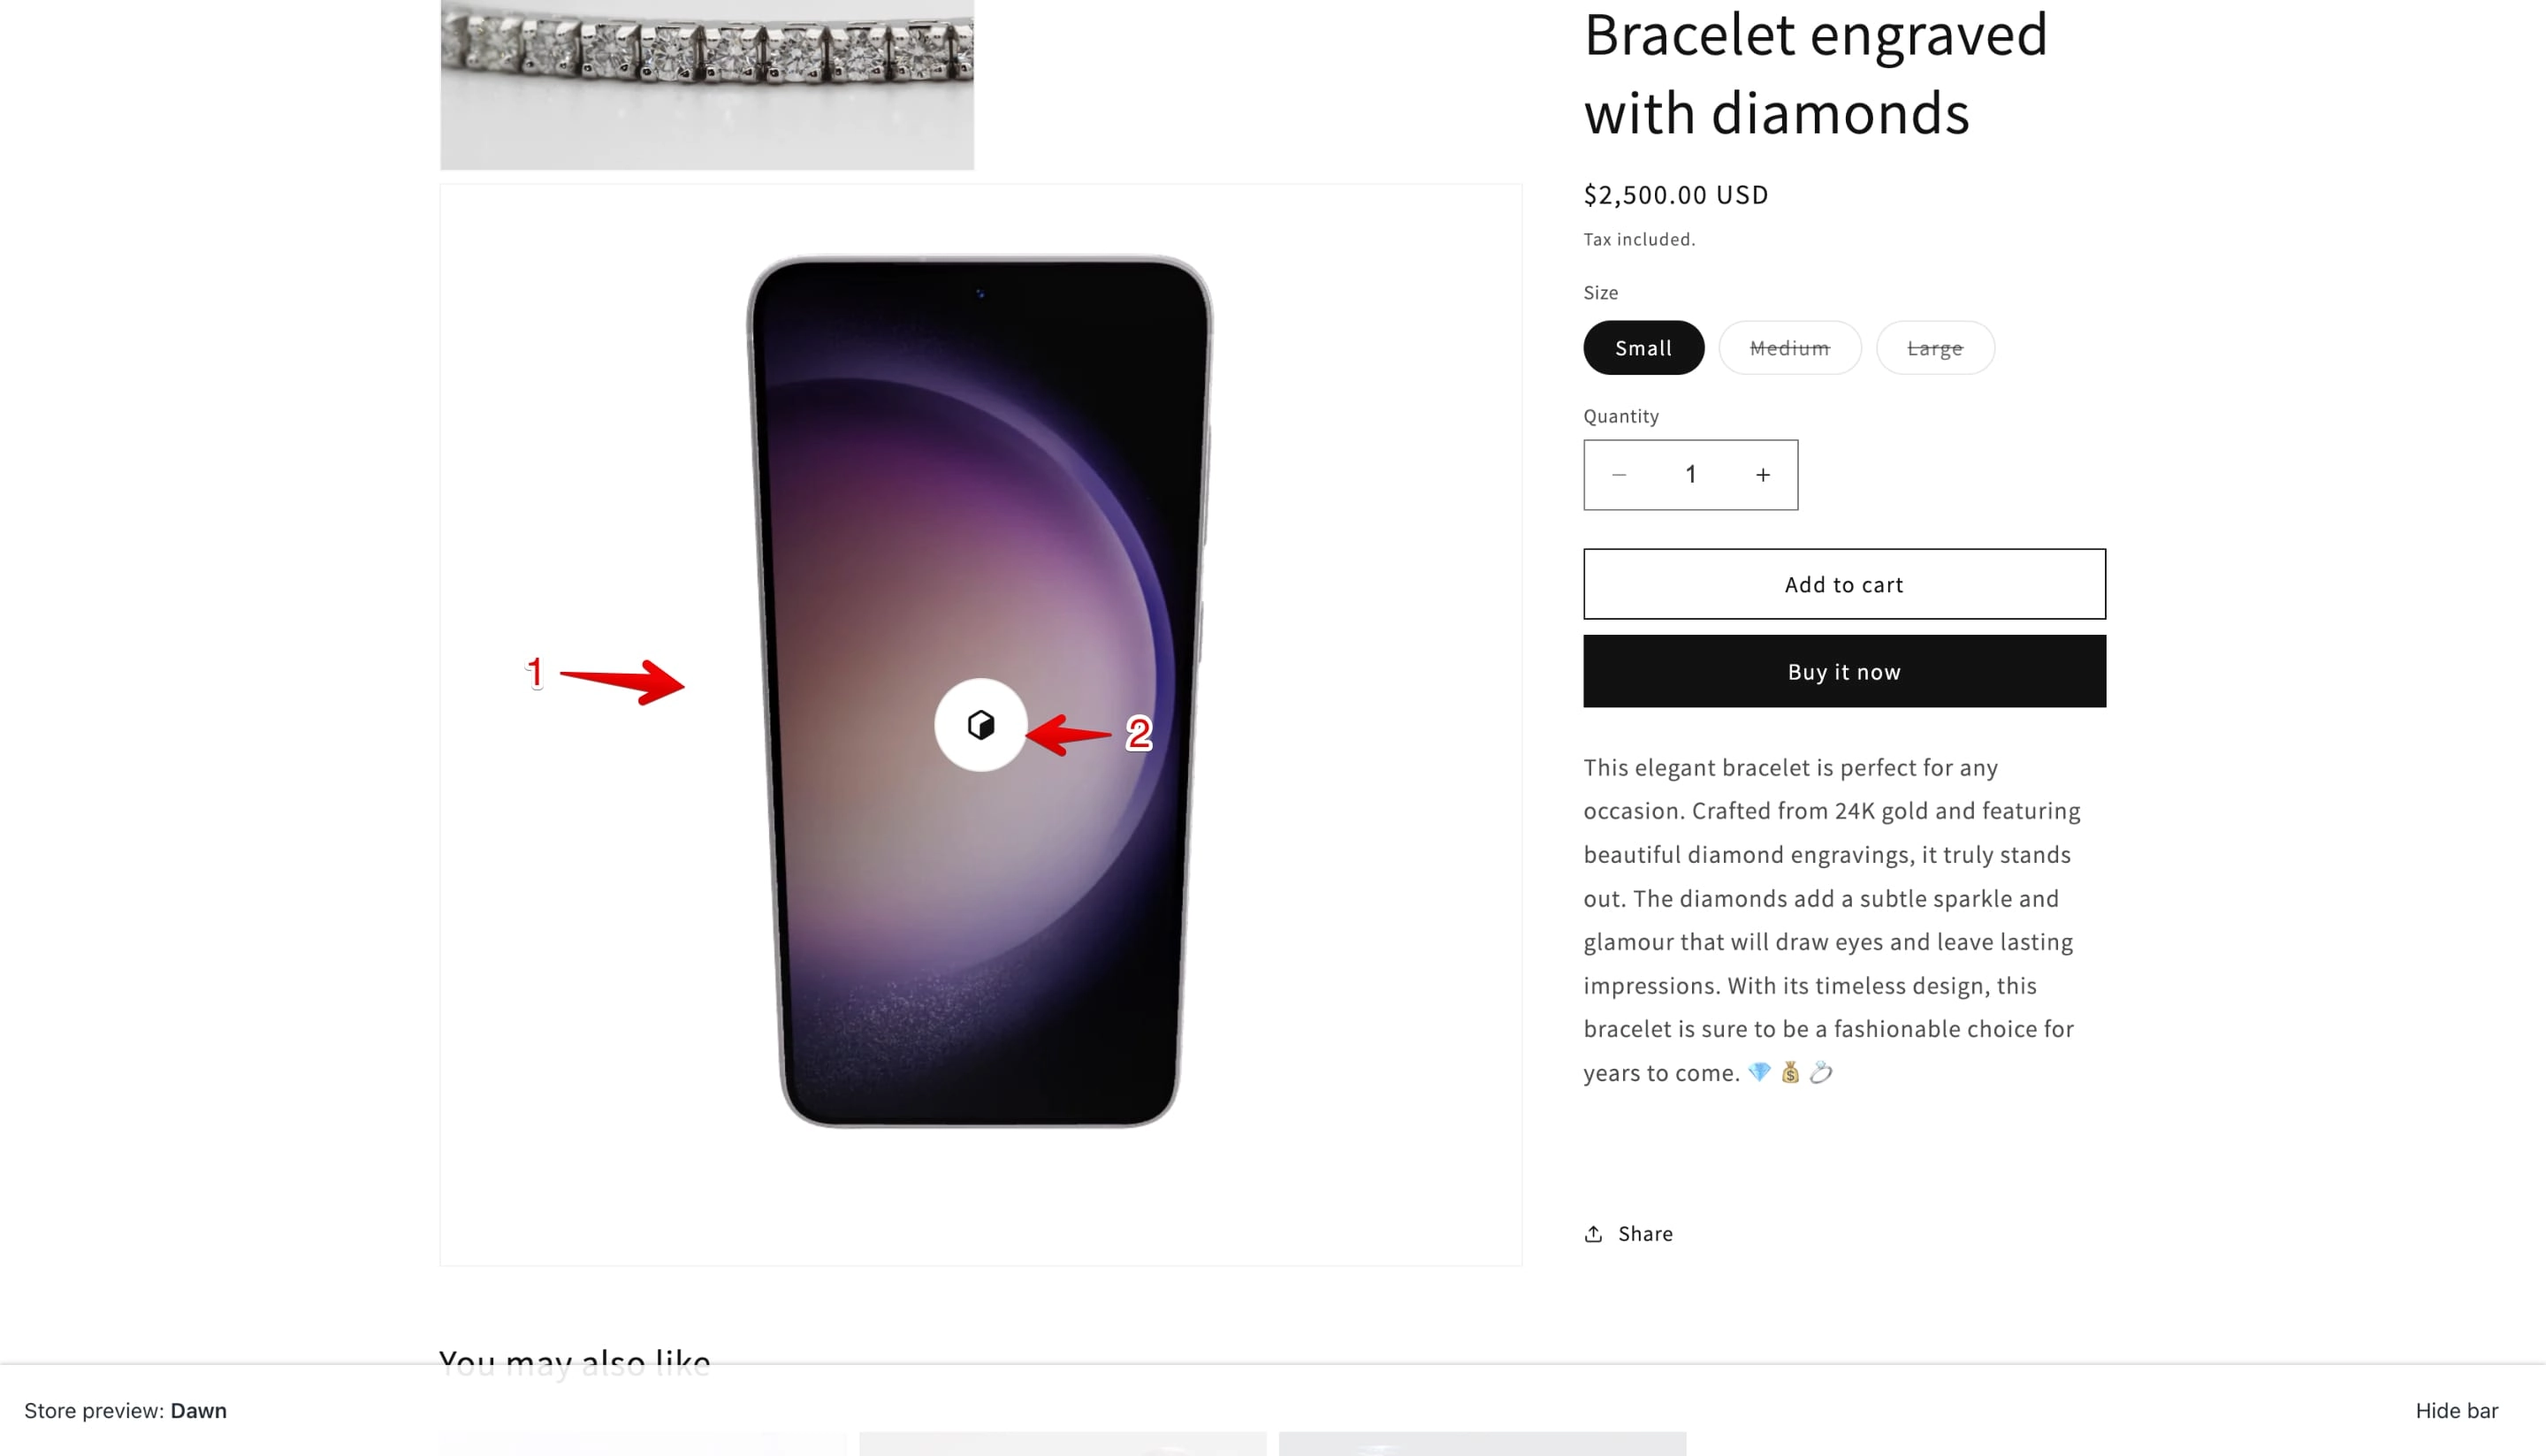
When you are done editing, go to the store front and check the product to which you've assigned the 3D model (marked with 1 in the image below) and take the model for a spin by clicking on the "Cube" icon (marked with 2 in the image below).
Note that the icon sets for listing the model and functions differ from theme to theme, especially if a theme is custom built, it could have different icons and more features added to the model.
Conclusion
Adding a model to a product in Shopify is extremely easy, the hardest part is to create the model to reflect the products clearly and to look of top notch quality.
Do not upload to your products poorly done models since it will kill your conversions.